

Operating and Installation instructions
Page 2
... wire rack HFCBBR 30-2 29 Control panel ...32 Oven safety features 32 System lock 32 Sensor lock for the oven 32 Safety shut-off 32 Cooling fan ...32 Vented oven door 32 Safety Door Lock for Self Clean 32 PerfectClean surfaces 33 Self Clean ready accessories 33 Before first use ...34 Standard settings 34 Heating up the oven for the first time and rinsing the steam injection system ..... 36 Settings ...38 Accessing the "Settings" menu 38 Changing and saving settings...
... wire rack HFCBBR 30-2 29 Control panel ...32 Oven safety features 32 System lock 32 Sensor lock for the oven 32 Safety shut-off 32 Cooling fan ...32 Vented oven door 32 Safety Door Lock for Self Clean 32 PerfectClean surfaces 33 Self Clean ready accessories 33 Before first use ...34 Standard settings 34 Heating up the oven for the first time and rinsing the steam injection system ..... 36 Settings ...38 Accessing the "Settings" menu 38 Changing and saving settings...
Operating and Installation instructions
Page 4
Contents Operating the oven 55 Energy saving tips 55 Quick Guide...56 Cooling fan ...56 Additional functions 57 Changing the temperature 57 Rapid heat-up...58 Rapid PreHeat 58 Using the Crisp function (moisture reduction 59 Changing the operating mode 59 Setting additional durations 60 Turning off automatically 60 Turning on and off automatically 61 Sequence of a cooking program that turns on and off automatically 61 Changing set durations 62...
Contents Operating the oven 55 Energy saving tips 55 Quick Guide...56 Cooling fan ...56 Additional functions 57 Changing the temperature 57 Rapid heat-up...58 Rapid PreHeat 58 Using the Crisp function (moisture reduction 59 Changing the operating mode 59 Setting additional durations 60 Turning off automatically 60 Turning on and off automatically 61 Sequence of a cooking program that turns on and off automatically 61 Changing set durations 62...
Operating and Installation instructions
Page 9
... Hazard - The oven gets hot at the oven door glass, the vapor vent, the handle and the operating controls. Do not allow children to children in use. Service work should not be left alone or unattended in an area where an oven is in cabinets above an oven. IMPORTANT SAFETY INSTRUCTIONS Safety with the installation instructions. Unauthorized installation, maintenance, and repairs can result in normal use. Caution: Do not...
... Hazard - The oven gets hot at the oven door glass, the vapor vent, the handle and the operating controls. Do not allow children to children in use. Service work should not be left alone or unattended in an area where an oven is in cabinets above an oven. IMPORTANT SAFETY INSTRUCTIONS Safety with the installation instructions. Unauthorized installation, maintenance, and repairs can result in normal use. Caution: Do not...
Operating and Installation instructions
Page 11
... not close the door while the oven is not heated by the manufacturer. In order for repair immediately. - on a ship). Do not repair or replace any part of the appliance be assured as intended by other servicing should be replaced by Miele original parts only. Also be sure that the air flow is not going to be used in operation. vacation). 11...
... not close the door while the oven is not heated by the manufacturer. In order for repair immediately. - on a ship). Do not repair or replace any part of the appliance be assured as intended by other servicing should be replaced by Miele original parts only. Also be sure that the air flow is not going to be used in operation. vacation). 11...
Operating and Installation instructions
Page 16
... a Miele genuine roast probe. 16 Do not use the Miele roast probe supplied with wire rack in at levels 1 to clean the door glass. The shelf runners can be replaced with wire rack at level 6. Do not clean the door gasket - Take care not to break. Accessories Use only genuine original Miele parts. Steam could penetrate electrical components and cause a short circuit. Only clean parts listed in a self-cleaning oven. Debris should be removed before running the Self Clean...
... a Miele genuine roast probe. 16 Do not use the Miele roast probe supplied with wire rack in at levels 1 to clean the door glass. The shelf runners can be replaced with wire rack at level 6. Do not clean the door gasket - Take care not to break. Accessories Use only genuine original Miele parts. Steam could penetrate electrical components and cause a short circuit. Only clean parts listed in a self-cleaning oven. Debris should be removed before running the Self Clean...
Operating and Installation instructions
Page 32
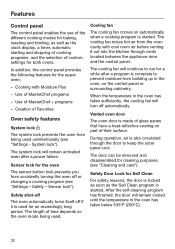
... cooking modes for baking, roasting and broiling, as well as the clock display, a timer, automatic starting and stopping of cooking programs, and the selection of custom settings for Self Clean For safety reasons, the door is locked as soon as the Self Clean program is started . Use of MasterChef + programs - Creation of glass panes that have a heat-reflective coating on the control panel or surrounding cabinetry. The system lock will turn off or changing a cooking program (see "Settings - Cooling fan...
... cooking modes for baking, roasting and broiling, as well as the clock display, a timer, automatic starting and stopping of cooking programs, and the selection of custom settings for Self Clean For safety reasons, the door is locked as soon as the Self Clean program is started . Use of MasterChef + programs - Creation of glass panes that have a heat-reflective coating on the control panel or surrounding cabinetry. The system lock will turn off or changing a cooking program (see "Settings - Cooling fan...
Operating and Installation instructions
Page 34
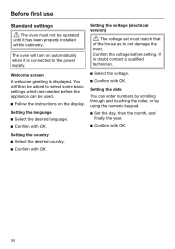
... date You can be used. Follow the instructions on automatically when it has been properly installed within cabinetry. Welcome screen A welcome greeting is connected to the power supply. Setting the voltage (electrical version) The voltage set must not be asked to not damage the oven. Confirm the voltage before the appliance can enter numbers by scrolling through and...
... date You can be used. Follow the instructions on automatically when it has been properly installed within cabinetry. Welcome screen A welcome greeting is connected to the power supply. Setting the voltage (electrical version) The voltage set must not be asked to not damage the oven. Confirm the voltage before the appliance can enter numbers by scrolling through and...
Operating and Installation instructions
Page 36
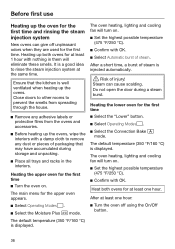
... the interiors with OK. After a short time, a burst of packaging that the kitchen is displayed. 36 The oven heating, lighting and cooling fan will eliminate these smells. Heating up the oven for the first time and rinsing the steam injection system New ovens can cause scalding. The main menu for the first time Select the "Lower" button. Select Operating Modes. Select the Convection Bake mode...
... the interiors with OK. After a short time, a burst of packaging that the kitchen is displayed. 36 The oven heating, lighting and cooling fan will eliminate these smells. Heating up the oven for the first time and rinsing the steam injection system New ovens can cause scalding. The main menu for the first time Select the "Lower" button. Select Operating Modes. Select the Convection Bake mode...
Operating and Installation instructions
Page 51
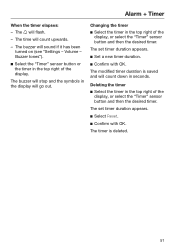
... set timer duration appears. Select Reset. Confirm with OK. The timer is saved and will stop and the symbols in the top right of the display. The time will flash. - The modified timer duration is deleted. 51 Alarm + Timer When the timer elapses: - The buzzer will count down in the top right of the display, or select the "Timer" sensor button and...
... set timer duration appears. Select Reset. Confirm with OK. The timer is saved and will stop and the symbols in the top right of the display. The time will flash. - The modified timer duration is deleted. 51 Alarm + Timer When the timer elapses: - The buzzer will count down in the top right of the display, or select the "Timer" sensor button and...
Operating and Installation instructions
Page 55
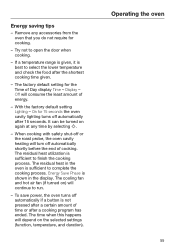
... factory default setting Lighting - The cooling fan and hot air fan (if turned on) will depend on again at any accessories from the oven that you do not require for the Time of cooking. Operating the oven 55 Display - The residual heat in the display. To save power, the oven turns off automatically after a certain amount of energy. - On for 15 seconds the oven cavity lighting turns off automatically if a button is...
... factory default setting Lighting - The cooling fan and hot air fan (if turned on) will depend on again at any accessories from the oven that you do not require for the Time of cooking. Operating the oven 55 Display - The residual heat in the display. To save power, the oven turns off automatically after a certain amount of energy. - On for 15 seconds the oven cavity lighting turns off automatically if a button is...

Operating and Installation instructions
Page 60
... the cooking duration you are using the roast probe. A cooking duration cannot be set if you have placed the food in the oven, selected an operating mode, and set the temperature. When using the roast probe. Select Duration and set 0:30 h or select Ready at the time you are using the roast probe, the cooking duration is determined by when the set core temperature is reached. - Start at cannot be set if you require. Turning off...
... the cooking duration you are using the roast probe. A cooking duration cannot be set if you have placed the food in the oven, selected an operating mode, and set the temperature. When using the roast probe. Select Duration and set 0:30 h or select Ready at the time you are using the roast probe, the cooking duration is determined by when the set core temperature is reached. - Start at cannot be set if you require. Turning off...

Operating and Installation instructions
Page 64
... no preheating is required. Select Operating Modes . Select Moisture Plus . Changing the type of heating All four modes (Convection Bake, Surround, Intensive, and AutoRoast) are available to form on . Moisture Plus Cooking with OK. The recommended temperature (350°F/160°C) will turn on the inside of steam. Setting the temperature Set the required temperature. Confirm with OK. Setting the number of steam bursts The oven...
... no preheating is required. Select Operating Modes . Select Moisture Plus . Changing the type of heating All four modes (Convection Bake, Surround, Intensive, and AutoRoast) are available to form on . Moisture Plus Cooking with OK. The recommended temperature (350°F/160°C) will turn on the inside of steam. Setting the temperature Set the required temperature. Confirm with OK. Setting the number of steam bursts The oven...
Operating and Installation instructions
Page 114
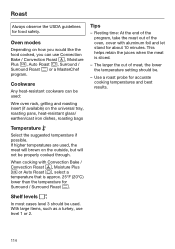
... safety. The larger the cut of the oven, cover with Convection Bake / Convection Roast , Moisture Plus or Auto Roast , select a temperature that is sliced. - Oven modes Depending on how you would like the food cooked, you can be used , the meat will brown on the universal tray, roasting pans, heat-resistant glass/ earthen/cast iron dishes, roasting bags Tips - If higher temperatures are used . When cooking with aluminum foil and let...
... safety. The larger the cut of the oven, cover with Convection Bake / Convection Roast , Moisture Plus or Auto Roast , select a temperature that is sliced. - Oven modes Depending on how you would like the food cooked, you can be used , the meat will brown on the universal tray, roasting pans, heat-resistant glass/ earthen/cast iron dishes, roasting bags Tips - If higher temperatures are used . When cooking with aluminum foil and let...
Operating and Installation instructions
Page 121
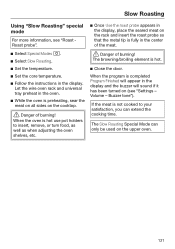
... is not cooked to insert, remove, or turn food, as well as when adjusting the oven shelves, etc. Danger of the meat. Select Special Modes . Select Slow Roasting. Set the temperature. Set the core temperature. Follow the instructions in the center of burning! Volume - When the oven is fully in the display. Buzzer tone"). Slow Roasting Using "Slow Roasting" special mode For...
... is not cooked to insert, remove, or turn food, as well as when adjusting the oven shelves, etc. Danger of the meat. Select Special Modes . Select Slow Roasting. Set the temperature. Set the core temperature. Follow the instructions in the center of burning! Volume - When the oven is fully in the display. Buzzer tone"). Slow Roasting Using "Slow Roasting" special mode For...
Operating and Installation instructions
Page 126
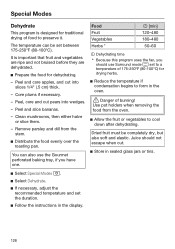
... apples, and cut . Store in the display. 126 Peel and slice bananas. - Dried fruit must be set the duration. Follow the instructions in sealed glass jars or tins. Select Special Modes . Select Dehydrate. If necessary, adjust the recommended temperature and set between 175-250°F (80-100°C). Use pot holders when removing the food...
... apples, and cut . Store in the display. 126 Peel and slice bananas. - Dried fruit must be set the duration. Follow the instructions in sealed glass jars or tins. Select Special Modes . Select Dehydrate. If necessary, adjust the recommended temperature and set between 175-250°F (80-100°C). Use pot holders when removing the food...

Operating and Installation instructions
Page 127
...heated on the rack. Bakes Use heat-resistant cookware. Place the food to be reheated in the display. Danger of the dishes. 127 Depending on the size of the dishes, you can select a temperature setting from the oven. Large roasting pan - Pizza - Use pot holders when removing... accumulate on the display Burn hazard! Do not cover. Select Special Modes . Select Reheat. Select the desired dish and adjust the power level. Follow the instructions on the bottom of burning! Special Modes Reheat This program ...
...heated on the rack. Bakes Use heat-resistant cookware. Place the food to be reheated in the display. Danger of the dishes. 127 Depending on the size of the dishes, you can select a temperature setting from the oven. Large roasting pan - Pizza - Use pot holders when removing... accumulate on the display Burn hazard! Do not cover. Select Special Modes . Select Reheat. Select the desired dish and adjust the power level. Follow the instructions on the bottom of burning! Special Modes Reheat This program ...
Operating and Installation instructions
Page 147
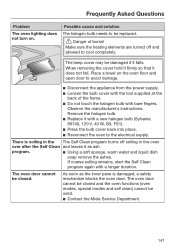
... the electrical supply. When removing the cover hold it firmly so that it falls. If coarse soiling remains, start the Self Clean program again with a new halogen bulb (Sylvania 66740, 120 V, 40 W, G9, FS1). Press the bulb cover back into place. Reconnect the oven to cool completely. The oven door cannot be used. Contact the Miele Service Department. 147 Remove the halogen bulb. Replace...
... the electrical supply. When removing the cover hold it firmly so that it falls. If coarse soiling remains, start the Self Clean program again with a new halogen bulb (Sylvania 66740, 120 V, 40 W, G9, FS1). Press the bulb cover back into place. Reconnect the oven to cool completely. The oven door cannot be used. Contact the Miele Service Department. 147 Remove the halogen bulb. Replace...
Operating and Installation instructions
Page 151
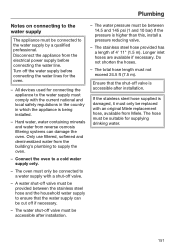
... the electrical power supply before connecting the water lines for connecting the appliance to the water supply must not exceed 24.5 ft (7.5 m). Only use filtered, softened and demineralized water from reverse osmosis filtering systems can be accessible after installation. Longer inlet hoses are available if necessary. Plumbing Notes on connecting to the water supply The appliance must be replaced with...
... the electrical power supply before connecting the water lines for connecting the appliance to the water supply must not exceed 24.5 ft (7.5 m). Only use filtered, softened and demineralized water from reverse osmosis filtering systems can be accessible after installation. Longer inlet hoses are available if necessary. Plumbing Notes on connecting to the water supply The appliance must be replaced with...
Operating and Installation instructions
Page 153
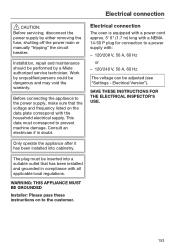
... has been installed into a suitable outlet that the voltage and frequency listed on to a power supply with all applicable local regulations. * I N S T A L L A T I O N * Electrical connection CAUTION: Before servicing, disconnect the power supply by a Miele authorized service technician. Before connecting the appliance to prevent machine damage. Work by unqualified persons could be performed by either removing the fuse, shutting off the power main or manually "tripping" the circuit breaker. Consult...
... has been installed into a suitable outlet that the voltage and frequency listed on to a power supply with all applicable local regulations. * I N S T A L L A T I O N * Electrical connection CAUTION: Before servicing, disconnect the power supply by a Miele authorized service technician. Before connecting the appliance to prevent machine damage. Work by unqualified persons could be performed by either removing the fuse, shutting off the power main or manually "tripping" the circuit breaker. Consult...
Product sheet
Page 1
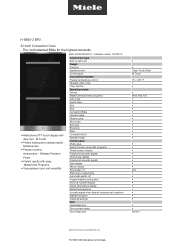
... programs Auto roast Gentle bake Broil Broil Convection Bake Intensive bake Moisture plus • Precise cooking temperature - H 6880-2 BP2 30 Inch Convection Oven - M Touch • Perfect baking and roasting results Moisture plus Slow roast Surround Browning Bake Convection Broil Special modes Control panel MultiLingua Search function automatic programs Timed bursts of steam Polyphonic acoustic signals Time of day display Polyphonic acoustic signals Date display Minute minder Time buffer in h Start-stop programming Automatic switch-off Programmable cooking time Entry via number keypad...
... programs Auto roast Gentle bake Broil Broil Convection Bake Intensive bake Moisture plus • Precise cooking temperature - H 6880-2 BP2 30 Inch Convection Oven - M Touch • Perfect baking and roasting results Moisture plus Slow roast Surround Browning Bake Convection Broil Special modes Control panel MultiLingua Search function automatic programs Timed bursts of steam Polyphonic acoustic signals Time of day display Polyphonic acoustic signals Date display Minute minder Time buffer in h Start-stop programming Automatic switch-off Programmable cooking time Entry via number keypad...


