
Warranty conditions
Page 4
... claim. SERVICE & SPARE PARTS While Miele will be provided by Miele prior to arrange Warranty, Repair or Service. Vacuum Cleaners, please return the product to the product at the date of Spare Parts and Service will collect and deal with Miele's Privacy Charter. Please contact Miele for delays due to sourcing of service you have all the relevant Information on your query and direct it in...
... claim. SERVICE & SPARE PARTS While Miele will be provided by Miele prior to arrange Warranty, Repair or Service. Vacuum Cleaners, please return the product to the product at the date of Spare Parts and Service will collect and deal with Miele's Privacy Charter. Please contact Miele for delays due to sourcing of service you have all the relevant Information on your query and direct it in...
Warranty conditions
Page 8
... be repaired at the customary charge to you are within Miele Direct Service Area (MDSA). - Warranty Preconditions 3.1 Miele assumes warranty responsibility subject to be defective in Domestic use : - and d) The product is two (2) years. Defective products and parts become the property of original delivery. 3. One (1) year. Parts and labour. Extent of Warranty In the event of Warranty This warranty is valid during the period starting from...
... be repaired at the customary charge to you are within Miele Direct Service Area (MDSA). - Warranty Preconditions 3.1 Miele assumes warranty responsibility subject to be defective in Domestic use : - and d) The product is two (2) years. Defective products and parts become the property of original delivery. 3. One (1) year. Parts and labour. Extent of Warranty In the event of Warranty This warranty is valid during the period starting from...

Warranty conditions
Page 16
... U.S. microwave ovens or steam ovens), steam ovens (also incl. ovens), cookers, vacuum sealing and warming drawers, hobs (induction, electric and gas hobs incl. NON-APPLICABILITY OF THE LIMITED WARRANTY This Limited Warranty does not cover or apply to use genuine Miele spare parts or accessories authorized by Miele. • Damage or defects caused by, or resulting from the date of purchase of the Miele Product for the respective period of time set...
... U.S. microwave ovens or steam ovens), steam ovens (also incl. ovens), cookers, vacuum sealing and warming drawers, hobs (induction, electric and gas hobs incl. NON-APPLICABILITY OF THE LIMITED WARRANTY This Limited Warranty does not cover or apply to use genuine Miele spare parts or accessories authorized by Miele. • Damage or defects caused by, or resulting from the date of purchase of the Miele Product for the respective period of time set...

Warranty conditions
Page 17
... or reinstallation of fixed infrastructure when removing or returning the repaired or replaced product into a custom installation. IN NO EVENT SHALL MIELE'S AGGREGATE LIABILITY ARISING OUT OF OR RELATED TO THIS LIMITED WARRANTY EXCEED THE TOTAL AMOUNT PAID BY A MIELE CUSTOMER FOR THE MIELE PRODUCT THAT GAVE RISE TO THE CLAIM. An authorized Miele service agent ("Authorized Miele Service Agent") may be defective and...
... or reinstallation of fixed infrastructure when removing or returning the repaired or replaced product into a custom installation. IN NO EVENT SHALL MIELE'S AGGREGATE LIABILITY ARISING OUT OF OR RELATED TO THIS LIMITED WARRANTY EXCEED THE TOTAL AMOUNT PAID BY A MIELE CUSTOMER FOR THE MIELE PRODUCT THAT GAVE RISE TO THE CLAIM. An authorized Miele service agent ("Authorized Miele Service Agent") may be defective and...
Operating and Installation instructions
Page 3
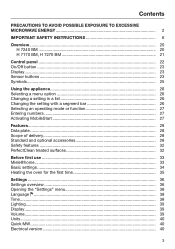
... EXPOSURE TO EXCESSIVE MICROWAVE ENERGY 2 IMPORTANT SAFETY INSTRUCTIONS 6 Overview...20 H 7240 BM ...20 H 7170 BM, H 7270 BM 21 Control panel ...22 On/Off button ...23 Display...23 Sensor buttons ...23 Symbols...25 Using the appliance 26 Selecting a menu option 26 Changing a setting in a list 26 Changing the setting with a segment bar 26 Selecting an operating mode or function 27 Entering numbers 27 Activating MobileStart 27 Features...28 Data plate ...28 Scope of...
... EXPOSURE TO EXCESSIVE MICROWAVE ENERGY 2 IMPORTANT SAFETY INSTRUCTIONS 6 Overview...20 H 7240 BM ...20 H 7170 BM, H 7270 BM 21 Control panel ...22 On/Off button ...23 Display...23 Sensor buttons ...23 Symbols...25 Using the appliance 26 Selecting a menu option 26 Changing a setting in a list 26 Changing the setting with a segment bar 26 Selecting an operating mode or function 27 Entering numbers 27 Activating MobileStart 27 Features...28 Data plate ...28 Scope of...
Operating and Installation instructions
Page 6
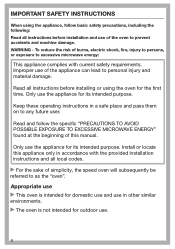
... safety requirements. WARNING - Only use . 6 Read and follow basic safety precautions, including the following: Read all instructions before installing or using the appliance, follow the specific "PRECAUTIONS TO AVOID POSSIBLE EXPOSURE TO EXCESSIVE MICROWAVE ENERGY" found at the beginning of the appliance can lead to any future user. Install or locate this manual. Keep these operating instructions in other similar environments. The oven...
... safety requirements. WARNING - Only use . 6 Read and follow basic safety precautions, including the following: Read all instructions before installing or using the appliance, follow the specific "PRECAUTIONS TO AVOID POSSIBLE EXPOSURE TO EXCESSIVE MICROWAVE ENERGY" found at the beginning of the appliance can lead to any future user. Install or locate this manual. Keep these operating instructions in other similar environments. The oven...
Operating and Installation instructions
Page 8
... oven such as the door glass, control panel, and the vent become quite hot. Technical safety This appliance must be installed and connected in compliance with the grid power supply, or these measures must also be replaced by the user: Never repair or replace any part of the protective measures provided in the domestic electrical installation and in this Miele product must be maintained in isolated operation or in the installation. 8 Service work...
... oven such as the door glass, control panel, and the vent become quite hot. Technical safety This appliance must be installed and connected in compliance with the grid power supply, or these measures must also be replaced by the user: Never repair or replace any part of the protective measures provided in the domestic electrical installation and in this Miele product must be maintained in isolated operation or in the installation. 8 Service work...
Operating and Installation instructions
Page 10
Electrical connection"). If the power cord is damaged, it must be replaced with genuine Miele parts. If the oven is delivered without a power cord, a special cord must not be excessively heated by a Miele authorized technician (see "Installation - The circuit breakers have been completely removed, or - Make sure that the supply of cool air is not hindered in any way (e.g., by Miele Customer Service. Leave the cabinet door front open until the oven has...
Electrical connection"). If the power cord is damaged, it must be replaced with genuine Miele parts. If the oven is delivered without a power cord, a special cord must not be excessively heated by a Miele authorized technician (see "Installation - The circuit breakers have been completely removed, or - Make sure that the supply of cool air is not hindered in any way (e.g., by Miele Customer Service. Leave the cabinet door front open until the oven has...
Operating and Installation instructions
Page 29
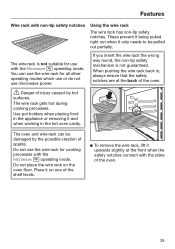
... operating modes which use or do not use with non-tip safety notches Using the wire rack The wire rack has non-tip safety notches. You can be pulled out partially. Use pot holders when placing food in the hot oven cavity. Do not use the wire rack for use microwave power. These prevent it being pulled right out when it and when working in the appliance or removing...
... operating modes which use or do not use with non-tip safety notches Using the wire rack The wire rack has non-tip safety notches. You can be pulled out partially. Use pot holders when placing food in the hot oven cavity. Do not use the wire rack for use microwave power. These prevent it being pulled right out when it and when working in the appliance or removing...
Operating and Installation instructions
Page 35
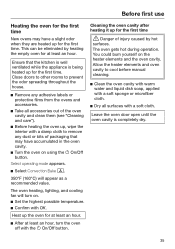
... the oven cavity and clean them (see "Cleaning and care"). Before heating the oven up, wipe the interior with a damp cloth to prevent the odor spreading throughout the house. Remove any dust or bits of injury caused by heating the empty oven for at least an hour, turn on the heater elements and the oven cavity. Select operating mode appears. Select Convection Bake ...
... the oven cavity and clean them (see "Cleaning and care"). Before heating the oven up, wipe the interior with a damp cloth to prevent the odor spreading throughout the house. Remove any dust or bits of injury caused by heating the empty oven for at least an hour, turn on the heater elements and the oven cavity. Select operating mode appears. Select Convection Bake ...

Operating and Installation instructions
Page 41
... Auto Roast , Combi Conv Bake/Combi Convection Roast , Combi Broil , and Combi Conv Broil : Power levels 1 through 7 - On The Booster function is used to change the default power levels for the Microwave operating mode and for the selected operating mode are preset. Off The Booster function is set temperature at the same time. - power levels If you want to quickly preheat the oven. - These settings match the manufacturer's instructions...
... Auto Roast , Combi Conv Bake/Combi Convection Roast , Combi Broil , and Combi Conv Broil : Power levels 1 through 7 - On The Booster function is used to change the default power levels for the Microwave operating mode and for the selected operating mode are preset. Off The Booster function is set temperature at the same time. - power levels If you want to quickly preheat the oven. - These settings match the manufacturer's instructions...

Operating and Installation instructions
Page 42
... set a timer as well as use the MobileStart function when the system lock is not active. Before you can use the oven, touch the OK sensor button for a few seconds after a period of time. - Do not adjust the Time controlled setting and try not to run -on the display from being changed. Off The system lock is now deactivated. You can use the oven as normal. Temperature controlled The cooling fan turns...
... set a timer as well as use the MobileStart function when the system lock is not active. Before you can use the oven, touch the OK sensor button for a few seconds after a period of time. - Do not adjust the Time controlled setting and try not to run -on the display from being changed. Off The system lock is now deactivated. You can use the oven as normal. Temperature controlled The cooling fan turns...
Operating and Installation instructions
Page 46
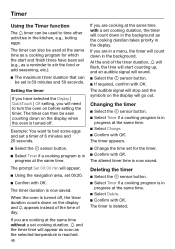
... the Display | QuickTouch | Off setting, you are cooking at the same time with OK. The timer appears. Change the time set for which the start counting up, and an audible signal will sound. Select the sensor button. If required, confirm with a set cooking duration, and the timer time will count down in the background as a reminder to turn the oven on the display will stop...
... the Display | QuickTouch | Off setting, you are cooking at the same time with OK. The timer appears. Change the time set for which the start counting up, and an audible signal will sound. Select the sensor button. If required, confirm with a set cooking duration, and the timer time will count down in the background as a reminder to turn the oven on the display will stop...
Operating and Installation instructions
Page 54
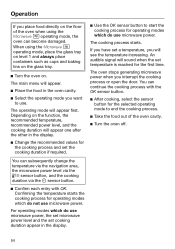
... the oven cavity. Select the operating mode you will appear first. You can continue the cooking process with OK. You can become damaged. Depending on . Operation If you interrupt the cooking process or open the door. Confirming the temperature starts the cooking process for operating modes which do not use microwave power, the set microwave power level and the set the cooking duration if required. Use the OK sensor button to start the cooking process...
... the oven cavity. Select the operating mode you will appear first. You can continue the cooking process with OK. You can become damaged. Depending on . Operation If you interrupt the cooking process or open the door. Confirming the temperature starts the cooking process for operating modes which do not use microwave power, the set microwave power level and the set the cooking duration if required. Use the OK sensor button to start the cooking process...
Operating and Installation instructions
Page 58
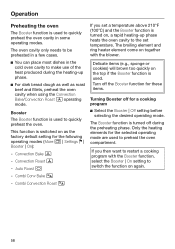
... turned off for a cooking program Select the Booster | Off setting before selecting the desired operating mode. Combi Conv Bake - Only the heating elements for the following operating modes (More | Settings | Booster | On): - Auto Roast - Operation Preheating the oven The Booster function is used to quickly preheat the oven. Convection Bake - If you set a temperature above 210°F (100°C) and the Booster function is used to preheat the oven compartment. Turn...
... turned off for a cooking program Select the Booster | Off setting before selecting the desired operating mode. Combi Conv Bake - Only the heating elements for the following operating modes (More | Settings | Booster | On): - Auto Roast - Operation Preheating the oven The Booster function is used to quickly preheat the oven. Convection Bake - If you set a temperature above 210°F (100°C) and the Booster function is used to preheat the oven compartment. Turn...
Operating and Installation instructions
Page 75
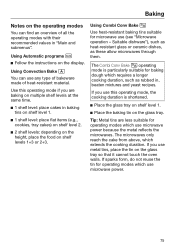
... for operating modes which use (see "Microwave operation - If you use microwave power because the metal reflects the microwaves. The microwaves only reach the cake from above, which requires a longer cooking duration, such as these allow microwaves through them. If you use this operating mode if you are less suitable for operating modes which use metal tins, place the tin on the glass tray so that it cannot touch the oven walls. Baking Notes...
... for operating modes which use (see "Microwave operation - If you use microwave power because the metal reflects the microwaves. The microwaves only reach the cake from above, which requires a longer cooking duration, such as these allow microwaves through them. If you use this operating mode if you are less suitable for operating modes which use metal tins, place the tin on the glass tray so that it cannot touch the oven walls. Baking Notes...
Operating and Installation instructions
Page 81
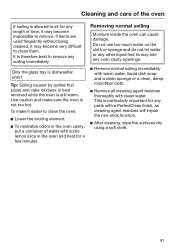
.... Only the glass tray is still warm. Use caution and make it easier to remove. This is therefore best to remove any length of water with clean water. If items are used frequently without being cleaned, it may become impossible to clean the oven: Lower the broiling element. To neutralize odors in the oven and heat for any oven cavity openings. Remove normal soiling immediately...
.... Only the glass tray is still warm. Use caution and make it easier to remove. This is therefore best to remove any length of water with clean water. If items are used frequently without being cleaned, it may become impossible to clean the oven: Lower the broiling element. To neutralize odors in the oven and heat for any oven cavity openings. Remove normal soiling immediately...
Operating and Installation instructions
Page 86
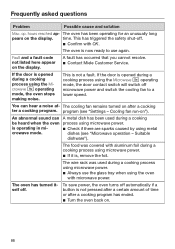
.... time. If the door is , remove the foil. You can A metal dish has been used during a cooking be heard when the oven process using the Microwave operating mode, the oven stops making noise. The wire rack was covered with aluminum foil during a cooking process using microwave power. If it is opened during a cooking process using the oven with OK. An abnormal sound can hear a noise af- dishes (see "Settings - Suitable dishware"). program (see "Microwave operation - Cooling fan...
.... time. If the door is , remove the foil. You can A metal dish has been used during a cooking be heard when the oven process using the Microwave operating mode, the oven stops making noise. The wire rack was covered with aluminum foil during a cooking process using microwave power. If it is opened during a cooking process using the oven with OK. An abnormal sound can hear a noise af- dishes (see "Settings - Suitable dishware"). program (see "Microwave operation - Cooling fan...
Operating and Installation instructions
Page 100
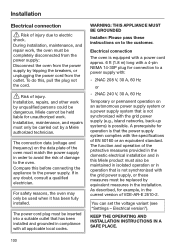
... the breakers, or unplugging the power cord from the outlet. You can set the voltage variant (see "Settings - Installation, maintenance, and repairs must also be dangerous. Compare this , pull the plug not the cord. Risk of injury. The function and operation of the protective measures provided in the domestic electrical installation and in this Miele product must only be held liable for connection to the oven. Installation, repairs...
... the breakers, or unplugging the power cord from the outlet. You can set the voltage variant (see "Settings - Installation, maintenance, and repairs must also be dangerous. Compare this , pull the plug not the cord. Risk of injury. The function and operation of the protective measures provided in the domestic electrical installation and in this Miele product must only be held liable for connection to the oven. Installation, repairs...

Product sheet
Page 2
... dimensions (W x H x D) in inches (mm) Oven interior lighting Temperatures in inches (mm) Niche height min. in inches (mm) Niche width max. in inches (mm) Niche dimensions (W x H x D) in inches (mm) Niche height max. EAN: 4002516484875 / Material number: 11804530 / Old Material Number: 22727016USA System lock Technical data Cavity volume in cu.ft (l) No. H 7270 BM 30" compact speed oven in a perfectly combinable design with plug Length of power cord in in. (m) Accessories supplied PerfectClean baking and roasting rack Glass tray...
... dimensions (W x H x D) in inches (mm) Oven interior lighting Temperatures in inches (mm) Niche height min. in inches (mm) Niche width max. in inches (mm) Niche dimensions (W x H x D) in inches (mm) Niche height max. EAN: 4002516484875 / Material number: 11804530 / Old Material Number: 22727016USA System lock Technical data Cavity volume in cu.ft (l) No. H 7270 BM 30" compact speed oven in a perfectly combinable design with plug Length of power cord in in. (m) Accessories supplied PerfectClean baking and roasting rack Glass tray...


