Product Manual
Page 4
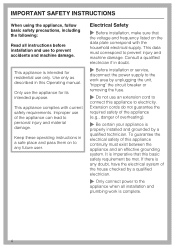
.... ~ Before installation or service, disconnect the power supply to the work is intended for its intended purpose. To guarantee the electrical safety of this Operating manual. IMPORTANT SAFETY INSTRUCTIONS When using the appliance, follow basic safety precautions, including the following: Read all installation and plumbing work area by a qualified technician. This...
.... ~ Before installation or service, disconnect the power supply to the work is intended for its intended purpose. To guarantee the electrical safety of this Operating manual. IMPORTANT SAFETY INSTRUCTIONS When using the appliance, follow basic safety precautions, including the following: Read all installation and plumbing work area by a qualified technician. This...
Product Manual
Page 11
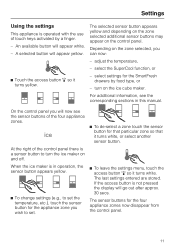
... the sensor button for the four appliance zones now disappear from the control panel. 11 adjust the temperature, - When the ice maker is in this manual. On the control panel you can now: - An available button will appear yellow.
... the sensor button for the four appliance zones now disappear from the control panel. 11 adjust the temperature, - When the ice maker is in this manual. On the control panel you can now: - An available button will appear yellow.
Product Manual
Page 12
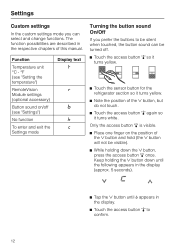
... . ^ Touch the access button "p" so it turns yellow. ^ Touch the sensor button for the refrigerator section so it turns yellow. ^ Note the position of this manual. Settings Custom settings In the custom settings mode you prefer the buttons to confirm. 12
... . ^ Touch the access button "p" so it turns yellow. ^ Touch the sensor button for the refrigerator section so it turns yellow. ^ Note the position of this manual. Settings Custom settings In the custom settings mode you prefer the buttons to confirm. 12
Product Manual
Page 49
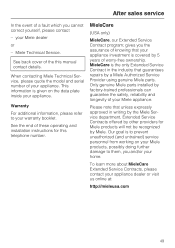
....com 49 gives you cannot correct yourself, please contact - MieleCare is the only Extended Service Contract in writing by the Miele Service department, Extended Service Contracts offered by other providers for this manual contact details. Please note that unless expressly approved in the industry that your appliance investment is covered by 5 years...
....com 49 gives you cannot correct yourself, please contact - MieleCare is the only Extended Service Contract in writing by the Miele Service department, Extended Service Contracts offered by other providers for this manual contact details. Please note that unless expressly approved in the industry that your appliance investment is covered by 5 years...
Product Manual
Page 69
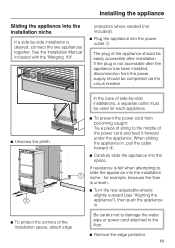
See the Installation Manual included with the "Merging Kit". If the plug is desired, connect the two appliances together. The plug of the appliance should be completed via the ...
See the Installation Manual included with the "Merging Kit". If the plug is desired, connect the two appliances together. The plug of the appliance should be completed via the ...

Product Manual
Page 84
... the problem. Windows XP® or newer operating system, Mac® OS X 10.3 or higher - If a fault occurs, Miele's client service center will be notified and contact you, or another trusted individual identified on set-up and installation of the RemoteVision module ...see the "Installation" section of this manual. Be sure your appliance to your wireless system meets the following requirements - Microsoft® Internet Explorer 6 or higher, Safari 2.0 or higher...
... the problem. Windows XP® or newer operating system, Mac® OS X 10.3 or higher - If a fault occurs, Miele's client service center will be notified and contact you, or another trusted individual identified on set-up and installation of the RemoteVision module ...see the "Installation" section of this manual. Be sure your appliance to your wireless system meets the following requirements - Microsoft® Internet Explorer 6 or higher, Safari 2.0 or higher...

Product Manual
Page 85
... settings mode. The module has been connected to confirm. If ; # does not appear, refer to the "Network options" section of the XKM 2000 Installation Instruction manual. ^ Press and hold (the X button will not be visible). ^ While holding the X button down the X button, press the access button "p" once. Once the door is...
... settings mode. The module has been connected to confirm. If ; # does not appear, refer to the "Network options" section of the XKM 2000 Installation Instruction manual. ^ Press and hold (the X button will not be visible). ^ While holding the X button down the X button, press the access button "p" once. Once the door is...