Product Manual
Page 2
... Using the freezer efficiently 21 Freezing food 21 Defrosting 22 Cooling drinks quickly 22 SuperCool 23 Ice cube maker 24 Automatic defrost 25 Adjusting the interior fittings 26 Moving the shelves 26 Floating drawer 26 Removing the storage shelf from above the drawer 28 Ice cube container 29 Small freezer basket 29 Cleaning and care 30 Cleaning the interior and accessories 31 Appliance doors 31 Humidity filters 33 Ventilation slits 33 Door seals 33 Changing the light bulb...
... Using the freezer efficiently 21 Freezing food 21 Defrosting 22 Cooling drinks quickly 22 SuperCool 23 Ice cube maker 24 Automatic defrost 25 Adjusting the interior fittings 26 Moving the shelves 26 Floating drawer 26 Removing the storage shelf from above the drawer 28 Ice cube container 29 Small freezer basket 29 Cleaning and care 30 Cleaning the interior and accessories 31 Appliance doors 31 Humidity filters 33 Ventilation slits 33 Door seals 33 Changing the light bulb...
Product Manual
Page 3
Contents Water filter 36 Water filter change indicator 36 Exchanging the water filter 37 Confirming the filter change 38 Using an external water filter 38 Lead free certificate 41 Frequently asked questions 42 Causes of noises 49 After sales service 50 Caring for the environment 53 Installation 54 Climate Range 54 Installation site 54 Stainless steel panels 57 Installation options 57 Adjusting the door opening angle (optional accessory 59 Dimensions 60 Installing the appliance 63 Before you begin 63...
Contents Water filter 36 Water filter change indicator 36 Exchanging the water filter 37 Confirming the filter change 38 Using an external water filter 38 Lead free certificate 41 Frequently asked questions 42 Causes of noises 49 After sales service 50 Caring for the environment 53 Installation 54 Climate Range 54 Installation site 54 Stainless steel panels 57 Installation options 57 Adjusting the door opening angle (optional accessory 59 Dimensions 60 Installing the appliance 63 Before you begin 63...
Product Manual
Page 4
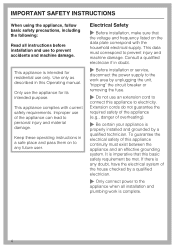
... and material damage. This appliance is any future user. IMPORTANT SAFETY INSTRUCTIONS When using the appliance, follow basic safety precautions, including the following: Read all installation and plumbing work area by unplugging the unit, "tripping" the circuit breaker or removing the fuse. ~ Do not use an extension cord to connect this Operating manual. Use only as described in a safe place and pass...
... and material damage. This appliance is any future user. IMPORTANT SAFETY INSTRUCTIONS When using the appliance, follow basic safety precautions, including the following: Read all installation and plumbing work area by unplugging the unit, "tripping" the circuit breaker or removing the fuse. ~ Do not use an extension cord to connect this Operating manual. Use only as described in a safe place and pass...
Product Manual
Page 5
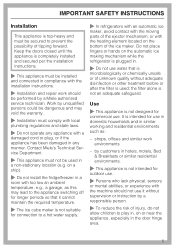
... of the ice maker. IMPORTANT SAFETY INSTRUCTIONS Installation This appliance is top-heavy and must not be used ; the filter alone is not designed for commercial use in domestic households and in a non-stationary location (e.g. Work by a responsible person. ~ To reduce the risk of injury, do not allow children to play in, on the automatic ice making mechanism while the refrigerator is plugged in. ~ Do...
... of the ice maker. IMPORTANT SAFETY INSTRUCTIONS Installation This appliance is top-heavy and must not be used ; the filter alone is not designed for commercial use in domestic households and in a non-stationary location (e.g. Work by a responsible person. ~ To reduce the risk of injury, do not allow children to play in, on the automatic ice making mechanism while the refrigerator is plugged in. ~ Do...

Product Manual
Page 6
... or other appliance. ~ Do not deactivate the water filter display. ~ Do not use sharp-edged objects to the appliance. ~ Do not use any other types of adhesive on the door seal, as they might contain substances which could damage the plastic parts or which have thawed completely. ~ Do not handle frozen food or ice with wet hands. Pressurized steam could cause a build...
... or other appliance. ~ Do not deactivate the water filter display. ~ Do not use sharp-edged objects to the appliance. ~ Do not use any other types of adhesive on the door seal, as they might contain substances which could damage the plastic parts or which have thawed completely. ~ Do not handle frozen food or ice with wet hands. Pressurized steam could cause a build...
Product Manual
Page 9
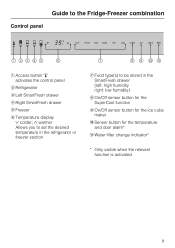
... in the refrigerator or freezer section g Food type(s) to the Fridge-Freezer combination Control panel a Access button "p" activates the control panel b Refrigerator c Left SmartFresh drawer d Right SmartFresh drawer e Freezer f Temperature display X colder; Y warmer Allows you to set the desired temperature in the SmartFresh drawer (left: high humidity right: low humidity) h On/Off sensor button for the SuperCool function i On/Off sensor button for the ice cube maker j Sensor button for the temperature and door alarm* k Water filter change indicator* * Only...
... in the refrigerator or freezer section g Food type(s) to the Fridge-Freezer combination Control panel a Access button "p" activates the control panel b Refrigerator c Left SmartFresh drawer d Right SmartFresh drawer e Freezer f Temperature display X colder; Y warmer Allows you to set the desired temperature in the SmartFresh drawer (left: high humidity right: low humidity) h On/Off sensor button for the SuperCool function i On/Off sensor button for the ice cube maker j Sensor button for the temperature and door alarm* k Water filter change indicator* * Only...

Product Manual
Page 10
... before turning it from the power supply. 10 When the doors are reached after a few hours. The preset temperatures (factory default settings) are open, the interior lights come on or off the appliance with the main switch. All zones are reached. ,Turning off together. Do not remove this protective film until the preset temperatures are switched on . After removing the protective film clean the exterior...
... before turning it from the power supply. 10 When the doors are reached after a few hours. The preset temperatures (factory default settings) are open, the interior lights come on or off the appliance with the main switch. All zones are reached. ,Turning off together. Do not remove this protective film until the preset temperatures are switched on . After removing the protective film clean the exterior...

Product Manual
Page 11
... button. ^ To change settings (e.g., to set . ^ To leave the settings menu, touch the access button "p" so it turns yellow. - If the access button is operated with the use of the control panel there is in this manual. The sensor buttons for the SmartFresh drawers by a finger. - When the ice maker is a sensor button to set the temperature, etc.), touch the sensor button for the appliance zone you wish to turn on the control panel. Settings Using the settings...
... button. ^ To change settings (e.g., to set . ^ To leave the settings menu, touch the access button "p" so it turns yellow. - If the access button is operated with the use of the control panel there is in this manual. The sensor buttons for the SmartFresh drawers by a finger. - When the ice maker is a sensor button to set the temperature, etc.), touch the sensor button for the appliance zone you wish to turn on the control panel. Settings Using the settings...

Product Manual
Page 13
... the ice cube container ^ Clean the interior ^ Remove and discard the water filter (secure the filter cap) ^ Leave the doors open to confirm the setting. ^ Tap the X button until you can choose between: = 0 : Button sound is off = 1 : Button sound is turned off for longer periods of time If the appliance is reactivated. Turning off automatically. in the Custom settings mode the door alarm is on = - : Return to menu. ^ Touch the access button "p" to...
... the ice cube container ^ Clean the interior ^ Remove and discard the water filter (secure the filter cap) ^ Leave the doors open to confirm the setting. ^ Tap the X button until you can choose between: = 0 : Button sound is off = 1 : Button sound is turned off for longer periods of time If the appliance is reactivated. Turning off automatically. in the Custom settings mode the door alarm is on = - : Return to menu. ^ Touch the access button "p" to...

Product Manual
Page 17
... dairy products The level of food stored. But several food types within one group can be selected at the same time. Using the SmartFresh drawers There are best stored under dry conditions, such as vegetables and fruit - Right: Foods that are two SmartFresh drawers. Left: Foods that are not adversely affected by cold, the best range is dependent on: - The selected sensor button turns...
... dairy products The level of food stored. But several food types within one group can be selected at the same time. Using the SmartFresh drawers There are best stored under dry conditions, such as vegetables and fruit - Right: Foods that are two SmartFresh drawers. Left: Foods that are not adversely affected by cold, the best range is dependent on: - The selected sensor button turns...
Product Manual
Page 25
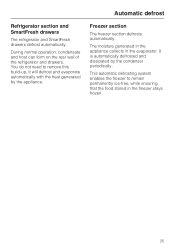
... defrosting system enables the freezer to remove this build-up, it will defrost and evaporate automatically with the heat generated by the condenser periodically. During normal operation, condensate and frost can form on the rear wall of the refrigerator and drawers. You do not need to remain permanently ice-free, while ensuring that the food stored in the evaporator. Automatic defrost Refrigerator...
... defrosting system enables the freezer to remove this build-up, it will defrost and evaporate automatically with the heat generated by the condenser periodically. During normal operation, condensate and frost can form on the rear wall of the refrigerator and drawers. You do not need to remain permanently ice-free, while ensuring that the food stored in the evaporator. Automatic defrost Refrigerator...
Product Manual
Page 26
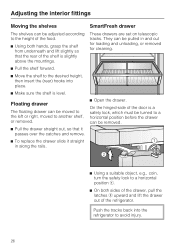
... can be removed. ^ To replace the drawer slide it passes over the catches and remove. ^ Open the drawer. They can be pulled in along the rails. ^ Using a suitable object, e.g., coin, turn the safety lock to the desired height, then insert the (rear) hooks into the refrigerator to avoid injury. 26 These drawers are set on telescopic tracks. Adjusting the interior fittings Moving...
... can be removed. ^ To replace the drawer slide it passes over the catches and remove. ^ Open the drawer. They can be pulled in along the rails. ^ Using a suitable object, e.g., coin, turn the safety lock to the desired height, then insert the (rear) hooks into the refrigerator to avoid injury. 26 These drawers are set on telescopic tracks. Adjusting the interior fittings Moving...

Product Manual
Page 27
Replacing the SmartFresh drawer ^ Completely extend the telescopic tracks. ^ Lay the drawer on the tracks so that it back down along the tracks. To re-insert the divider, slide it connects in the front and back. ^ Turn the safety lock back to the vertical position. ^ Slide the drawer in. 27 Important: If the divider is not in the drawer can also be removed for cleaning. ^ Remove the drawer. ^ Lift the divider upward and out. Adjusting the interior fittings The divider in place, the SmartFresh drawer will not work properly.
Replacing the SmartFresh drawer ^ Completely extend the telescopic tracks. ^ Lay the drawer on the tracks so that it back down along the tracks. To re-insert the divider, slide it connects in the front and back. ^ Turn the safety lock back to the vertical position. ^ Slide the drawer in. 27 Important: If the divider is not in the drawer can also be removed for cleaning. ^ Remove the drawer. ^ Lift the divider upward and out. Adjusting the interior fittings The divider in place, the SmartFresh drawer will not work properly.

Product Manual
Page 29
Adjusting the interior fittings Ice cube container The ice cube container is set on telescopic tracks, and can be removed for cleaning. ^ Slide the basket forward until resistance is a safety lock, which must be turned to a horizontal position a. ^ On both sides of the container, pull the latches (see arrow) upward and lift the container out of the door is felt. ^ On both sides...
Adjusting the interior fittings Ice cube container The ice cube container is set on telescopic tracks, and can be removed for cleaning. ^ Slide the basket forward until resistance is a safety lock, which must be turned to a horizontal position a. ^ On both sides of the container, pull the latches (see arrow) upward and lift the container out of the door is felt. ^ On both sides...

Product Manual
Page 30
... use a mild solution of warm water and liquid dish soap to clean this appliance. cleaners containing soda, ammonia, thinners, or chlorides - dishwasher soap (powder), - scouring pads, steel wool, hard brushes, - steam cleaning products. Remove the cleaner promptly. 30 Never use cleaning agents containing abrasive substances such as they can be cleaned using a non-abrasive stainless steel cleaner (available from the power supply by shutting...
... use a mild solution of warm water and liquid dish soap to clean this appliance. cleaners containing soda, ammonia, thinners, or chlorides - dishwasher soap (powder), - scouring pads, steel wool, hard brushes, - steam cleaning products. Remove the cleaner promptly. 30 Never use cleaning agents containing abrasive substances such as they can be cleaned using a non-abrasive stainless steel cleaner (available from the power supply by shutting...

Product Manual
Page 31
... warm water. All surfaces may become diffficult to remove and the surfaces may discolor. ^ Use the main switch to turn the appliance off completely. It contains material-friendly substances and - Do not wipe these with a stainless steel conditioner, it may also be used, without a cleaning agent. ^ After cleaning, rinse everything with clean water, then dry with a soft cloth. 31 Before cleaning Cleaning and care Cleaning the interior...
... warm water. All surfaces may become diffficult to remove and the surfaces may discolor. ^ Use the main switch to turn the appliance off completely. It contains material-friendly substances and - Do not wipe these with a stainless steel conditioner, it may also be used, without a cleaning agent. ^ After cleaning, rinse everything with clean water, then dry with a soft cloth. 31 Before cleaning Cleaning and care Cleaning the interior...

Product Manual
Page 33
... machine. Cleaning and care Humidity filters The two humidity filters, located above the SmartFresh drawers, must be removed for cleaning. ^ Clean the filters by rinsing them along with lukewarm water. Remove any dirt/dust with warm water and dry thoroughly. ^ Remove the filter mat. 33 This may cause the seals to deteriorate and become porous over time. ^ Clean the door seals with a vacuum cleaner or brush. Do not use oil...
... machine. Cleaning and care Humidity filters The two humidity filters, located above the SmartFresh drawers, must be removed for cleaning. ^ Clean the filters by rinsing them along with lukewarm water. Remove any dirt/dust with warm water and dry thoroughly. ^ Remove the filter mat. 33 This may cause the seals to deteriorate and become porous over time. ^ Clean the door seals with a vacuum cleaner or brush. Do not use oil...

Product Manual
Page 46
... high. - the freezer compartment temperature is open. - See "Ice Cube Maker" and/or "Plumbing" for the first ice cubes to the power supply. Self-tapping valves and 3/16" (4.76 mm) saddle valves reduce the water pressure and can take up to 10 hours for more information. - Contact Miele. The ice cube maker When the appliance is turned on . The appliance is switched on . the water...
... high. - the freezer compartment temperature is open. - See "Ice Cube Maker" and/or "Plumbing" for the first ice cubes to the power supply. Self-tapping valves and 3/16" (4.76 mm) saddle valves reduce the water pressure and can take up to 10 hours for more information. - Contact Miele. The ice cube maker When the appliance is turned on . The appliance is switched on . the water...
Product Manual
Page 76
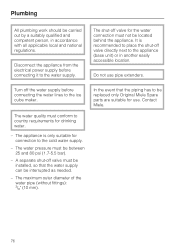
Disconnect the appliance from the electrical power supply before connecting the water lines to be replaced only Original Miele Spare parts are suitable for the water connection must be between 25 and 80 psi (1.7-5.5 bar). - The water quality must be installed, so that the piping has to the ice cube maker. Contact Miele. 76 It is only suitable for drinking water. - The appliance is...
Disconnect the appliance from the electrical power supply before connecting the water lines to be replaced only Original Miele Spare parts are suitable for the water connection must be between 25 and 80 psi (1.7-5.5 bar). - The water quality must be installed, so that the piping has to the ice cube maker. Contact Miele. 76 It is only suitable for drinking water. - The appliance is...
Product Manual
Page 79
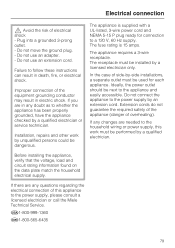
... you are any doubt as to the household wiring or power supply, this appliance to follow these instructions can result in death, fire, or electrical shock. If there are in electric shock. Do not move the ground plug. - Failure to the power supply, please consult a licensed electrician or call the Miele Technical Service. Installation, repairs and other work must be dangerous. In the case...
... you are any doubt as to the household wiring or power supply, this appliance to follow these instructions can result in death, fire, or electrical shock. If there are in electric shock. Do not move the ground plug. - Failure to the power supply, please consult a licensed electrician or call the Miele Technical Service. Installation, repairs and other work must be dangerous. In the case...

