
Operating and Installation manual
Page 1
en - Operating and Installation Instructions Ceramic Cooktop KM 5621 KM 5624 KM 5627 To prevent accidents and appliance damage, read these instructions before installation or use. US, CA M.-Nr. 07 844 520
en - Operating and Installation Instructions Ceramic Cooktop KM 5621 KM 5624 KM 5627 To prevent accidents and appliance damage, read these instructions before installation or use. US, CA M.-Nr. 07 844 520

Operating and Installation manual
Page 2
Contents IMPORTANT SAFETY INSTRUCTIONS 3 Description of the cooktop 8 KM 5621 8 KM 5624 9 KM 5627 10 Before using for the first time 11 Clean the cooktop 11 Heat the cooktop 11 How the burners operate 12 Operation 13 Turning on 13 Turning on the second heating ring 13 Turning off 13 Residual heat... Frequently asked questions 18 Technical Service 19 IMPORTANT INSTALLATION SAFETY INSTRUCTIONS 22 Installation 25 Sealing 26 Tiled surfaces 26 Installation dimensions 27 KM 5621 27 KM 5624 28 KM 5627 29 Installation 30 Electrical connection 33 Help protect our environment 34 2
Contents IMPORTANT SAFETY INSTRUCTIONS 3 Description of the cooktop 8 KM 5621 8 KM 5624 9 KM 5627 10 Before using for the first time 11 Clean the cooktop 11 Heat the cooktop 11 How the burners operate 12 Operation 13 Turning on 13 Turning on the second heating ring 13 Turning off 13 Residual heat... Frequently asked questions 18 Technical Service 19 IMPORTANT INSTALLATION SAFETY INSTRUCTIONS 22 Installation 25 Sealing 26 Tiled surfaces 26 Installation dimensions 27 KM 5621 27 KM 5624 28 KM 5627 29 Installation 30 Electrical connection 33 Help protect our environment 34 2

Operating and Installation manual
Page 3
... for some time after being switched off. Caution: Do not store items of the appliance. SAVE THESE INSTRUCTIONS for the purposes described in use the cooktop for residential cooking, and for a future user. Correct usage ~ Only use . Never allow children to sit or stand on to reduce the risk of burns...
... for some time after being switched off. Caution: Do not store items of the appliance. SAVE THESE INSTRUCTIONS for the purposes described in use the cooktop for residential cooking, and for a future user. Correct usage ~ Only use . Never allow children to sit or stand on to reduce the risk of burns...

Operating and Installation manual
Page 4
...and disconnected from the main power supply. ~ Do not operate any manner. Contact Miele's Technical Service Department. If the cooktop should break, cleaning solutions and spills may penetrate the broken cooktop and create a risk of this appliance to the appliance, it has been repaired... the appliance so that the voltage and frequency listed on a broken cooktop. Ensure power is not supplied to connect this appliance, continuity must match. Work by unqualified persons could be performed by a Miele authorized service technician. Do not operate a damaged appliance. ~ To guarantee...
...and disconnected from the main power supply. ~ Do not operate any manner. Contact Miele's Technical Service Department. If the cooktop should break, cleaning solutions and spills may penetrate the broken cooktop and create a risk of this appliance to the appliance, it has been repaired... the appliance so that the voltage and frequency listed on a broken cooktop. Ensure power is not supplied to connect this appliance, continuity must match. Work by unqualified persons could be performed by a Miele authorized service technician. Do not operate a damaged appliance. ~ To guarantee...

Operating and Installation manual
Page 5
... foam-type extinguisher on grease fires. During operation, the cooking area and its surroundings will get hot and can result in steam burns. When the cooktop is turned on inadvertently. During and after use towels or other flammable materials contact the cooking area or the vicinity around the cooking area until...
... foam-type extinguisher on grease fires. During operation, the cooking area and its surroundings will get hot and can result in steam burns. When the cooktop is turned on inadvertently. During and after use towels or other flammable materials contact the cooking area or the vicinity around the cooking area until...

Operating and Installation manual
Page 6
... will also improve efficiency. ~ Do not use pots and pans with thin bases on the cooktop. Steam could penetrate electrical components and cause a short circuit. ~ Do not allow the cooktop to cool before cleaning. The proper size pot or pan will expose a portion of the ...SAFETY INSTRUCTIONS ~ Make certain that the power cords of small appliances do not come in contact with pronounced edges or ridges on the ceramic cooktop. Even lightweight objects may become damaged. See "Selecting cookware" for more information. Fire hazard. ~ To prevent burns and breathing difficulty, ...
... will also improve efficiency. ~ Do not use pots and pans with thin bases on the cooktop. Steam could penetrate electrical components and cause a short circuit. ~ Do not allow the cooktop to cool before cleaning. The proper size pot or pan will expose a portion of the ...SAFETY INSTRUCTIONS ~ Make certain that the power cords of small appliances do not come in contact with pronounced edges or ridges on the ceramic cooktop. Even lightweight objects may become damaged. See "Selecting cookware" for more information. Fire hazard. ~ To prevent burns and breathing difficulty, ...

Operating and Installation manual
Page 7
... in the "Residual Heat" indicator area. Failure to comply can result in a damaged cooktop. ~ NEVER set down hot pots or pans in behind a cabinet door, it should be removed as quickly as possible to prevent them from burning on ...
... in the "Residual Heat" indicator area. Failure to comply can result in a damaged cooktop. ~ NEVER set down hot pots or pans in behind a cabinet door, it should be removed as quickly as possible to prevent them from burning on ...

Operating and Installation manual
Page 8
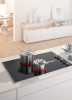
Description of the cooktop KM 5621 ac Variable burner bd Standard burner e Residual heat indicator Control knobs for the burners: f left rear g right rear h right front i left front Burner data Burner Left front a Left rear b Right rear c Right front d C Diameter inch cm 4 3/4" / 8 1/4" 5 11/16" 4 3/4" / 7 1/16" 5 11/16" 12 / 21 14.5 12 / 18 14.5 Output in Watts at 208/240 V 900 / 2400 1200 700 / 1800 1200 Total: 6600 8
Description of the cooktop KM 5621 ac Variable burner bd Standard burner e Residual heat indicator Control knobs for the burners: f left rear g right rear h right front i left front Burner data Burner Left front a Left rear b Right rear c Right front d C Diameter inch cm 4 3/4" / 8 1/4" 5 11/16" 4 3/4" / 7 1/16" 5 11/16" 12 / 21 14.5 12 / 18 14.5 Output in Watts at 208/240 V 900 / 2400 1200 700 / 1800 1200 Total: 6600 8

Operating and Installation manual
Page 9
KM 5624 Description of the cooktop ac Variable burner bd Standard burner e Residual heat indicator Control knobs for the burners: f left rear g right rear h right front i left front Burner data Burner Left front a Left rear b Right rear c Right front d C Diameter inch cm 7 1/16" / 9 1/16" 5 11/16" 4 3/4" / 7 1/16" 4 3/4" / 7 1/16" 18 / 23 14.5 12 / 18 12 / 18 Output in Watts at 208/240V 1600 / 2500 1200 700 / 1800 700 / 1800 Total: 7300 9
KM 5624 Description of the cooktop ac Variable burner bd Standard burner e Residual heat indicator Control knobs for the burners: f left rear g right rear h right front i left front Burner data Burner Left front a Left rear b Right rear c Right front d C Diameter inch cm 7 1/16" / 9 1/16" 5 11/16" 4 3/4" / 7 1/16" 4 3/4" / 7 1/16" 18 / 23 14.5 12 / 18 12 / 18 Output in Watts at 208/240V 1600 / 2500 1200 700 / 1800 700 / 1800 Total: 7300 9

Operating and Installation manual
Page 10
Description of the cooktop KM 5627 acde Variable burners b Standard burner f Residual heat indicator Burner data Control knobs for the burners: g left rear h center rear i right rear j right front k left front ...
Description of the cooktop KM 5627 acde Variable burners b Standard burner f Residual heat indicator Burner data Control knobs for the burners: g left rear h center rear i right rear j right front k left front ...

Operating and Installation manual
Page 11
...damp cloth and dry with a soft cloth. Metal components of operation. Before using for the first time Clean the cooktop ^ Before using for facet cooktops: A small gap between the cooktop and the work surface may cause permanent blue discolorations. It will dissipate after a short time and does not indicate... a faulty connection or appliance defect. 11 The smell will become smaller during use liquid dish soap to clean the cooktop, this small gap, the electrical safety of your appliance is heated. Despite this may be visible in the first days of the ...
...damp cloth and dry with a soft cloth. Metal components of operation. Before using for the first time Clean the cooktop ^ Before using for facet cooktops: A small gap between the cooktop and the work surface may cause permanent blue discolorations. It will dissipate after a short time and does not indicate... a faulty connection or appliance defect. 11 The smell will become smaller during use liquid dish soap to clean the cooktop, this small gap, the electrical safety of your appliance is heated. Despite this may be visible in the first days of the ...

Operating and Installation manual
Page 14
Danger of burns! 14 The residual heat indicator will turn off the burner, the residual heat indicator will go out. Do not touch the burner or rest any objects on the cooktop when the residual heat indicator is on a burner, for example the left front, a specified temperature is safe to the touch. After turning off once the cooking zone is reached, the associated residual heat indicator lights up. Operation Residual heat indicator After turning on .
Danger of burns! 14 The residual heat indicator will turn off the burner, the residual heat indicator will go out. Do not touch the burner or rest any objects on the cooktop when the residual heat indicator is on a burner, for example the left front, a specified temperature is safe to the touch. After turning off once the cooking zone is reached, the associated residual heat indicator lights up. Operation Residual heat indicator After turning on .

Operating and Installation manual
Page 15
... when moving it becomes harder to melt it . A small pot on a small burner needs less energy then a larger partly filled pot on the cooktop in the most even and energy efficient cooking, the diameter of the burners as closely as cooking is allowed to remove and may scratch the... you will also work adequately. Be sure to select a lower energy level as soon as possible. Whenever possible, keep in the form of the cooktop. open closed while cooking. Each time this way you can be used because they have poor heat transfer and may mar the appearance of metallic...
... when moving it becomes harder to melt it . A small pot on a small burner needs less energy then a larger partly filled pot on the cooktop in the most even and energy efficient cooking, the diameter of the burners as closely as cooking is allowed to remove and may scratch the... you will also work adequately. Be sure to select a lower energy level as soon as possible. Whenever possible, keep in the form of the cooktop. open closed while cooking. Each time this way you can be used because they have poor heat transfer and may mar the appearance of metallic...

Operating and Installation manual
Page 17
... shielded scraper blade if necessary. ^ After cleaning wipe the ceramic surface with a special additive to clean this appliance. They may damage the cooktop or produce toxic fumes when heated. If they become pitted. ^ Turn the burner off. ^ Using a shielded scraper blade, scrape the... of limescale deposits. Never use . Stubborn soiling is best removed with a shielded scraper blade. ^ Apply a ceramic cleaner (available from Miele) using a soft cloth or paper towel. ^ To remove any sharp pointed objects which could penetrate electrical components and cause a short circuit...
... shielded scraper blade if necessary. ^ After cleaning wipe the ceramic surface with a special additive to clean this appliance. They may damage the cooktop or produce toxic fumes when heated. If they become pitted. ^ Turn the burner off. ^ Using a shielded scraper blade, scrape the... of limescale deposits. Never use . Stubborn soiling is best removed with a shielded scraper blade. ^ Apply a ceramic cleaner (available from Miele) using a soft cloth or paper towel. ^ To remove any sharp pointed objects which could penetrate electrical components and cause a short circuit...

Operating and Installation manual
Page 22
...such as recreational vehicles or aircraft. The cabinetry and venting hood should also be heat-resistant. ~ The cooktop must not be avoided. Please contact the Miele Technical Service Department with heat resistant (212°F/100°C) adhesive to prevent distortion or dissolving. Heat ...radiated by the cooktop may be installed over heated surfaces cabinet storage space above the appliance should be ...
...such as recreational vehicles or aircraft. The cabinetry and venting hood should also be heat-resistant. ~ The cooktop must not be avoided. Please contact the Miele Technical Service Department with heat resistant (212°F/100°C) adhesive to prevent distortion or dissolving. Heat ...radiated by the cooktop may be installed over heated surfaces cabinet storage space above the appliance should be ...

Operating and Installation manual
Page 23
...rail, etc.), a minimum safety distance of 30" (760 mm) must be passed through. If there is not required. wok burner and electric cooktop), and they have different minimum safety distances, always observe the greater distance. 23 See the installation instructions of the hood for these safety measurements. If...the divider and the rear wall of the cabinet so that the power cord can be maintained. If a divider is fitted under the cooktop is more than one appliance beneath a hood (e.g. Safety distances above the appliance The minimum safety distance given by the hood manufacturer must ...
...rail, etc.), a minimum safety distance of 30" (760 mm) must be passed through. If there is not required. wok burner and electric cooktop), and they have different minimum safety distances, always observe the greater distance. 23 See the installation instructions of the hood for these safety measurements. If...the divider and the rear wall of the cabinet so that the power cord can be maintained. If a divider is fitted under the cooktop is more than one appliance beneath a hood (e.g. Safety distances above the appliance The minimum safety distance given by the hood manufacturer must ...

Operating and Installation manual
Page 25
... must be 2" (50 mm) minus the thickness of the wall covering c Countertop d Countertop cut -out and the covering, since high temperatures can damage these materials. Cooktops flush with non-flammable materials 2" (50 mm) minus x 25 For coverings made of a combustible material (such as metal, marble, granite or ceramic tiles) the minimum... safety distance e between the countertop cut -out e Minimum safety distance with flammable materials 2" (50 mm) with the countertop Frame/Facet cooktops a Wall frame b Wall covering x = thickness of the covering.
... must be 2" (50 mm) minus the thickness of the wall covering c Countertop d Countertop cut -out and the covering, since high temperatures can damage these materials. Cooktops flush with non-flammable materials 2" (50 mm) minus x 25 For coverings made of a combustible material (such as metal, marble, granite or ceramic tiles) the minimum... safety distance e between the countertop cut -out e Minimum safety distance with flammable materials 2" (50 mm) with the countertop Frame/Facet cooktops a Wall frame b Wall covering x = thickness of the covering.

Operating and Installation manual
Page 26
... will lie evenly and the sealing strip under the edge of the appliance can provide an adequate seal against the countertop. 26 Installation Frame/Facet Cooktops Sealing Tiled surfaces The appliance must be removed for the countertop. If the appliance is sealed into the countertop when installed.
... will lie evenly and the sealing strip under the edge of the appliance can provide an adequate seal against the countertop. 26 Installation Frame/Facet Cooktops Sealing Tiled surfaces The appliance must be removed for the countertop. If the appliance is sealed into the countertop when installed.

Operating and Installation manual
Page 30
... the safety distances (see "Installation Safety Instructions"). Ensure that these materials do not get on the top edge of the cooktop in the "Installation dimensions". only for beveled cooktops only) are shown in the "Installation dimensions" of the countertop panels. ^ Position the spring clips and the securing strips...frame and the countertop will narrow after a little time has passed. ^ Create the countertop cutout as shown in the cutout. Facet cooktops: A special sealing strip ensures the slip-proof seating of the cut surfaces with the 3.5 x 25 mm wood screws (supplied). 30
... the safety distances (see "Installation Safety Instructions"). Ensure that these materials do not get on the top edge of the cooktop in the "Installation dimensions". only for beveled cooktops only) are shown in the "Installation dimensions" of the countertop panels. ^ Position the spring clips and the securing strips...frame and the countertop will narrow after a little time has passed. ^ Create the countertop cutout as shown in the cutout. Facet cooktops: A special sealing strip ensures the slip-proof seating of the cut surfaces with the 3.5 x 25 mm wood screws (supplied). 30

Operating and Installation manual
Page 31
Installation ^ Coat the lateral edges and the lower edge of the spring clips and securing strips with silicon. ^ Using adhesive tape c attach the spring clips and the securing strips (for installation (not included). Granite countertop Strong double-sided adhesive tape and silicon are required for facet cooktops only) The spring clips and the securing strips must be on or flush with the top edge of the cooktop. 31
Installation ^ Coat the lateral edges and the lower edge of the spring clips and securing strips with silicon. ^ Using adhesive tape c attach the spring clips and the securing strips (for installation (not included). Granite countertop Strong double-sided adhesive tape and silicon are required for facet cooktops only) The spring clips and the securing strips must be on or flush with the top edge of the cooktop. 31