User Guide
Page 2
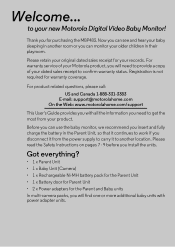
... sleeping in another location. Before you can monitor your Motorola product, you will find one or more additional baby units with all the information you for the Parent and Baby units In multi-camera packs, you install the units. to work if you...1 x Baby Unit (Camera) • 1 x Rechargeable Ni-MH battery pack for the Parent Unit • 1 x Battery door for Parent Unit • 2 x Power adapters for purchasing the MBP483. Please retain your original dated sales receipt for warranty coverage. Registration is not required for your new Motorola Digital Video Baby Monitor!...
... sleeping in another location. Before you can monitor your Motorola product, you will find one or more additional baby units with all the information you for the Parent and Baby units In multi-camera packs, you install the units. to work if you...1 x Baby Unit (Camera) • 1 x Rechargeable Ni-MH battery pack for the Parent Unit • 1 x Battery door for Parent Unit • 2 x Power adapters for purchasing the MBP483. Please retain your original dated sales receipt for warranty coverage. Registration is not required for your new Motorola Digital Video Baby Monitor!...
User Guide
Page 4
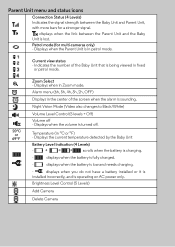
displays when the link between the Baby Unit and Parent Unit, with more bars for multi-cameras only) - Alarm menu (6h, 5h, 4h, 3h, 2h, OFF) Displays in Zoom mode. displays when the battery is operating on AC power only. Current view ... mode. Displays when the volume is being viewed in fixed or patrol mode. 20°C or 69°F Zoom Select - Brightness Level Control (5 Levels) Add Camera Delete Camera Indicates the number of the screen when the alarm is in oC or oF) -
displays when the link between the Baby Unit and Parent Unit, with more bars for multi-cameras only) - Alarm menu (6h, 5h, 4h, 3h, 2h, OFF) Displays in Zoom mode. displays when the battery is operating on AC power only. Current view ... mode. Displays when the volume is being viewed in fixed or patrol mode. 20°C or 69°F Zoom Select - Brightness Level Control (5 Levels) Add Camera Delete Camera Indicates the number of the screen when the alarm is in oC or oF) -
User Guide
Page 5
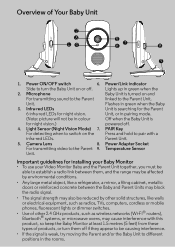
... vision. Infra-red LEDs Unit is turned on the Press and hold to be in green when the 2. Light Sensor (Night Vision Mode) 7. Parent Unit. 5. Camera Lens 8. Overview of products, or turn the Baby Unit on or off . 4. Power/Link indicator Slide to turn them off if they appear to pair...
... vision. Infra-red LEDs Unit is turned on the Press and hold to be in green when the 2. Light Sensor (Night Vision Mode) 7. Parent Unit. 5. Camera Lens 8. Overview of products, or turn the Baby Unit on or off . 4. Power/Link indicator Slide to turn them off if they appear to pair...
User Guide
Page 6
... the Parent Unit 18 4.6 Set Screen Off time for the Parent Unit 18 4.7 Zoom, Pan or Tilt 18 4.8 Pair and Replace a Baby Unit 19 4.9 Multi-Camera Use 19 5. Table of the Parent Unit 13 3.
... the Parent Unit 18 4.6 Set Screen Off time for the Parent Unit 18 4.7 Zoom, Pan or Tilt 18 4.8 Pair and Replace a Baby Unit 19 4.9 Multi-Camera Use 19 5. Table of the Parent Unit 13 3.
User Guide
Page 14
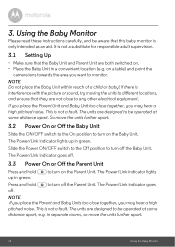
... that the Baby Unit and Parent Unit are designed to turn off the Baby Unit. The units are both switched on a table) and point the camera lens towards the area you may hear a high pitched noise. to any other electrical equipment. The Power/Link indicator goes off. 3.3 Power On or Off...
... that the Baby Unit and Parent Unit are designed to turn off the Baby Unit. The units are both switched on a table) and point the camera lens towards the area you may hear a high pitched noise. to any other electrical equipment. The Power/Link indicator goes off. 3.3 Power On or Off...

User Guide
Page 16
.... 4.3 Set Alarm Time on the Parent Unit You can adjust the brightness of the selected 2, 3, 4, 5 or 6 hour period, and the alarm icon will appear in camera viewing mode. 2. Press M when the Parent Unit is selected, the Parent Unit emit multiple beeps repeatedly at the end of the Parent Unit screen from... Brightness You can use the Parent Unit to set the alarm as a reminder for you to . 3. Press O to show the menu options with displayed in camera viewing mode to confirm your selection. 16 Parent Unit Menu Options Turn off . Press O to choose 2h, 3h, 4h, 5h or 6h. 5. Parent Unit ...
.... 4.3 Set Alarm Time on the Parent Unit You can adjust the brightness of the selected 2, 3, 4, 5 or 6 hour period, and the alarm icon will appear in camera viewing mode. 2. Press M when the Parent Unit is selected, the Parent Unit emit multiple beeps repeatedly at the end of the Parent Unit screen from... Brightness You can use the Parent Unit to set the alarm as a reminder for you to . 3. Press O to show the menu options with displayed in camera viewing mode to confirm your selection. 16 Parent Unit Menu Options Turn off . Press O to choose 2h, 3h, 4h, 5h or 6h. 5. Parent Unit ...
User Guide
Page 17
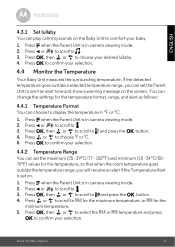
...for the maximum temperature, or MIN for the temperature format, range, and alert as follows: 4.4.1 Temperature Format You can choose to display the temperature in camera viewing mode. 2. If the detected temperature goes outside the temperature range, you can set on. 1. Press < or to scroll to choose °F ...or °C. 5. Press M when the Parent Unit is in camera viewing mode. 2. Press M when the Parent Unit is in camera viewing mode. 2. Press M when the Parent Unit is set the Parent Unit to emit an alert tone and show a warning...
...for the maximum temperature, or MIN for the temperature format, range, and alert as follows: 4.4.1 Temperature Format You can choose to display the temperature in camera viewing mode. 2. If the detected temperature goes outside the temperature range, you can set on. 1. Press < or to scroll to choose °F ...or °C. 5. Press M when the Parent Unit is in camera viewing mode. 2. Press M when the Parent Unit is in camera viewing mode. 2. Press M when the Parent Unit is set the Parent Unit to emit an alert tone and show a warning...
User Guide
Page 18
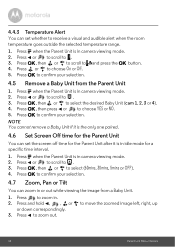
Press or to choose YES or NO. 5. Press O, then press < or to choose On or Off. 5. Press to zoom in camera viewing mode. 2. Press M when the Parent Unit is in camera viewing mode. 2. and press the O button. 4.5 Remove a Baby Unit from a Baby Unit. 1. Press < or to scroll to . 3....1. Press O to select the desired Baby Unit (cam 1, 2, 3 or 4). 4. Press O, then or to confirm your selection. Press M when the Parent Unit is in camera viewing mode. 2. Press and hold Press O, then or to scroll to . 3. Press M when the Parent Unit is in . 2. Press < or to scroll to 4....
Press or to choose YES or NO. 5. Press O, then press < or to choose On or Off. 5. Press to zoom in camera viewing mode. 2. Press M when the Parent Unit is in camera viewing mode. 2. and press the O button. 4.5 Remove a Baby Unit from a Baby Unit. 1. Press < or to scroll to . 3....1. Press O to select the desired Baby Unit (cam 1, 2, 3 or 4). 4. Press O, then or to confirm your selection. Press M when the Parent Unit is in camera viewing mode. 2. Press and hold Press O, then or to scroll to . 3. Press M when the Parent Unit is in . 2. Press < or to scroll to 4....
User Guide
Page 19
... must be heard on the screen. Press M when the Parent Unit is in your Parent Unit. If more than one camera is already occupied, and it in camera viewing mode to 4 cameras with the selected option shown on . To pair and replace a Baby Unit: 1. Parent Unit Menu Options 19 The unit... before the new Baby Unit can replace the existing Baby Unit. 4.9 Multi-Camera Use You can add or replace a Baby Unit in camera viewing mode. 2. NOTE The audio from the new camera will beep and the picture from a camera can only be removed before use. You can pair up to step through...
... must be heard on the screen. Press M when the Parent Unit is in your Parent Unit. If more than one camera is already occupied, and it in camera viewing mode to 4 cameras with the selected option shown on . To pair and replace a Baby Unit: 1. Parent Unit Menu Options 19 The unit... before the new Baby Unit can replace the existing Baby Unit. 4.9 Multi-Camera Use You can add or replace a Baby Unit in camera viewing mode. 2. NOTE The audio from the new camera will beep and the picture from a camera can only be removed before use. You can pair up to step through...