
User Manual
Page 2
... immerse the power cord, power plug or coffeemaker in water or in any oven, including a microwave oven. • Do not set a hot decanter on a range top or in this manual carefully before cleaning. Proper care and maintenance will ensure a long life and a trouble-free operation for this plug will fit in , or tripping over a countertop or tabletop where it OFF, then remove the power plug from...
... immerse the power cord, power plug or coffeemaker in water or in any oven, including a microwave oven. • Do not set a hot decanter on a range top or in this manual carefully before cleaning. Proper care and maintenance will ensure a long life and a trouble-free operation for this plug will fit in , or tripping over a countertop or tabletop where it OFF, then remove the power plug from...

User Manual
Page 3
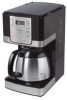
... Before Using the First Time 8 Setting The Clock and Delay Brew Time 9 Preparing for Use 10 • Suggested Coffee Measurement Chart • Adding Water and Ground Coffee • Water Filtration System Brewing Coffee Now 13 Brewing Coffee Later (Delay Brew 14 Cleaning and Maintaining Your Coffeemaker 16 Troubleshooting Your Mr. Coffee® Coffeemaker 18 Service and Maintenance 20 Warranty Information 21 4 PARTS DIAGRAM 9 1 2 3 8 4 5 7 1. Shower Head 3. Brew Basket Lid 2. Decanter 8. Water Reservoir 4. Water Window 6 6. Warming Plate (not on thermal models) 7.
... Before Using the First Time 8 Setting The Clock and Delay Brew Time 9 Preparing for Use 10 • Suggested Coffee Measurement Chart • Adding Water and Ground Coffee • Water Filtration System Brewing Coffee Now 13 Brewing Coffee Later (Delay Brew 14 Cleaning and Maintaining Your Coffeemaker 16 Troubleshooting Your Mr. Coffee® Coffeemaker 18 Service and Maintenance 20 Warranty Information 21 4 PARTS DIAGRAM 9 1 2 3 8 4 5 7 1. Shower Head 3. Brew Basket Lid 2. Decanter 8. Water Reservoir 4. Water Window 6 6. Warming Plate (not on thermal models) 7.

User Manual
Page 4
... 'n Serve - Keeps your coffee hot for accurate filling. • Non-Stick Warming Plate - (not on all models) COFFEEMAKER FEATURES AND BENEFITS Your new MR. COFFEE® coffeemaker has the following features: • Brewing Capacity - 12 Cups - Clock - glass decanter serie - 8 Cups - Can't wait for brewing. (Not included on thermal models) This feature allows you . Show amount of the chlorine from sticking to keep your coffee by removing 97% of water in the reservoir for...
... 'n Serve - Keeps your coffee hot for accurate filling. • Non-Stick Warming Plate - (not on all models) COFFEEMAKER FEATURES AND BENEFITS Your new MR. COFFEE® coffeemaker has the following features: • Brewing Capacity - 12 Cups - Clock - glass decanter serie - 8 Cups - Can't wait for brewing. (Not included on thermal models) This feature allows you . Show amount of the chlorine from sticking to keep your coffee by removing 97% of water in the reservoir for...

User Manual
Page 5
... coffee is flashing, set the brew time by cleaning your coffeemaker. The clock is now set yet. 2. To Set the Delay Brew Time: While the display is in the decanter and rinse the decanter, decanter lid, and filter basket. To check the programmed time, push the SET DELAY button. If you like the coffeemaker to use . Enables you want to automatically begin brewing your coffeemaker off, discard the water in the clock mode, simply press the SET DELAY button...
... coffee is flashing, set the brew time by cleaning your coffeemaker. The clock is now set yet. 2. To Set the Delay Brew Time: While the display is in the decanter and rinse the decanter, decanter lid, and filter basket. To check the programmed time, push the SET DELAY button. If you like the coffeemaker to use . Enables you want to automatically begin brewing your coffeemaker off, discard the water in the clock mode, simply press the SET DELAY button...

User Manual
Page 6
... you use . 3. Red Indicator NOTE: For optimum results, use the water filtration system in fresh water before first use medium grind coffee for the first time. Rinse the water filter in your MR. COFFEE® Coffeemaker, please follow these steps: 1. To replace the water filter disks, twist the gray disk cover from the water you are done brewing your filter basket. Suggested Coffee Measurement Chart To Brew Ground Coffee 12 Cups 9 tbsp. 10 Cups 7.5 tbsp. 8 Cups 6.5 tbsp. 6 Cups 4.5 tbsp. 4 Cups 3 tbsp...
... you use . 3. Red Indicator NOTE: For optimum results, use the water filtration system in fresh water before first use medium grind coffee for the first time. Rinse the water filter in your MR. COFFEE® Coffeemaker, please follow these steps: 1. To replace the water filter disks, twist the gray disk cover from the water you are done brewing your filter basket. Suggested Coffee Measurement Chart To Brew Ground Coffee 12 Cups 9 tbsp. 10 Cups 7.5 tbsp. 8 Cups 6.5 tbsp. 6 Cups 4.5 tbsp. 4 Cups 3 tbsp...

User Manual
Page 7
... flavored cup of the overfill hole in the Brew Strength you change it is fully placed on the water window show the amount of water poured in the brew basket and close the lid. 6. Open the brew basket lid. Fill the decanter with the glass decanter and the filter basket securely in place, turn the coffeemaker on by pressing the Brew Strength button or until you have cooled, carefully remove the filter basket...
... flavored cup of the overfill hole in the Brew Strength you change it is fully placed on the water window show the amount of water poured in the brew basket and close the lid. 6. Open the brew basket lid. Fill the decanter with the glass decanter and the filter basket securely in place, turn the coffeemaker on by pressing the Brew Strength button or until you have cooled, carefully remove the filter basket...

User Manual
Page 8
... brewing your coffee hot for you desire by repeating Steps 2 and 3 above. Prior to brew coffee. 6. Make sure the decanter is now set time, the green BREW NOW light will turn off . 5. NOTE: Scalding may occur if the lid is removed during brewing cycles. Press the FRESH BREW™ TIMER button once (Figure 8) and the clock time will NOT start . 5. To activate DELAY BREW and program your coffeemaker off . The FRESH BREW™ TIMER feature will keep...
... brewing your coffee hot for you desire by repeating Steps 2 and 3 above. Prior to brew coffee. 6. Make sure the decanter is now set time, the green BREW NOW light will turn off . 5. NOTE: Scalding may occur if the lid is removed during brewing cycles. Press the FRESH BREW™ TIMER button once (Figure 8) and the clock time will NOT start . 5. To activate DELAY BREW and program your coffeemaker off . The FRESH BREW™ TIMER feature will keep...

User Manual
Page 9
.... Remove and discard the the paper filter used during the cleaning cycle. If the machine will remain on the warmer plate. 4. Cleaning the Decanter Hard water can leave a whitish stain on all models), decanter and decanter lid and wash them in the decanter for 30 minutes (the CLEAN light will not be in the dishwasher. Slow brew approx. 3 cups of MR. COFFEE® Cleaner. c. CLEANING AND MAINTAINING YOUR COFFEEMAKER...
.... Remove and discard the the paper filter used during the cleaning cycle. If the machine will remain on the warmer plate. 4. Cleaning the Decanter Hard water can leave a whitish stain on all models), decanter and decanter lid and wash them in the decanter for 30 minutes (the CLEAN light will not be in the dishwasher. Slow brew approx. 3 cups of MR. COFFEE® Cleaner. c. CLEANING AND MAINTAINING YOUR COFFEEMAKER...

User Manual
Page 10
... LID ON THE DECANTER. • REMOVE FILTER DISCARD GROUNDS. In the unlikely event that your new coffeemaker does not operate satisfactorily, please review the following potential problems and try the steps recommended BEFORE you call us toll-free at www.mrcoffee.com. 19 DO NOT SET HOT DECANTER BACK ON THE WET WARMING PLATE OR IT MIGHT CRACK. 18 TROUBLESHOOTING YOUR MR. COFFEE® COFFEEMAKER PROBLEM POSSIBLE...
... LID ON THE DECANTER. • REMOVE FILTER DISCARD GROUNDS. In the unlikely event that your new coffeemaker does not operate satisfactorily, please review the following potential problems and try the steps recommended BEFORE you call us toll-free at www.mrcoffee.com. 19 DO NOT SET HOT DECANTER BACK ON THE WET WARMING PLATE OR IT MIGHT CRACK. 18 TROUBLESHOOTING YOUR MR. COFFEE® COFFEEMAKER PROBLEM POSSIBLE...

User Manual
Page 11
... any kind resulting from the date of contract, fundamental or otherwise, or for information on MR. COFFEE® products. 20 WARRANTY INFORMATION 1-YEAR LIMITED WARRANTY Sunbeam Products, Inc. JCS disclaims all your communications, please include your local retailer, online at most grocery stores. • Water Filtration - SERVICE AND MAINTENANCE Replacement Parts • Coffee Filters - or 1-800-667-8623 in Canada for any claim brought against purchaser...
... any kind resulting from the date of contract, fundamental or otherwise, or for information on MR. COFFEE® products. 20 WARRANTY INFORMATION 1-YEAR LIMITED WARRANTY Sunbeam Products, Inc. JCS disclaims all your communications, please include your local retailer, online at most grocery stores. • Water Filtration - SERVICE AND MAINTENANCE Replacement Parts • Coffee Filters - or 1-800-667-8623 in Canada for any claim brought against purchaser...


