

Product Data Sheet
Page 1
... Series Network Attached Storage (NAS) Data Sheet RN202/RN204 RN204 RN202 ReadyNAS: Advanced Performance and Data Protection The ReadyNAS 200 is powered by a dual core Cortex A15 1.4GHz processor, has 2 Gigabytes of RAM, dual Gigabit Ethernet ports with new PC App • Sync folders between ReadyNAS® and PCs • Time Machine® backup support for all the MACs® in your phone Stream and Share Photos, Movies & Music • Powerful media server using Plex, iTunes...
... Series Network Attached Storage (NAS) Data Sheet RN202/RN204 RN204 RN202 ReadyNAS: Advanced Performance and Data Protection The ReadyNAS 200 is powered by a dual core Cortex A15 1.4GHz processor, has 2 Gigabytes of RAM, dual Gigabit Ethernet ports with new PC App • Sync folders between ReadyNAS® and PCs • Time Machine® backup support for all the MACs® in your phone Stream and Share Photos, Movies & Music • Powerful media server using Plex, iTunes...

Product Data Sheet
Page 3
...8226; Max # Concurrent Connections: 1024 • Share Folder Level ACL Support • Advanced Folder Permissions with Subfolder ACL support for CIFS/SMB, AFP, FTP • Microsoft Active Directory (AD) Domain Controller Authentication • Local access list • ReadyCLOUD based ACL • Domain user login via CIFS/SMB, AFP, FTP Page 3 of drives/bays) • RAID Global Hot Spare • Backup to ReadyNAS). ReadyNAS® 200 Series Network Attached Storage (NAS) Data Sheet RN202/RN204 Technical Specifications Media • ReadyDLNA (UPnP DLNA Media Server...
...8226; Max # Concurrent Connections: 1024 • Share Folder Level ACL Support • Advanced Folder Permissions with Subfolder ACL support for CIFS/SMB, AFP, FTP • Microsoft Active Directory (AD) Domain Controller Authentication • Local access list • ReadyCLOUD based ACL • Domain user login via CIFS/SMB, AFP, FTP Page 3 of drives/bays) • RAID Global Hot Spare • Backup to ReadyNAS). ReadyNAS® 200 Series Network Attached Storage (NAS) Data Sheet RN202/RN204 Technical Specifications Media • ReadyDLNA (UPnP DLNA Media Server...

Product Data Sheet
Page 4
ReadyNAS® 200 Series Network Attached Storage (NAS) Data Sheet RN202/RN204 Technical Specifications Networking Protocols • TCP/IP • IPv4 • Next-generation Internet Protocol (IPv6) • Static IP Address • Dynamic IP Address • Multiple IP Settings • DHCP Client • UPnP Discovery • Bonjour Discovery • Link Aggregation IEEE 802.3ad • Port Trunking (balanced round robin, active backup, balance xor, broadcast, 802.3ad link aggregation LACP, transmit load...
ReadyNAS® 200 Series Network Attached Storage (NAS) Data Sheet RN202/RN204 Technical Specifications Networking Protocols • TCP/IP • IPv4 • Next-generation Internet Protocol (IPv6) • Static IP Address • Dynamic IP Address • Multiple IP Settings • DHCP Client • UPnP Discovery • Bonjour Discovery • Link Aggregation IEEE 802.3ad • Port Trunking (balanced round robin, active backup, balance xor, broadcast, 802.3ad link aggregation LACP, transmit load...

Hardware Manual
Page 8
... on the following systems: • Microsoft Windows 8 • Microsoft Windows 7 • Microsoft Windows Vista • Apple Mac OS X 10.5 Leopard or later • Linux, UNIX, Solaris • Apple iOS • Google Android Getting Started 8 ReadyNAS OS 6 Desktop Storage Systems Additional Documentation For detailed information about configuring, managing, and using an uninterruptable power supply (UPS) for protection, the power cable can be securely and safely connected to the UPS.
... on the following systems: • Microsoft Windows 8 • Microsoft Windows 7 • Microsoft Windows Vista • Apple Mac OS X 10.5 Leopard or later • Linux, UNIX, Solaris • Apple iOS • Google Android Getting Started 8 ReadyNAS OS 6 Desktop Storage Systems Additional Documentation For detailed information about configuring, managing, and using an uninterruptable power supply (UPS) for protection, the power cable can be securely and safely connected to the UPS.

Hardware Manual
Page 16
...: To start the factory default process immediately, press the Backup button during a disaster recovery. • Memory test. Reinstalls the firmware from the internal flash to restart or troubleshoot your storage system, such as read only. For more , depending on the size of the power failure, the system remains off a disk during the 10-minute time-out period. • OS reinstall. NETGEAR ReadyNAS 102 16 Use the OS reinstall boot mode when...
...: To start the factory default process immediately, press the Backup button during a disaster recovery. • Memory test. Reinstalls the firmware from the internal flash to restart or troubleshoot your storage system, such as read only. For more , depending on the size of the power failure, the system remains off a disk during the 10-minute time-out period. • OS reinstall. NETGEAR ReadyNAS 102 16 Use the OS reinstall boot mode when...

Hardware Manual
Page 21
... port, and the network configuration requirements needed to support 2 Gbps, see the ReadyNAS OS 6.2 Software Manual, which is available at http://support.netgear.com/product/ReadyNAS-OS6. 5. Kensington lock NETGEAR ReadyNAS 104 21 ReadyNAS OS 6 Desktop Storage Systems Rear Panel The following figure shows the rear panel of the ReadyNAS 104. 23 4 5 1 6 7 Figure 6. GbE ports with a 2 Gbps potential speed. Power cable socket 6. Exhaust fan 7. They can be used as two separate Ethernet connections...
... port, and the network configuration requirements needed to support 2 Gbps, see the ReadyNAS OS 6.2 Software Manual, which is available at http://support.netgear.com/product/ReadyNAS-OS6. 5. Kensington lock NETGEAR ReadyNAS 104 21 ReadyNAS OS 6 Desktop Storage Systems Rear Panel The following figure shows the rear panel of the ReadyNAS 104. 23 4 5 1 6 7 Figure 6. GbE ports with a 2 Gbps potential speed. Power cable socket 6. Exhaust fan 7. They can be used as two separate Ethernet connections...
Hardware Manual
Page 24
... reset the system to restart or troubleshoot your ReadyNAS storage system. Boot Menu Use the boot menu to factory default settings, do not power off your storage system, such as Internet protocol settings and the administrator password, to defaults. After the disk test, a 10-minute time-out period begins. Tip: To start the factory default process immediately, press the Backup button during the 10-minute time-out period. • OS reinstall. ReadyNAS OS 6 Desktop Storage Systems Forced Shutdown...
... reset the system to restart or troubleshoot your ReadyNAS storage system. Boot Menu Use the boot menu to factory default settings, do not power off your storage system, such as Internet protocol settings and the administrator password, to defaults. After the disk test, a 10-minute time-out period begins. Tip: To start the factory default process immediately, press the Backup button during the 10-minute time-out period. • OS reinstall. ReadyNAS OS 6 Desktop Storage Systems Forced Shutdown...

Hardware Manual
Page 25
... selected boot mode. Continue to scroll through boot mode options. The system boots in the system logs. Boots into a low-level diagnostic mode. Performs a memory test. Any problems are attempting to do so. • Volume read -only. Power off a disk during a disaster recovery. • Memory test. ReadyNAS OS 6 Desktop Storage Systems • Tech support. Mounts a volume as read only. Press the Backup button to press the Reset button until the status display screen shows a boot...
... selected boot mode. Continue to scroll through boot mode options. The system boots in the system logs. Boots into a low-level diagnostic mode. Performs a memory test. Any problems are attempting to do so. • Volume read -only. Power off a disk during a disaster recovery. • Memory test. ReadyNAS OS 6 Desktop Storage Systems • Tech support. Mounts a volume as read only. Press the Backup button to press the Reset button until the status display screen shows a boot...

Hardware Manual
Page 30
... separate Ethernet connections, or can be configured as a single, bonded port with LED status indicators Note: The two GbE ports are equivalent. Exhaust fan 2. Reset button 7. For information on how to configure a bonded port, and the network configuration requirements needed to support 2 Gbps, see the ReadyNAS OS 6.2 Software Manual, which is available at http://support.netgear.com/product/ReadyNAS-OS6. 6. USB 3.0 ports 4. ReadyNAS 202 rear panel 1. eSATA port 5. Power adapter socket NETGEAR ReadyNAS 202 30 Kensington lock 3. ReadyNAS OS 6 Desktop Storage...
... separate Ethernet connections, or can be configured as a single, bonded port with LED status indicators Note: The two GbE ports are equivalent. Exhaust fan 2. Reset button 7. For information on how to configure a bonded port, and the network configuration requirements needed to support 2 Gbps, see the ReadyNAS OS 6.2 Software Manual, which is available at http://support.netgear.com/product/ReadyNAS-OS6. 6. USB 3.0 ports 4. ReadyNAS 202 rear panel 1. eSATA port 5. Power adapter socket NETGEAR ReadyNAS 202 30 Kensington lock 3. ReadyNAS OS 6 Desktop Storage...
Hardware Manual
Page 33
...resets some configuration files. Boots into a low-level diagnostic mode. Initiates a normal boot process, just like booting using the Power button. • Factory default. After the disk test, a 10-minute time-out period begins. Tip: To start the factory default process immediately, press the Backup button during a disaster recovery. Mounts a volume as Internet protocol settings and the administrator password, to defaults. • Tech support. NETGEAR ReadyNAS 202 33 ReadyNAS OS 6 Desktop Storage Systems Power State If the power supply is interrupted due to a power failure...
...resets some configuration files. Boots into a low-level diagnostic mode. Initiates a normal boot process, just like booting using the Power button. • Factory default. After the disk test, a 10-minute time-out period begins. Tip: To start the factory default process immediately, press the Backup button during a disaster recovery. Mounts a volume as Internet protocol settings and the administrator password, to defaults. • Tech support. NETGEAR ReadyNAS 202 33 ReadyNAS OS 6 Desktop Storage Systems Power State If the power supply is interrupted due to a power failure...

Hardware Manual
Page 34
... storage system LEDs, as described in the system logs. The system powers on the size of your storage system. 2. The current status and the pass or fail result is available at http://support.netgear.com/product/ReadyNAS-OS6. To access the boot menu: 1. Power off your disks. Press the Power button. Continue to scroll through boot mode options. Press the Backup button to press the Reset button until the Power button LED, USB and backup status LED, disk 1 LED, and disk 2 LED light. 5. Any problems...
... storage system LEDs, as described in the system logs. The system powers on the size of your storage system. 2. The current status and the pass or fail result is available at http://support.netgear.com/product/ReadyNAS-OS6. To access the boot menu: 1. Power off your disks. Press the Power button. Continue to scroll through boot mode options. Press the Backup button to press the Reset button until the Power button LED, USB and backup status LED, disk 1 LED, and disk 2 LED light. 5. Any problems...
Hardware Manual
Page 43
... the disk test, a 10-minute time-out period begins. Tip: To start the factory default process immediately, press the Backup button during the 10-minute time-out period. • OS reinstall. NETGEAR ReadyNAS 204 43 The system powers down safely without causing any data loss. - OS reinstall boot mode also resets some configuration files. If you want to reset the system to its last state when the power supply is restored...
... the disk test, a 10-minute time-out period begins. Tip: To start the factory default process immediately, press the Backup button during the 10-minute time-out period. • OS reinstall. NETGEAR ReadyNAS 204 43 The system powers down safely without causing any data loss. - OS reinstall boot mode also resets some configuration files. If you want to reset the system to its last state when the power supply is restored...

Hardware Manual
Page 44
...-level diagnostic mode. Mounts a volume as read only. Any problems are attempting to rescue data off your disks. Using a straightened paper clip, press and hold the Reset button. 3. Press the Backup button to press the Reset button until the status display screen shows a boot menu message. 5. The status display screen shows the current boot mode option. 6. Use the tech support boot mode only when a NETGEAR technical support representative instructs you need, press and release the Reset button to do...
...-level diagnostic mode. Mounts a volume as read only. Any problems are attempting to rescue data off your disks. Using a straightened paper clip, press and hold the Reset button. 3. Press the Backup button to press the Reset button until the status display screen shows a boot menu message. 5. The status display screen shows the current boot mode option. 6. Use the tech support boot mode only when a NETGEAR technical support representative instructs you need, press and release the Reset button to do...

Hardware Manual
Page 51
... disk test. NETGEAR ReadyNAS 312 51 Your storage system has the following boot modes: • Normal. WARNING: The factory default reboot process resets the storage system to factory settings, erases all data, resets all defaults, and reformats the disk to interpret memory test results. • Test disk. The system powers down safely without causing any data loss. - Tip: To start the factory default process immediately, press the Backup button during a disaster recovery. • Memory test. Reinstalls the firmware...
... disk test. NETGEAR ReadyNAS 312 51 Your storage system has the following boot modes: • Normal. WARNING: The factory default reboot process resets the storage system to factory settings, erases all data, resets all defaults, and reformats the disk to interpret memory test results. • Test disk. The system powers down safely without causing any data loss. - Tip: To start the factory default process immediately, press the Backup button during a disaster recovery. • Memory test. Reinstalls the firmware...

Hardware Manual
Page 59
...: The factory default reboot process resets the storage system to factory settings, erases all data, resets all defaults, and reformats the disk to the disks. The system powers down . After the disk test, a 10-minute time-out period begins. Reinstalls the firmware from the internal flash to X-RAID. - Boots into a low-level diagnostic mode. Use the tech support boot mode only when a NETGEAR technical support representative instructs you are reported in the system logs. The pass or fail result is...
...: The factory default reboot process resets the storage system to factory settings, erases all data, resets all defaults, and reformats the disk to the disks. The system powers down . After the disk test, a 10-minute time-out period begins. Reinstalls the firmware from the internal flash to X-RAID. - Boots into a low-level diagnostic mode. Use the tech support boot mode only when a NETGEAR technical support representative instructs you are reported in the system logs. The pass or fail result is...

Hardware Manual
Page 67
... factory settings, erases all data, resets all defaults, and reformats the disk to the disks. After the 10-minute time-out period, the factory default process begins. Mounts a volume as Internet protocol settings and the administrator password, to defaults. • Tech support. Your storage system has the following boot modes: • Normal. The pass or fail result is available at http://support.netgear.com/product/ReadyNAS-OS6. ReadyNAS OS 6 Desktop Storage Systems Boot Menu Use the boot menu to restart or troubleshoot...
... factory settings, erases all data, resets all defaults, and reformats the disk to the disks. After the 10-minute time-out period, the factory default process begins. Mounts a volume as Internet protocol settings and the administrator password, to defaults. • Tech support. Your storage system has the following boot modes: • Normal. The pass or fail result is available at http://support.netgear.com/product/ReadyNAS-OS6. ReadyNAS OS 6 Desktop Storage Systems Boot Menu Use the boot menu to restart or troubleshoot...
Hardware Manual
Page 75
...://support.netgear.com/product/ReadyNAS-OS6. NETGEAR ReadyNAS 516 75 ReadyNAS OS 6 Desktop Storage Systems Boot Menu Use the boot menu to defaults. • Tech support. Tip: To start the factory default process immediately, press the OK button during a disaster recovery. • Memory test. OS reinstall boot mode also resets some configuration files. Mounts a volume as Internet protocol settings and the administrator password, to restart or troubleshoot your disks. Any problems are attempting to do not power off a disk during the 10-minute time...
...://support.netgear.com/product/ReadyNAS-OS6. NETGEAR ReadyNAS 516 75 ReadyNAS OS 6 Desktop Storage Systems Boot Menu Use the boot menu to defaults. • Tech support. Tip: To start the factory default process immediately, press the OK button during a disaster recovery. • Memory test. OS reinstall boot mode also resets some configuration files. Mounts a volume as Internet protocol settings and the administrator password, to restart or troubleshoot your disks. Any problems are attempting to do not power off a disk during the 10-minute time...

Hardware Manual
Page 83
... full disk test. Use the tech support boot mode only when instructed to do not power off a disk during the 10-minute time-out period. • OS reinstall. After the disk test, a 10-minute time-out period begins. If you want to reset the system to factory default settings, do so by a NETGEAR technical support representative. • Volume read -only. Mounts a volume as Internet protocol settings and the administrator password, to defaults. • Tech support...
... full disk test. Use the tech support boot mode only when instructed to do not power off a disk during the 10-minute time-out period. • OS reinstall. After the disk test, a 10-minute time-out period begins. If you want to reset the system to factory default settings, do so by a NETGEAR technical support representative. • Volume read -only. Mounts a volume as Internet protocol settings and the administrator password, to defaults. • Tech support...

Hardware Manual
Page 89
.... The disk was removed, failed, or is active. • Solid red. Powered on and the disk is operating normally. • Blinking blue. Powered off. The data volume or volumes are not mounted. The disk is resynchronizing. See the display screen for details. • Off. NETGEAR EDA 500 89 The Alert LED has these states: • On. Use the local admin page to each active drive bay indicates the status of your storage system...
.... The disk was removed, failed, or is active. • Solid red. Powered on and the disk is operating normally. • Blinking blue. Powered off. The data volume or volumes are not mounted. The disk is resynchronizing. See the display screen for details. • Off. NETGEAR EDA 500 89 The Alert LED has these states: • On. Use the local admin page to each active drive bay indicates the status of your storage system...
Hardware Manual
Page 103
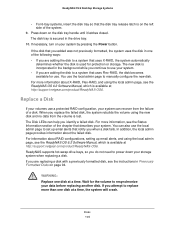
... the ReadyNAS OS 6.2 Software Manual, which is available at http://support.netgear.com/product/ReadyNAS-OS6. The Disk LEDs can help you replace the failed disk, the system rebuilds the volume using the local admin page, see the instructions in the drive bay. 10. You can recover from the volume is lost. If you are adding the disk to set up email alerts, and using the new disk and no data from the failure of the system. 9. If necessary, turn...
... the ReadyNAS OS 6.2 Software Manual, which is available at http://support.netgear.com/product/ReadyNAS-OS6. The Disk LEDs can help you replace the failed disk, the system rebuilds the volume using the local admin page, see the instructions in the drive bay. 10. You can recover from the volume is lost. If you are adding the disk to set up email alerts, and using the new disk and no data from the failure of the system. 9. If necessary, turn...


