
Hardware Manual
Page 2
... other countries. Technical Support Thank you for choosing NETGEAR. NETGEAR does not assume any means without the written permission of NETGEAR, Inc. All rights reserved. Statement of , the product(s) or circuit layout(s) described herein. 2 NETGEAR, the NETGEAR logo, and Connect with Innovation are trademarks and/or registered trademarks of NETGEAR, Inc. No part of this document without notice. © NETGEAR, Inc. and...
... other countries. Technical Support Thank you for choosing NETGEAR. NETGEAR does not assume any means without the written permission of NETGEAR, Inc. All rights reserved. Statement of , the product(s) or circuit layout(s) described herein. 2 NETGEAR, the NETGEAR logo, and Connect with Innovation are trademarks and/or registered trademarks of NETGEAR, Inc. No part of this document without notice. © NETGEAR, Inc. and...

Hardware Manual
Page 3
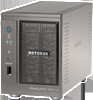
Table of Contents Chapter 1 Getting Started Additional Documentation 6 Setup Location 7 System Requirements 7 Diskless Units 8 Chapter 2 ReadyNAS Duo v2 Front and Side Panels 11 Drive Bays 12 Rear Panel 14 Status Information 15 System Shutdown 15 Boot Menu 16 Chapter 3 ReadyNAS NV+ v2 Front and Side Panels 19 Drive Bays 20 Rear Panel 22 Status Information 23 System Shutdown 23 Boot Menu 24 Chapter 4 Disks Previously Formatted Disks 27 Adding a Disk 28 Failed Disk Notification 29 Replacing a Disk 30 3
Table of Contents Chapter 1 Getting Started Additional Documentation 6 Setup Location 7 System Requirements 7 Diskless Units 8 Chapter 2 ReadyNAS Duo v2 Front and Side Panels 11 Drive Bays 12 Rear Panel 14 Status Information 15 System Shutdown 15 Boot Menu 16 Chapter 3 ReadyNAS NV+ v2 Front and Side Panels 19 Drive Bays 20 Rear Panel 22 Status Information 23 System Shutdown 23 Boot Menu 24 Chapter 4 Disks Previously Formatted Disks 27 Adding a Disk 28 Failed Disk Notification 29 Replacing a Disk 30 3

Hardware Manual
Page 6
ReadyNAS Duo v2 and NV+ v2 Additional Documentation For detailed information about configuring, managing, and using your ReadyNAS Duo v2 or NV+ v2 storage system, see the ReadyNAS RAIDiator 5.3 for reviews, tutorials, a comparison chart, software updates, documentation, an active user forum, and much more. NETGEAR maintains a community website that supports ReadyNAS products. Getting Started 6 Visit http://readynas.com for Home Software Manual, which is available at http://www.readynas.com/documentation.
ReadyNAS Duo v2 and NV+ v2 Additional Documentation For detailed information about configuring, managing, and using your ReadyNAS Duo v2 or NV+ v2 storage system, see the ReadyNAS RAIDiator 5.3 for reviews, tutorials, a comparison chart, software updates, documentation, an active user forum, and much more. NETGEAR maintains a community website that supports ReadyNAS products. Getting Started 6 Visit http://readynas.com for Home Software Manual, which is available at http://www.readynas.com/documentation.

Hardware Manual
Page 7
... power cable can be freestanding. System Requirements Your ReadyNAS Duo v2 or NV+ v2 requires the following: • Ethernet connection • Microsoft Windows 7, Vista, XP, 2000, Mac OS, UNIX, or Linux operating system • Microsoft Internet Explorer 7.0+, Apple Safari, 2.0+, Mozilla Firefox 2.0+, Opera 9.5+, or Google Chrome 10+ browser • Hard disk drive or drives from the NETGEAR Hardware Compatibility List; The small, compact size makes it can be securely and...
... power cable can be freestanding. System Requirements Your ReadyNAS Duo v2 or NV+ v2 requires the following: • Ethernet connection • Microsoft Windows 7, Vista, XP, 2000, Mac OS, UNIX, or Linux operating system • Microsoft Internet Explorer 7.0+, Apple Safari, 2.0+, Mozilla Firefox 2.0+, Opera 9.5+, or Google Chrome 10+ browser • Hard disk drive or drives from the NETGEAR Hardware Compatibility List; The small, compact size makes it can be securely and...

Hardware Manual
Page 9
... Previously Formatted Disks on . 4. Getting Started 9 Make sure that came with the screws that the hard disk connectors face the interior of the disk bay. Turn the unit on page 27. For more information, see the ReadyNAS RAIDiator 5.3 for Home Software Manual, which is slower until the volume synchronization finishes. c. you are using previously formatted disks, perform a factory reboot. Pull out the disk tray, place the new disk on the disk size...
... Previously Formatted Disks on . 4. Getting Started 9 Make sure that came with the screws that the hard disk connectors face the interior of the disk bay. Turn the unit on page 27. For more information, see the ReadyNAS RAIDiator 5.3 for Home Software Manual, which is slower until the volume synchronization finishes. c. you are using previously formatted disks, perform a factory reboot. Pull out the disk tray, place the new disk on the disk size...

Hardware Manual
Page 11
Backup button 6. ReadyNAS Duo v2 and NV+ v2 Front and Side Panels The following figure shows the front and side panels of ReadyNAS Duo v2. 1 2 3 8 45 6 7 Figure 1. Power button and LED 2. Drive bay door ReadyNAS Duo v2 11 Exhaust vent 4. Disk 1 and disk 2 LEDs 8. ReadyNAS Duo v2 front and side panels 1. USB and backup status LED 7. USB 2.0 port 5. Disk activity LED 3.
Backup button 6. ReadyNAS Duo v2 and NV+ v2 Front and Side Panels The following figure shows the front and side panels of ReadyNAS Duo v2. 1 2 3 8 45 6 7 Figure 1. Power button and LED 2. Drive bay door ReadyNAS Duo v2 11 Exhaust vent 4. Disk 1 and disk 2 LEDs 8. ReadyNAS Duo v2 front and side panels 1. USB and backup status LED 7. USB 2.0 port 5. Disk activity LED 3.

Hardware Manual
Page 15
... to shut down • On. The disk LEDs have these states: • Blinking. For information about the status of the unit. Booting or shutting down your Duo v2, see the ReadyNAS RAIDiator 5.3 for Home Software Manual, which is operating normally. • Blinking. The disk activity LED has these ways: • Using the Power button: • Preferred shutdown. Indicator Power button and LED Disk LEDs (1, 2) Disk activity LED Rear panel Ethernet port LEDs Description Press this port, one green and one amber.
... to shut down • On. The disk LEDs have these states: • Blinking. For information about the status of the unit. Booting or shutting down your Duo v2, see the ReadyNAS RAIDiator 5.3 for Home Software Manual, which is operating normally. • Blinking. The disk activity LED has these ways: • Using the Power button: • Preferred shutdown. Indicator Power button and LED Disk LEDs (1, 2) Disk activity LED Rear panel Ethernet port LEDs Description Press this port, one green and one amber.
Hardware Manual
Page 16
... firmware from the internal flash to X-RAID2. • OS reinstall. The factory default reboot process resets the unit to factory settings, erases all data, resets all defaults, and reformats the disk to the disks. Performs an offline full disk test. Boots into a low-level diagnostic mode. Your unit has the following boot modes: • Normal. ReadyNAS Duo v2 and NV+ v2 Boot Menu Use the boot menu to do so by a NETGEAR Technical Support representative, otherwise data...
... firmware from the internal flash to X-RAID2. • OS reinstall. The factory default reboot process resets the unit to factory settings, erases all data, resets all defaults, and reformats the disk to the disks. Performs an offline full disk test. Boots into a low-level diagnostic mode. Your unit has the following boot modes: • Normal. ReadyNAS Duo v2 and NV+ v2 Boot Menu Use the boot menu to do so by a NETGEAR Technical Support representative, otherwise data...

Hardware Manual
Page 17
... Reset button until the Power button LED, USB and backup status LED, disk 1 LED, and disk 2 LED illuminate. 5. The system boots in the following table: Boot Mode Description Status Indicator Power LED Normal Power LED illuminates. Factory default Disk 1 LED illuminates. OS reinstall Disk 2 LED illuminates. Tech support USB and backup status LED illuminates. Skip volume check Power LED and disk 1 LED illuminate. Memory test Power LED and disk 2 LED illuminate. Disk test Power LED and USB and backup status LED...
... Reset button until the Power button LED, USB and backup status LED, disk 1 LED, and disk 2 LED illuminate. 5. The system boots in the following table: Boot Mode Description Status Indicator Power LED Normal Power LED illuminates. Factory default Disk 1 LED illuminates. OS reinstall Disk 2 LED illuminates. Tech support USB and backup status LED illuminates. Skip volume check Power LED and disk 1 LED illuminate. Memory test Power LED and disk 2 LED illuminate. Disk test Power LED and USB and backup status LED...

Hardware Manual
Page 23
...; Blinking. No disks are built into this button to initiate a graceful shutdown. • Forced shutdown. The disk LEDs have these ways: • Using the Power button: • Preferred shutdown. ReadyNAS Duo v2 and NV+ v2 Status Information You can shut down your unit in the following table. Power is operating normally. • Blinking. Indicator Power button and LED Disk LEDs (1, 2, 3, 4) Disk activity LED Rear panel Ethernet port LEDs Description Press this port, one green and one amber. The disk was removed, failed...
...; Blinking. No disks are built into this button to initiate a graceful shutdown. • Forced shutdown. The disk LEDs have these ways: • Using the Power button: • Preferred shutdown. ReadyNAS Duo v2 and NV+ v2 Status Information You can shut down your unit in the following table. Power is operating normally. • Blinking. Indicator Power button and LED Disk LEDs (1, 2, 3, 4) Disk activity LED Rear panel Ethernet port LEDs Description Press this port, one green and one amber. The disk was removed, failed...

Hardware Manual
Page 24
ReadyNAS Duo v2 and NV+ v2 Boot Menu Use the boot menu to restart or troubleshoot your unit, such as Internet protocol settings and the administrator password, to defaults. • Tech support. Reinstalls the firmware from the internal flash to X-RAID2. • OS reinstall. Use the tech support boot mode only when instructed to boot. ReadyNAS NV+ v2 24 The factory default reboot process resets the unit to factory settings, erases all data, resets all defaults, and reformats the disk to the disks. Boots into...
ReadyNAS Duo v2 and NV+ v2 Boot Menu Use the boot menu to restart or troubleshoot your unit, such as Internet protocol settings and the administrator password, to defaults. • Tech support. Reinstalls the firmware from the internal flash to X-RAID2. • OS reinstall. Use the tech support boot mode only when instructed to boot. ReadyNAS NV+ v2 24 The factory default reboot process resets the unit to factory settings, erases all data, resets all defaults, and reformats the disk to the disks. Boots into...

Hardware Manual
Page 26
...see the ReadyNAS RAIDiator 5.3 for Home Software Manual, which is available at http://www.readynas.com/hard_disk_hcl. This chapter includes the following topics: • Previously Formatted Disks • Adding a Disk • Failed Disk Notification • Replacing a Disk 26 For information about configuring disks on your ReadyNAS storage system. If you use non-supported disks, NETGEAR Technical Support will not provide assistance. Disks 4 Use only supported disks in your ReadyNAS storage system, see theNETGEAR Hardware Compatibility List at http://www.readynas.com/documentation...
...see the ReadyNAS RAIDiator 5.3 for Home Software Manual, which is available at http://www.readynas.com/hard_disk_hcl. This chapter includes the following topics: • Previously Formatted Disks • Adding a Disk • Failed Disk Notification • Replacing a Disk 26 For information about configuring disks on your ReadyNAS storage system. If you use non-supported disks, NETGEAR Technical Support will not provide assistance. Disks 4 Use only supported disks in your ReadyNAS storage system, see theNETGEAR Hardware Compatibility List at http://www.readynas.com/documentation...

Hardware Manual
Page 27
Then, perform a factory default reboot as described in Diskless Units on page 8. For example, if you try to X-RAID2. Previously formatted disks must appear on page 16. Previously Formatted Disk Precautions Unit Status ReadyNAS unit has no disks (diskless) Precaution Turn the unit off and insert the disk as described in Boot Menu on the NETGEAR Hardware Compatibility List, which is operating with With the unit running...
Then, perform a factory default reboot as described in Diskless Units on page 8. For example, if you try to X-RAID2. Previously formatted disks must appear on page 16. Previously Formatted Disk Precautions Unit Status ReadyNAS unit has no disks (diskless) Precaution Turn the unit off and insert the disk as described in Boot Menu on the NETGEAR Hardware Compatibility List, which is operating with With the unit running...

Hardware Manual
Page 29
... first time. You can continue to use your unit. You are installed in your unit on the disk size. WARNING! NETGEAR recommends replacing a failed disk with the new disk in the drive bays to determine the disk vendor and model used in your ReadyNAS, although access is available at http://www.readynas.com/documentation. No matter how many hard drives are notified by email. Disks 29 The volume automatically synchronizes with the same disk model. Use the ReadyNAS...
... first time. You can continue to use your unit. You are installed in your unit on the disk size. WARNING! NETGEAR recommends replacing a failed disk with the new disk in the drive bays to determine the disk vendor and model used in your ReadyNAS, although access is available at http://www.readynas.com/documentation. No matter how many hard drives are notified by email. Disks 29 The volume automatically synchronizes with the same disk model. Use the ReadyNAS...

Hardware Manual
Page 30
The disk tray handle pops out. Press the disk tray pull release latch. Disks 30 ReadyNAS Duo v2 and NV+ v2 Replacing a Disk In the case of a failed disk, the unit provides email alerts and status messages about the need to replace a disk. ReadyNAS supports hot-swap bays, so you are replacing a disk with a previously formatted disk, see the precautions in Previously Formatted Disks on page 27. To replace a disk: 1. If you do not need to power down your unit when replacing a disk.
The disk tray handle pops out. Press the disk tray pull release latch. Disks 30 ReadyNAS Duo v2 and NV+ v2 Replacing a Disk In the case of a failed disk, the unit provides email alerts and status messages about the need to replace a disk. ReadyNAS supports hot-swap bays, so you are replacing a disk with a previously formatted disk, see the precautions in Previously Formatted Disks on page 27. To replace a disk: 1. If you do not need to power down your unit when replacing a disk.

Hardware Manual
Page 33
... table lists factory default settings for Windows, Mac, and Linux and RAID formatting utility LAN Connections MAC address See sticker on unit MTU size 1500 Ethernet port Auto Sense 10/100/1000BASE-T, RJ-45 LAN IP address DHCP acquired Defaults and Technical Specifications 33 Feature Default Login User login URL when the ReadyNAS is https://192.168.168.168/admin not connected to a DHCP server Admin user name (case-sensitive) admin Admin login password (case-sensitive) password Management System configuration ReadyNAS Dashboard web-based configuration and status monitoring...
... table lists factory default settings for Windows, Mac, and Linux and RAID formatting utility LAN Connections MAC address See sticker on unit MTU size 1500 Ethernet port Auto Sense 10/100/1000BASE-T, RJ-45 LAN IP address DHCP acquired Defaults and Technical Specifications 33 Feature Default Login User login URL when the ReadyNAS is https://192.168.168.168/admin not connected to a DHCP server Admin user name (case-sensitive) admin Admin login password (case-sensitive) password Management System configuration ReadyNAS Dashboard web-based configuration and status monitoring...

Hardware Manual
Page 36
... to equipment within the same building. Defaults and Technical Specifications 36 Install the socket outlet near the equipment in this manual for details about your specific ReadyNAS unit. This is to decrease static electrical discharge as protection from the system when removing or installing main system components, such as electrical insulators. • Use only power supply cords that include a grounding plug and...
... to equipment within the same building. Defaults and Technical Specifications 36 Install the socket outlet near the equipment in this manual for details about your specific ReadyNAS unit. This is to decrease static electrical discharge as protection from the system when removing or installing main system components, such as electrical insulators. • Use only power supply cords that include a grounding plug and...

Hardware Manual
Page 37
...Defaults and Technical Specifications 37 Contact Technical Support for use . • For grounding purposes, make sure your clothing, which can replace the self-resetting PTC (positive temperature coefficient) fuses on -board battery only with the same battery or an equivalent type of used batteries according to the manufacturer's instructions... the main board and peripherals back into their antistatic bags until ready for details and support. ReadyNAS Duo v2 and NV+ v2 • Replace the on the main board, using only new fuses that are the same as or equivalent to the ones being...
...Defaults and Technical Specifications 37 Contact Technical Support for use . • For grounding purposes, make sure your clothing, which can replace the self-resetting PTC (positive temperature coefficient) fuses on -board battery only with the same battery or an equivalent type of used batteries according to the manufacturer's instructions... the main board and peripherals back into their antistatic bags until ready for details and support. ReadyNAS Duo v2 and NV+ v2 • Replace the on the main board, using only new fuses that are the same as or equivalent to the ones being...
Hardware Manual
Page 39
... device must accept any interference received, including interference that interference will not occur in a particular installation. This equipment uses and can be determined by turning the equipment off and on, the user is connected. • Consult the dealer or an experienced radio/TV technician for help. Canadian Department of Communications Radio Interference Regulations This digital apparatus, NETGEAR ReadyNAS Duo v2...
... device must accept any interference received, including interference that interference will not occur in a particular installation. This equipment uses and can be determined by turning the equipment off and on, the user is connected. • Consult the dealer or an experienced radio/TV technician for help. Canadian Department of Communications Radio Interference Regulations This digital apparatus, NETGEAR ReadyNAS Duo v2...

Hardware Manual
Page 41
... 36 boot menu Duo v2 16 NV+ v2 24 C compliance 38 D Declaration Of Conformity 39 disk adding 28 failure 29 previously formatted 27 replacing 30 supported 26 disk tray Duo v2 13 NV+ v2 21 diskless units 8, 27 drive bay Duo v2 12 NV+ v2 20 E electrical safety 36 electrostatic discharge 37 email alerts 29 ESD 37 F factory default settings Duo v2 33 NV+ v2 33 failed disk 29...
... 36 boot menu Duo v2 16 NV+ v2 24 C compliance 38 D Declaration Of Conformity 39 disk adding 28 failure 29 previously formatted 27 replacing 30 supported 26 disk tray Duo v2 13 NV+ v2 21 diskless units 8, 27 drive bay Duo v2 12 NV+ v2 20 E electrical safety 36 electrostatic discharge 37 email alerts 29 ESD 37 F factory default settings Duo v2 33 NV+ v2 33 failed disk 29...


