
L22 / L21 User's Manual
Page 9
... Help Displays...13 About the Shutter-release Button...13 Attaching the Camera Strap ...13 First Steps ...14 Inserting the Batteries ...14 Applicable Batteries ...14 Turning On and Off the Camera...14 Setting Display Language, Date and Time 16 Inserting Memory Cards ...18 Removing Memory Cards...19 G Basic Photography and Playback: Easy Auto Mode 20 Step 1 Turn the Camera On and Select G (Easy Auto) Mode 20 Indicators Displayed in G (Easy auto) Mode 21 Step 2 Frame a Picture ...22 Using the Zoom...23 Step 3 Focus and Shoot ...24 Step 4 Viewing and Deleting Pictures 26 Viewing Pictures...
... Help Displays...13 About the Shutter-release Button...13 Attaching the Camera Strap ...13 First Steps ...14 Inserting the Batteries ...14 Applicable Batteries ...14 Turning On and Off the Camera...14 Setting Display Language, Date and Time 16 Inserting Memory Cards ...18 Removing Memory Cards...19 G Basic Photography and Playback: Easy Auto Mode 20 Step 1 Turn the Camera On and Select G (Easy Auto) Mode 20 Indicators Displayed in G (Easy auto) Mode 21 Step 2 Frame a Picture ...22 Using the Zoom...23 Step 3 Focus and Shoot ...24 Step 4 Viewing and Deleting Pictures 26 Viewing Pictures...

L22 / L21 User's Manual
Page 20
... set" indicator 89, 116 11 Travel destination indicator 89 12 Date imprint 94 13 Movie options 56 14 Image mode*2 74 15 (still pictures 20 b Movie length 55 16 Internal memory indicator 21 17 Aperture 24 18 Focus area 22, 24 19 Focus area (Face Detection) .........22, 24 20 Shutter speed 24 21 ISO sensitivity 31 22 Exposure compensation value 34 23 Color options 79 24 White balance mode 76 25 Continuous shooting mode 78 26 Self-timer indicator...
... set" indicator 89, 116 11 Travel destination indicator 89 12 Date imprint 94 13 Movie options 56 14 Image mode*2 74 15 (still pictures 20 b Movie length 55 16 Internal memory indicator 21 17 Aperture 24 18 Focus area 22, 24 19 Focus area (Face Detection) .........22, 24 20 Shutter speed 24 21 ISO sensitivity 31 22 Exposure compensation value 34 23 Color options 79 24 White balance mode 76 25 Continuous shooting mode 78 26 Self-timer indicator...

L22 / L21 User's Manual
Page 27
... power the camera continuously for extended periods, use another make or model of battery is used : First Steps Batteries with peeling Batteries with purchase. Do not, under any other type of AC adapter. B Battery Type By setting Battery type (A 105) in the setup menu (A 85) to match the type of alkaline batteries may vary greatly depending on the manufacturer. After a further three minutes, the Auto off function will turn the camera...
... power the camera continuously for extended periods, use another make or model of battery is used : First Steps Batteries with peeling Batteries with purchase. Do not, under any other type of AC adapter. B Battery Type By setting Battery type (A 105) in the setup menu (A 85) to match the type of alkaline batteries may vary greatly depending on the manufacturer. After a further three minutes, the Auto off function will turn the camera...

L22 / L21 User's Manual
Page 30
... the internal memory. 1 Confirm the power-on lamp and the monitor are off the camera before opening the battery-chamber/memory card slot 1 2 cover, hold the camera upside down or backwards could damage the camera or the memory card. Close the battery-chamber/memory card slot cover. Make sure that the memory card is inserted in the internal memory, or play back, delete or transfer pictures from falling out. 2 Insert the memory card. Remove the memory card to the memory card...
... the internal memory. 1 Confirm the power-on lamp and the monitor are off the camera before opening the battery-chamber/memory card slot 1 2 cover, hold the camera upside down or backwards could damage the camera or the memory card. Close the battery-chamber/memory card slot cover. Make sure that the memory card is inserted in the internal memory, or play back, delete or transfer pictures from falling out. 2 Insert the memory card. Remove the memory card to the memory card...

L22 / L21 User's Manual
Page 31
... k. Pictures cannot be recorded or deleted and the memory card cannot be formatted before formatting Yes the memory card. Write protect switch B Memory Cards • Use only Secure Digital memory cards. • Do not perform the following during formatting, while data is not formatted. Turn off . must be formatted when this camera (A 100). deletes all pictures and other devices into the camera, be displayed. Insert or remove the card - No To format, use . To start formatting, choose Format and press k. • Do not turn the camera off...
... k. Pictures cannot be recorded or deleted and the memory card cannot be formatted before formatting Yes the memory card. Write protect switch B Memory Cards • Use only Secure Digital memory cards. • Do not perform the following during formatting, while data is not formatted. Turn off . must be formatted when this camera (A 100). deletes all pictures and other devices into the camera, be displayed. Insert or remove the card - No To format, use . To start formatting, choose Format and press k. • Do not turn the camera off...

L22 / L21 User's Manual
Page 33
...). Image mode Display image size and quality set to W (off in standby mode to save power, press the power switch, the shutter-release button, or A to reactivate it (A 24, 28). • The flash setting can be recorded to memory card. Step 1 Turn the Camera On and Select G (Easy Auto) Mode Indicators Displayed in G (Easy auto) Mode Shooting mode When using easy auto mode, U, e, f, g, h, i, or j is displayed to indicate the shooting mode selected by the camera for more information. Basic Photography and Playback: Easy Auto Mode 4 Internal memory indicator Pictures will be changed...
...). Image mode Display image size and quality set to W (off in standby mode to save power, press the power switch, the shutter-release button, or A to reactivate it (A 24, 28). • The flash setting can be recorded to memory card. Step 1 Turn the Camera On and Select G (Easy Auto) Mode Indicators Displayed in G (Easy auto) Mode Shooting mode When using easy auto mode, U, e, f, g, h, i, or j is displayed to indicate the shooting mode selected by the camera for more information. Basic Photography and Playback: Easy Auto Mode 4 Internal memory indicator Pictures will be changed...

L22 / L21 User's Manual
Page 39
... has turned off , hold down c to reactivate it (A 99). Yes No D Selecting Multiple Pictures for Deletion When Delete (A 84) is off in standby mode to save power, press the power switch, the shutter-release button, or c to turn on the camera in full-frame playback mode. While viewing 16 picture thumbnails, rotate the zoom control to f (h) to switch to display 4, 9 or 16 picture thumbnails. Erase 1 image? Rotate the zoom control to f to calendar display. The lens will be deleted. 27...
... has turned off , hold down c to reactivate it (A 99). Yes No D Selecting Multiple Pictures for Deletion When Delete (A 84) is off in standby mode to save power, press the power switch, the shutter-release button, or c to turn on the camera in full-frame playback mode. While viewing 16 picture thumbnails, rotate the zoom control to f (h) to switch to display 4, 9 or 16 picture thumbnails. Erase 1 image? Rotate the zoom control to f to calendar display. The lens will be deleted. 27...

L22 / L21 User's Manual
Page 43
...; "Camera Settings that Cannot Be Set at the Same Time" (A 80) When the shooting mode is A (auto) mode, the changed flash setting will fire when picture is saved. Pictures taken when E is low, the monitor will not fire when picture is turned off until the flash has finished charging. C Red-eye Reduction This camera uses advanced red-eye reduction ("In-Camera Red-Eye Fix"). To reduce these reflections, set the flash to W (Off). Auto Mode Using the Flash B Shooting When Lighting Is Poor and the Flash Is Disabled...
...; "Camera Settings that Cannot Be Set at the Same Time" (A 80) When the shooting mode is A (auto) mode, the changed flash setting will fire when picture is saved. Pictures taken when E is low, the monitor will not fire when picture is turned off until the flash has finished charging. C Red-eye Reduction This camera uses advanced red-eye reduction ("In-Camera Red-Eye Fix"). To reduce these reflections, set the flash to W (Off). Auto Mode Using the Flash B Shooting When Lighting Is Poor and the Flash Is Disabled...

L22 / L21 User's Manual
Page 45
... zoom indicator glows green. • The camera can be unable to select ON and press k. Macro Mode Macro mode is used to lock the focus. Macro mode 3 Rotate the zoom control to move to the wide zoom position. • Macro mode can focus on the multi selector. • The macro menu is displayed. 2 Press the multi selector H or I to light entire subject at the position where G is displayed. Note that the flash may be used for taking pictures...
... zoom indicator glows green. • The camera can be unable to select ON and press k. Macro Mode Macro mode is used to lock the focus. Macro mode 3 Rotate the zoom control to move to the wide zoom position. • Macro mode can focus on the multi selector. • The macro menu is displayed. 2 Press the multi selector H or I to light entire subject at the position where G is displayed. Note that the flash may be used for taking pictures...

L22 / L21 User's Manual
Page 60
... Rotate the zoom control to g (i) to change the number of thumbnail images. Press k. 26 Press A. 10 C Thumbnail Playback Mode Display While pictures selected for Print set (A 70) and Protect (A 106) are chosen, the icons shown at right are displayed, rotate the zoom control to g (i) again to return to fullframe display mode. While 4 frames are displayed with them. The following operations can select images to thumbnail display mode. Movies are displayed. 19 To Use Description A Choose pictures Press...
... Rotate the zoom control to g (i) to change the number of thumbnail images. Press k. 26 Press A. 10 C Thumbnail Playback Mode Display While pictures selected for Print set (A 70) and Protect (A 106) are chosen, the icons shown at right are displayed, rotate the zoom control to g (i) again to return to fullframe display mode. While 4 frames are displayed with them. The following operations can select images to thumbnail display mode. Movies are displayed. 19 To Use Description A Choose pictures Press...

L22 / L21 User's Manual
Page 83
Date and time printed using Date imprint (A 94) in the setup menu. This information can be printed, even if Print set screen. 71 Print set Done Date Info Exit Pictures selected for printing are indicated by using this option are not affected when the camera's date and time setting are changed from printers that do not support printing of recording on all pictures. C Deleting All Print Orders 15.05.2010 Choose Delete print set in step 3 of shooting date and photo information is used. • Photo information cannot be...
Date and time printed using Date imprint (A 94) in the setup menu. This information can be printed, even if Print set screen. 71 Print set Done Date Info Exit Pictures selected for printing are indicated by using this option are not affected when the camera's date and time setting are changed from printers that do not support printing of recording on all pictures. C Deleting All Print Orders 15.05.2010 Choose Delete print set in step 3 of shooting date and photo information is used. • Photo information cannot be...

L22 / L21 User's Manual
Page 88
... direct sunlight. g Flash Use with the color of the light source. The human brain is displayed on the monitor (A 8). b Preset manual Neutral-colored object used simultaneously with the result that Cannot Be Set at the Same Time" (A 80) 76 • At white-balance settings other than Auto or Flash, turn the flash off (W) (A 30). d Incandescent Use under overcast skies. Digital cameras can be used as "white balance". Although the default setting, Auto can mimic this adjustment by processing images...
... direct sunlight. g Flash Use with the color of the light source. The human brain is displayed on the monitor (A 8). b Preset manual Neutral-colored object used simultaneously with the result that Cannot Be Set at the Same Time" (A 80) 76 • At white-balance settings other than Auto or Flash, turn the flash off (W) (A 30). d Incandescent Use under overcast skies. Digital cameras can be used as "white balance". Although the default setting, Auto can mimic this adjustment by processing images...

L22 / L21 User's Manual
Page 97
... AF-assist illumination. Format memory/Format card A 100 Format internal memory or memory card. Reset all A 103 Restore camera settings to reduce blurring when motion is turned on pictures. Electronic VR A 95 Specify the electronic vibration reduction setting for connection to display information in the monitor, whether or not pictures are shown on the display for camera monitor display. Sound settings A 98 Adjust sound settings. Video mode A 101 Adjust settings for taking them, and set the monitor brightness. Basic Camera Setup: The Setup Menu Shooting...
... AF-assist illumination. Format memory/Format card A 100 Format internal memory or memory card. Reset all A 103 Restore camera settings to reduce blurring when motion is turned on pictures. Electronic VR A 95 Specify the electronic vibration reduction setting for connection to display information in the monitor, whether or not pictures are shown on the display for camera monitor display. Sound settings A 98 Adjust sound settings. Video mode A 101 Adjust settings for taking them, and set the monitor brightness. Basic Camera Setup: The Setup Menu Shooting...

L22 / L21 User's Manual
Page 106
... recorded using the Panorama assist scene mode - At settings other than Off, the icon for the current setting is imprinted in the following situations. - Date can be printed from DPOF-compatible printers that do not support the date imprinting (A 71). 15.05.2010 Off (default setting) Date and time are not imprinted on the pictures. B Date imprint • Imprinted dates form a permanent part of pictures. C Date Imprint and Print Set When pictures are printed from printers that can print date and photo...
... recorded using the Panorama assist scene mode - At settings other than Off, the icon for the current setting is imprinted in the following situations. - Date can be printed from DPOF-compatible printers that do not support the date imprinting (A 71). 15.05.2010 Off (default setting) Date and time are not imprinted on the pictures. B Date imprint • Imprinted dates form a permanent part of pictures. C Date Imprint and Print Set When pictures are printed from printers that can print date and photo...

L22 / L21 User's Manual
Page 129
... viewed on - Remove memory card to create or edit this camera. Disable protection. 106 89 - N Memory contains no image COOLPIX L22/L21. Confirm the conditions that cannot be used to 108 play back pictures from 84 destination. Camera has run out of P 3968×2232 for L22 and P 3200×1800 for welcome screen. recording movie. data. Problem Error occurred while recording picture. File cannot be deleted. There is protected. Replace the memory card, 18 or format the internal 100 memory/memory card...
... viewed on - Remove memory card to create or edit this camera. Disable protection. 106 89 - N Memory contains no image COOLPIX L22/L21. Confirm the conditions that cannot be used to 108 play back pictures from 84 destination. Camera has run out of P 3968×2232 for L22 and P 3200×1800 for welcome screen. recording movie. data. Problem Error occurred while recording picture. File cannot be deleted. There is protected. Replace the memory card, 18 or format the internal 100 memory/memory card...

L22 / L21 User's Manual
Page 131
... shutter-release button halfway. • When flash lamp blinks red, wait until flash has 31 charged. • Camera and computer are connected via AV cable. 58 Monitor is hard to Panorama 42 assist • Movies 55 Camera settings reset The clock battery is situations. Display, Settings and Power Supply Problem Cause/Solution A Monitor is blank • Camera is off automatically to save 99 power. • Battery is cold. 113 Date and time of recording are connected via USB 60 cable. • Camera and...
... shutter-release button halfway. • When flash lamp blinks red, wait until flash has 31 charged. • Camera and computer are connected via AV cable. 58 Monitor is hard to Panorama 42 assist • Movies 55 Camera settings reset The clock battery is situations. Display, Settings and Power Supply Problem Cause/Solution A Monitor is blank • Camera is off automatically to save 99 power. • Battery is cold. 113 Date and time of recording are connected via USB 60 cable. • Camera and...

L22 / L21 User's Manual
Page 133
... while recording movies). • When Multi-shot 16 is dirty. or ISO sensitivity is too slow ("noise") appear in some scene modes. 97 36-42 Pictures appear smeared. Select the Backlight scene mode, or set to X (fill flash). 30 22 30 34 30, 41 Pictures are unnatural. Digital zoom cannot be used . Lens is selected for Sound settings > Shutter 98 sound in setup menu. Clean lens. 114 Hues are too bright Adjust exposure...
... while recording movies). • When Multi-shot 16 is dirty. or ISO sensitivity is too slow ("noise") appear in some scene modes. 97 36-42 Pictures appear smeared. Select the Backlight scene mode, or set to X (fill flash). 30 22 30 34 30, 41 Pictures are unnatural. Digital zoom cannot be used . Lens is selected for Sound settings > Shutter 98 sound in setup menu. Clean lens. 114 Hues are too bright Adjust exposure...

L22 / L21 User's Manual
Page 134
... flash set to launch Nikon Transfer - Cannot zoom in Nikon Transfer. Cause/Solution A File was overwritten or renamed by red-eye. Technical Notes 122 Remove memory card to play back pictures from internal memory. • Camera is off. 20 • Battery exhausted. 20 • USB cable is not correctly connected. 60 • Camera is not recognized by the computer. - • Computer is connected. For more information about Nikon Transfer, refer to any other settings other than V (auto with movies, - Cannot use D-Lighting...
... flash set to launch Nikon Transfer - Cannot zoom in Nikon Transfer. Cause/Solution A File was overwritten or renamed by red-eye. Technical Notes 122 Remove memory card to play back pictures from internal memory. • Camera is off. 20 • Battery exhausted. 20 • USB cable is not correctly connected. 60 • Camera is not recognized by the computer. - • Computer is connected. For more information about Nikon Transfer, refer to any other settings other than V (auto with movies, - Cannot use D-Lighting...

L22 / L21 User's Manual
Page 143
... Playback button 5, 7, 10 Playback menu 81 Playback zoom 50 Portrait b 36 Power 14, 16, 20 Power switch 4, 6, 14, 20 Power-on lamp 14, 20 Preset manual 77 Print 66, 67, 70 Print set 70 Print Set (Date) 71 Printer 64 Protect 106 R Recording movies 55 Red-eye reduction 30, 31 Reset all 103 Rotate image 107 RSCN 111 S Scene mode 35, 36 Self-timer 32 Self-timer lamp 4, 6, 32 Sepia 79 Setup menu 85 Shooting 20, 22, 24 Shooting Menu 72 Shooting mode button 5, 7, 10 Shooting-mode Selection menu 10 Shutter sound 98 Shutter speed...
... Playback button 5, 7, 10 Playback menu 81 Playback zoom 50 Portrait b 36 Power 14, 16, 20 Power switch 4, 6, 14, 20 Power-on lamp 14, 20 Preset manual 77 Print 66, 67, 70 Print set 70 Print Set (Date) 71 Printer 64 Protect 106 R Recording movies 55 Red-eye reduction 30, 31 Reset all 103 Rotate image 107 RSCN 111 S Scene mode 35, 36 Self-timer 32 Self-timer lamp 4, 6, 32 Sepia 79 Setup menu 85 Shooting 20, 22, 24 Shooting Menu 72 Shooting mode button 5, 7, 10 Shooting-mode Selection menu 10 Shutter sound 98 Shutter speed...
Brochure
Page 2
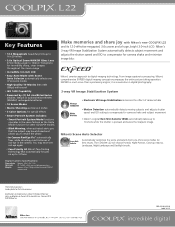
... the photo • In-Camera Red-Eye Fix™ automatically fixes, while shooting, most instances of red-eye in the camera. The COOLPIX L22 will choose Portrait, Night Portrait, Close-up to 10 shots while the shutter is pressed and saves the sharpest image. February 2010 ©2010 Nikon Inc. Nikon's 3-way VR Image Stabilization System automatically detects subject movement and adjusts the shutter speed and ISO to compensate for illustrative purposes. Specifications...
... the photo • In-Camera Red-Eye Fix™ automatically fixes, while shooting, most instances of red-eye in the camera. The COOLPIX L22 will choose Portrait, Night Portrait, Close-up to 10 shots while the shutter is pressed and saves the sharpest image. February 2010 ©2010 Nikon Inc. Nikon's 3-way VR Image Stabilization System automatically detects subject movement and adjusts the shutter speed and ISO to compensate for illustrative purposes. Specifications...

