

Product Manual
Page 25
Symbol for separate collection at an appropriate collection point. Do not dispose of as household waste • For more information, contact the retailer or the local authorities in European countries. • This product is designated for separate collection applicable in European countries This symbol indicates that this product is to users in charge of waste management. The following apply only to be collected separately.
Symbol for separate collection at an appropriate collection point. Do not dispose of as household waste • For more information, contact the retailer or the local authorities in European countries. • This product is designated for separate collection applicable in European countries This symbol indicates that this product is to users in charge of waste management. The following apply only to be collected separately.

Product Manual
Page 124
© 1995 Nikon Corporation Printed in Japan TT0C04 (53) 8MAA2053-04 c G01
© 1995 Nikon Corporation Printed in Japan TT0C04 (53) 8MAA2053-04 c G01

Reference Manual
Page 1
DIGITAL CAMERA Reference Manual • Read this manual thoroughly before using the camera. • To ensure proper use of the camera, be sure to read "For Your Safety" (page vi). • After reading this manual, keep it in a readily accessible place for future reference.
DIGITAL CAMERA Reference Manual • Read this manual thoroughly before using the camera. • To ensure proper use of the camera, be sure to read "For Your Safety" (page vi). • After reading this manual, keep it in a readily accessible place for future reference.
Reference Manual
Page 2
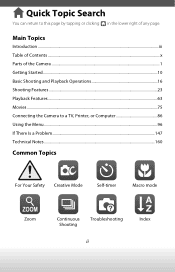
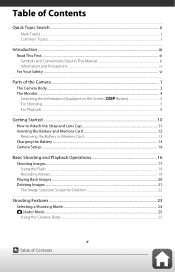
Quick Topic Search You can return to a TV, Printer, or Computer 86 Using the Menu...96 If There Is a Problem...147 Technical Notes...160 Common Topics For Your Safety Creative Mode Self-timer Macro mode Zoom Continuous Shooting Troubleshooting ii Index Main Topics Introduction ...iii Table of Contents ...x Parts of the Camera ...1 Getting Started...10 Basic Shooting and Playback Operations 16 Shooting Features...23 Playback Features...63 Movies ...75 Connecting the Camera to this page by tapping or clicking in the lower right of any page.
Quick Topic Search You can return to a TV, Printer, or Computer 86 Using the Menu...96 If There Is a Problem...147 Technical Notes...160 Common Topics For Your Safety Creative Mode Self-timer Macro mode Zoom Continuous Shooting Troubleshooting ii Index Main Topics Introduction ...iii Table of Contents ...x Parts of the Camera ...1 Getting Started...10 Basic Shooting and Playback Operations 16 Shooting Features...23 Playback Features...63 Movies ...75 Connecting the Camera to this page by tapping or clicking in the lower right of any page.
Reference Manual
Page 3
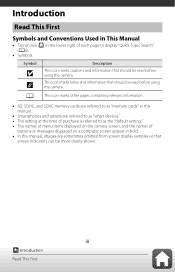
... in this manual. • Smartphones and tablets are sometimes omitted from screen display samples so that screen indicators can be read before using the camera. Introduction Read This First Symbols and Conventions Used in This Manual • Tap or click (Aii). • Symbols in the lower right... of each page to as the "default setting." • The names of menu items displayed on the camera screen, and the names of purchase is referred to display "Quick Topic Search" Symbol Description This icon marks cautions and information that should be ...
... in this manual. • Smartphones and tablets are sometimes omitted from screen display samples so that screen indicators can be read before using the camera. Introduction Read This First Symbols and Conventions Used in This Manual • Tap or click (Aii). • Symbols in the lower right... of each page to as the "default setting." • The names of menu items displayed on the camera screen, and the names of purchase is referred to display "Quick Topic Search" Symbol Description This icon marks cautions and information that should be ...
Reference Manual
Page 4
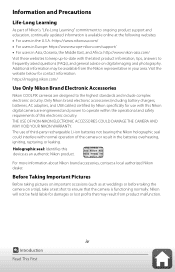
...Before Taking Important Pictures Before taking the camera on a trip), take a test shot to the highest standards and include complex electronic circuitry. https://imaging.nikon.com/ Use Only Nikon Brand Electronic Accessories Nikon COOLPIX cameras are engineered and proven to operate within... the operational and safety requirements of this Nikon digital camera are designed to ensure that may be held ...
...Before Taking Important Pictures Before taking the camera on a trip), take a test shot to the highest standards and include complex electronic circuitry. https://imaging.nikon.com/ Use Only Nikon Brand Electronic Accessories Nikon COOLPIX cameras are engineered and proven to operate within... the operational and safety requirements of this Nikon digital camera are designed to ensure that may be held ...
Reference Manual
Page 5
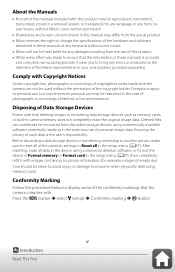
... display some of the conformity markings that the information in these manuals is accurate and complete, we would appreciate it with the camera can sometimes be restricted in the setup menu (A97). Comply with Copyright Notices Under copyright law, photographs or recordings of copyrighted ... not be held liable for example, images of the Nikon representative in the malicious use may be recovered from discarded storage devices using commercial deletion software, or format the device in Format memory or Format card in camera memory does not completely erase the original image data....
... display some of the conformity markings that the information in these manuals is accurate and complete, we would appreciate it with the camera can sometimes be restricted in the setup menu (A97). Comply with Copyright Notices Under copyright law, photographs or recordings of copyrighted ... not be held liable for example, images of the Nikon representative in the malicious use may be recovered from discarded storage devices using commercial deletion software, or format the device in Format memory or Format card in camera memory does not completely erase the original image data....
Reference Manual
Page 6
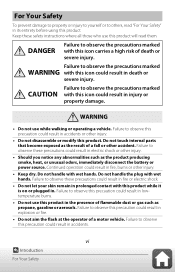
Failure to observe the precautions marked WARNING with this product will read "For Your Safety" in its entirety before using this product while it is on or plugged in. Do not touch internal parts that become exposed as the product producing smoke, heat, or unusual odors, immediately disconnect the battery or power source. Do not handle with wet hands. Do not handle the plug with wet hands. Continued operation could result in death or severe injury. Failure to observe this icon could result in fire, burns or other injury. • Keep dry. Failure to observe this precaution ...
Failure to observe the precautions marked WARNING with this product will read "For Your Safety" in its entirety before using this product while it is on or plugged in. Do not touch internal parts that become exposed as the product producing smoke, heat, or unusual odors, immediately disconnect the battery or power source. Do not handle with wet hands. Do not handle the plug with wet hands. Continued operation could result in death or severe injury. Failure to observe this icon could result in fire, burns or other injury. • Keep dry. Failure to observe this precaution ...

Reference Manual
Page 7
Should a child swallow any part of this product out of reach of children. Failure to extremely high or low temperatures. When using the AC adapter during thunderstorms. Failure to observe this precaution could result in electric shock. • Do not handle with bare hands in locations exposed to observe this precaution could result in accidents. • Do not use batteries, chargers, AC adapters, or USB cables not specifically designated for use with DC-to observe this precaution could result in injury or product malfunction. Failure to observe these precautions could result in ...
Should a child swallow any part of this product out of reach of children. Failure to extremely high or low temperatures. When using the AC adapter during thunderstorms. Failure to observe this precaution could result in electric shock. • Do not handle with bare hands in locations exposed to observe this precaution could result in accidents. • Do not use batteries, chargers, AC adapters, or USB cables not specifically designated for use with DC-to observe this precaution could result in injury or product malfunction. Failure to observe these precautions could result in ...
Reference Manual
Page 8
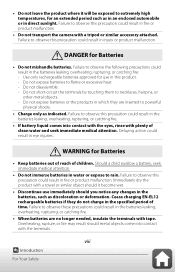
..., such as indicated. DANGER for an extended period such as in an enclosed automobile or in fire or product malfunction. • Do not transport the camera with the terminals. Cease charging EN-EL12 rechargeable batteries if they are no longer needed, insulate the terminals with plenty of time. Failure to observe...
..., such as indicated. DANGER for an extended period such as in an enclosed automobile or in fire or product malfunction. • Do not transport the camera with the terminals. Cease charging EN-EL12 rechargeable batteries if they are no longer needed, insulate the terminals with plenty of time. Failure to observe...

Reference Manual
Page 9
ix Introduction For Your Safety • If battery liquid comes into contact with a person's skin or clothing, immediately rinse the affected area with plenty of clean water. Failure to observe this precaution could result in skin irritation.
ix Introduction For Your Safety • If battery liquid comes into contact with a person's skin or clothing, immediately rinse the affected area with plenty of clean water. Failure to observe this precaution could result in skin irritation.
Reference Manual
Page 10
... iii Information and Precautions ...iv For Your Safety ...vi Parts of the Camera ...1 The Camera Body...2 The Monitor ...4 Switching the Information Displayed on the Screen (s Button 4 For Shooting...5 For Playback...8 Getting Started...10 How to Attach the Strap and Lens Cap 11 Inserting the Battery and... Memory Card 12 Removing the Battery or Memory Card ...12 Charging the Battery ...13 Camera Setup...14 Basic Shooting and Playback Operations 16 Shooting ...
... iii Information and Precautions ...iv For Your Safety ...vi Parts of the Camera ...1 The Camera Body...2 The Monitor ...4 Switching the Information Displayed on the Screen (s Button 4 For Shooting...5 For Playback...8 Getting Started...10 How to Attach the Strap and Lens Cap 11 Inserting the Battery and... Memory Card 12 Removing the Battery or Memory Card ...12 Charging the Battery ...13 Camera Setup...14 Basic Shooting and Playback Operations 16 Shooting ...

Reference Manual
Page 11
Scene Mode (Shooting Suited to the Shooting Conditions 27 Tips and Notes About Scene Mode...28 Shooting with Easy Panorama...36 Playback with Easy Panorama ...38 Creative Mode (Applying Effects When Shooting 39 Smart Portrait Mode (Enhancing Human Faces When Shooting 41 Using Smile Timer...43 Using Self-Collage...44 Setting the Flash Mode, Self-timer, Macro Mode, and Exposure Compensation.......... 46 Flash Mode...47 Self-timer ...49 Macro Mode (Taking Close-up Pictures 50 Exposure Compensation (Adjusting Brightness 51 Using the Zoom...52 Focusing...54 The Shutter-release Button...54 ...
Scene Mode (Shooting Suited to the Shooting Conditions 27 Tips and Notes About Scene Mode...28 Shooting with Easy Panorama...36 Playback with Easy Panorama ...38 Creative Mode (Applying Effects When Shooting 39 Smart Portrait Mode (Enhancing Human Faces When Shooting 41 Using Smile Timer...43 Using Self-Collage...44 Setting the Flash Mode, Self-timer, Macro Mode, and Exposure Compensation.......... 46 Flash Mode...47 Self-timer ...49 Macro Mode (Taking Close-up Pictures 50 Exposure Compensation (Adjusting Brightness 51 Using the Zoom...52 Focusing...54 The Shutter-release Button...54 ...
Reference Manual
Page 12
...83 Editing Movies ...84 Extracting Only the Desired Portion of a Movie 84 Saving a Frame from a Movie as a Still Image 85 Connecting the Camera to a TV, Printer, or Computer 86 Utilizing Images...87 Viewing Images on a TV ...88 Printing Images Without a Computer 89 Connecting the... Camera to a Printer ...89 Printing Images One at a Time ...90 Printing Multiple Images ...91 Transferring Images to a Computer (ViewNX-i 93 Installing ViewNX-i...93 Transferring...
...83 Editing Movies ...84 Extracting Only the Desired Portion of a Movie 84 Saving a Frame from a Movie as a Still Image 85 Connecting the Camera to a TV, Printer, or Computer 86 Utilizing Images...87 Viewing Images on a TV ...88 Printing Images Without a Computer 89 Connecting the... Camera to a Printer ...89 Printing Images One at a Time ...90 Printing Multiple Images ...91 Transferring Images to a Computer (ViewNX-i 93 Installing ViewNX-i...93 Transferring...

Reference Manual
Page 13
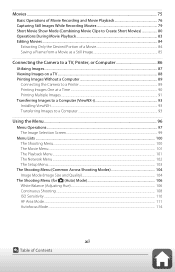
The Smart Portrait Menu...115 Self-Collage ...115 Blink Proof ...116 The Movie Menu ...117 Movie Options...117 Autofocus Mode ...121 Movie VR ...122 Wind Noise Reduction ...123 Frame Rate...123 The Playback Menu...124 Mark for Upload...124 Slide Show ...125 Protect...126 Rotate Image...126 Copy (Copy Between the Memory Card and Internal Memory 127 Sequence Display...128 The Network Menu ...129 Connecting to a Smart Device...129 Connecting to the Remote Control...129 Network Menu List ...130 Operating the Text Input Keyboard...132 The Setup Menu...133 Time Zone and Date ...133 Monitor Settings...
The Smart Portrait Menu...115 Self-Collage ...115 Blink Proof ...116 The Movie Menu ...117 Movie Options...117 Autofocus Mode ...121 Movie VR ...122 Wind Noise Reduction ...123 Frame Rate...123 The Playback Menu...124 Mark for Upload...124 Slide Show ...125 Protect...126 Rotate Image...126 Copy (Copy Between the Memory Card and Internal Memory 127 Sequence Display...128 The Network Menu ...129 Connecting to a Smart Device...129 Connecting to the Remote Control...129 Network Menu List ...130 Operating the Text Input Keyboard...132 The Setup Menu...133 Time Zone and Date ...133 Monitor Settings...
Reference Manual
Page 14
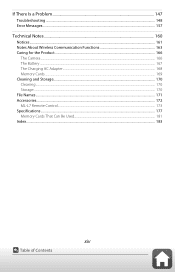
If There Is a Problem...147 Troubleshooting ...148 Error Messages...157 Technical Notes...160 Notices...161 Notes About Wireless Communication Functions 163 Caring for the Product ...166 The Camera...166 The Battery ...167 The Charging AC Adapter...168 Memory Cards...169 Cleaning and Storage...170 Cleaning...170 Storage...170 File Names...171 Accessories...172 ML-L7 Remote Control...173 Specifications ...177 Memory Cards That Can Be Used...181 Index...183 xiv Table of Contents
If There Is a Problem...147 Troubleshooting ...148 Error Messages...157 Technical Notes...160 Notices...161 Notes About Wireless Communication Functions 163 Caring for the Product ...166 The Camera...166 The Battery ...167 The Charging AC Adapter...168 Memory Cards...169 Cleaning and Storage...170 Cleaning...170 Storage...170 File Names...171 Accessories...172 ML-L7 Remote Control...173 Specifications ...177 Memory Cards That Can Be Used...181 Index...183 xiv Table of Contents

Reference Manual
Page 15
Parts of the Camera The Camera Body ...2 The Monitor...4 1 Parts of the Camera
Parts of the Camera The Camera Body ...2 The Monitor...4 1 Parts of the Camera
Reference Manual
Page 16
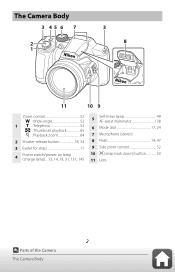
The Camera Body 3 45 6 7 2 1 3 8 11 10 9 Zoom control 52 f : Wide-angle 52 1 g : Telephoto 52 h : Thumbnail playback 65 i : Playback zoom 64 2 Shutter-release button 18, 54 3 Eyelet for strap 11 Power switch/power-on lamp 4 (charge lamp)... 13, 14, 19, 31, 131, 145 5 Self-timer lamp 49 AF-assist illuminator 138 6 Mode dial 17, 24 7 Microphone (stereo) 8 Flash 19, 47 9 Side zoom control 52 10 q (snap-back zoom) button 53 11 Lens 2 Parts of the Camera The Camera Body
The Camera Body 3 45 6 7 2 1 3 8 11 10 9 Zoom control 52 f : Wide-angle 52 1 g : Telephoto 52 h : Thumbnail playback 65 i : Playback zoom 64 2 Shutter-release button 18, 54 3 Eyelet for strap 11 Power switch/power-on lamp 4 (charge lamp)... 13, 14, 19, 31, 131, 145 5 Self-timer lamp 49 AF-assist illuminator 138 6 Mode dial 17, 24 7 Microphone (stereo) 8 Flash 19, 47 9 Side zoom control 52 10 q (snap-back zoom) button 53 11 Lens 2 Parts of the Camera The Camera Body
Reference Manual
Page 17
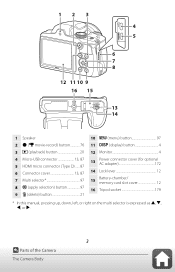
... 15 4 5 6 7 8 13 14 1 Speaker 2 b (e movie-record) button 76 3 c (playback) button 20 10 d (menu) button 97 11 s (display) button 4 12 Monitor 4 4 Micro-USB connector 13, 87 5 HDMI micro connector (Type D) ...... 87 6 Connector cover 13, 87 7 Multi selector 97 8 k (... 12 16 Tripod socket 179 * In this manual, pressing up, down, left, or right on the multi selector is expressed as H, I, J, or K. 3 Parts of the Camera The Camera Body
... 15 4 5 6 7 8 13 14 1 Speaker 2 b (e movie-record) button 76 3 c (playback) button 20 10 d (menu) button 97 11 s (display) button 4 12 Monitor 4 4 Micro-USB connector 13, 87 5 HDMI micro connector (Type D) ...... 87 6 Connector cover 13, 87 7 Multi selector 97 8 k (... 12 16 Tripod socket 179 * In this manual, pressing up, down, left, or right on the multi selector is expressed as H, I, J, or K. 3 Parts of the Camera The Camera Body
Reference Manual
Page 18
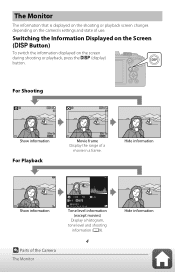
... during shooting or playback, press the s (display) button. Switching the Information Displayed on the Screen (s Button) To switch the information displayed on the camera's settings and state of the Camera The Monitor 1 / 2 5 0 F 3.3 125 0.0 0004.JPG 15/11/2019 15:30 Tone level information (except movies) Display a histogram, tone level and shooting information...
... during shooting or playback, press the s (display) button. Switching the Information Displayed on the Screen (s Button) To switch the information displayed on the camera's settings and state of the Camera The Monitor 1 / 2 5 0 F 3.3 125 0.0 0004.JPG 15/11/2019 15:30 Tone level information (except movies) Display a histogram, tone level and shooting information...
