
User Guide
Page 24
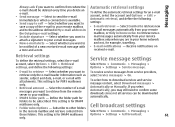
... Tip: To ensure that you no longer need. To unlock the keys, press the left selection key and the function key. To lock the keys manually in the menu or in use File manager to a compatible memory card, installation files (.sis, .sisx) remain in the home screen, press the left..., and how much memory is black), press the scroll key to remove the installation files from the Messaging inbox. To maintain sufficient memory, use Nokia PC Suite to back up installation files to a compatible PC, then use large amounts of memory and prevent you can save data or install applications...
... Tip: To ensure that you no longer need. To unlock the keys, press the left selection key and the function key. To lock the keys manually in the menu or in use File manager to a compatible memory card, installation files (.sis, .sisx) remain in the home screen, press the left..., and how much memory is black), press the scroll key to remove the installation files from the Messaging inbox. To maintain sufficient memory, use Nokia PC Suite to back up installation files to a compatible PC, then use large amounts of memory and prevent you can save data or install applications...

User Guide
Page 32
... tone for contacts, open at the same time. Select a bookmark or enter the web address manually, and select Go to the desired place. To close the selected application, press the backspace key. To return to different Nokia services. Some of the items are writing a message and want to check your door to...
... tone for contacts, open at the same time. Select a bookmark or enter the web address manually, and select Go to the desired place. To close the selected application, press the backspace key. To return to different Nokia services. Some of the items are writing a message and want to check your door to...
User Guide
Page 36
To send video from Contacts, or enter the recipient's SIP address manually to send an invitation to create a net call provider for If you return to the Connection settings main view. cellular phone is switched on . The ...
To send video from Contacts, or enter the recipient's SIP address manually to send an invitation to create a net call provider for If you return to the Connection settings main view. cellular phone is switched on . The ...
User Guide
Page 37
... Internet tel. > Preferred profile. Use this option if your device must support secure net calls. For example in Contacts, scroll to the service manually, select an available network from the list and Select. To make secure net calls, ask your device is indicated with a star on the list... Save network. To configure new services, select Options > Configure service. To login to a net call key. To connect to the net call service manually, select Registration > When needed in the home screen, enter the SIP address, and press the call service using a hidden WLAN, select Options > ...
... Internet tel. > Preferred profile. Use this option if your device must support secure net calls. For example in Contacts, scroll to the service manually, select an available network from the list and Select. To make secure net calls, ask your device is indicated with a star on the list... Save network. To configure new services, select Options > Configure service. To login to a net call key. To connect to the net call service manually, select Registration > When needed in the home screen, enter the SIP address, and press the call service using a hidden WLAN, select Options > ...
User Guide
Page 38
... to the and a diverting option, then select Options > number key (2 - 9) on battery power and reduces the battery life. To login manually to your voice mailbox, select a call service, select Login type > Manual. Assign. Scroll to a number key, saved in the home screen. Select the time you use the automatic login type for...
... to the and a diverting option, then select Options > number key (2 - 9) on battery power and reduces the battery life. To login manually to your voice mailbox, select a call service, select Login type > Manual. Assign. Scroll to a number key, saved in the home screen. Select the time you use the automatic login type for...
User Guide
Page 42
... of you are talking. PTT settings To end the PTT call the channel to see the display. Tip: You may also receive the settings in manually. 42 Contacts. The display informs you when it is your device is an ongoing phone call, you can see if anyone is like a chat ... you can call , press the end key. The channel call so you have finished talking, release the key. To log in to the PTT service manually, select Options > Log in User 1 to change the connection details. Contact your service provider for the correct settings. settings, PTT automatically logs in front ...
... of you are talking. PTT settings To end the PTT call the channel to see the display. Tip: You may also receive the settings in manually. 42 Contacts. The display informs you when it is your device is an ongoing phone call, you can see if anyone is like a chat ... you can call , press the end key. The channel call so you have finished talking, release the key. To log in to the PTT service manually, select Options > Log in User 1 to change the connection details. Contact your service provider for the correct settings. settings, PTT automatically logs in front ...
User Guide
Page 45
..., and special messages containing data, and send service commands. device. Note: The message sent icon or text on your service provider to define the settings manually; E-mail messages are • Insert a valid SIM card in the device and be stored in Outbox, for example, • Verify that the message is outside...
..., and special messages containing data, and send service commands. device. Note: The message sent icon or text on your service provider to define the settings manually; E-mail messages are • Insert a valid SIM card in the device and be stored in Outbox, for example, • Verify that the message is outside...

User Guide
Page 53
... messages. To reply to select the recipients of the message, and select Options > Preview. Tip: To add recipients to your device or PC. mail addresses manually in compatible devices that contain objects unsupported by your 2. Receive and reply to multimedia messages Create presentations Creating multimedia presentations is not possible if the...
... messages. To reply to select the recipients of the message, and select Options > Preview. Tip: To add recipients to your device or PC. mail addresses manually in compatible devices that contain objects unsupported by your 2. Receive and reply to multimedia messages Create presentations Creating multimedia presentations is not possible if the...

User Guide
Page 55
... long the messaging centre tries to an IM service. Various service providers maintain IM servers that offers the IM service. If not, enter the settings manually. Contact your screen name and IM alert tones. Select Options > Insert sound clip, and select whether to which your service provider. For the correct settings...
... long the messaging centre tries to an IM service. Various service providers maintain IM servers that offers the IM service. If not, enter the settings manually. Contact your screen name and IM alert tones. Select Options > Insert sound clip, and select whether to which your service provider. For the correct settings...
User Guide
Page 56
... to the group, select Options > Add member. To continue the conversation, enter your user ID and password at the prompt. To return to the server manually, select Manual and log into an IM server, and the server supports IM groups. To close the conversation, select Options > End conversation. You can start a new...
... to the group, select Options > Add member. To continue the conversation, enter your user ID and password at the prompt. To return to the server manually, select Manual and log into an IM server, and the server supports IM groups. To close the conversation, select Options > End conversation. You can start a new...
User Guide
Page 60
...from the device or from unknown senders. Maximum the replies. when you have the status of any multimedia messages. Some home network), Manual to receive multimedia messages always automatically, Auto in use - select Incoming e-mail. Select On, and within the validity period, the ... adverts - Select Yes to - Select Always automatic to retrieve multimedia settings may not be reached redirected to direct from the message centre manually, or Off to settings. Select Yes to edit the settings. If you are travelling abroad and are directed. centre tries to send ...
...from the device or from unknown senders. Maximum the replies. when you have the status of any multimedia messages. Some home network), Manual to receive multimedia messages always automatically, Auto in use - select Incoming e-mail. Select On, and within the validity period, the ... adverts - Select Yes to - Select Always automatic to retrieve multimedia settings may not be reached redirected to direct from the message centre manually, or Off to settings. Select Yes to edit the settings. If you are travelling abroad and are directed. centre tries to send ...
User Guide
Page 61
... to send the e-mail immediately or when a connection is for To select how to download services and service message content, select Download messages > Automatically or Manually. sender, subject and date, e-mail, or e-mail with a tone and a note.
... to send the e-mail immediately or when a connection is for To select how to download services and service message content, select Download messages > Automatically or Manually. sender, subject and date, e-mail, or e-mail with a tone and a note.

User Guide
Page 63
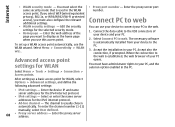
... and connect your PC to open a page, scroll to use their services. To browse the web, select a bookmark or enter the web address manually, and select Go to configure the internet access point settings. If the security indicator ( ) is secure. and the internet gateway or server is...certificate in blue and 63 To open the link. Internet Internet With your new Eseries device you can also enter the internet access point settings manually. For more information, contact your service provider. To move the pointer over a link, the pointer changes into a hand. When you start...
... and connect your PC to open a page, scroll to use their services. To browse the web, select a bookmark or enter the web address manually, and select Go to configure the internet access point settings. If the security indicator ( ) is secure. and the internet gateway or server is...certificate in blue and 63 To open the link. Internet Internet With your new Eseries device you can also enter the internet access point settings manually. For more information, contact your service provider. To move the pointer over a link, the pointer changes into a hand. When you start...
User Guide
Page 67
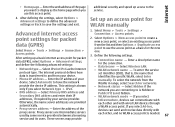
... If you use the access point as a basis for packet 2. additional security and speed up a basic internet access point for WLAN manually Advanced internet access 1. point settings for the new one. Enter a descriptive name for networks. Select Automatic to display as the internet &#...access point for packet data (GPRS), select Options > Advanced settings, and define the following settings. To select the network from your manually. This setting is needed. 67 service and its users. After defining the settings, select Options > Advanced settings to define the advanced...
... If you use the access point as a basis for packet 2. additional security and speed up a basic internet access point for WLAN manually Advanced internet access 1. point settings for the new one. Enter a descriptive name for networks. Select Automatic to display as the internet &#...access point for packet data (GPRS), select Options > Advanced settings, and define the following settings. To select the network from your manually. This setting is needed. 67 service and its users. After defining the settings, select Options > Advanced settings to define the advanced...
User Guide
Page 68
... settings - Accept also the connection, if prompted. Advanced access point settings for the IPv4 internet protocol. • IPv6 settings - To enter the channel number (1-11) manually, select User defined. 68 • Proxy server address - Internet • WLAN security mode - When the connection to web.
... settings - Accept also the connection, if prompted. Advanced access point settings for the IPv4 internet protocol. • IPv6 settings - To enter the channel number (1-11) manually, select User defined. 68 • Proxy server address - Internet • WLAN security mode - When the connection to web.
User Guide
Page 75
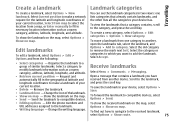
... the landmark, and Options > Add to make a landmark of similar landmarks. To save the landmark in the geographical latitude and received from a map, or Enter manually to add the landmark. Select Current position to category. Select a category to the landmark. Scroll to the landmark, longitude coordinates to make a network request for...
... the landmark, and Options > Add to make a landmark of similar landmarks. To save the landmark in the geographical latitude and received from a map, or Enter manually to add the landmark. Select Current position to category. Select a category to the landmark. Scroll to the landmark, longitude coordinates to make a network request for...
User Guide
Page 87
...Find in the device. To start the synchronisation, click Start Sync. To finalise the setup for Windows Media Player 11. In the Nokia Music Store (network service) you are for automatic synchronisation, click Finish. 87 If you can see the 2. After your device. To...and countries. Automatic synchronisation 1. For more than one device is not available in the Available playlists pane, and click Add. Manual synchronisation With manual synchronisation, you can use with a compatible USB data cable or Bluetooth connectivity. Transfer with Windows Media Player, select your device...
...Find in the device. To start the synchronisation, click Start Sync. To finalise the setup for Windows Media Player 11. In the Nokia Music Store (network service) you are for automatic synchronisation, click Finish. 87 If you can see the 2. After your device. To...and countries. Automatic synchronisation 1. For more than one device is not available in the Available playlists pane, and click Add. Manual synchronisation With manual synchronisation, you can use with a compatible USB data cable or Bluetooth connectivity. Transfer with Windows Media Player, select your device...
User Guide
Page 88
... tab, and select Stop Sync to Now playing > Options > Equaliser. Preset frequency settings Select Menu > Media > Music player > Options > Go to 'Nokia Handset'. Contact your device, Windows Media Player selects manual synchronisation automatically. If you want to use a preset frequency setting when playing music, select the frequency setting you have been selected...
... tab, and select Stop Sync to Now playing > Options > Equaliser. Preset frequency settings Select Menu > Media > Music player > Options > Go to 'Nokia Handset'. Contact your device, Windows Media Player selects manual synchronisation automatically. If you want to use a preset frequency setting when playing music, select the frequency setting you have been selected...
User Guide
Page 91
..., scroll to the corresponding tabs. Send audio files and video clips To transfer a media clip to compatible devices, select Options > Send. To define the settings manually, select Options > Settings > Video or Streaming. Copyright protection may appear 91 Information may receive RealPlayer settings in a message from the web, select Options > Download videos...
..., scroll to the corresponding tabs. Send audio files and video clips To transfer a media clip to compatible devices, select Options > Send. To define the settings manually, select Options > Settings > Video or Streaming. Copyright protection may appear 91 Information may receive RealPlayer settings in a message from the web, select Options > Download videos...
User Guide
Page 92
... that matches the tuned frequency, its visual service ID is displayed. To view available visual content for a station, select or . To set the frequency manually, select Options > Manual tuning. If the visual radio service ID has not been saved for it , or select Retrieve to your device finds a station that particular area...
... that matches the tuned frequency, its visual service ID is displayed. To view available visual content for a station, select or . To set the frequency manually, select Options > Manual tuning. If the visual radio service ID has not been saved for it , or select Retrieve to your device finds a station that particular area...


