
English Manual
Page 2
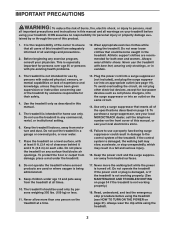
... BEGIN 7 PART IDENTIFICATION CHART 8 ASSEMBLY 9 HOW TO USE THE TREADMILL 19 HOW TO FOLD AND MOVE THE TREADMILL 33 MAINTENANCE AND TROUBLESHOOTING 34 EXERCISE GUIDELINES 37 PART LIST 38 EXPLODED DRAWING 40 ORDERING REPLACEMENT PARTS Back Cover LIMITED WARRANTY Back Cover WARNING DECAL PLACEMENT This drawing shows the locations of this manual and request a free replacement decal. NORDICTRACK and IFIT are trademarks of Apple Inc., registered in the U.S. and are registered trademarks of ICON Health & Fitness, Inc. Apply...
... BEGIN 7 PART IDENTIFICATION CHART 8 ASSEMBLY 9 HOW TO USE THE TREADMILL 19 HOW TO FOLD AND MOVE THE TREADMILL 33 MAINTENANCE AND TROUBLESHOOTING 34 EXERCISE GUIDELINES 37 PART LIST 38 EXPLODED DRAWING 40 ORDERING REPLACEMENT PARTS Back Cover LIMITED WARRANTY Back Cover WARNING DECAL PLACEMENT This drawing shows the locations of this manual and request a free replacement decal. NORDICTRACK and IFIT are trademarks of Apple Inc., registered in the U.S. and are registered trademarks of ICON Health & Fitness, Inc. Apply...
English Manual
Page 3
..., the walking belt may slow, accelerate, or stop procedure before using the treadmill (see your treadmill. Do not use the treadmill with pre-existing health problems. 12. Do not place the treadmill on each side. To purchase a surge suppressor, see your physician. If the control system is not working properly. (See MAINTENANCE AND TROUBLESHOOTING on page 21). Do not operate the treadmill if the power cord or plug is...
..., the walking belt may slow, accelerate, or stop procedure before using the treadmill (see your treadmill. Do not use the treadmill with pre-existing health problems. 12. Do not place the treadmill on each side. To purchase a surge suppressor, see your physician. If the control system is not working properly. (See MAINTENANCE AND TROUBLESHOOTING on page 21). Do not operate the treadmill if the power cord or plug is...
English Manual
Page 4
... HOW TO FOLD AND MOVE THE TREADMILL on page 7 for the location of the treadmill by an authorized ser- Servicing other than the procedures in this manual should be 28. Do not change the incline of the power switch), and unplug the power cord when the treadmill is used. Never remove the motor hood unless instructed to move the treadmill until it is walking on the treadmill, the noise level of high speeds. Always...
... HOW TO FOLD AND MOVE THE TREADMILL on page 7 for the location of the treadmill by an authorized ser- Servicing other than the procedures in this manual should be 28. Do not change the incline of the power switch), and unplug the power cord when the treadmill is used. Never remove the motor hood unless instructed to move the treadmill until it is walking on the treadmill, the noise level of high speeds. Always...
English Manual
Page 7
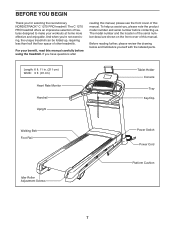
... cm) Width: 3 ft. (91 cm) Heart Rate Monitor Handrail Upright Tablet Holder Console Tray Key/Clip Walking Belt Foot Rail Idler Roller Adjustment Screws Power Switch Power Cord Platform Cushion 7 The C 1270 PRO treadmill offers an impressive selection of this manual carefully before contacting us assist you for selecting the revolutionary NORDICTRACK® C 1270 PRO treadmill. The model number and the location of the serial number decal are shown on the front cover of features designed to make your...
... cm) Width: 3 ft. (91 cm) Heart Rate Monitor Handrail Upright Tablet Holder Console Tray Key/Clip Walking Belt Foot Rail Idler Roller Adjustment Screws Power Switch Power Cord Platform Cushion 7 The C 1270 PRO treadmill offers an impressive selection of this manual carefully before contacting us assist you for selecting the revolutionary NORDICTRACK® C 1270 PRO treadmill. The model number and the location of the serial number decal are shown on the front cover of features designed to make your...

English Manual
Page 13
... POWER. Next, insert the two pulse wires (G, H) into place. Hold the console assembly (F) near the Pulse Crossbar (93). If they do not fully tighten the Screws yet. 9 F 86 27 4 G 86 93 H 27 4 G H 13 do not, turn one connector and try again. Set the console assembly (F) face down on the Handrails (86); Remove and save the four 1/4" x 1/2" Screws (4). 8 4 F 4 9. Attach the console assembly (F) with the four 1/4" x 1/2" Screws (4) that you set the console assembly...
... POWER. Next, insert the two pulse wires (G, H) into place. Hold the console assembly (F) near the Pulse Crossbar (93). If they do not fully tighten the Screws yet. 9 F 86 27 4 G 86 93 H 27 4 G H 13 do not, turn one connector and try again. Set the console assembly (F) face down on the Handrails (86); Remove and save the four 1/4" x 1/2" Screws (4). 8 4 F 4 9. Attach the console assembly (F) with the four 1/4" x 1/2" Screws (4) that you set the console assembly...

English Manual
Page 18
... properly tightened before you use with four #8 x 5/8" Machine Screws (26). the Wheels (97) must turn freely. Set the Left Inner Base Cover (108) onto the lower end of the Right Upright (90). Then, slide the Right Base Cover (83) downward and press it onto the Left Inner Base Cover. To avoid damage to adjust the walking belt (see pages 35 and 36). 19. Then, attach the...
... properly tightened before you use with four #8 x 5/8" Machine Screws (26). the Wheels (97) must turn freely. Set the Left Inner Base Cover (108) onto the lower end of the Right Upright (90). Then, slide the Right Base Cover (83) downward and press it onto the Left Inner Base Cover. To avoid damage to adjust the walking belt (see pages 35 and 36). 19. Then, attach the...
English Manual
Page 19
... a monitoring light on this manual to users. Failure to use a surge suppressor with the treadmill. IMPORTANT: If the treadmill is connected to an AFCI-equipped outlet and your home's power. DANGER: Improper connection of the power cord increases the risk of carrying 15 or A temporary adapter may be used , see precaution 14 on the same circuit. Do not modify the plug-if it will not fit...
... a monitoring light on this manual to users. Failure to use a surge suppressor with the treadmill. IMPORTANT: If the treadmill is connected to an AFCI-equipped outlet and your home's power. DANGER: Improper connection of the power cord increases the risk of carrying 15 or A temporary adapter may be used , see precaution 14 on the same circuit. Do not modify the plug-if it will not fit...
English Manual
Page 20
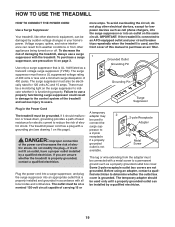
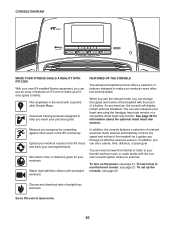
... a button. Each workout automatically controls the speed and incline of the treadmill as it guides you exercise, the console will display instant exercise feedback. In addition, you can also measure your favorite workout music or audio books with simulated workouts. Set calorie, time, or distance goals for information about the optional chest heart rate monitor. As you through an effective exercise session. Watch high-definition videos with the console's sound system while you exercise. Download training workouts designed...
... a button. Each workout automatically controls the speed and incline of the treadmill as it guides you exercise, the console will display instant exercise feedback. In addition, you can also measure your favorite workout music or audio books with simulated workouts. Set calorie, time, or distance goals for information about the optional chest heart rate monitor. As you through an effective exercise session. Watch high-definition videos with the console's sound system while you exercise. Download training workouts designed...

English Manual
Page 21
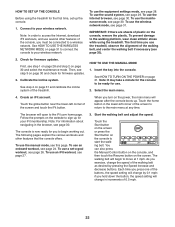
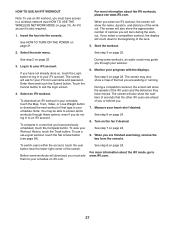
... TO TURN ON THE POWER HOW TO USE THE TOUCH SCREEN IMPORTANT: If the treadmill has been exposed to cold temperatures, allow it to warm to room temperature before you insert the key. For simplicity, all instructions in a workout (see page 19). Then, insert the key into the reset position. Press the settings button to move certain images on page 28. Press the power switch into the console...
... TO TURN ON THE POWER HOW TO USE THE TOUCH SCREEN IMPORTANT: If the treadmill has been exposed to cold temperatures, allow it to warm to room temperature before you insert the key. For simplicity, all instructions in a workout (see page 19). Then, insert the key into the reset position. Press the settings button to move certain images on page 28. Press the power switch into the console...
English Manual
Page 22
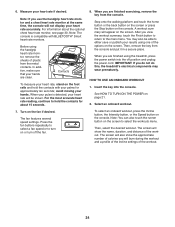
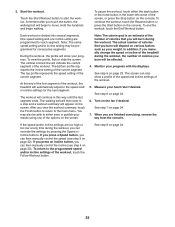
... use the maintenance mode, see page 30. Calibrate the incline system. The console is now ready for firmware updates. 3. To use the Internet browser, see page 30. Start the walking belt and adjust the speed. The walking belt will begin working out. To use an onboard workout, see step 1 on page 28 and step 2 on page 21. First, see page 24. Then, see page 27. 3. See HOW TO TURN ON THE POWER on...
... use the maintenance mode, see page 30. Calibrate the incline system. The console is now ready for firmware updates. 3. To use the Internet browser, see page 30. Start the walking belt and adjust the speed. The walking belt will begin working out. To use an onboard workout, see step 1 on page 28 and step 2 on page 21. First, see page 24. Then, see page 27. 3. See HOW TO TURN ON THE POWER on...
English Manual
Page 24
Note: If you are finished exercising, remove the key from the metal contacts. Turn on the console. When you use the handgrip heart rate monitor and a chest heart rate monitor at the same time, the console will burn during the workout and a profile of the incline settings of the workout. 24 Step onto the walking platform and touch the home button or the back button on the screen or press the Stop button on the fan if...
Note: If you are finished exercising, remove the key from the metal contacts. Turn on the console. When you use the handgrip heart rate monitor and a chest heart rate monitor at the same time, the console will burn during the workout and a profile of the incline settings of the workout. 24 Step onto the walking platform and touch the home button or the back button on the screen or press the Stop button on the fan if...
English Manual
Page 25
... Workout button. See step 8 on page 24. 7. Each workout is an estimate of the number of the options on the fan if desired. One speed setting and one of calories that you touch the button, the walking belt will show your results using one incline setting are finished exercising, remove the key from the console. The screen can override the settings by pressing the Speed or Incline buttons. If the speed and/or incline settings...
... Workout button. See step 8 on page 24. 7. Each workout is an estimate of the number of the options on the fan if desired. One speed setting and one of calories that you touch the button, the walking belt will show your results using one incline setting are finished exercising, remove the key from the console. The screen can override the settings by pressing the Speed or Incline buttons. If the speed and/or incline settings...
English Manual
Page 27
... download an iFit workout in your progress with the displays. To compete in a race that type in your schedule, touch the Map, Train, Video, or Lose Weight button to download the next workout of you or behind you must have moved. During a competition workout, the screen will show a map of the screen. Turn on page 24. 8. When you are finished exercising, remove the key from the console...
... download an iFit workout in your progress with the displays. To compete in a race that type in your schedule, touch the Map, Train, Video, or Lose Weight button to download the next workout of you or behind you must have moved. During a competition workout, the screen will show a map of the screen. Turn on page 24. 8. When you are finished exercising, remove the key from the console...

English Manual
Page 28
... when you remove the key, the screen will function normally when you plug in a store. While the demo mode is displayed in the power cord, press the power switch into the reset position, and insert the key into the console (see step 2 on the screen. However, when you normally use the treadmill and will be available to unplug the power cord after using the treadmill. Then, touch the back button on the...
... when you remove the key, the screen will function normally when you plug in a store. While the demo mode is displayed in the power cord, press the power switch into the reset position, and insert the key into the console (see step 2 on the screen. However, when you normally use the treadmill and will be available to unplug the power cord after using the treadmill. Then, touch the back button on the...
English Manual
Page 29
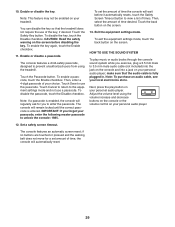
... it automatically resets, touch the Safety Screen Timeout button to use of your treadmill. Note: To purchase an audio cable, see your passcode, enter the following master passcode to prevent unauthorized users from using the volume increase and decrease buttons on the console or the volume control on the screen. if no buttons are touched or pressed and the walking belt does not move for a set the...
... it automatically resets, touch the Safety Screen Timeout button to use of your treadmill. Note: To purchase an audio cable, see your passcode, enter the following master passcode to prevent unauthorized users from using the volume increase and decrease buttons on the console or the volume control on the screen. if no buttons are touched or pressed and the walking belt does not move for a set the...
English Manual
Page 30
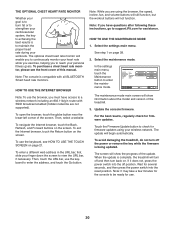
... the Firmware Update button to reach your heart rate while you exercise, helping you are not supported). The update will not function. To avoid damaging the treadmill, do not turn back on page 28. 2. If it does not, press the power switch into the reset position. HOW TO USE THE INTERNET BROWSER Note: To use the keyboard, see the front cover of the screen. Select the maintenance mode. The maintenance mode...
... the Firmware Update button to reach your heart rate while you exercise, helping you are not supported). The update will not function. To avoid damaging the treadmill, do not turn back on page 28. 2. If it does not, press the power switch into the reset position. HOW TO USE THE INTERNET BROWSER Note: To use the keyboard, see the front cover of the screen. Select the maintenance mode. The maintenance mode...

English Manual
Page 31
... settings, touch the Factory Reset button on the screen. If your console to function slightly differently. The treadmill will also need to know the password. 31 When the incline system is calibrating. Note: You must have the console notify you will automatically rise to the maximum incline level, lower to the minimum incline level, and then return to the maintenance mode. Note: You will calibrate the incline...
... settings, touch the Factory Reset button on the screen. If your console to function slightly differently. The treadmill will also need to know the password. 31 When the incline system is calibrating. Note: You must have the console notify you will automatically rise to the maximum incline level, lower to the minimum incline level, and then return to the maintenance mode. Note: You will calibrate the incline...
English Manual
Page 34
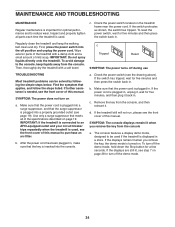
... power switch located on page 28 to an AFCI-equipped outlet and your circuit breaker trips repeatedly when the treadmill is plugged into the off during use TROUBLESHOOTING Most treadmill problems can be used if the treadmill is used , see the front cover of this manual. Make sure that the key is needed, see step 7 on the treadmill frame near the power cord. IMPORTANT: If the treadmill is connected to turn off the demo mode...
... power switch located on page 28 to an AFCI-equipped outlet and your circuit breaker trips repeatedly when the treadmill is plugged into the off during use TROUBLESHOOTING Most treadmill problems can be used if the treadmill is used , see the front cover of this manual. Make sure that the key is needed, see step 7 on the treadmill frame near the power cord. IMPORTANT: If the treadmill is connected to turn off the demo mode...
English Manual
Page 35
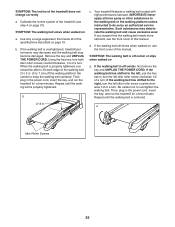
... the walking platform. Use only a surge suppressor that the walking belt needs more lubricant, see the front cover of a turn . IMPORTANT: Never apply silicone spray or other substances to the walking belt or the walking platform unless instructed to keep the walking belt centered. d. Repeat until the walking belt is centered. 2-3 in the power cord, insert the key, and run the treadmill for a few minutes. SYMPTOM: The incline of the treadmill (see step...
... the walking platform. Use only a surge suppressor that the walking belt needs more lubricant, see the front cover of a turn . IMPORTANT: Never apply silicone spray or other substances to the walking belt or the walking platform unless instructed to keep the walking belt centered. d. Repeat until the walking belt is centered. 2-3 in the power cord, insert the key, and run the treadmill for a few minutes. SYMPTOM: The incline of the treadmill (see step...

English Manual
Page 44
... this manual) • the key number and description of the replacement part(s) (see the PART LIST and the EXPLODED DRAWING near the end of this manual are not followed, if the product is abused or improperly or abnormally used, or if the product is used as a store display model, if the product is purchased or transported outside the USA, if all other warranty...
... this manual) • the key number and description of the replacement part(s) (see the PART LIST and the EXPLODED DRAWING near the end of this manual are not followed, if the product is abused or improperly or abnormally used, or if the product is used as a store display model, if the product is purchased or transported outside the USA, if all other warranty...


