

Owner Manual
Page 1
Please retain this manual will enable you for future reference. Others 23 En Please read this manual thoroughly before making connections and plugging in this manual for purchasing an Onkyo Compact Disc Player. Compact Disc Player DX-7555 Instruction Manual Contents Introduction 2 Connections 10 Operation 12 Thank you to obtain optimum performance and listening enjoyment from your new Compact Disc Player. Following the instructions in the unit.
Please retain this manual will enable you for future reference. Others 23 En Please read this manual thoroughly before making connections and plugging in this manual for purchasing an Onkyo Compact Disc Player. Compact Disc Player DX-7555 Instruction Manual Contents Introduction 2 Connections 10 Operation 12 Thank you to obtain optimum performance and listening enjoyment from your new Compact Disc Player. Following the instructions in the unit.
Owner Manual
Page 7
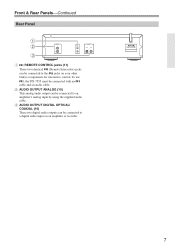
B AUDIO OUTPUT ANALOG (10) This analog audio output can be connected to an amplifier's analog input by using the supplied audio cable. C AUDIO OUTPUT DIGITAL OPTICAL/ COAXIAL (10) These two digital audio outputs can be connected to the jacks on an amplifier or recorder. 7 To use , the DX-7555 must be connected to a digital audio input on your other Onkyo components for interactive control. Front & Rear Panels-Continued Rear Panel 1 2 3 A REMOTE CONTROL jacks (11) These two identical (Remote Interactive) jacks can be connected with an cable and an audio cable.
B AUDIO OUTPUT ANALOG (10) This analog audio output can be connected to an amplifier's analog input by using the supplied audio cable. C AUDIO OUTPUT DIGITAL OPTICAL/ COAXIAL (10) These two digital audio outputs can be connected to the jacks on an amplifier or recorder. 7 To use , the DX-7555 must be connected to a digital audio input on your other Onkyo components for interactive control. Front & Rear Panels-Continued Rear Panel 1 2 3 A REMOTE CONTROL jacks (11) These two identical (Remote Interactive) jacks can be connected with an cable and an audio cable.

Owner Manual
Page 11
... is connected to an -compatible Onkyo hi-fi amp or AV receiver, when you turn on the DX-7555, the AV receiver will select the DX-7555 as the input source. Connecting the DX-7555-Continued Connections With (Remote Interactive) you can control the DX-7555 together with your other -compatible ... only cables for connections. • To use the functions, you must make an analog audio connection (RCA/phono) between your DX-7555 and Onkyo AV receiver even if they are dimmed as well. Connecting to other manufacturer's AV components may not support the special functions described here...
... is connected to an -compatible Onkyo hi-fi amp or AV receiver, when you turn on the DX-7555, the AV receiver will select the DX-7555 as the input source. Connecting the DX-7555-Continued Connections With (Remote Interactive) you can control the DX-7555 together with your other -compatible ... only cables for connections. • To use the functions, you must make an analog audio connection (RCA/phono) between your DX-7555 and Onkyo AV receiver even if they are dimmed as well. Connecting to other manufacturer's AV components may not support the special functions described here...
Owner Manual
Page 25
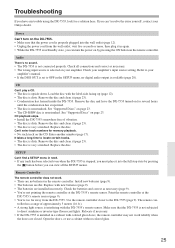
...er. Check your Onkyo dealer. Refer to OFF in the remote controller. Replace the disc. troller has a range of vibration. • The disc is dirty. Install new batteries (page 9). • The batteries are no batteries in the SETUP menu, no sound. • The DX-7555 is not connected ...is properly plugged into the full stop state by pressing the ON button on the DX-7555. • Make sure that the DX-7555 is not subjected to the DX-7555 (page 9). Relocate if necessary. • If the DX-7555 is installed in Standby state, you can 't resolve the issue yourself, contact your...
...er. Check your Onkyo dealer. Refer to OFF in the remote controller. Replace the disc. troller has a range of vibration. • The disc is dirty. Install new batteries (page 9). • The batteries are no batteries in the SETUP menu, no sound. • The DX-7555 is not connected ...is properly plugged into the full stop state by pressing the ON button on the DX-7555. • Make sure that the DX-7555 is not subjected to the DX-7555 (page 9). Relocate if necessary. • If the DX-7555 is installed in Standby state, you can 't resolve the issue yourself, contact your...
Owner Manual
Page 26
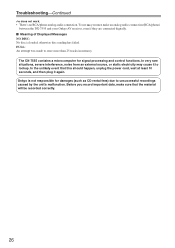
...interference, noise from an external source, or static electricity may cause it again. The DX-7555 contains a microcomputer for damages (such as CD rental fees) due to lockup. otherwise disc reading has failed. Onkyo is loaded; In the unlikely event that the material will be recorded correctly. 26 To... use you record important data, make an analog audio connection (RCA/phono) between the DX-7555 and your Onkyo AV receiver, even if they are connected digitally. FULL: An attempt was made to store more than 25 tracks in memory. I ...
...interference, noise from an external source, or static electricity may cause it again. The DX-7555 contains a microcomputer for damages (such as CD rental fees) due to lockup. otherwise disc reading has failed. Onkyo is loaded; In the unlikely event that the material will be recorded correctly. 26 To... use you record important data, make an analog audio connection (RCA/phono) between the DX-7555 and your Onkyo AV receiver, even if they are connected digitally. FULL: An attempt was made to store more than 25 tracks in memory. I ...


