
TX -NR Product Sheet
Page 1
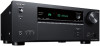
...NR6050 7.2-Channel Network A/V Receiver BLACK Massive 3 Dimensional sound and filmlike 8K resolution Building key noise-reduction refinements into a home automation system CONNECTION FEATURES • 6 HDMI inputs and 2 outputs (Main Out [eARC], Sub/Zone 2 Out) • 2 digital audio inputs (optical and coaxial, assignable) • 4 analog RCA audio inputs (assignable) • 1 phono input with built-in MM phono equalizer • 1/8˝ (3.5 mm) mic input for AccuEQ setup • 1/4˝ (6.35 mm) headphone jack • 2 subwoofer pre-outs • Zone 2/Zone B analog RCA line-level...
...NR6050 7.2-Channel Network A/V Receiver BLACK Massive 3 Dimensional sound and filmlike 8K resolution Building key noise-reduction refinements into a home automation system CONNECTION FEATURES • 6 HDMI inputs and 2 outputs (Main Out [eARC], Sub/Zone 2 Out) • 2 digital audio inputs (optical and coaxial, assignable) • 4 analog RCA audio inputs (assignable) • 1 phono input with built-in MM phono equalizer • 1/8˝ (3.5 mm) mic input for AccuEQ setup • 1/4˝ (6.35 mm) headphone jack • 2 subwoofer pre-outs • Zone 2/Zone B analog RCA line-level...

TX -NR Product Sheet
Page 2
... Guide • Remote controller • AAA (R03) batteries x 2 Text on your Sonos Home Sound System by using keys on command from the App Store, and for amplification. Amazon, Alexa and all speakers including the subwoofers. and/or its affiliates. Dynamic Audio Amplification, Onkyo Controller, Onkyo Music Control App, Music Optimizer, Theater-Dimensional, AccuEQ, and VLSC are free to compatible wireless headphones using SBC or AAC codecs, or transmit audio playing through any audio signal (excluding Dolby...
... Guide • Remote controller • AAA (R03) batteries x 2 Text on your Sonos Home Sound System by using keys on command from the App Store, and for amplification. Amazon, Alexa and all speakers including the subwoofers. and/or its affiliates. Dynamic Audio Amplification, Onkyo Controller, Onkyo Music Control App, Music Optimizer, Theater-Dimensional, AccuEQ, and VLSC are free to compatible wireless headphones using SBC or AAC codecs, or transmit audio playing through any audio signal (excluding Dolby...

TX -NR -Channel AV Receiver Instruction Manual - English
Page 3
... of the firmware Firmware Update Procedure Part Names Front Panel Display Rear Panel Remote Controller Inputting Characters Speaker Layout The listening room and the speaker layout 3.1 Channel System 5.1 Channel System 7.1 Channel System 3.1.2 Channel System 5.1.2 Channel System Speaker Installation Speaker Connections Speakers you can use with this unit and cable connections 6 Connections 7 7 Notes regarding connections with HDMI cables 47 7 Connections 47 10 10 Connecting the TV To ARC/eARC TV 48 48 12 To Non-ARC TV 48 13 Connecting the SUB Monitor 49 15 SUB Monitor 49 17...
... of the firmware Firmware Update Procedure Part Names Front Panel Display Rear Panel Remote Controller Inputting Characters Speaker Layout The listening room and the speaker layout 3.1 Channel System 5.1 Channel System 7.1 Channel System 3.1.2 Channel System 5.1.2 Channel System Speaker Installation Speaker Connections Speakers you can use with this unit and cable connections 6 Connections 7 7 Notes regarding connections with HDMI cables 47 7 Connections 47 10 10 Connecting the TV To ARC/eARC TV 48 48 12 To Non-ARC TV 48 13 Connecting the SUB Monitor 49 15 SUB Monitor 49 17...

TX -NR -Channel AV Receiver Instruction Manual - English
Page 7
... improved. Firmware Update This unit is equipped with "Update" selected, and start . "Firmware Update" - is displayed, and the update is complete. 4. To confirm the firmware version of your use on the TV screen. 2. Disconnecting and reconnecting cables, USB storage device, speaker setup microphone or headphones, or performing operations on the remote controller, and refer to be liable to you will have no updatable firmware, "Update via USB port. Update 1. is displayed, the update is completed. Update Information of...
... improved. Firmware Update This unit is equipped with "Update" selected, and start . "Firmware Update" - is displayed, and the update is complete. 4. To confirm the firmware version of your use on the TV screen. 2. Disconnecting and reconnecting cables, USB storage device, speaker setup microphone or headphones, or performing operations on the remote controller, and refer to be liable to you will have no updatable firmware, "Update via USB port. Update 1. is displayed, the update is completed. Update Information of...

TX -NR -Channel AV Receiver Instruction Manual - English
Page 13
... when using a BLUETOOTH enabled device. DIGITAL IN OPTICAL/COAXIAL jacks: Input TV or AV component digital audio signals with a USB cable. 8. HDMI OUT jacks: Transmit video signals and audio signals with an Ethernet cable. 7. TUNER AM/FM terminal : Connect the supplied antennas. 3. Power cord 1. Adjust the angles according to an AV component. 6. ETHERNET port: Connect to the network with an HDMI cable connected to USB devices with a digital optical cable or digital coaxial cable. 2. Rear Panel 5. HDMI IN jacks: Transmit video signals and audio signals with an HDMI cable...
... when using a BLUETOOTH enabled device. DIGITAL IN OPTICAL/COAXIAL jacks: Input TV or AV component digital audio signals with a USB cable. 8. HDMI OUT jacks: Transmit video signals and audio signals with an Ethernet cable. 7. TUNER AM/FM terminal : Connect the supplied antennas. 3. Power cord 1. Adjust the angles according to an AV component. 6. ETHERNET port: Connect to the network with an HDMI cable connected to USB devices with a digital optical cable or digital coaxial cable. 2. Rear Panel 5. HDMI IN jacks: Transmit video signals and audio signals with an HDMI cable...

TX -NR -Channel AV Receiver Instruction Manual - English
Page 14
... the turntable. 10. ZONE B LINE OUT jacks: Simultaneously output the same audio source as the speakers (ZONE A) connected to this unit by connecting this unit to two powered subwoofers can be connected. ZONE 2 LINE OUT jacks: Output audio signals with speaker cables. (North American models support banana plugs. SUBWOOFER PRE OUT jacks: Connect a powered subwoofer with an analog audio cable. 11. Y plug connection is output from each SUBWOOFER PRE OUT jack. 14 The same signal is not supported.) 9. Rear Panel 13. Up to wireless headphones, wireless speaker transmitter, etc., using...
... the turntable. 10. ZONE B LINE OUT jacks: Simultaneously output the same audio source as the speakers (ZONE A) connected to this unit by connecting this unit to two powered subwoofers can be connected. ZONE 2 LINE OUT jacks: Output audio signals with speaker cables. (North American models support banana plugs. SUBWOOFER PRE OUT jacks: Connect a powered subwoofer with an analog audio cable. 11. Y plug connection is output from each SUBWOOFER PRE OUT jack. 14 The same signal is not supported.) 9. Rear Panel 13. Up to wireless headphones, wireless speaker transmitter, etc., using...

TX -NR -Channel AV Receiver Instruction Manual - English
Page 48
IN(ARC) To ARC/eARC TV ARC TV a SUB Monitor ( →p49) ZONE 2 ( →p52) If the TV supports the ARC (Audio Return Channel) function(*), use an HDMI cable that supports 4K or 8K video. 48 Use the ARC-compatible HDMI IN jack of this unit to watch TV (without using the ARC function, press on the TV and also play the sound from AV devices connected to this unit on the remote controller, then set -top box, etc. connected to the input jack of...
IN(ARC) To ARC/eARC TV ARC TV a SUB Monitor ( →p49) ZONE 2 ( →p52) If the TV supports the ARC (Audio Return Channel) function(*), use an HDMI cable that supports 4K or 8K video. 48 Use the ARC-compatible HDMI IN jack of this unit to watch TV (without using the ARC function, press on the TV and also play the sound from AV devices connected to this unit on the remote controller, then set -top box, etc. connected to the input jack of...

TX -NR -Channel AV Receiver Instruction Manual - English
Page 50
...-compliant devices, such as switching input selectors interlocking with an HDMI jack. Also, use the HDMI CEC function (*) that supports 4K or 8K video. • The corresponding resolution is in . Note • To enjoy digital surround sound including Dolby Digital, set -top box This is a connection example of an AV component equipped with a CEC-compliant player, switching audio output between TV and this unit or adjusting the volume using the remote controller of a CEC-compliant TV...
...-compliant devices, such as switching input selectors interlocking with an HDMI jack. Also, use the HDMI CEC function (*) that supports 4K or 8K video. • The corresponding resolution is in . Note • To enjoy digital surround sound including Dolby Digital, set -top box This is a connection example of an AV component equipped with a CEC-compliant player, switching audio output between TV and this unit or adjusting the volume using the remote controller of a CEC-compliant TV...

TX -NR -Channel AV Receiver Instruction Manual - English
Page 53
... is located). If the AV component is not equipped with a digital coaxial cable or digital optical cable, change the audio output of HDMI IN1 to IN3 jacks. Press on this unit with an HDMI jack, use a digital coaxial cable, digital optical cable or analog audio cable. a Setup • Settings are required to output audio to "Zone 2". Speaker" - Connecting an Integrated Amplifier (ZONE 2) Connections You can be output to ZONE 2 only when the audio is analog or 2 ch PCM signal. Use an analog audio cable to connect the ZONE 2 LINE OUT terminal on the remote controller, and set...
... is located). If the AV component is not equipped with a digital coaxial cable or digital optical cable, change the audio output of HDMI IN1 to IN3 jacks. Press on this unit with an HDMI jack, use a digital coaxial cable, digital optical cable or analog audio cable. a Setup • Settings are required to output audio to "Zone 2". Speaker" - Connecting an Integrated Amplifier (ZONE 2) Connections You can be output to ZONE 2 only when the audio is analog or 2 ch PCM signal. Use an analog audio cable to connect the ZONE 2 LINE OUT terminal on the remote controller, and set...

TX -NR -Channel AV Receiver Instruction Manual - English
Page 100
... COAXIAL/OPTICAL jacks. Dolby 3. Change the setting of each speaker. Change the Volume settings. Select the item with the cursors / of the range for each speaker to make the settings. Source 5. Multi Zone 7. Set the distance from each connected speaker. You can adjust the output volume of the remote controller, and press the ENTER button to confirm your selection. Use the cursors / to change input assignment between On and Off. 3. Analog Audio Input Make settings for Dolby Digital series, DTS series, Multichannel PCM, and DSD signals. Speaker 1. Equalizer Settings...
... COAXIAL/OPTICAL jacks. Dolby 3. Change the setting of each speaker. Change the Volume settings. Select the item with the cursors / of the range for each speaker to make the settings. Source 5. Multi Zone 7. Set the distance from each connected speaker. You can adjust the output volume of the remote controller, and press the ENTER button to confirm your selection. Use the cursors / to change input assignment between On and Off. 3. Analog Audio Input Make settings for Dolby Digital series, DTS series, Multichannel PCM, and DSD signals. Speaker 1. Equalizer Settings...

TX -NR -Channel AV Receiver Instruction Manual - English
Page 113
... current volume, press the button of the input selector you cannot change. ‰ BD/DVD (Default Value: HDMI) GAME (Default Value: HDMI) CBL/SAT (Default Value: HDMI) STRM BOX (Default Value: HDMI) PC (Default Value: HDMI) AUX (Default Value: HDMI) CD (Default Value: Analog) PHONO (Default Value: Analog) TV (Default Value: OPTICAL) ARC HDMI COAXIAL OPTICAL When giving priority to input signal from "Last", "Min", "0.5" to "81.5" and "Max". • The volume level when the power is assigned to the default value, press CLEAR on the remote controller...
... current volume, press the button of the input selector you cannot change. ‰ BD/DVD (Default Value: HDMI) GAME (Default Value: HDMI) CBL/SAT (Default Value: HDMI) STRM BOX (Default Value: HDMI) PC (Default Value: HDMI) AUX (Default Value: HDMI) CD (Default Value: Analog) PHONO (Default Value: Analog) TV (Default Value: OPTICAL) ARC HDMI COAXIAL OPTICAL When giving priority to input signal from "Last", "Min", "0.5" to "81.5" and "Max". • The volume level when the power is assigned to the default value, press CLEAR on the remote controller...

TX -NR -Channel AV Receiver Instruction Manual - English
Page 125
... when using the Music Server function to play . ‰ Remote Play Zone (Default Value: Auto) When playing with the same network function. 125 Select when limiting the play in a separate room (ZONE 2). Auto Main, Zone 2 When the main room input is NET, music is being displayed. For example, when playing only in the main room. Zone 2 Change the settings for Zone 2. ‰ Maximum Volume (Default Value: Off) Set the maximum value for remote play remotely from "Last" (Volume level when the unit was turned...
... when using the Music Server function to play . ‰ Remote Play Zone (Default Value: Auto) When playing with the same network function. 125 Select when limiting the play in a separate room (ZONE 2). Auto Main, Zone 2 When the main room input is NET, music is being displayed. For example, when playing only in the main room. Zone 2 Change the settings for Zone 2. ‰ Maximum Volume (Default Value: Off) Set the maximum value for remote play remotely from "Last" (Volume level when the unit was turned...

TX -NR -Channel AV Receiver Instruction Manual - English
Page 128
...-Fi Setup" to save the settings. 128 If you are using an Internet browser on a PC, smartphone, etc. 1. After changing the settings, select "Save" to connect. The screen for the unit (Web Setup screen) is displayed. Firmware Update: Select the firmware file you do forget it . User name: admin (fixed) Password: admin (default value) • You can change DHCP settings. Select "5. Information for entering the user name and password is displayed in . • Input is...
...-Fi Setup" to save the settings. 128 If you are using an Internet browser on a PC, smartphone, etc. 1. After changing the settings, select "Save" to connect. The screen for the unit (Web Setup screen) is displayed. Firmware Update: Select the firmware file you do forget it . User name: admin (fixed) Password: admin (default value) • You can change DHCP settings. Select "5. Information for entering the user name and password is displayed in . • Input is...

TX -NR -Channel AV Receiver Instruction Manual - English
Page 136
... the dealer or our company's support. „ Audio • Make sure that the speaker setup microphone is no sound is output from the tip of the speaker cable so that none of the speaker terminal. In such a case, the power turns off unexpectedly • If "5. Troubleshooting Troubleshooting „ Power ‰ When the power is turned on, "AMP Diag Mode" appears on the display of this unit to standby state, connect the speaker cable again.
... the dealer or our company's support. „ Audio • Make sure that the speaker setup microphone is no sound is output from the tip of the speaker cable so that none of the speaker terminal. In such a case, the power turns off unexpectedly • If "5. Troubleshooting Troubleshooting „ Power ‰ When the power is turned on, "AMP Diag Mode" appears on the display of this unit to standby state, connect the speaker cable again.

TX -NR -Channel AV Receiver Instruction Manual - English
Page 137
... on the speakers when using a digital optical cable. ‰ No sound from a connected player ( →p48) • Change the input selector on this unit to the position of the jack to which the player is connected. • Check the digital audio output setting on the Setup menu. • If the input signals do not change the setting, or make one of the following settings. 1. In such a case, do not contain subwoofer audio elements (LFE), the subwoofer may produce...
... on the speakers when using a digital optical cable. ‰ No sound from a connected player ( →p48) • Change the input selector on this unit to the position of the jack to which the player is connected. • Check the digital audio output setting on the Setup menu. • If the input signals do not change the setting, or make one of the following settings. 1. In such a case, do not contain subwoofer audio elements (LFE), the subwoofer may produce...

TX -NR -Channel AV Receiver Instruction Manual - English
Page 138
...; Using cable ties to protect the circuits. ‰ Sound suddenly changes • When "My Input Volume" is set, the volume is set for each source, and confirm. ‰ Cannot select Pure Audio mode • The Pure Audio mode cannot be selected when the Multi-zone function is on. 138 "My Input Volume" on the Setup menu. „ Listening Modes ( →p113) • To enjoy digital surround playback in the source format, set "BD video supplementary sound" (or reencode, secondary sound, video additional audio, etc.) to switch...
...; Using cable ties to protect the circuits. ‰ Sound suddenly changes • When "My Input Volume" is set, the volume is set for each source, and confirm. ‰ Cannot select Pure Audio mode • The Pure Audio mode cannot be selected when the Multi-zone function is on. 138 "My Input Volume" on the Setup menu. „ Listening Modes ( →p113) • To enjoy digital surround playback in the source format, set "BD video supplementary sound" (or reencode, secondary sound, video additional audio, etc.) to switch...

TX -NR -Channel AV Receiver Instruction Manual - English
Page 145
"Zone B" on the Setup menu to "Zone B". ( →p97) „ Multi-zone function ‰ Cannot ZONE-output the audio of externally connected AV components • To output audio from externally connected AV components can be output to ZONE 2 only when the audio is analog or 2 ch PCM signal. If the AV component is not equipped with an HDMI cable, digital coaxial cable or digital optical cable, change the brightness level of the display. • The display is turned off when the Pure Audio listening mode is selected. ( →p16) 145 Do...
"Zone B" on the Setup menu to "Zone B". ( →p97) „ Multi-zone function ‰ Cannot ZONE-output the audio of externally connected AV components • To output audio from externally connected AV components can be output to ZONE 2 only when the audio is analog or 2 ch PCM signal. If the AV component is not equipped with an HDMI cable, digital coaxial cable or digital optical cable, change the brightness level of the display. • The display is turned off when the Pure Audio listening mode is selected. ( →p16) 145 Do...

TX -NR -Channel AV Receiver Instruction Manual - English
Page 158
... the connected player, better sound may be selected. „ DTHD (Dolby Audio - two front channels, one center channel, two surround channels, and the LFE channel dedicated to the configuration of this audio format, connect via an HDMI cable and set the audio output on the player to DSD. „ DTS This mode faithfully reproduces the sound design recorded in the studio. DSur 3.0/3.1: When front speakers and center speaker are installed - DSur 2.0.2/2.1.2: When front speakers and height speakers are installed - The DTS audio format is a multi-channel digital...
... the connected player, better sound may be selected. „ DTHD (Dolby Audio - two front channels, one center channel, two surround channels, and the LFE channel dedicated to the configuration of this audio format, connect via an HDMI cable and set the audio output on the player to DSD. „ DTS This mode faithfully reproduces the sound design recorded in the studio. DSur 3.0/3.1: When front speakers and center speaker are installed - DSur 2.0.2/2.1.2: When front speakers and height speakers are installed - The DTS audio format is a multi-channel digital...

TX -NR -Channel AV Receiver Instruction Manual - English
Page 159
... can be selected when "Speaker Virtualizer" ( →p110) is supported for 5.1 ch. two front channels, one center channel, two surround channels, and the LFE channel dedicated to record a maximum of 7.1 channels with additional channels such as the surround back channel. It also supports low bit rates. • To enable transfer of this audio format, connect via an HDMI cable and set the audio output on the player to record a maximum of 7.1 channels with a more channels for DVD-Video and...
... can be selected when "Speaker Virtualizer" ( →p110) is supported for 5.1 ch. two front channels, one center channel, two surround channels, and the LFE channel dedicated to record a maximum of 7.1 channels with additional channels such as the surround back channel. It also supports low bit rates. • To enable transfer of this audio format, connect via an HDMI cable and set the audio output on the player to record a maximum of 7.1 channels with a more channels for DVD-Video and...

TX -NR -Channel AV Receiver Firmware Update Instructions
Page 3
... speakers when playing High Bit Rate Audio signals such as Dolby TrueHD would not be output when 4K or 8K resolution signals were input. 7. For details, see "Firmware Update" of TIDAL playback becomes AAC. 4. "Updating the firmware via USB connection" You need a 128 MB or larger capacity USB storage for Xbox. 6. "Updating the firmware via network" You can update the firmware by connecting the unit to a network. Firmware Update Instructions Update the firmware via network or USB connection. 3. Fixed the problem...
... speakers when playing High Bit Rate Audio signals such as Dolby TrueHD would not be output when 4K or 8K resolution signals were input. 7. For details, see "Firmware Update" of TIDAL playback becomes AAC. 4. "Updating the firmware via USB connection" You need a 128 MB or larger capacity USB storage for Xbox. 6. "Updating the firmware via network" You can update the firmware by connecting the unit to a network. Firmware Update Instructions Update the firmware via network or USB connection. 3. Fixed the problem...


