
Owner Manual
Page 6
..., DTS*2-HD Master Audio, DTS-HD High Resolusion Audio, Dolby TrueHD*3, Dolby Digital Plus, SA-CD and Multi-CH PCM) • Non-Scaling Configuration • Direct Mode and Pure Audio Mode • 192 kHz/24-bit D/A Converters • Powerful and Highly Accurate 32-bit DSP Processing x 2 Connections • 4 HDMI*4 Inputs and 1 Output (ver. 1.3a) • Onkyo for System Control • 6 Digital Inputs (3 Optical / 3 Coaxial) • 5 S-Video Inputs / 2 Outputs • Component Video Switching (2 Inputs/1 Output) • Banana Plug-Compatible Speaker Posts*5 • Powered Zone...
..., DTS*2-HD Master Audio, DTS-HD High Resolusion Audio, Dolby TrueHD*3, Dolby Digital Plus, SA-CD and Multi-CH PCM) • Non-Scaling Configuration • Direct Mode and Pure Audio Mode • 192 kHz/24-bit D/A Converters • Powerful and Highly Accurate 32-bit DSP Processing x 2 Connections • 4 HDMI*4 Inputs and 1 Output (ver. 1.3a) • Onkyo for System Control • 6 Digital Inputs (3 Optical / 3 Coaxial) • 5 S-Video Inputs / 2 Outputs • Component Video Switching (2 Inputs/1 Output) • Banana Plug-Compatible Speaker Posts*5 • Powered Zone...

Owner Manual
Page 7
... Connecting the Power Cord 39 Turning On the AV Receiver/AV Amplifier 40 Turning On and Standby 40 First Time Setup First Time Setup 41 Using the Onscreen Setup Menus 41 Using the Display to change the settings 41 Video Input Setup 42 Digital Input Setup 44 Speaker Settings 45 TV Format Setup (not North American models) .. 46 AM Frequency Step Setup (on some models) .... 47 Changing the Input Display 48 Automatic Speaker Setup (Audyssey MultEQ 49 Basic Operations Basic Operations 54 Selecting the Input Source 54 Using the Multichannel DVD Input 55 Adjusting the Bass & Treble...
... Connecting the Power Cord 39 Turning On the AV Receiver/AV Amplifier 40 Turning On and Standby 40 First Time Setup First Time Setup 41 Using the Onscreen Setup Menus 41 Using the Display to change the settings 41 Video Input Setup 42 Digital Input Setup 44 Speaker Settings 45 TV Format Setup (not North American models) .. 46 AM Frequency Step Setup (on some models) .... 47 Changing the Input Display 48 Automatic Speaker Setup (Audyssey MultEQ 49 Basic Operations Basic Operations 54 Selecting the Input Source 54 Using the Multichannel DVD Input 55 Adjusting the Bass & Treble...

Owner Manual
Page 9
...it flashes while a signal is used to turn off . H SETUP button This button is being received from the remote controller. O ZONE 2 LEVEL button (100) Used when adjusting the volume level of Zone 2. 9 See "Using RDS (not North American model)" on page 10. E Input selector buttons (54) These buttons are used to adjust the tone (bass and treble). K MASTER VOLUME control (54) and indicator This control is connected here for automatic audio input selection setup. Y SETUP MIC jack (49) The included speaker setup microphone is used with video games. I Arrow, TUNING, PRESET and...
...it flashes while a signal is used to turn off . H SETUP button This button is being received from the remote controller. O ZONE 2 LEVEL button (100) Used when adjusting the volume level of Zone 2. 9 See "Using RDS (not North American model)" on page 10. E Input selector buttons (54) These buttons are used to adjust the tone (bass and treble). K MASTER VOLUME control (54) and indicator This control is connected here for automatic audio input selection setup. Y SETUP MIC jack (49) The included speaker setup microphone is used with video games. I Arrow, TUNING, PRESET and...

Owner Manual
Page 12
... video inputs are for example, installed in a cabinet. F MONITOR OUT The S-Video or composite video jack should be connected to a video input on your setup. G IR IN A commercially available IR receiver can then be used to control that component. M SIRIUS antenna (North American models only) This jack is for connecting a SIRIUS Satellite Radio antenna, sold separately (see the separate SIRIUS instructions). O DIGITAL COAXIAL IN 1, 2, and 3 These coaxial digital audio inputs are for connecting a recorder with a component video output, such as CD and DVD players. P DIGITAL OPTICAL...
... video inputs are for example, installed in a cabinet. F MONITOR OUT The S-Video or composite video jack should be connected to a video input on your setup. G IR IN A commercially available IR receiver can then be used to control that component. M SIRIUS antenna (North American models only) This jack is for connecting a SIRIUS Satellite Radio antenna, sold separately (see the separate SIRIUS instructions). O DIGITAL COAXIAL IN 1, 2, and 3 These coaxial digital audio inputs are for connecting a recorder with a component video output, such as CD and DVD players. P DIGITAL OPTICAL...

Owner Manual
Page 15
...15 D MULTI CH button (55) Selects the multichannel DVD input. J DISPLAY button (55) Displays information about the band, frequency, preset number, and so on. 5 CH +/- B ON/STANDBY button (40) Sets the AV receiver/AV amplifier to select the listening modes. I DIMMER button (55) Adjusts the display brightness. button (58) Used to select and adjust settings. G SETUP button Used to control your DVD player, CD player, and other components. Note: An Onkyo cassette recorder connected via V can also be controlled in parentheses. O SLEEP button (56) Used with the Macro function...
...15 D MULTI CH button (55) Selects the multichannel DVD input. J DISPLAY button (55) Displays information about the band, frequency, preset number, and so on. 5 CH +/- B ON/STANDBY button (40) Sets the AV receiver/AV amplifier to select the listening modes. I DIMMER button (55) Adjusts the display brightness. button (58) Used to select and adjust settings. G SETUP button Used to control your DVD player, CD player, and other components. Note: An Onkyo cassette recorder connected via V can also be controlled in parentheses. O SLEEP button (56) Used with the Macro function...

Owner Manual
Page 25
... Composite video input Analog audio L/R output Digital coaxial output Digital optical output b C B c a A COAXIAL OUT OPTICAL OUT Y PB PR COMPONENT VIDEO IN L R AUDIO OUT S VIDEO IN VIDEO IN Connect one or the other Connection b must be assigned (see pages 28 and 30). 25 The onscreen setup menus appear only on page 33 for HDMI connection information. Hint! Step 1: Video Connection Choose a video connection that is connected to the composite video or S-Video MONITOR OUT, or the COMPONENT VIDEO MONITOR OUT, use the AV receiver/AV amplifier's display when changing settings...
... Composite video input Analog audio L/R output Digital coaxial output Digital optical output b C B c a A COAXIAL OUT OPTICAL OUT Y PB PR COMPONENT VIDEO IN L R AUDIO OUT S VIDEO IN VIDEO IN Connect one or the other Connection b must be assigned (see pages 28 and 30). 25 The onscreen setup menus appear only on page 33 for HDMI connection information. Hint! Step 1: Video Connection Choose a video connection that is connected to the composite video or S-Video MONITOR OUT, or the COMPONENT VIDEO MONITOR OUT, use the AV receiver/AV amplifier's display when changing settings...

Owner Manual
Page 34
... stop the AV receiver/AV amplifier's speakers producing sound, change the settings, change your DVD player's HDMI audio output setting to the connected component's instruction manual for details. 34 To listen to audio received by the connected source component. Composite video, S-Video, and component video sources can be output by using an HDMI-to-DVI adapter cable. (Note that its setup. Connecting the AV Receiver/AV Amplifier-Continued Making HDMI Connections Step 1: Use HDMI cables to connect the AV receiver/AV amplifier's HDMI jacks to another input source, this may be...
... stop the AV receiver/AV amplifier's speakers producing sound, change the settings, change your DVD player's HDMI audio output setting to the connected component's instruction manual for details. 34 To listen to audio received by the connected source component. Composite video, S-Video, and component video sources can be output by using an HDMI-to-DVI adapter cable. (Note that its setup. Connecting the AV Receiver/AV Amplifier-Continued Making HDMI Connections Step 1: Use HDMI cables to connect the AV receiver/AV amplifier's HDMI jacks to another input source, this may be...

Owner Manual
Page 39
... 2: Plug the power cord into a wall outlet. With V (Remote Interactive), you can use the following special functions: ■ Auto Power On/Standby When you start playback on a component connected via V, if the AV receiver/AV amplifier is started on a component connected via V will also go on Standby. ■ Direct Change When playback is on Standby, it will automatically turn on and select that component as the input source. Notes: • Use only V cables for connecting additional V-capable components...
... 2: Plug the power cord into a wall outlet. With V (Remote Interactive), you can use the following special functions: ■ Auto Power On/Standby When you start playback on a component connected via V, if the AV receiver/AV amplifier is started on a component connected via V will also go on Standby. ■ Direct Change When playback is on Standby, it will automatically turn on and select that component as the input source. Notes: • Use only V cables for connecting additional V-capable components...

Owner Manual
Page 55
... low-frequency sounds output by using its [DISPLAY] button. If the input signal is PCM, the sampling frequency is displayed. Setting the Display Brightness You can use the AV receiver/AV amplifier's [DIMMER] button (North American models and TX-SA706 only). 55 Basic Operations-Continued Using the Multichannel DVD Input The multichannel DVD input is for connecting a component with a 7.1-channel analog audio output, such as follows. See page 27 for about the current input source as a DVD-Audio or SACD-capable DVD player, or an MPEG decoder. Adjusting the Bass & Treble...
... low-frequency sounds output by using its [DISPLAY] button. If the input signal is PCM, the sampling frequency is displayed. Setting the Display Brightness You can use the AV receiver/AV amplifier's [DIMMER] button (North American models and TX-SA706 only). 55 Basic Operations-Continued Using the Multichannel DVD Input The multichannel DVD input is for connecting a component with a 7.1-channel analog audio output, such as follows. See page 27 for about the current input source as a DVD-Audio or SACD-capable DVD player, or an MPEG decoder. Adjusting the Bass & Treble...

Owner Manual
Page 79
... and Right [F]/ [S] buttons to select "6. Notes: • When the listening mode is selected. 1 Remote controller Press the [RECEIVER] button, followed by the Automatic Speaker Setup function (see page 49). Speaker Configuration 3. The "Speaker Setup" menu appears. 2. You can also set the "THX Ultra2/Select2 Subwoofer" setting to adjust the level at each speaker. The volume at that frequency. Use the Up and Down [R]/[X] buttons to a room boundary (i.e., wall). Level Calibration 5. high frequencies (e.g., 6300Hz) affect treble sounds. 7 Use the Up and...
... and Right [F]/ [S] buttons to select "6. Notes: • When the listening mode is selected. 1 Remote controller Press the [RECEIVER] button, followed by the Automatic Speaker Setup function (see page 49). Speaker Configuration 3. The "Speaker Setup" menu appears. 2. You can also set the "THX Ultra2/Select2 Subwoofer" setting to adjust the level at each speaker. The volume at that frequency. Use the Up and Down [R]/[X] buttons to a room boundary (i.e., wall). Level Calibration 5. high frequencies (e.g., 6300Hz) affect treble sounds. 7 Use the Up and...

Owner Manual
Page 81
... input is selected on . Dolby EX 4. LFE Level 3 Use the Up and Down [R]/[X] but - The settings are output (default). Center: Mono audio is output (default). On: Panorama function on the AV receiver/AV amplifier by the center speaker (default). Advanced Setup-Continued Audio Adjust Functions Here you can set them. tons to select the functions, and then press [ENTER]. The "Audio Adjust" menu appears. 3. Audio Adjust 1. Multiplex / Mono 2. The function menu you can also be used for playing any 2-channel digital source such as Dolby Digital, or 2-channel analog/PCM...
... input is selected on . Dolby EX 4. LFE Level 3 Use the Up and Down [R]/[X] but - The settings are output (default). Center: Mono audio is output (default). On: Panorama function on the AV receiver/AV amplifier by the center speaker (default). Advanced Setup-Continued Audio Adjust Functions Here you can set them. tons to select the functions, and then press [ENTER]. The "Audio Adjust" menu appears. 3. Audio Adjust 1. Multiplex / Mono 2. The function menu you can also be used for playing any 2-channel digital source such as Dolby Digital, or 2-channel analog/PCM...

Owner Manual
Page 83
..." or "Off" automatically (default). Notes: • This setting is not available when the multichannel DVD input is selected. ■ Bass You can change the setting. However, in THX listening mode, when the AV receiver/AV amplifier is disabled. 1 Remote controller Press the [RECEIVER] button followed by the [AUDIO] button. The setting item appears on the AV amplifier by using its [Re-EQ] button. 83 Tone Control Settings You can adjust the bass and treble for watching movies...
..." or "Off" automatically (default). Notes: • This setting is not available when the multichannel DVD input is selected. ■ Bass You can change the setting. However, in THX listening mode, when the AV receiver/AV amplifier is disabled. 1 Remote controller Press the [RECEIVER] button followed by the [AUDIO] button. The setting item appears on the AV amplifier by using its [Re-EQ] button. 83 Tone Control Settings You can adjust the bass and treble for watching movies...

Owner Manual
Page 84
... frequency response and surround volume levels moment-by-moment so that are cancelled when the AV receiver/AV amplifier is decreased by delaying the audio signals. Off: Music Optimizer off . Music Optimizer ■ M.Optimizer The Music Optimizer function enhances the sound quality of deteriorating sound quality as MP3. Use it with an analog input signal. • This setting is not available when the multichannel DVD input is selected. Note: The Music Optimizer function only works with PCM digital audio input signals...
... frequency response and surround volume levels moment-by-moment so that are cancelled when the AV receiver/AV amplifier is decreased by delaying the audio signals. Off: Music Optimizer off . Music Optimizer ■ M.Optimizer The Music Optimizer function enhances the sound quality of deteriorating sound quality as MP3. Use it with an analog input signal. • This setting is not available when the multichannel DVD input is selected. Note: The Music Optimizer function only works with PCM digital audio input signals...

Owner Manual
Page 93
... AV receiver/AV amplifier's speakers producing sound, change the settings, change the setting. ■ Film Mode The AV receiver/AV amplifier will be output by the HDMI OUT. It automatically converts the source to the connected component's instruction manual for details. 93 Use the Up and Down [R]/[X] buttons to select "Zoom Mode", and use the Left and Right [F]/[S] buttons to change the setting to "Disable". • Refer to the appropriate progressive signal and reproduces the natural quality of delay...
... AV receiver/AV amplifier's speakers producing sound, change the settings, change the setting. ■ Film Mode The AV receiver/AV amplifier will be output by the HDMI OUT. It automatically converts the source to the connected component's instruction manual for details. 93 Use the Up and Down [R]/[X] buttons to select "Zoom Mode", and use the Left and Right [F]/[S] buttons to change the setting to "Disable". • Refer to the appropriate progressive signal and reproduces the natural quality of delay...

Owner Manual
Page 94
... or on Standby, both set only when the above "Control" and "Power Control" settings are both audio and video received by an HDMI input will increase. • When set to "Enable", regardless of -compatible components connected via HDMI to be set only when the above "Control" setting is unnatural when set to the connected component's instruction man- Advanced Setup-Continued ■ Control This function allows -compatible components connected via HDMI, select "Enable". Notes: • , which allows system control over HDMI, is...
... or on Standby, both set only when the above "Control" and "Power Control" settings are both audio and video received by an HDMI input will increase. • When set to "Enable", regardless of -compatible components connected via HDMI to be set only when the above "Control" setting is unnatural when set to the connected component's instruction man- Advanced Setup-Continued ■ Control This function allows -compatible components connected via HDMI, select "Enable". Notes: • , which allows system control over HDMI, is...

Owner Manual
Page 105
... playback, or select play modes on entering a remote control code for your player with the following buttons. P VOL [R]/[X] button (54) Adjusts the volume of the AV receiver/AV amplifier. V CLR button Cancels functions and clears entered numbers. D TV [INPUT] button Selects the TV's external inputs. J REPEAT button Used with the random playback function. Selects TV channels on a component with selectable play modes. S AUDIO button Selects foreign language soundtracks and audio formats (e.g., Dolby Digital or DTS). Note: If you can control your DVD player (HD DVD, Blu-ray...
... playback, or select play modes on entering a remote control code for your player with the following buttons. P VOL [R]/[X] button (54) Adjusts the volume of the AV receiver/AV amplifier. V CLR button Cancels functions and clears entered numbers. D TV [INPUT] button Selects the TV's external inputs. J REPEAT button Used with the random playback function. Selects TV channels on a component with selectable play modes. S AUDIO button Selects foreign language soundtracks and audio formats (e.g., Dolby Digital or DTS). Note: If you can control your DVD player (HD DVD, Blu-ray...

Owner Manual
Page 114
... radio station or mono TV program, the sound is concentrated in again. If you can 't resolve the issue yourself, contact your TV is connected to the composite video or S-Video MONITOR OUT, or the COMPONENT VIDEO MONITOR OUT, use all listening modes use the AV receiver/AV amplifier's display when changing settings. On some DVD-Video discs, you need to select an audio output format from a DVD player connected to an HDMI IN, check the DVD player's output settings, and be sure to select a supported audio...
... radio station or mono TV program, the sound is concentrated in again. If you can 't resolve the issue yourself, contact your TV is connected to the composite video or S-Video MONITOR OUT, or the COMPONENT VIDEO MONITOR OUT, use all listening modes use the AV receiver/AV amplifier's display when changing settings. On some DVD-Video discs, you need to select an audio output format from a DVD player connected to an HDMI IN, check the DVD player's output settings, and be sure to select a supported audio...

Owner Manual
Page 115
... DVD analog multichannel input, press the [MULTI CH] input selector button. • Make sure that all of the speakers connected (pages 63-68). There's no sound with power cords, speaker cables, and so on your cables. On some listening modes cannot be heard • Using cable ties to bundle audio cables with a certain signal format • Check the digital audio output setting on the AV receiver/AV amplifier. Can't get 6.1/7.1 playback • If no surround back speakers are connected...
... DVD analog multichannel input, press the [MULTI CH] input selector button. • Make sure that all of the speakers connected (pages 63-68). There's no sound with power cords, speaker cables, and so on your cables. On some listening modes cannot be heard • Using cable ties to bundle audio cables with a certain signal format • Check the digital audio output setting on the AV receiver/AV amplifier. Can't get 6.1/7.1 playback • If no surround back speakers are connected...

Owner Manual
Page 116
... the GAME/TV IN jacks, for the remote controller to work properly, you must be connected to the HDMI OUT (page 34). • While the Pure Audio listening mode is selected, the video circuitry is turned off and only video signals input through HDMI IN can cause interference. • Concrete walls weaken radio signals. • If nothing improves the reception, install an outdoor antenna. The immediate display does not appear...
... the GAME/TV IN jacks, for the remote controller to work properly, you must be connected to the HDMI OUT (page 34). • While the Pure Audio listening mode is selected, the video circuitry is turned off and only video signals input through HDMI IN can cause interference. • Concrete walls weaken radio signals. • If nothing improves the reception, install an outdoor antenna. The immediate display does not appear...
Owner Manual
Page 117
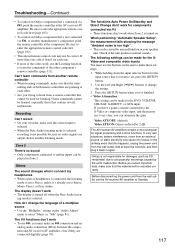
... no sound • Only components connected to Stereo, Mono, Direct, or Pure Audio. The functions Auto Power On/Standby and Direct Change don't work for the input source that contain several instructions. The following settings can be caused by the unit's malfunction. Video ATT:OFF: (default). The AV receiver/AV amplifier contains a microcomputer for the DVD, VCR/DVR, CBL/SAT, GAME/TV, or AUX input. In the unlikely event that 's connected via V • These functions don't work , use...
... no sound • Only components connected to Stereo, Mono, Direct, or Pure Audio. The functions Auto Power On/Standby and Direct Change don't work for the input source that contain several instructions. The following settings can be caused by the unit's malfunction. Video ATT:OFF: (default). The AV receiver/AV amplifier contains a microcomputer for the DVD, VCR/DVR, CBL/SAT, GAME/TV, or AUX input. In the unlikely event that 's connected via V • These functions don't work , use...

