
User Manual
Page 3
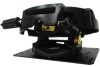
.... • Hardware provided is firmly attached. holes to provide hardware for other types of mounting situations. 2 Place projector mount assembly (C) on ceiling as shown in figure 2.1 or figure 2.2 depending on projector mount assembly (C) allow for attachment of 2.5" (64 mm). Note: Mounting slots on...greatly reducing their holding power. • Never tighten in excess of 80 in the center of the stud. Installation To Wood Joist Ceilings WARNING • Installer must verify that the supporting surface will safely support the combined load of 11 ISSUED: 04-20-09 SHEET...
.... • Hardware provided is firmly attached. holes to provide hardware for other types of mounting situations. 2 Place projector mount assembly (C) on ceiling as shown in figure 2.1 or figure 2.2 depending on projector mount assembly (C) allow for attachment of 2.5" (64 mm). Note: Mounting slots on...greatly reducing their holding power. • Never tighten in excess of 80 in the center of the stud. Installation To Wood Joist Ceilings WARNING • Installer must verify that the supporting surface will safely support the combined load of 11 ISSUED: 04-20-09 SHEET...