User's Manual
Page 1
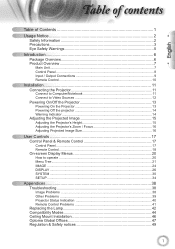
... ...24 DISPLAY ...26 SYSTEM ...30 SETUP ...34 Appendices 38 Troubleshooting 38 Image Problems 38 Other Problems 39 Projector Status Indication 40 Remote Control Problems 41 Replacing the Lamp 42 Compatibility Modes 44 Ceiling Mount Installation 46 Optoma Global Offices 47 Regulation & Safety notices 49 1
... ...24 DISPLAY ...26 SYSTEM ...30 SETUP ...34 Appendices 38 Troubleshooting 38 Image Problems 38 Other Problems 39 Projector Status Indication 40 Remote Control Problems 41 Replacing the Lamp 42 Compatibility Modes 44 Ceiling Mount Installation 46 Optoma Global Offices 47 Regulation & Safety notices 49 1

User's Manual
Page 3
...43. ▀■ Warning- To reduce the risk of its life, the projector will show on -screen display "System | Lamp Settings" menu after replacing the lamp module (refer to cool down . ▀■ Warning- Please be sure to rain or moisture. ▀■ Warning- ... ▀■ Warning- To replace the lamp, follow all warnings, precautions and maintenance as described on until the lamp module has been replaced. Do not look into the projector's lens when the lamp is in this user's guide. ▀■ Warning- When replacing the lamp, please allow the unit to ...
...43. ▀■ Warning- To reduce the risk of its life, the projector will show on -screen display "System | Lamp Settings" menu after replacing the lamp module (refer to cool down . ▀■ Warning- Please be sure to rain or moisture. ▀■ Warning- ... ▀■ Warning- To replace the lamp, follow all warnings, precautions and maintenance as described on until the lamp module has been replaced. Do not look into the projector's lens when the lamp is in this user's guide. ▀■ Warning- When replacing the lamp, please allow the unit to ...
User's Manual
Page 33
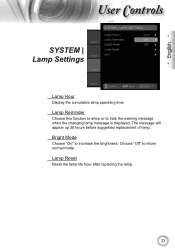
English ser ontrols SYSTEM | Lamp Settings Lamp Hour Display the cumulative lamp operating time. Lamp Reset Reset the lamp life hour after replacing the lamp. 33 Lamp Reminder Choose this function to show or to return normal mode. Choose "Off" to hide the warning message when the changing lamp message is displayed. Bright Mode Choose "On" to increase the brightness. The message will appear up 30 hours before suggested replacement of lamp.
English ser ontrols SYSTEM | Lamp Settings Lamp Hour Display the cumulative lamp operating time. Lamp Reset Reset the lamp life hour after replacing the lamp. 33 Lamp Reminder Choose this function to show or to return normal mode. Choose "Off" to hide the warning message when the changing lamp message is displayed. Bright Mode Choose "On" to increase the brightness. The message will appear up 30 hours before suggested replacement of lamp.
User's Manual
Page 38
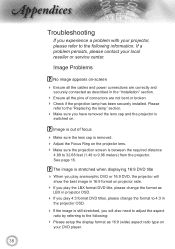
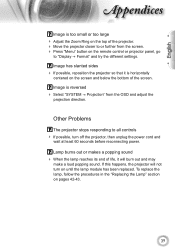
Image Problems No image appears on . Please refer to the "Replacing the lamp" section. Make sure you have removed the lens cap and the projector is switched on -screen Ensure all the pins of focus ... by referring to 4:3 in the "Installation" section. Ensure all the cables and power connections are not bent or broken. Check if the projection lamp has been securely installed.
Image Problems No image appears on . Please refer to the "Replacing the lamp" section. Make sure you have removed the lens cap and the projector is switched on -screen Ensure all the pins of focus ... by referring to 4:3 in the "Installation" section. Ensure all the cables and power connections are not bent or broken. Check if the projection lamp has been securely installed.
User's Manual
Page 39
... wait at least 60 seconds before reconnecting power. Other Problems The projector stops responding to all controls If possible, turn on until the lamp module has been replaced. If this happens, the projector will burn out and may make a loud popping sound. English ppendices Image is too small or too large...
... wait at least 60 seconds before reconnecting power. Other Problems The projector stops responding to all controls If possible, turn on until the lamp module has been replaced. If this happens, the projector will burn out and may make a loud popping sound. English ppendices Image is too small or too large...
User's Manual
Page 41
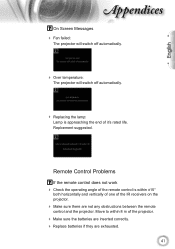
... Fan failed: The projector will switch off automatically. Over temperature: The projector will switch off automatically. Replacing the lamp: Lamp is within 8 m of the projector. Make sure the batteries are inserted correctly. Replace batteries if they are not any obstructions between the remote control and the projector. Replcement suggested.
... Fan failed: The projector will switch off automatically. Over temperature: The projector will switch off automatically. Replacing the lamp: Lamp is within 8 m of the projector. Make sure the batteries are inserted correctly. Replace batteries if they are not any obstructions between the remote control and the projector. Replcement suggested.
User's Manual
Page 42
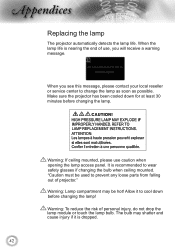
... used to cool down for at least 30 minutes before changing the lamp! ppendices Replacing the lamp The projector automatically detects the lamp life. When the lamp life is recommended to change the lamp as soon as possible. When you will receive a warning message. Warning: Lamp compartment may shatter and cause injury if it to prevent any...
... used to cool down for at least 30 minutes before changing the lamp! ppendices Replacing the lamp The projector automatically detects the lamp life. When the lamp life is recommended to change the lamp as soon as possible. When you will receive a warning message. Warning: Lamp compartment may shatter and cause injury if it to prevent any...

User's Manual
Page 43
Hand oil can cause the lamp to clean the lamp module if it was accidentally touched. 2 4 3 Lamp Replacement Procedure: 1. Disconnect the power cord. 4. Lift up the lamp handle and remove the lamp module slowly and carefully. 4 To replace the lamp module, reverse the previous steps. 8. Lift up and remove the cover. 2 6. Use a dry cloth to shatter. Unscrew the two...
Hand oil can cause the lamp to clean the lamp module if it was accidentally touched. 2 4 3 Lamp Replacement Procedure: 1. Disconnect the power cord. 4. Lift up the lamp handle and remove the lamp module slowly and carefully. 4 To replace the lamp module, reverse the previous steps. 8. Lift up and remove the cover. 2 6. Use a dry cloth to shatter. Unscrew the two...

