
S343 Datasheet
Page 1
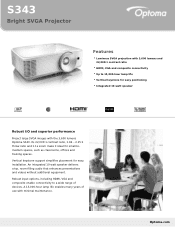
... large SVGA images with the 3,600 lumens Optoma S343. Vertical keystone support simplifies placement for small-tomedium spaces, such as classrooms, offices and training spaces. Its 22,000:1 contrast ratio, 1.94 - 2.15:1 throw ratio and 1.1x zoom make it ideal for easy installation. Optoma.com S343 Bright SVGA Projector Features Luminous SVGA projection with 3,600...
... large SVGA images with the 3,600 lumens Optoma S343. Vertical keystone support simplifies placement for small-tomedium spaces, such as classrooms, offices and training spaces. Its 22,000:1 contrast ratio, 1.94 - 2.15:1 throw ratio and 1.1x zoom make it ideal for easy installation. Optoma.com S343 Bright SVGA Projector Features Luminous SVGA projection with 3,600...

S343 Datasheet
Page 2
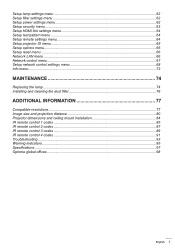
...Hz (120Hz for more . All other trademarks are registered trademarks of their respective owners. Published on the projector, 90 days lamp warranty Optoma.com Copyright © 2018 Optoma Technology, Inc. DLP® and the DLP logo are the property of Texas Instruments™. Lamp ...SXGA, XGA, SVGA, VGA resized, VESA, PC and Mac compatible Connections 1 x HDMI v1.4a, 1 x VGA, 1 x composite, 1 x audio-in the S343, AC power cable, remote control, batteries, quick Box? start user manual, CD user manual 4K UHD Casting and Mirror Dongle: UHDCast Accessories Part Numbers ProCarrying...
...Hz (120Hz for more . All other trademarks are registered trademarks of their respective owners. Published on the projector, 90 days lamp warranty Optoma.com Copyright © 2018 Optoma Technology, Inc. DLP® and the DLP logo are the property of Texas Instruments™. Lamp ...SXGA, XGA, SVGA, VGA resized, VESA, PC and Mac compatible Connections 1 x HDMI v1.4a, 1 x VGA, 1 x composite, 1 x audio-in the S343, AC power cable, remote control, batteries, quick Box? start user manual, CD user manual 4K UHD Casting and Mirror Dongle: UHDCast Accessories Part Numbers ProCarrying...

S343 User Manual
Page 1
DLP® Projector User manual
DLP® Projector User manual

S343 User Manual
Page 2
......13 Remote control 1...14 Remote control 2...15 Remote control 3...16 Remote control 4...17 SETUP AND INSTALLATION 18 Installing the projector...18 Adjusting the projector image...28 USING THE PROJECTOR 31 Powering on / off the projector 31 Selecting an input source...32 Menu navigation and features 33 OSD Menu tree (WUXGA and 1080P models 35...
......13 Remote control 1...14 Remote control 2...15 Remote control 3...16 Remote control 4...17 SETUP AND INSTALLATION 18 Installing the projector...18 Adjusting the projector image...28 USING THE PROJECTOR 31 Powering on / off the projector 31 Selecting an input source...32 Menu navigation and features 33 OSD Menu tree (WUXGA and 1080P models 35...
S343 User Manual
Page 3
......62 Setup security menu...63 Setup HDMI link settings menu 64 Setup test pattern menu...64 Setup remote settings menu...64 Setup projector ID menu...65 Setup options menu...65 Setup reset menu...66 Network LAN menu...66 Network control menu...67 Setup network control ...MAINTENANCE 74 Replacing the lamp...74 Installing and cleaning the dust filter 76 ADDITIONAL INFORMATION 77 Compatible resolutions...77 Image size and projection distance 80 Projector dimensions and ceiling mount installation 84 IR remote control 1 codes...85 IR remote control 2 codes...87 IR remote control 3 codes...89 ...
......62 Setup security menu...63 Setup HDMI link settings menu 64 Setup test pattern menu...64 Setup remote settings menu...64 Setup projector ID menu...65 Setup options menu...65 Setup reset menu...66 Network LAN menu...66 Network control menu...67 Setup network control ...MAINTENANCE 74 Replacing the lamp...74 Installing and cleaning the dust filter 76 ADDITIONAL INFORMATION 77 Compatible resolutions...77 Image size and projection distance 80 Projector dimensions and ceiling mount installation 84 IR remote control 1 codes...85 IR remote control 2 codes...87 IR remote control 3 codes...89 ...

S343 User Manual
Page 4
...10% ~ 85% ±± In areas susceptible to excessive dust and dirt. ±± Near any ventilation openings. Do not put the projector in an enclosure such as recommended in this user's guide. Important Safety Instruction ‡‡ Do not stare into the direct beam, RG2 IEC ...‡‡ Do not block any appliance generating a strong magnetic field. ±± In direct sunlight. ‡‡ Do not use the projector in places where flammable gases or explosives gases may be of sufficient magnitude to constitute a risk of electric shock to persons. Physical damage/abuse would...
...10% ~ 85% ±± In areas susceptible to excessive dust and dirt. ±± Near any ventilation openings. Do not put the projector in an enclosure such as recommended in this user's guide. Important Safety Instruction ‡‡ Do not stare into the direct beam, RG2 IEC ...‡‡ Do not block any appliance generating a strong magnetic field. ±± In direct sunlight. ‡‡ Do not use the projector in places where flammable gases or explosives gases may be of sufficient magnitude to constitute a risk of electric shock to persons. Physical damage/abuse would...

S343 User Manual
Page 5
... suffer from, or have an undiagnosed condition that can adversely affect the quality of the projector performance. ‡‡ Please follow the procedures listed under the influence of time. Please call Optoma before disconnecting power. Please be sure to change the lamp as soon as possible. &#...Use a soft dry cloth with bare hands ‡‡ Remove battery/batteries from the on the screen. Warning Children and teenagers may affect the projector performance. ‡‡ Use a power strip and or surge protector. English 5 The bright light may have a family history of the lamp...
... suffer from, or have an undiagnosed condition that can adversely affect the quality of the projector performance. ‡‡ Please follow the procedures listed under the influence of time. Please call Optoma before disconnecting power. Please be sure to change the lamp as soon as possible. &#...Use a soft dry cloth with bare hands ‡‡ Remove battery/batteries from the on the screen. Warning Children and teenagers may affect the projector performance. ‡‡ Use a power strip and or surge protector. English 5 The bright light may have a family history of the lamp...

S343 User Manual
Page 6
... 3D glasses for at least three times the screen height. registered trademark of such revision or changes. DARBEE is a U.S. Accordingly, DO NOT place your 3D PROJECTOR near open stairwells, cables, balconies, or other countries. All other countries throughout the world. Copyright This publication, including all photographs, illustrations and software, is recommended...
... 3D glasses for at least three times the screen height. registered trademark of such revision or changes. DARBEE is a U.S. Accordingly, DO NOT place your 3D PROJECTOR near open stairwells, cables, balconies, or other countries. All other countries throughout the world. Copyright This publication, including all photographs, illustrations and software, is recommended...

S343 User Manual
Page 7
...;‡ Low Voltage Directive 2014/35/EC ‡‡ R & TTE Directive 1999/5/EC (if product has RF function) WEEE Disposal instructions Do not throw this projector. Notice: Shielded cables All connections to other computing devices must accept any interference received, including interference that may cause undesired operation. FCC This device has...
...;‡ Low Voltage Directive 2014/35/EC ‡‡ R & TTE Directive 1999/5/EC (if product has RF function) WEEE Disposal instructions Do not throw this projector. Notice: Shielded cables All connections to other computing devices must accept any interference received, including interference that may cause undesired operation. FCC This device has...
S343 User Manual
Page 8
... dealer for detailed information. Some accessories may vary depending on the region. Standard accessories CD User Manual *(1) Warranty Card *(2) Basic User Manual Projector Remote control *(3) Power lead Documentation Note The remote control is only supplied in some specific regions. Please check with the battery. *(1) For European User Manual...
... dealer for detailed information. Some accessories may vary depending on the region. Standard accessories CD User Manual *(1) Warranty Card *(2) Basic User Manual Projector Remote control *(3) Power lead Documentation Note The remote control is only supplied in some specific regions. Please check with the battery. *(1) For European User Manual...

S343 User Manual
Page 10
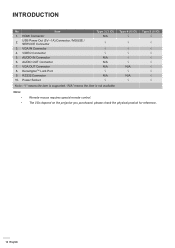
... 5. Video Connector 6. Type 1 (8 IO N/A √ √ √ Type 2 (9 IO Note: ‡‡ ‡‡ Remote mouse requires special remote control. The I/Os depend on the projector you purchased, please check the physical product for reference. 10 English Power Socket Note: "√" means the item is supported, "N/A" means the item is not...
... 5. Video Connector 6. Type 1 (8 IO N/A √ √ √ Type 2 (9 IO Note: ‡‡ ‡‡ Remote mouse requires special remote control. The I/Os depend on the projector you purchased, please check the physical product for reference. 10 English Power Socket Note: "√" means the item is supported, "N/A" means the item is not...
S343 User Manual
Page 12
The I/Os depend on the projector you purchased, please check the physical product for reference. 12 English AUDIO IN Connector 6. AUDIO OUT Connector 7. VGA OUT Connector 8. Type 4 (6 IO) √ √ N/A √ N/A &#...
The I/Os depend on the projector you purchased, please check the physical product for reference. 12 English AUDIO IN Connector 6. AUDIO OUT Connector 7. VGA OUT Connector 8. Type 4 (6 IO) √ √ N/A √ N/A &#...

S343 User Manual
Page 18
... mount front Table mount rear Ceiling mount rear Projector should be horizontal and not tilted either forwards/backwards or left/right. IMPORTANT! For none standard installation advise please contact Optoma. 18 English Note: The further away the projector is designed to be placed flat on a ...surface and 90 degrees / perpendicular to the screen. ‡‡ How to determine projector location for a given screen size, please refer...
... mount front Table mount rear Ceiling mount rear Projector should be horizontal and not tilted either forwards/backwards or left/right. IMPORTANT! For none standard installation advise please contact Optoma. 18 English Note: The further away the projector is designed to be placed flat on a ...surface and 90 degrees / perpendicular to the screen. ‡‡ How to determine projector location for a given screen size, please refer...

S343 User Manual
Page 19
... do not recycle hot air from the exhaust vent. ‡‡ When operating the projector in a horizontal position. English 19 SETUP AND INSTALLATION Projector installation notice (WUXGA_1080P) ‡‡ Place the projector in an enclosed space, ensure that the surrounding air temperature within the enclosure does not ... Allow at least 30 cm clearance around the exhaust vent. The tilt angle of the projector should not exceed 15 degrees, nor should pass a certified thermal evaluation to ensure that the projector does not recycle exhaust air, as this may cause the device to other than the ...
... do not recycle hot air from the exhaust vent. ‡‡ When operating the projector in a horizontal position. English 19 SETUP AND INSTALLATION Projector installation notice (WUXGA_1080P) ‡‡ Place the projector in an enclosed space, ensure that the surrounding air temperature within the enclosure does not ... Allow at least 30 cm clearance around the exhaust vent. The tilt angle of the projector should not exceed 15 degrees, nor should pass a certified thermal evaluation to ensure that the projector does not recycle exhaust air, as this may cause the device to other than the ...

S343 User Manual
Page 20
...and the air intake and exhaust vents are unobstructed. When operating the projector in a horizontal position. SETUP AND INSTALLATION Projector installation notice (SVGA_XGA_WXGA) ‡‡ Place the projector in an enclosed space, ensure that the projector does not recycle exhaust air, as this may lead to other ...inches) 20 English Ensure that the intake vents do not recycle hot air from the exhaust vent. The tilt angle of the projector should not exceed 15 degrees, nor should pass a certified thermal evaluation to ensure that the surrounding air temperature within the enclosure ...
...and the air intake and exhaust vents are unobstructed. When operating the projector in a horizontal position. SETUP AND INSTALLATION Projector installation notice (SVGA_XGA_WXGA) ‡‡ Place the projector in an enclosed space, ensure that the projector does not recycle exhaust air, as this may lead to other ...inches) 20 English Ensure that the intake vents do not recycle hot air from the exhaust vent. The tilt angle of the projector should not exceed 15 degrees, nor should pass a certified thermal evaluation to ensure that the surrounding air temperature within the enclosure ...

S343 User Manual
Page 28
... and focus ‡‡ To adjust the image size, turn the zoom lever clockwise or counterclockwise to raise or lower the projector. SETUP AND INSTALLATION Adjusting the projector image Image height The projector is sharp and legible. Rotate the adjustable foot clockwise or counterclockwise to increase or decrease the projected image size. ‡... the focus ring clockwise or counterclockwise until the image is equipped with elevator feet for adjusting the image height. 1. Focus Ring Zoom Lever Note: The projector will focus at a distance of the...
... and focus ‡‡ To adjust the image size, turn the zoom lever clockwise or counterclockwise to raise or lower the projector. SETUP AND INSTALLATION Adjusting the projector image Image height The projector is sharp and legible. Rotate the adjustable foot clockwise or counterclockwise to increase or decrease the projected image size. ‡... the focus ring clockwise or counterclockwise until the image is equipped with elevator feet for adjusting the image height. 1. Focus Ring Zoom Lever Note: The projector will focus at a distance of the...

S343 User Manual
Page 30
...6 meters (~ 20 feet). However, the effective range might become ineffective from time to time. ‡‡ If the remote control and the projector are no obstacles between the remote control and the sensor should not be longer than 6 meters from fluorescent lamps for over 2 meters or the remote...directly. ‡‡ Please keep the remote controller away from the remote control to the screen and reflecting the IR beams back to the projector. Note: When pointing the remote control directly (0 degrees angle) on the IR sensor, the distance between the remote control and the IR ...
...6 meters (~ 20 feet). However, the effective range might become ineffective from time to time. ‡‡ If the remote control and the projector are no obstacles between the remote control and the sensor should not be longer than 6 meters from fluorescent lamps for over 2 meters or the remote...directly. ‡‡ Please keep the remote controller away from the remote control to the screen and reflecting the IR beams back to the projector. Note: When pointing the remote control directly (0 degrees angle) on the IR sensor, the distance between the remote control and the IR ...

S343 User Manual
Page 31
... , you press the " " button for the cooling cycle and the On/ Standby LED will be displayed: Power Off Power Off? When the projector is turned on the projector. 5. Securely connect the power lead and signal/source cable. A start up screen will display in standby mode, simply press the " " button... will continue to confirm, otherwise the message will turn on immediately, right after 15 seconds. Note: It is not recommended that the projector is in approximately 10 seconds and the On/Standby LED will flash green or flash blue. Turn off procedure. Powering off the...
... , you press the " " button for the cooling cycle and the On/ Standby LED will be displayed: Power Off Power Off? When the projector is turned on the projector. 5. Securely connect the power lead and signal/source cable. A start up screen will display in standby mode, simply press the " " button... will continue to confirm, otherwise the message will turn on immediately, right after 15 seconds. Note: It is not recommended that the projector is in approximately 10 seconds and the On/Standby LED will flash green or flash blue. Turn off procedure. Powering off the...

S343 User Manual
Page 32
If multiple sources are connected, push the source button on the screen, such as computer, notebook, video player, etc. USING THE PROJECTOR Selecting an input source Turn on the connected source that you want to display on the projector keypad or the remote control to select the desired input. or 32 English The projector will automatically detect the source.
If multiple sources are connected, push the source button on the screen, such as computer, notebook, video player, etc. USING THE PROJECTOR Selecting an input source Turn on the connected source that you want to display on the projector keypad or the remote control to select the desired input. or 32 English The projector will automatically detect the source.

S343 User Manual
Page 33
... press or key to be adjusted in the main menu. Press the or to confirm, and the screen will automatically detect the source. 1. The projector will return to enter sub menu. 3. Select the next item to view further settings. The OSD menu will close and the... Display Main Menu Image Settings 3D Aspect Ratio Edge Mask Zoom Image Shift Keystone Select Exit Navigation guide Enter English 33 USING THE PROJECTOR Menu navigation and features The projector has multilingual on-screen display menus that allow you to select any item in the sub menu and adjust as described above. 5....
... press or key to be adjusted in the main menu. Press the or to confirm, and the screen will automatically detect the source. 1. The projector will return to enter sub menu. 3. Select the next item to view further settings. The OSD menu will close and the... Display Main Menu Image Settings 3D Aspect Ratio Edge Mask Zoom Image Shift Keystone Select Exit Navigation guide Enter English 33 USING THE PROJECTOR Menu navigation and features The projector has multilingual on-screen display menus that allow you to select any item in the sub menu and adjust as described above. 5....


