User Guide
Page 2
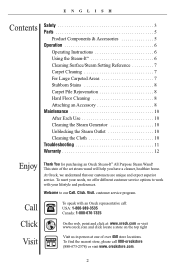
... the Steam-It 6 Cleaning Surface/Steam Setting Reference 7 Carpet Cleaning 7 For Large Carpeted Areas 7 Stubborn Stains 8 Carpet Pile Rejuvenation 8 Hard Floor Cleaning 8 Attaching an Accessory 8 Maintenance 10 After Each Use 10 Cleaning the Steam Generator 10 Unblocking the Steam Outlet 10 Cleaning the Cloth 10 Troubleshooting 11 Warranty 12 Enjoy Thank You for purchasing an Oreck Steam-It™...
... the Steam-It 6 Cleaning Surface/Steam Setting Reference 7 Carpet Cleaning 7 For Large Carpeted Areas 7 Stubborn Stains 8 Carpet Pile Rejuvenation 8 Hard Floor Cleaning 8 Attaching an Accessory 8 Maintenance 10 After Each Use 10 Cleaning the Steam Generator 10 Unblocking the Steam Outlet 10 Cleaning the Cloth 10 Troubleshooting 11 Warranty 12 Enjoy Thank You for purchasing an Oreck Steam-It™...

User Guide
Page 5
ENGLISH Parts Product Components & Accessories 25 26 1 12 2 3 27 28 11 Accessories 16 17 4 10 9 13 14 5 6 8 7 23 Parts 1 Steam Regulator 2 Control Switches 3 Water Tank Cap 4 Water Tank 5 Lock Button 6 Powerhead 7 Towel Grips 8 Brush Slides 9 Cord Wrap 10 Lower Handle 11 Power Cord 12 Cord ... Squeegee 14 Utility Tool 15 Deflector Nozzle 16 Floor Cloth 17 Utility Cloth 18 Spot Brush 19 Nozzle Brush 20 Nozzle Pin 21 Funnel 22 Carpet Glide Base 15 18 20 21 19 22 24 23 Steam Comb 24 Corner Gliders 25 On/Off Switch 26...
ENGLISH Parts Product Components & Accessories 25 26 1 12 2 3 27 28 11 Accessories 16 17 4 10 9 13 14 5 6 8 7 23 Parts 1 Steam Regulator 2 Control Switches 3 Water Tank Cap 4 Water Tank 5 Lock Button 6 Powerhead 7 Towel Grips 8 Brush Slides 9 Cord Wrap 10 Lower Handle 11 Power Cord 12 Cord ... Squeegee 14 Utility Tool 15 Deflector Nozzle 16 Floor Cloth 17 Utility Cloth 18 Spot Brush 19 Nozzle Brush 20 Nozzle Pin 21 Funnel 22 Carpet Glide Base 15 18 20 21 19 22 24 23 Steam Comb 24 Corner Gliders 25 On/Off Switch 26...

User Guide
Page 6
...10 - 15 seconds, to the "ON" position. Make sure the steam cleaner is turned off . 3. After approximately 30 seconds the green "steam ready" light should be illuminated. 4. Using the Steam-It™ NOTE: Carpets should come on the main body of the other cleaning accessories. Use ...the funnel provided to the powerhead by using the steam cleaner. 1. Ensure that the lock button...
...10 - 15 seconds, to the "ON" position. Make sure the steam cleaner is turned off . 3. After approximately 30 seconds the green "steam ready" light should be illuminated. 4. Using the Steam-It™ NOTE: Carpets should come on the main body of the other cleaning accessories. Use ...the funnel provided to the powerhead by using the steam cleaner. 1. Ensure that the lock button...

User Guide
Page 7
... Low to Medium Sealed Hardwood Low Carpet Cleaning When cleaning carpets and rugs, leave the steam regulator control set to "maximum." For Large Carpeted Areas For smoother movement of the steamer over larger carpeted areas the carpet glide attachment can be used: 1. Detach and remove the steam comb section from the carpet glide attachment. 2. Secure the powerhead inside...
... Low to Medium Sealed Hardwood Low Carpet Cleaning When cleaning carpets and rugs, leave the steam regulator control set to "maximum." For Large Carpeted Areas For smoother movement of the steamer over larger carpeted areas the carpet glide attachment can be used: 1. Detach and remove the steam comb section from the carpet glide attachment. 2. Secure the powerhead inside...

User Guide
Page 8
... accessories become hot during operation.Allow the steam cleaner to remove the powerhead when cool. 2. Move the brush sliders so that the brushes appear underneath the powerhead. Carpet Pile Rejuvenation To rejuvenate flattened carpet pile, remove the cloth and connect the carpet glide base to a lower setting by... Do not use the reverse side or replace with the lock button on the main body of the steam cleaner. The brushes should only be used for routine carpet and hard floor cleaning as unnecessary scrubbing may cause damage. IMPORTANT! Attach the desired accessory by turning...
... accessories become hot during operation.Allow the steam cleaner to remove the powerhead when cool. 2. Move the brush sliders so that the brushes appear underneath the powerhead. Carpet Pile Rejuvenation To rejuvenate flattened carpet pile, remove the cloth and connect the carpet glide base to a lower setting by... Do not use the reverse side or replace with the lock button on the main body of the steam cleaner. The brushes should only be used for routine carpet and hard floor cleaning as unnecessary scrubbing may cause damage. IMPORTANT! Attach the desired accessory by turning...

User Guide
Page 9
... 9 For small window panels, remove the squeegee tool and spray the steam directly onto the surface. Point it directly at maximum steam flow. Use the squeegee at medium or high steam flow. Use at a very low steam flow. Spot Brush For cleaning the grout between tiles or stubborn marks and... Nozzle For cleaning sanitary ware such as toilet bowls, taps or drain covers. Use the squeegee separately to medium steam flow. Achieve this nozzle at stains on carpets or upholstery while holding a clean cloth near the stained area to wipe the blade and remove excess water during usage...
... 9 For small window panels, remove the squeegee tool and spray the steam directly onto the surface. Point it directly at maximum steam flow. Use the squeegee at medium or high steam flow. Use at a very low steam flow. Spot Brush For cleaning the grout between tiles or stubborn marks and... Nozzle For cleaning sanitary ware such as toilet bowls, taps or drain covers. Use the squeegee separately to medium steam flow. Achieve this nozzle at stains on carpets or upholstery while holding a clean cloth near the stained area to wipe the blade and remove excess water during usage...


