
User Guide
Page 1
Read all instructions carefully, and keep for future reference. 53439-01 REV A STEAM-IT™ All Purpose Steam Wand STEAM100 User's Guide Important!
Read all instructions carefully, and keep for future reference. 53439-01 REV A STEAM-IT™ All Purpose Steam Wand STEAM100 User's Guide Important!
User Guide
Page 2
...3535 Canada: 1-888-676-7325 On the web, point and click at: www.oreck.com or visit www.oreck.com and click locate a store on the top right Visit us in person at one of the art steam wand will help you have a cleaner, healthier home. To meet your needs,... 8 Hard Floor Cleaning 8 Attaching an Accessory 8 Maintenance 10 After Each Use 10 Cleaning the Steam Generator 10 Unblocking the Steam Outlet 10 Cleaning the Cloth 10 Troubleshooting 11 Warranty 12 Enjoy Thank You for purchasing an Oreck Steam-It™ All Purpose Steam Wand! This state of over 450 store locations. Click.
...3535 Canada: 1-888-676-7325 On the web, point and click at: www.oreck.com or visit www.oreck.com and click locate a store on the top right Visit us in person at one of the art steam wand will help you have a cleaner, healthier home. To meet your needs,... 8 Hard Floor Cleaning 8 Attaching an Accessory 8 Maintenance 10 After Each Use 10 Cleaning the Steam Generator 10 Unblocking the Steam Outlet 10 Cleaning the Cloth 10 Troubleshooting 11 Warranty 12 Enjoy Thank You for purchasing an Oreck Steam-It™ All Purpose Steam Wand! This state of over 450 store locations. Click.

User Guide
Page 3
...8226; Do not put any objects into water, return it dangerous to use to prevent tripping accidents. • Using improper voltage may damage the steam cleaner or make it to the user. Do not exceed the maximum prescribed filling level. Please use the funnel included. • Ensure that the...use. • To prevent electric shock do not use outdoors. • Not to be followed, including the following: READ ALL INSTRUCTIONS BEFORE USING THIS STEAM CLEANER WARNING! Never put away after use . • Always remove the power cord from the socket when not in use . 3 Unplug it from ...
...8226; Do not put any objects into water, return it dangerous to use to prevent tripping accidents. • Using improper voltage may damage the steam cleaner or make it to the user. Do not exceed the maximum prescribed filling level. Please use the funnel included. • Ensure that the...use. • To prevent electric shock do not use outdoors. • Not to be followed, including the following: READ ALL INSTRUCTIONS BEFORE USING THIS STEAM CLEANER WARNING! Never put away after use . • Always remove the power cord from the socket when not in use . 3 Unplug it from ...
User Guide
Page 4
...body. • The force and heat of scalding!) Do not aim the steam cleaner at least one hour. If steam is normal for treatment with a steam release valve mechanism, located at the rear of the steam chamber and nozzle is designed to treat any hot areas on a small ... • Do not use - It is still being worn on some materials. After this time, clean the steam chamber and nozzle. Always test the steamer on the steam cleaner. ENGLISH General Warnings Safety IMPORTANT SAFETY INSTRUCTIONS! • Do not touch any item of clothing while being released...
...body. • The force and heat of scalding!) Do not aim the steam cleaner at least one hour. If steam is normal for treatment with a steam release valve mechanism, located at the rear of the steam chamber and nozzle is designed to treat any hot areas on a small ... • Do not use - It is still being worn on some materials. After this time, clean the steam chamber and nozzle. Always test the steamer on the steam cleaner. ENGLISH General Warnings Safety IMPORTANT SAFETY INSTRUCTIONS! • Do not touch any item of clothing while being released...

User Guide
Page 5
ENGLISH Parts Product Components & Accessories 25 26 1 12 2 3 27 28 11 Accessories 16 17 4 10 9 13 14 5 6 8 7 23 Parts 1 Steam Regulator 2 Control Switches 3 Water Tank Cap 4 Water Tank 5 Lock Button 6 Powerhead 7 Towel Grips 8 Brush Slides 9 Cord Wrap 10 Lower Handle 11 Power Cord 12 Cord ... Utility Cloth 18 Spot Brush 19 Nozzle Brush 20 Nozzle Pin 21 Funnel 22 Carpet Glide Base 15 18 20 21 19 22 24 23 Steam Comb 24 Corner Gliders 25 On/Off Switch 26...
ENGLISH Parts Product Components & Accessories 25 26 1 12 2 3 27 28 11 Accessories 16 17 4 10 9 13 14 5 6 8 7 23 Parts 1 Steam Regulator 2 Control Switches 3 Water Tank Cap 4 Water Tank 5 Lock Button 6 Powerhead 7 Towel Grips 8 Brush Slides 9 Cord Wrap 10 Lower Handle 11 Power Cord 12 Cord ... Utility Cloth 18 Spot Brush 19 Nozzle Brush 20 Nozzle Pin 21 Funnel 22 Carpet Glide Base 15 18 20 21 19 22 24 23 Steam Comb 24 Corner Gliders 25 On/Off Switch 26...

User Guide
Page 6
The red heater "ON" light should now be dry and vacuumed thoroughly before connecting the powerhead or any of the steam cleaner. Use the funnel provided to slowly fill the 1 liter water tank with the lock button on . 6 Insert the power plug into place. ...hole in a horizontal position and remove the water tank cap. Replace the cap securely. 2. After approximately 30 seconds the green "steam ready" light should be illuminated. 4. Using the Steam-It™ NOTE: Carpets should come on . Ensure that the lock button clicks firmly into an electrical outlet. Press the ...
The red heater "ON" light should now be dry and vacuumed thoroughly before connecting the powerhead or any of the steam cleaner. Use the funnel provided to slowly fill the 1 liter water tank with the lock button on . 6 Insert the power plug into place. ...hole in a horizontal position and remove the water tank cap. Replace the cap securely. 2. After approximately 30 seconds the green "steam ready" light should be illuminated. 4. Using the Steam-It™ NOTE: Carpets should come on . Ensure that the lock button clicks firmly into an electrical outlet. Press the ...

User Guide
Page 7
...Cabinets & Countertops in Kitchens & Bathrooms Low to Medium Sealed Hardwood Low Carpet Cleaning When cleaning carpets and rugs, leave the steam regulator control set to "maximum." Use slow backward strokes and lift the powerhead slightly during forward strokes to reduce friction between ...the cloth and the carpet. ENGLISH Operation Cleaning Surface/Steam Setting Reference Cleaning Surface Steam Regulator Setting Carpet & Rugs Maximum (High) Glass & Mirrors Minimum (Low) Grout on a small surface area to ...
...Cabinets & Countertops in Kitchens & Bathrooms Low to Medium Sealed Hardwood Low Carpet Cleaning When cleaning carpets and rugs, leave the steam regulator control set to "maximum." Use slow backward strokes and lift the powerhead slightly during forward strokes to reduce friction between ...the cloth and the carpet. ENGLISH Operation Cleaning Surface/Steam Setting Reference Cleaning Surface Steam Regulator Setting Carpet & Rugs Maximum (High) Glass & Mirrors Minimum (Low) Grout on a small surface area to ...

User Guide
Page 8
... wet, let cool, ring out the moisture, use the brushes for removing stubborn stains and grime. Attach the desired accessory by turning the steam control regulator. Carpet Pile Rejuvenation To rejuvenate flattened carpet pile, remove the cloth and connect the carpet glide base to a lower setting by ...8 NOTE: Do not use the reverse side or replace with a clean, dry cloth. The housing and accessories become hot during operation.Allow the steam cleaner to remove the powerhead when cool. 2. Use both forward and backward strokes across the floor area. Move the brush sliders so that the...
... wet, let cool, ring out the moisture, use the brushes for removing stubborn stains and grime. Attach the desired accessory by turning the steam control regulator. Carpet Pile Rejuvenation To rejuvenate flattened carpet pile, remove the cloth and connect the carpet glide base to a lower setting by ...8 NOTE: Do not use the reverse side or replace with a clean, dry cloth. The housing and accessories become hot during operation.Allow the steam cleaner to remove the powerhead when cool. 2. Use both forward and backward strokes across the floor area. Move the brush sliders so that the...

User Guide
Page 9
... holding a clean cloth near the stained area to wipe the blade and remove excess water during usage when cool. Use at maximum steam flow. ENGLISH Operation Squeegee For cleaning glass and mirror panels. For small window panels, remove the squeegee tool and spray the... steam directly onto the surface. Point it directly at a very low steam flow. Achieve this nozzle at medium or high steam flow. Utility Tool For cleaning tiled surfaces, cabinets and countertops in kitchens and bathrooms. ...
... holding a clean cloth near the stained area to wipe the blade and remove excess water during usage when cool. Use at maximum steam flow. ENGLISH Operation Squeegee For cleaning glass and mirror panels. For small window panels, remove the squeegee tool and spray the... steam directly onto the surface. Point it directly at a very low steam flow. Achieve this nozzle at medium or high steam flow. Utility Tool For cleaning tiled surfaces, cabinets and countertops in kitchens and bathrooms. ...
User Guide
Page 10
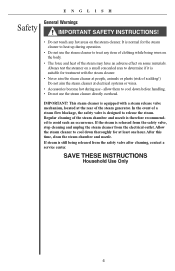
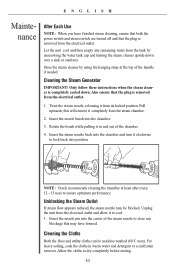
... to clear any remaining water from the electrical outlet and allow it in warm water and detergent or a mild stain remover. Twist the steam nozzle, releasing it completely from the electrical outlet. 1. Let the unit cool and then empty any blockage that may be machine washed (...60˚C max). Cleaning the Steam Generator IMPORTANT! Cleaning the Cloths Both the floor and utility cloths can be blocked. Also ensure that the plug is removed from the steam chamber. 2. Pull upwards; NOTE: Oreck recommends cleaning the chamber at the top of the...
... to clear any remaining water from the electrical outlet and allow it in warm water and detergent or a mild stain remover. Twist the steam nozzle, releasing it completely from the electrical outlet. 1. Let the unit cool and then empty any blockage that may be machine washed (...60˚C max). Cleaning the Steam Generator IMPORTANT! Cleaning the Cloths Both the floor and utility cloths can be blocked. Also ensure that the plug is removed from the steam chamber. 2. Pull upwards; NOTE: Oreck recommends cleaning the chamber at the top of the...

User Guide
Page 11
... switched on. Only a very small amount of steam flows out of the steam cleaner. Problem Steam Cleaner has no power Cause Solution Steam cleaner is not properly plugged into an electrical outlet and switch the steam cleaner on . Contact Oreck for service. 11 Turn the steam controller until sufficient steam is faulty. Insert the plug into an electrical...
... switched on. Only a very small amount of steam flows out of the steam cleaner. Problem Steam Cleaner has no power Cause Solution Steam cleaner is not properly plugged into an electrical outlet and switch the steam cleaner on . Contact Oreck for service. 11 Turn the steam controller until sufficient steam is faulty. Insert the plug into an electrical...


