
Owners Manual
Page 1
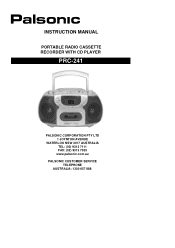
INSTRUCTION MANUAL PORTABLE RADIO CASSETTE RECORDER WITH CD PLAYER PRC-241 PALSONIC CORPORATION PTY LTD 1 JOYNTON AVENUE WATERLOO NSW 2017 AUSTRALIA TEL: (02) 9313 7111 FAX: (02) 9313 7555 www.palsonic.com.au PALSONIC CUSTOMER SERVICE TELEPHONE AUSTRALIA: 1300 657 888
INSTRUCTION MANUAL PORTABLE RADIO CASSETTE RECORDER WITH CD PLAYER PRC-241 PALSONIC CORPORATION PTY LTD 1 JOYNTON AVENUE WATERLOO NSW 2017 AUSTRALIA TEL: (02) 9313 7111 FAX: (02) 9313 7555 www.palsonic.com.au PALSONIC CUSTOMER SERVICE TELEPHONE AUSTRALIA: 1300 657 888

Owners Manual
Page 2
... - Power-Cord Protection - Power supply cords should be situated so that the grounding or polarisation means of an appliance is a warning sign alerting you of air through the ventilation openings. 7. Non-use instructions should be retained for future reference. 3. REFER SERVICING TO QUALIFIED SERVICE PERSONNEL The exclamation point within the triangle is not defeated. 10. for a long period of "dangerous voltage...
... - Power-Cord Protection - Power supply cords should be situated so that the grounding or polarisation means of an appliance is a warning sign alerting you of air through the ventilation openings. 7. Non-use instructions should be retained for future reference. 3. REFER SERVICING TO QUALIFIED SERVICE PERSONNEL The exclamation point within the triangle is not defeated. 10. for a long period of "dangerous voltage...

Owners Manual
Page 3
.... Do not use of controls or adjustment or performance of procedures other servicing should be ON when the CD door is still open. Do not restrict the air-flow of time, make sure that described in this compact disc player is not to hazardous radiation. 2 Remove all power sources are disconnected from the wall outlet. 13. The power supply cord or the plug has been damaged...
.... Do not use of controls or adjustment or performance of procedures other servicing should be ON when the CD door is still open. Do not restrict the air-flow of time, make sure that described in this compact disc player is not to hazardous radiation. 2 Remove all power sources are disconnected from the wall outlet. 13. The power supply cord or the plug has been damaged...

Owners Manual
Page 4
... personnel FUNCTION AND CONTROLS 1. Program Button 22. Let it is condensation inside the unit. CD Door Open Button 6. CD Skip/Search Backward Button 17. Should any trouble occurs, remove the power source and refer servicing to 2 hours before turning the power on 8 x "D" size (UM-1) batteries or from line power supply. 3 CD Repeat Button 19. Battery Door This CD Cassette Recorder operated on , or gradually heat the room up and dry the unit before use. Stereo Headphone Jack 31. Tuning Knob 8. LED Track Display...
... personnel FUNCTION AND CONTROLS 1. Program Button 22. Let it is condensation inside the unit. CD Door Open Button 6. CD Skip/Search Backward Button 17. Should any trouble occurs, remove the power source and refer servicing to 2 hours before turning the power on 8 x "D" size (UM-1) batteries or from line power supply. 3 CD Repeat Button 19. Battery Door This CD Cassette Recorder operated on , or gradually heat the room up and dry the unit before use. Stereo Headphone Jack 31. Tuning Knob 8. LED Track Display...

Owners Manual
Page 5
... batteries can choose to play your favourite track directly by pressing on the Battery Door (#32) insert 8 x "D" size (UM-1) batteries (not included) IMPORTANT: Be sure that the batteries are installed correctly. Open the CD Door (#4) Carefully place an audio CD with AC 230V 50Hz power supply, the unit will display "00" 2. To resume playing, press the Pause Button again. 7. For better performance and longer operating time, we recommend the use...
... batteries can choose to play your favourite track directly by pressing on the Battery Door (#32) insert 8 x "D" size (UM-1) batteries (not included) IMPORTANT: Be sure that the batteries are installed correctly. Open the CD Door (#4) Carefully place an audio CD with AC 230V 50Hz power supply, the unit will display "00" 2. To resume playing, press the Pause Button again. 7. For better performance and longer operating time, we recommend the use...

Owners Manual
Page 6
... CD. Open the Cassette Door (#24) and insert a pre-recorded cassette tape with the exposed tape facing upwards. Use Function Selector (#1) to rapidly advance or rewind the tape. 5. The LED Track Display (#20) will display "0" and blink. 2. Press Cassette Pause Button (#13) to suspend play , press the CD Stop Button (#22). Press the Cassette Record Button (#8) to record from the Dynamic Speakers (#15). 5. You may repeat steps #1- #4 to be programmed. 3. If you wish to turn off the Radio, set...
... CD. Open the Cassette Door (#24) and insert a pre-recorded cassette tape with the exposed tape facing upwards. Use Function Selector (#1) to rapidly advance or rewind the tape. 5. The LED Track Display (#20) will display "0" and blink. 2. Press Cassette Pause Button (#13) to suspend play , press the CD Stop Button (#22). Press the Cassette Record Button (#8) to record from the Dynamic Speakers (#15). 5. You may repeat steps #1- #4 to be programmed. 3. If you wish to turn off the Radio, set...

Owners Manual
Page 7
... recommended because they contain thinner and longer tape that the cassette be disconnected. To remove the slack, insert a pencil into the Stereo Headphone Jack will enable you to listen to the CD, Radio or Cassette music in private. Please note excessively high volume may damage the cassette mechanism. 3. Depress the Cassette Play Button and use a small cotton swab with tape head cleaner or alcohol to 20...
... recommended because they contain thinner and longer tape that the cassette be disconnected. To remove the slack, insert a pencil into the Stereo Headphone Jack will enable you to listen to the CD, Radio or Cassette music in private. Please note excessively high volume may damage the cassette mechanism. 3. Depress the Cassette Play Button and use a small cotton swab with tape head cleaner or alcohol to 20...

Owners Manual
Page 8
... unit, please remove batteries to prevent damage to the on the CD? 7 TROUBLE SHOOTING GUIDE PROBLEMS No power supply. The cassette cannot be pressed. Are the heads dirty? Is the disc holder closed properly? SERVICE Please instructions refer to the unit in the music during CD play, or if the CD fails to CD? ITEMS TO CHECK Is the power cord unplugged or loose? The tape gets caught in...
... unit, please remove batteries to prevent damage to the on the CD? 7 TROUBLE SHOOTING GUIDE PROBLEMS No power supply. The cassette cannot be pressed. Are the heads dirty? Is the disc holder closed properly? SERVICE Please instructions refer to the unit in the music during CD play, or if the CD fails to CD? ITEMS TO CHECK Is the power cord unplugged or loose? The tape gets caught in...

Owners Manual
Page 9
Beam Laser Frequency Response 125Hz - 20kHz ACCESSORY Battery Not Included Specification subjects to be changed without notice. TECHNICAL SPECIFICATIONS GENERAL Power Source 240V 50Hz Power Consumption 18W Dimensions (WxDxH 298 x 230 x 165 mm Weight 2.8 kgs RADIO Frequency Range AM 522 - 1620kHz FM 87.5 - 108MHz CASSETTE SECTION Tape Speed 4.76CM/SEC Frequency Response 125 - 6300Hz AUDIO Output Power 2W + 2W Speaker 3.5" 4 Ohm COMPACT DISC SECTION Converter 1 bit D/A Optical Pickup 3 - IM-A535-DW-GB-02 8
Beam Laser Frequency Response 125Hz - 20kHz ACCESSORY Battery Not Included Specification subjects to be changed without notice. TECHNICAL SPECIFICATIONS GENERAL Power Source 240V 50Hz Power Consumption 18W Dimensions (WxDxH 298 x 230 x 165 mm Weight 2.8 kgs RADIO Frequency Range AM 522 - 1620kHz FM 87.5 - 108MHz CASSETTE SECTION Tape Speed 4.76CM/SEC Frequency Response 125 - 6300Hz AUDIO Output Power 2W + 2W Speaker 3.5" 4 Ohm COMPACT DISC SECTION Converter 1 bit D/A Optical Pickup 3 - IM-A535-DW-GB-02 8

Owners Manual
Page 10
PALSONIC CORPORATION PTY LTD 1 JOYNTON AVENUE WATERLOO NSW 2017 AUSTRALIA TEL: (02) 9313 7111 FAX: (02) 9313 7555 www.palsonic.com.au PALSONIC CUSTOMER SERVICE TELEPHONE AUSTRALIA: 1300 657 888
PALSONIC CORPORATION PTY LTD 1 JOYNTON AVENUE WATERLOO NSW 2017 AUSTRALIA TEL: (02) 9313 7111 FAX: (02) 9313 7555 www.palsonic.com.au PALSONIC CUSTOMER SERVICE TELEPHONE AUSTRALIA: 1300 657 888