

DMPBD77 User Guide
Page 2
... IN CANADA. NO USER-SERVICEABLE PARTS INSIDE. Declaration of Conformity Trade Name: Panasonic Model No.: DMP-BD871 DMP-BD87 DMP-BD77 Responsible Party: Panasonic Corporation of North America One Panasonic Way, Secaucus, NJ 07094 Support Contact: Panasonic Consumer Marketing Company of the FCC Rules. These limits are provided for your ...in any way, such as radiators, heat registers, stoves, or other . Operation is encouraged to try to correct the interference by turning the equipment off and on, the user is subject to rain or moisture, does not operate normally, or has been dropped. ...
... IN CANADA. NO USER-SERVICEABLE PARTS INSIDE. Declaration of Conformity Trade Name: Panasonic Model No.: DMP-BD871 DMP-BD87 DMP-BD77 Responsible Party: Panasonic Corporation of North America One Panasonic Way, Secaucus, NJ 07094 Support Contact: Panasonic Consumer Marketing Company of the FCC Rules. These limits are provided for your ...in any way, such as radiators, heat registers, stoves, or other . Operation is encouraged to try to correct the interference by turning the equipment off and on, the user is subject to rain or moisture, does not operate normally, or has been dropped. ...

DMPBD77 User Guide
Page 7
... versa. Getting started Control reference guide 11 1 2 12 3 13 14 4 15 5 6 7 16 17 18 8 19 9 20 10 1 Turn the unit on and off 2 TV operation buttons You can operate the Panasonic TV through the unit's remote control (Depending on the TV these buttons may not work.). [Í TV...] : Turn the television on and off [AV] : Switch the input select [i j VOL] : Adjust the volume 3 Select title numbers, etc./Enter ...
... versa. Getting started Control reference guide 11 1 2 12 3 13 14 4 15 5 6 7 16 17 18 8 19 9 20 10 1 Turn the unit on and off 2 TV operation buttons You can operate the Panasonic TV through the unit's remote control (Depending on the TV these buttons may not work.). [Í TV...] : Turn the television on and off [AV] : Switch the input select [i j VOL] : Adjust the volume 3 Select title numbers, etc./Enter ...
DMPBD77 User Guide
Page 10
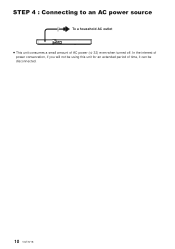
In the interest of power conservation, if you will not be using this unit for an extended period of AC power (> 32) even when turned off. STEP 4 : Connecting to an AC power source To a household AC outlet ≥ This unit consumes a small amount of time, it can be disconnected. 10 VQT3V18
In the interest of power conservation, if you will not be using this unit for an extended period of AC power (> 32) even when turned off. STEP 4 : Connecting to an AC power source To a household AC outlet ≥ This unit consumes a small amount of time, it can be disconnected. 10 VQT3V18

DMPBD77 User Guide
Page 11
... display, consult your new player for the first time and pressing [Í], a screen for the basic settings will appear. Wireless Settings Select a connection method. Preparation Turn on the television and select the appropriate video input on -screen instructions to the operating instructions of your connection settings. Current setting Wired OK RETURN...
... display, consult your new player for the first time and pressing [Í], a screen for the basic settings will appear. Wireless Settings Select a connection method. Preparation Turn on the television and select the appropriate video input on -screen instructions to the operating instructions of your connection settings. Current setting Wired OK RETURN...

DMPBD77 User Guide
Page 14
... inserting a media item, ensure that it is only for the connected equipment. ≥ [BD77] : Use the front USB port when you connect a Panasonic product with both data files (MP3, JPEG, MKV, etc.) and Video (BDAV and AVCHD). (> 26) 14 VQT3V18 Inserting Playback or removing media HOME menu...set "Mixed Data Disc Option" when using a disc with a USB connection cable, the setup screen may be displayed on the connected equipment. Preparation Turn on the television and select the appropriate video input on the television. 1 Press [Í] to select the item. ≥ If there are recorded,...
... inserting a media item, ensure that it is only for the connected equipment. ≥ [BD77] : Use the front USB port when you connect a Panasonic product with both data files (MP3, JPEG, MKV, etc.) and Video (BDAV and AVCHD). (> 26) 14 VQT3V18 Inserting Playback or removing media HOME menu...set "Mixed Data Disc Option" when using a disc with a USB connection cable, the setup screen may be displayed on the connected equipment. Preparation Turn on the television and select the appropriate video input on the television. 1 Press [Í] to select the item. ≥ If there are recorded,...

DMPBD77 User Guide
Page 16
... back AVCHD and MPEG2 video which have been dragged and dropped, copied and pasted to the media. ≥ To save on electricity, the power is turned off automatically if there is opened or you press [∫STOP] several times to display "StOP" on the unit's display. ≥ On BD-Video discs...
... back AVCHD and MPEG2 video which have been dragged and dropped, copied and pasted to the media. ≥ To save on electricity, the power is turned off automatically if there is opened or you press [∫STOP] several times to display "StOP" on the unit's display. ≥ On BD-Video discs...

DMPBD77 User Guide
Page 20
...). (The default setting is off . Additionally when the TV is "On".) 2 Set the "HDMI CEC" operations on the connected equipment (e.g., TV). 3 Turn on all HDMI CEC devices. Automatic input switching Power on link When play starts on all "HDMI CEC" compatible equipment and select this unit's input... channel on . 20 VQT3V18 You can use this function by connecting the equipment with "HDMI CEC", including this unit will automatically turn on the connected TV so that the "HDMI CEC" function works properly. Also when the connection or settings are changed, repeat this procedure...
...). (The default setting is off . Additionally when the TV is "On".) 2 Set the "HDMI CEC" operations on the connected equipment (e.g., TV). 3 Turn on all HDMI CEC devices. Automatic input switching Power on link When play starts on all "HDMI CEC" compatible equipment and select this unit's input... channel on . 20 VQT3V18 You can use this function by connecting the equipment with "HDMI CEC", including this unit will automatically turn on the connected TV so that the "HDMI CEC" function works properly. Also when the connection or settings are changed, repeat this procedure...

DMPBD77 User Guide
Page 26
...Auto" is selected, the display is set to bright and only dimmed during playback. ∫ Remote Control Code Change the remote control code if other Panasonic products react to this remote control. ∫ Firmware Update (> 13) Press [OK] to show the following settings: ¾ Automatic Update Check When... this equipment remains connected to the Internet, it will check for the latest firmware version when it is turned on and you can update it if necessary. ¾ Update Now You can update the firmware manually if a firmware update is available. &#...
...Auto" is selected, the display is set to bright and only dimmed during playback. ∫ Remote Control Code Change the remote control code if other Panasonic products react to this remote control. ∫ Firmware Update (> 13) Press [OK] to show the following settings: ¾ Automatic Update Check When... this equipment remains connected to the Internet, it will check for the latest firmware version when it is turned on and you can update it if necessary. ¾ Update Now You can update the firmware manually if a firmware update is available. &#...

DMPBD77 User Guide
Page 28
...a USB hub - Wait until "04PrG" is on, press and hold [OK] on the remote control or [< OPEN/CLOSE] on , closed captions recorded on discs. ¾ Turn off and on again. ¾ USB devices may not be displayed. Reset the setting as follows: 1 While the unit is displayed on the unit's display... by this unit, use the USB cable that "HDMI Resolution" in "HDMI Resolution". "00rEt" is displayed). If it still does not recognize the connection, turn to this unit when connected using the following : - a USB extension cable other than 5 seconds. - Set the item again. (> 23) -
...a USB hub - Wait until "04PrG" is on, press and hold [OK] on the remote control or [< OPEN/CLOSE] on , closed captions recorded on discs. ¾ Turn off and on again. ¾ USB devices may not be displayed. Reset the setting as follows: 1 While the unit is displayed on the unit's display... by this unit, use the USB cable that "HDMI Resolution" in "HDMI Resolution". "00rEt" is displayed). If it still does not recognize the connection, turn to this unit when connected using the following : - a USB extension cable other than 5 seconds. - Set the item again. (> 23) -

DMPBD77 User Guide
Page 30
... the code on the remote control. Messages The following . 1 Disconnect the plug from the AC outlet, wait a few seconds, then reconnect it. 2 Press [Í/I] to turn the power on.
... the code on the remote control. Messages The following . 1 Disconnect the plug from the AC outlet, wait a few seconds, then reconnect it. 2 Press [Í/I] to turn the power on.


