
Operating Instructions
Page 1
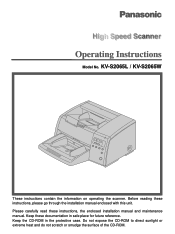
Keep the CD-ROM in safe place for future reference. Do not expose the CD-ROM to direct sunlight or extreme heat and do not scratch or smudge the surface of the CD-ROM. Model No. Before reading these instructions, the enclosed installation manual and maintenance manual. Please carefully read these instructions, please go through the installation manual enclosed with this unit. KV-S2065L / KV-S2065W These instructions contain the information on operating the scanner. Keep these documentation in the protective case.
Keep the CD-ROM in safe place for future reference. Do not expose the CD-ROM to direct sunlight or extreme heat and do not scratch or smudge the surface of the CD-ROM. Model No. Before reading these instructions, the enclosed installation manual and maintenance manual. Please carefully read these instructions, please go through the installation manual enclosed with this unit. KV-S2065L / KV-S2065W These instructions contain the information on operating the scanner. Keep these documentation in the protective case.

Operating Instructions
Page 2
.... Panasonic developed Panasonic Image Enhancement Technology to improve the quality of ficial or private documents, and the like to contribute to select dropout color quite easily. • With these Operating Instructions is recommended.) Windows® 95 / Windows® 98 / Windows NT® / Windows® 2000 / Windows® Me SCSI board Adaptec Brand AHA-1540 / 2930 / 2940 / 19160 / 29160 Series are recommended. § The scanning...
.... Panasonic developed Panasonic Image Enhancement Technology to improve the quality of ficial or private documents, and the like to contribute to select dropout color quite easily. • With these Operating Instructions is recommended.) Windows® 95 / Windows® 98 / Windows NT® / Windows® 2000 / Windows® Me SCSI board Adaptec Brand AHA-1540 / 2930 / 2940 / 19160 / 29160 Series are recommended. § The scanning...

Operating Instructions
Page 3
... ADF / manual feed selector 33 Others 34 • How to use the control sheet 34 Care and Maintenance Clearing Paper Jams 35 • Removing paper jams from the scanner 35 • Removing paper jams from the exit path 35 Cleaning the Unit 36 • Outside of the scanner 36 • Inside the scanner 36 • Cleaning the rollers 36 • Cleaning the scanning section glass, sensor rollers, document sensors and double feed detection sensors 38 • Roller cleaning paper 40 Replacing Consumables 41 Appendix Repacking Instructions 46 Specifications 47 Troubleshooting...
... ADF / manual feed selector 33 Others 34 • How to use the control sheet 34 Care and Maintenance Clearing Paper Jams 35 • Removing paper jams from the scanner 35 • Removing paper jams from the exit path 35 Cleaning the Unit 36 • Outside of the scanner 36 • Inside the scanner 36 • Cleaning the rollers 36 • Cleaning the scanning section glass, sensor rollers, document sensors and double feed detection sensors 38 • Roller cleaning paper 40 Replacing Consumables 41 Appendix Repacking Instructions 46 Specifications 47 Troubleshooting...

Operating Instructions
Page 10
... used for service. Do not insert your warranty. scanner. Accidental spillage of Do not leave the power cord plugged into the unit may cause severe damage. if the unit is a lot of liquid into the AC outlet smoke, dust, chemical fumes or vibration. Do not place any liquids near the unit. - Grip (On both side grips. Do not place books, paper...
... used for service. Do not insert your warranty. scanner. Accidental spillage of Do not leave the power cord plugged into the unit may cause severe damage. if the unit is a lot of liquid into the AC outlet smoke, dust, chemical fumes or vibration. Do not place any liquids near the unit. - Grip (On both side grips. Do not place books, paper...

Operating Instructions
Page 12
... indicator lights. ADF / manual feed selector To prevent double feeding, adjust the selector to feed the scanning document properly. (Refer to page 33.) Paper path selector Used to change to display the scanning conditions, etc. Connectors Used to connect the scanner unit to page 33.) AC inlet Power cord Fan exhaust vent 12 Exit document guide Power indicator When the power is called a preimprinter. When an error occurs, the indicator will change the scanning document's path direction (front side/back side). (Refer...
... indicator lights. ADF / manual feed selector To prevent double feeding, adjust the selector to feed the scanning document properly. (Refer to page 33.) Paper path selector Used to change to display the scanning conditions, etc. Connectors Used to connect the scanner unit to page 33.) AC inlet Power cord Fan exhaust vent 12 Exit document guide Power indicator When the power is called a preimprinter. When an error occurs, the indicator will change the scanning document's path direction (front side/back side). (Refer...

Operating Instructions
Page 15
... Panel Instructions ∫Setting the scanner The following parameters can be supported by the scanner. Scan menu No. If the application software provides these features, it will be customized using the scanner's various setting modes. Color drop Color selection for noise reduction when scanning a document. 12 Black line removal BLK Line Remove Selection to choose to remove the black lines appearing at the top or bottom or at the left and right edges of the Double Feed...
... Panel Instructions ∫Setting the scanner The following parameters can be supported by the scanner. Scan menu No. If the application software provides these features, it will be customized using the scanner's various setting modes. Color drop Color selection for noise reduction when scanning a document. 12 Black line removal BLK Line Remove Selection to choose to remove the black lines appearing at the top or bottom or at the left and right edges of the Double Feed...

Operating Instructions
Page 16
... memory where the conditions are saved into the memory. (2 memory settings) 23 Load Setting Loads the memory where the scanning conditions have already been saved. Save Setting Saves the scanning conditions into . Item 17 Feed speed Save settings (Select memory) 18 Save scanning settings (Execution) 19 Load scanning setting LCD display Contents Page Feed Speed Selection for an increase in the default number. 24 Clear the user counter User Counter Clears the counter which was set counter (user counter) on the LCD Disp. Display Panel Instructions No. Counter menu...
... memory where the conditions are saved into the memory. (2 memory settings) 23 Load Setting Loads the memory where the scanning conditions have already been saved. Save Setting Saves the scanning conditions into . Item 17 Feed speed Save settings (Select memory) 18 Save scanning settings (Execution) 19 Load scanning setting LCD display Contents Page Feed Speed Selection for an increase in the default number. 24 Clear the user counter User Counter Clears the counter which was set counter (user counter) on the LCD Disp. Display Panel Instructions No. Counter menu...

Operating Instructions
Page 18
... until sleep mode turns ON. 18 Clear the "Clean Roller Warning ≤≤%" display. 07 Checking the roller modules replacement Replace Roll. Clear the "Replace Roll. "Disable" : If between devices. 05 Setting the transfer rate Transfer Rate • Changes the maximum value of the synchronous transfer rate of the mechanical control, pre-imprinter or post-imprinter. See "Cleaning the Unit" on the host computer scanner application you are using. Warning...
... until sleep mode turns ON. 18 Clear the "Clean Roller Warning ≤≤%" display. 07 Checking the roller modules replacement Replace Roll. Clear the "Replace Roll. "Disable" : If between devices. 05 Setting the transfer rate Transfer Rate • Changes the maximum value of the synchronous transfer rate of the mechanical control, pre-imprinter or post-imprinter. See "Cleaning the Unit" on the host computer scanner application you are using. Warning...

Operating Instructions
Page 20
... None Low Medium High Host 04 Front side contrast 04 . F . F .Br i gh t ness D 03 Front side image emphasis 0 3 . F . Display Panel Instructions ¥ Actual settings Scan setting menu (by pressing the SCAN key) Number, mode and default display • Pressing the 3 key will change to the next mode. • Pressing the 4 key will change to another value. 01 Front side dropout color 01 . Emp h a s i s Ho s t D4 D3 D2 D1...
... None Low Medium High Host 04 Front side contrast 04 . F . F .Br i gh t ness D 03 Front side image emphasis 0 3 . F . Display Panel Instructions ¥ Actual settings Scan setting menu (by pressing the SCAN key) Number, mode and default display • Pressing the 3 key will change to the next mode. • Pressing the 4 key will change to another value. 01 Front side dropout color 01 . Emp h a s i s Ho s t D4 D3 D2 D1...

Operating Instructions
Page 22
... double feed detector's sensitivity will continue scanning. Display Panel Instructions 12 Black line removal 12 . Scann i ng Mo d e Ho s t Host Fit to Page Actual Fit to Page : Scanner shrinks image to "Detect", the scanner will sound a buzzer and the power indicator will still ring. • When scanning very important documents, confirm if the number of scanned pages displayed on the LCD matches the number of actual pages. 15 Setting the "Double Feed...
... double feed detector's sensitivity will continue scanning. Display Panel Instructions 12 Black line removal 12 . Scann i ng Mo d e Ho s t Host Fit to Page Actual Fit to Page : Scanner shrinks image to "Detect", the scanner will sound a buzzer and the power indicator will still ring. • When scanning very important documents, confirm if the number of scanned pages displayed on the LCD matches the number of actual pages. 15 Setting the "Double Feed...

Operating Instructions
Page 27
... to be used while the unit's power is off, be absolutely sure to install an external terminator which is located to terminal position on SCSI bus, set to "Enable". • Setting the terminator will be activated after turning the power off and turning it on . Display Panel Instructions Others setting menu (by pressing the OTHERS key) Number, mode and default display • Pressing the 3 key will change to the...
... to be used while the unit's power is off, be absolutely sure to install an external terminator which is located to terminal position on SCSI bus, set to "Enable". • Setting the terminator will be activated after turning the power off and turning it on . Display Panel Instructions Others setting menu (by pressing the OTHERS key) Number, mode and default display • Pressing the 3 key will change to the...

Operating Instructions
Page 28
.... 28 Rep l a c e Ro l l . Warning ≤≤%" displayed is displayed when the roller modules need to comply with a programmable power save feature (sleep mode) turned on the scanner or issue the scan instruction from the sleep mode, press any key on to be displayed. 07 Checking the roller modules replacement warning 07 . This is cleared. S l e e p Mo d e A f t e r 1 5m i n . This is provided with ENERGY STAR® requirement. Rep...
.... 28 Rep l a c e Ro l l . Warning ≤≤%" displayed is displayed when the roller modules need to comply with a programmable power save feature (sleep mode) turned on the scanner or issue the scan instruction from the sleep mode, press any key on to be displayed. 07 Checking the roller modules replacement warning 07 . This is cleared. S l e e p Mo d e A f t e r 1 5m i n . This is provided with ENERGY STAR® requirement. Rep...

Operating Instructions
Page 33
... double feed alarm beeps frequently, change the ADF / manual feed selector. 4 ADF / manual feed selector The ADF / manual feed selector is located on the left side of the scanner. 33 When scanning with smooth sided paper or a paper jam occurs with normal paper, set the paper path selector to "3". When a jam occurs at the paper feed component, set the ADF / manual feed selector to "4". • The ADF / manual feed selector must be set in NCR paper, set the ADF / manual feed selector to straight. When double feeding occurs frequently or scanning a document with...
... double feed alarm beeps frequently, change the ADF / manual feed selector. 4 ADF / manual feed selector The ADF / manual feed selector is located on the left side of the scanner. 33 When scanning with smooth sided paper or a paper jam occurs with normal paper, set the paper path selector to "3". When a jam occurs at the paper feed component, set the ADF / manual feed selector to "4". • The ADF / manual feed selector must be set in NCR paper, set the ADF / manual feed selector to straight. When double feeding occurs frequently or scanning a document with...

Operating Instructions
Page 36
... paper jamming or double feeding occurs frequently. • Clean the scanning section glass and sensor rollers when black or white lines appear on the scanned images. • If the documents you are scanning are dirty, then the scanner parts will become dirty as well. Power switch 3 Remove dirt and dust from the fan exhaust vent with a brush. : off position ∫Inside the scanner • Clean the unit at least once a month. 1 Turn the power off . 2 Use...
... paper jamming or double feeding occurs frequently. • Clean the scanning section glass and sensor rollers when black or white lines appear on the scanned images. • If the documents you are scanning are dirty, then the scanner parts will become dirty as well. Power switch 3 Remove dirt and dust from the fan exhaust vent with a brush. : off position ∫Inside the scanner • Clean the unit at least once a month. 1 Turn the power off . 2 Use...

Operating Instructions
Page 39
.... (Refer to page 40 for re-attachment.) Pointer (Black) Double feed detection sensors Document sensor Scanning section glass Sensor rollers Document sensors Document sensor Document sensor Left side view Paper detection sensor ¥ How to clean the document sensor, double feed detection sensor or paper detection sensor 4 Close the front door. (See the diagram in the back of the unit. Document sensor, double feed detection sensor or paper detection sensor Blower 39 Remove the brush and blow off the dirt through the document sensor hole, double feed detection sensor hole or...
.... (Refer to page 40 for re-attachment.) Pointer (Black) Double feed detection sensors Document sensor Scanning section glass Sensor rollers Document sensors Document sensor Document sensor Left side view Paper detection sensor ¥ How to clean the document sensor, double feed detection sensor or paper detection sensor 4 Close the front door. (See the diagram in the back of the unit. Document sensor, double feed detection sensor or paper detection sensor Blower 39 Remove the brush and blow off the dirt through the document sensor hole, double feed detection sensor hole or...

Operating Instructions
Page 41
.... : off and unplug the power cord. Power switch 2 Use your finger on the LCD, replace the paper feed roller module and retard roller module at the same time. 1 Turn the power off position Front door Front door release (I id h f d ) 3 Place your hand to remove the paper feed roller block from the magnet. (1) Push down the green levers and remove the paper feed roller module from the scanner by a magnet. •...
.... : off and unplug the power cord. Power switch 2 Use your finger on the LCD, replace the paper feed roller module and retard roller module at the same time. 1 Turn the power off position Front door Front door release (I id h f d ) 3 Place your hand to remove the paper feed roller block from the magnet. (1) Push down the green levers and remove the paper feed roller module from the scanner by a magnet. •...

Operating Instructions
Page 46
... instructions. S. Pre-imprinter door Screw Sheet Fixture Driver software (CD-ROM 1 piece) Operating Instructions Blower Joint Power cord ≥Installation manual ≥Maintenance manual ≥Roller cleaning paper (3 pieces) 46 A. Materials Required : • Original Scanner Carton & Packing Materials • Shipping Tape and Scissors 1 Disconnect your scanner from your scanner, please follow these are available from the electrical outlet and the interface cable. 2 Fold the plastic part of the original packing materials. Slide...
... instructions. S. Pre-imprinter door Screw Sheet Fixture Driver software (CD-ROM 1 piece) Operating Instructions Blower Joint Power cord ≥Installation manual ≥Maintenance manual ≥Roller cleaning paper (3 pieces) 46 A. Materials Required : • Original Scanner Carton & Packing Materials • Shipping Tape and Scissors 1 Disconnect your scanner from your scanner, please follow these are available from the electrical outlet and the interface cable. 2 Fold the plastic part of the original packing materials. Slide...

Operating Instructions
Page 49
... to the next page when an error is displayed. (See pages 50 and 51.) Clean all of the rollers. (See page 36 through 38.) Adjust the ADF / manual feed selector. (See page 33.) Make a copy of the document on paper of the specified size [between 48a70mm (1.9a2.75 in . Troubleshooting If a problem occurs while the unit is being used, first check the following items. If the unit still malfunctions, turn the computer...
... to the next page when an error is displayed. (See pages 50 and 51.) Clean all of the rollers. (See page 36 through 38.) Adjust the ADF / manual feed selector. (See page 33.) Make a copy of the document on paper of the specified size [between 48a70mm (1.9a2.75 in . Troubleshooting If a problem occurs while the unit is being used, first check the following items. If the unit still malfunctions, turn the computer...

Operating Instructions
Page 50
... remaining documents. U23 Doub l e Feed !!!!!!!! Clean a dust using the included blower. (See page 39.) Open the front door and remove the jammed paper. (See page 35.) U30 F r on t Doo r The front door is jammed. Feed Oc c u r ed U1 1 J AM !!!!!!!! The document is jammed. Multiple sheets were fed into the unit. The document is jammed. Dust adheres to be replaced. U1 2 J AM !!!!!!!! The document is jammed. Replace the paper feed roller module and retard roller module. (See pages 41...
... remaining documents. U23 Doub l e Feed !!!!!!!! Clean a dust using the included blower. (See page 39.) Open the front door and remove the jammed paper. (See page 35.) U30 F r on t Doo r The front door is jammed. Feed Oc c u r ed U1 1 J AM !!!!!!!! The document is jammed. Multiple sheets were fed into the unit. The document is jammed. Dust adheres to be replaced. U1 2 J AM !!!!!!!! The document is jammed. Replace the paper feed roller module and retard roller module. (See pages 41...

Operating Instructions
Page 52
... Black line removal 15, 22 Blower 39 C Carbon or carbonless paper 32 Checking the roller cleaning warning . . 18, 28 Checking the roller modules replacement warning 18, 28 Checking the version 18, 27 Clear the user counter 16, 24 Clearing the roller cleaning warning . . 18, 28 Clearing the roller modules replacement warning 18, 28 Connector 12 Conveyor 43 COUNTER 13, 19 Counter setting menu 24 D Default 16, 23 Detect 22 Display panel 12, 13 Document guide 12, 30 Document sensor 39 Double feed...
... Black line removal 15, 22 Blower 39 C Carbon or carbonless paper 32 Checking the roller cleaning warning . . 18, 28 Checking the roller modules replacement warning 18, 28 Checking the version 18, 27 Clear the user counter 16, 24 Clearing the roller cleaning warning . . 18, 28 Clearing the roller modules replacement warning 18, 28 Connector 12 Conveyor 43 COUNTER 13, 19 Counter setting menu 24 D Default 16, 23 Detect 22 Display panel 12, 13 Document guide 12, 30 Document sensor 39 Double feed...


