
Operating Instructions
Page 1
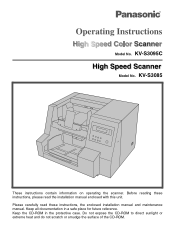
Model No. KV-S3085 These instructions contain information on operating the scanner. Before reading these instructions, the enclosed installation manual and maintenance manual. Keep all documentation in the protective case. Keep the CD-ROM in a safe place for future reference. Please carefully read these instructions, please read the installation manual enclosed with this unit. Do not expose the CD-ROM to direct sunlight or extreme heat and do not scratch or smudge the surface of the CD-ROM. KV-S3095C Model No.
Model No. KV-S3085 These instructions contain information on operating the scanner. Before reading these instructions, the enclosed installation manual and maintenance manual. Keep all documentation in the protective case. Keep the CD-ROM in a safe place for future reference. Please carefully read these instructions, please read the installation manual enclosed with this unit. Do not expose the CD-ROM to direct sunlight or extreme heat and do not scratch or smudge the surface of the CD-ROM. KV-S3095C Model No.

Operating Instructions
Page 2
..., Panasonic has determined that the SCSI board vender provides. § Use USB 2.0 interface because scanning speed of USB 1.1 interface is slow. § If you connect the scanner to a USB hub, it is subject to change without notice. 2 A large size color image may not be scanned in 600 dpi on Windows 98 or Windows Me. The information given in these Operating Instructions is not guaranteed to work . § When using the scanner, the...
..., Panasonic has determined that the SCSI board vender provides. § Use USB 2.0 interface because scanning speed of USB 1.1 interface is slow. § If you connect the scanner to a USB hub, it is subject to change without notice. 2 A large size color image may not be scanned in 600 dpi on Windows 98 or Windows Me. The information given in these Operating Instructions is not guaranteed to work . § When using the scanner, the...

Operating Instructions
Page 3
... ADF / manual feed selector 32 Others 33 ≥ How to use the control sheet and separation sheet 33 Changing the Reference Plate Setting 34 Care and Maintenance Clearing Paper Jams 36 ≥ Removing paper jams from the feed part 36 ≥ Removing paper jams from exit path 36 ≥ If the paper cannot be removed by pulling it forward 36 Cleaning the Unit 37 ≥ Outside of the scanner 37 ≥ Inside the scanner 37 ≥ Cleaning the rollers...
... ADF / manual feed selector 32 Others 33 ≥ How to use the control sheet and separation sheet 33 Changing the Reference Plate Setting 34 Care and Maintenance Clearing Paper Jams 36 ≥ Removing paper jams from the feed part 36 ≥ Removing paper jams from exit path 36 ≥ If the paper cannot be removed by pulling it forward 36 Cleaning the Unit 37 ≥ Outside of the scanner 37 ≥ Inside the scanner 37 ≥ Cleaning the rollers...

Operating Instructions
Page 4
...). • Only use only shielded interface cable and the provided power supply cord. The relevant national installation and/or equipment regulations shall be harmful to IEC 60227 (designation H05VV-F 3G 1.0 mm2). Roller cleaning paper precautions Before using the roller cleaning paper, please read these instructions for a Class A digital device, pursuant to part 15 of this equipment in a residential area is operated in a place with the instruction manual, may be considered...
...). • Only use only shielded interface cable and the provided power supply cord. The relevant national installation and/or equipment regulations shall be harmful to IEC 60227 (designation H05VV-F 3G 1.0 mm2). Roller cleaning paper precautions Before using the roller cleaning paper, please read these instructions for a Class A digital device, pursuant to part 15 of this equipment in a residential area is operated in a place with the instruction manual, may be considered...

Operating Instructions
Page 10
... postimprinter unit. ADF selector To prevent double feeding, adjust the lever to feed the scanning documents properly. (Refer to page 32.) Pointer lever Used to change the scanning documents path direction (front exit, straight pass). (Refer to display the scanning conditions, etc. AC inlet Fan exhaust vent Power cord 10 Exit tray Exit document guides Display panel When performing each setting, used to page 32.) Back door release Back door Open this door if a paper jam...
... postimprinter unit. ADF selector To prevent double feeding, adjust the lever to feed the scanning documents properly. (Refer to page 32.) Pointer lever Used to change the scanning documents path direction (front exit, straight pass). (Refer to display the scanning conditions, etc. AC inlet Fan exhaust vent Power cord 10 Exit tray Exit document guides Display panel When performing each setting, used to page 32.) Back door release Back door Open this door if a paper jam...

Operating Instructions
Page 14
... the Double Feed Detector. 20 17 Feed speed Feed Speed Chooses the feed speed when a document is reset before scanning. 22 02 Setting the user counter extender User Counter Selection for an increase in the default number. 22 Clear the user counter User Counter Clears the counter which is being scanned. 21 Save scanning settings (Select 18 memory) Selects the memory location where the conditions Save Setting are saved into. 21 Save scanning settings (Execution) Save Setting Saves the scanning conditions into the memory. (2 memory settings) 21 19 Load scanning setting...
... the Double Feed Detector. 20 17 Feed speed Feed Speed Chooses the feed speed when a document is reset before scanning. 22 02 Setting the user counter extender User Counter Selection for an increase in the default number. 22 Clear the user counter User Counter Clears the counter which is being scanned. 21 Save scanning settings (Select 18 memory) Selects the memory location where the conditions Save Setting are saved into. 21 Save scanning settings (Execution) Save Setting Saves the scanning conditions into the memory. (2 memory settings) 21 19 Load scanning setting...

Operating Instructions
Page 16
... page 43. When there is an error, 5 short beeps will be heard. 25 When scanning is time to emulate other 26 Panasonic scanners. Checking the roller cleaning warning 06 Clearing the roller cleaning warning Clean Roller Warning The alarm tells you are using. See "Cleaning the 25 Unit" on or off. Sets the time until sleep mode turns ON. 26 16 Display Panel Instructions Others menu No. Clearing the roller modules replacement warning Replace Roller Warning Clear Clear the "Replace...
... page 43. When there is an error, 5 short beeps will be heard. 25 When scanning is time to emulate other 26 Panasonic scanners. Checking the roller cleaning warning 06 Clearing the roller cleaning warning Clean Roller Warning The alarm tells you are using. See "Cleaning the 25 Unit" on or off. Sets the time until sleep mode turns ON. 26 16 Display Panel Instructions Others menu No. Clearing the roller modules replacement warning Replace Roller Warning Clear Clear the "Replace...

Operating Instructions
Page 19
...;5 W6✕6 B1a1TB6a6: Scanner reduces a black dot. "L" means light. Host Disable Enable • This setting is valid only when the white roller kit is displayed, pressing the 1 key or the 2 key will change the display to "Norm". • "D" means dark. Actual: Scanner scans at 100% actual page size. B . B . B . Scann i ng Mo d e Ho s t Host Fit to Page Actual Fit to Page: Scanner shrinks image to "Norm". •...
...;5 W6✕6 B1a1TB6a6: Scanner reduces a black dot. "L" means light. Host Disable Enable • This setting is valid only when the white roller kit is displayed, pressing the 1 key or the 2 key will change the display to "Norm". • "D" means dark. Actual: Scanner scans at 100% actual page size. B . B . B . Scann i ng Mo d e Ho s t Host Fit to Page Actual Fit to Page: Scanner shrinks image to "Norm". •...

Operating Instructions
Page 23
Display Panel Instructions Imprinter setting menu (by pressing the 1 key or the 2 key. Contents • Pressing the 1 key or the 2 key will be done according to the previous mode. By pressing the 1 key or the 2 key, you can specify the line where printing starts from 10.0 mm. Top of the paper Top of the document. Host Count Host: Printing will change to the host...
Display Panel Instructions Imprinter setting menu (by pressing the 1 key or the 2 key. Contents • Pressing the 1 key or the 2 key will be done according to the previous mode. By pressing the 1 key or the 2 key, you can specify the line where printing starts from 10.0 mm. Top of the paper Top of the document. Host Count Host: Printing will change to the host...

Operating Instructions
Page 26
... issue the scan instruction from the sleep mode, press any key on to be cleared. T After 60 min. Rep l a c e Ro l l e r Wa r n i n g C l e a r = < > When pressing the 1 key and the 2 key simultaneously, "Replace Roll. To conserve energy and operating cost, this scanner is idle for complete compatibility. 09 Setting the sleep mode 0 9 . Warning ≤≤%" is cleared. 100%: This is displayed when "Replace Roll. Display Panel Instructions 07 Checking...
... issue the scan instruction from the sleep mode, press any key on to be cleared. T After 60 min. Rep l a c e Ro l l e r Wa r n i n g C l e a r = < > When pressing the 1 key and the 2 key simultaneously, "Replace Roll. To conserve energy and operating cost, this scanner is idle for complete compatibility. 09 Setting the sleep mode 0 9 . Warning ≤≤%" is cleared. 100%: This is displayed when "Replace Roll. Display Panel Instructions 07 Checking...

Operating Instructions
Page 28
... documents ≥ Tracing paper ≥ Thermal paper When scanning is scanned. The following types of documents, paper jamming or multiple-sheet feeding may cause frequent jams and double feeding. ≥ Extremely smooth or shiny paper or paper that are glued together, etc. When a jam occurs at the document feeder, reduce the number of documents may need to "Slow". ≥ Scan the documents by fed manually one sheet at a time. 28 Be sure to remove the document from the exit tray...
... documents ≥ Tracing paper ≥ Thermal paper When scanning is scanned. The following types of documents, paper jamming or multiple-sheet feeding may cause frequent jams and double feeding. ≥ Extremely smooth or shiny paper or paper that are glued together, etc. When a jam occurs at the document feeder, reduce the number of documents may need to "Slow". ≥ Scan the documents by fed manually one sheet at a time. 28 Be sure to remove the document from the exit tray...

Operating Instructions
Page 37
... the image sensor covers or surroundings directly. To maintain proper scanning, clean the scanner parts frequently. ≥ The image sensor covers may be very hot after scanning a lot of the scanner Clean the unit at least once a week or when 20,000 sheets have been scanned, whichever comes first. ≥ Clean the rollers, sensors and double feed detectors if paper jamming or double feeding occurs frequently. (Refer to pages 38-42.) ≥ Clean the image sensor covers when black or white lines appear...
... the image sensor covers or surroundings directly. To maintain proper scanning, clean the scanner parts frequently. ≥ The image sensor covers may be very hot after scanning a lot of the scanner Clean the unit at least once a week or when 20,000 sheets have been scanned, whichever comes first. ≥ Clean the rollers, sensors and double feed detectors if paper jamming or double feeding occurs frequently. (Refer to pages 38-42.) ≥ Clean the image sensor covers when black or white lines appear...

Operating Instructions
Page 42
Document sensor or double feed detection sensor Black sheets Paper detection sensor Post-imprinter door Blower Paper jam sensor Document sensors 42 Cleaning the Unit ∫ Cleaning the sensors 1 Turn the power off the dirt through the document sensor hole or double feed detection sensor hole. Double feed detection sensor Document sensors Double feed detection sensor Edge limit sensors Black sheets µ How to clean the document sensor or double feed detection sensor Remove the brush and blow off . 2 Using your hand, pull the front door release towards you. ≥ The front door ...
Document sensor or double feed detection sensor Black sheets Paper detection sensor Post-imprinter door Blower Paper jam sensor Document sensors 42 Cleaning the Unit ∫ Cleaning the sensors 1 Turn the power off the dirt through the document sensor hole or double feed detection sensor hole. Double feed detection sensor Document sensors Double feed detection sensor Edge limit sensors Black sheets µ How to clean the document sensor or double feed detection sensor Remove the brush and blow off . 2 Using your hand, pull the front door release towards you. ≥ The front door ...

Operating Instructions
Page 46
Replacing Consumables ∫ Replacing the retard roller module 1 Turn the power off. 2 Set the ADF selector to the "Multiple sheet paper" position. (Refer to page 32). 3 Using your hand, pull the front door release towards you. ≥ The front door now opens slowly. 4 Using your fingers, open the retard roller cover. Front door Front door release (Inside the front door) Retard roller cover 5 Remove the retard roller module in the direction of the arrow. Retard roller module 46
Replacing Consumables ∫ Replacing the retard roller module 1 Turn the power off. 2 Set the ADF selector to the "Multiple sheet paper" position. (Refer to page 32). 3 Using your hand, pull the front door release towards you. ≥ The front door now opens slowly. 4 Using your fingers, open the retard roller cover. Front door Front door release (Inside the front door) Retard roller cover 5 Remove the retard roller module in the direction of the arrow. Retard roller module 46

Operating Instructions
Page 52
... ALL packing materials. Please refer to your scanner, please follow these are available from the scanner. ≥ Refer to page 16, 17 of Installation manual. 3 Pack the scanner. ≥ Blower ≥ Exit tray stopper ≥ Exit stopper ≥ CD-ROM (1 piece) Operating instructions Driver software ≥ Installation manual ≥ Maintenance manual ≥ Roller cleaning paper (3 pieces) ≥ Shading sheet ≥ Power cord Be sure to use the original carton and all of the...
... ALL packing materials. Please refer to your scanner, please follow these are available from the scanner. ≥ Refer to page 16, 17 of Installation manual. 3 Pack the scanner. ≥ Blower ≥ Exit tray stopper ≥ Exit stopper ≥ CD-ROM (1 piece) Operating instructions Driver software ≥ Installation manual ≥ Maintenance manual ≥ Roller cleaning paper (3 pieces) ≥ Shading sheet ≥ Power cord Be sure to use the original carton and all of the...

Operating Instructions
Page 53
... paper feeding : 0.025 to 0.2 mm (1.0 to 7.9 mils) Continuous paper feeding : 0.06 to 0.2 mm (2.4 to 42 lbs.)** Smaller than A7 size : Thicker than 50 g/m2), the optional roller exchange kit for thin paper is 400 dpi. Specifications Item Scanner Model No. Scanning face Scanning method Scanning width Readout speed Resolution Image Output Tonal gradation Image control Compression Size* Paper Thickness Weight Hopper capacity KV-S3095C KV-S3085 Duplex scanning Front side : 3-line (RGB) color CCD Back side : 3-line (RGB) color...
... paper feeding : 0.025 to 0.2 mm (1.0 to 7.9 mils) Continuous paper feeding : 0.06 to 0.2 mm (2.4 to 42 lbs.)** Smaller than A7 size : Thicker than 50 g/m2), the optional roller exchange kit for thin paper is 400 dpi. Specifications Item Scanner Model No. Scanning face Scanning method Scanning width Readout speed Resolution Image Output Tonal gradation Image control Compression Size* Paper Thickness Weight Hopper capacity KV-S3095C KV-S3085 Duplex scanning Front side : 3-line (RGB) color CCD Back side : 3-line (RGB) color...

Operating Instructions
Page 55
... properly. The scanner is connected with the User Utility. The document is used. Troubleshooting If a problem occurs while the unit is being used, check the following items and check the scanner status with USB 1.1. Problem with USB 2.0. Insert the power plug firmly. The same ID number is installed correctly using the device manager's property. Check the computer whether the USB interface of the document is slow at USB connection. Scan speed is curled. Connect the cables correctly. Connect with power supply. The sensor cannot detect...
... properly. The scanner is connected with the User Utility. The document is used. Troubleshooting If a problem occurs while the unit is being used, check the following items and check the scanner status with USB 1.1. Problem with USB 2.0. Insert the power plug firmly. The same ID number is installed correctly using the device manager's property. Check the computer whether the USB interface of the document is slow at USB connection. Scan speed is curled. Connect the cables correctly. Connect with power supply. The sensor cannot detect...

Operating Instructions
Page 56
of the specified size and scan the copy. (See page 28.) A paper jam occurs The ADF/manual feed selector is wrong. set aslant on the hopper tray. blank. loaded face down (upside down). (See page 30.) Vertical lines appear on the scanned documents. The image sensor covers are dirty. The settings of the function or change the resolution and wavy pattern noise. Clean the image sensor covers. (See page 42.) Scanned image has moire It is curled or folded...
of the specified size and scan the copy. (See page 28.) A paper jam occurs The ADF/manual feed selector is wrong. set aslant on the hopper tray. blank. loaded face down (upside down). (See page 30.) Vertical lines appear on the scanned documents. The image sensor covers are dirty. The settings of the function or change the resolution and wavy pattern noise. Clean the image sensor covers. (See page 42.) Scanned image has moire It is curled or folded...

Operating Instructions
Page 58
... be replaced. Remove the foreign matter. U2 3 Doub l e Feed tttttttt Multiple sheets were fed into Open the front door and remove the unit. Open the front door and remove the jammed paper. Clean the document sensors ment sensor and black and black sheets. (See sheets. tttttttt 58 Close the back door. Then clean all of the rollers. (See page 38.) When U23 Double Feed Replace the paper feed roller occurs frequently, the rollers module or the retard roller mod- Then clean all...
... be replaced. Remove the foreign matter. U2 3 Doub l e Feed tttttttt Multiple sheets were fed into Open the front door and remove the unit. Open the front door and remove the jammed paper. Clean the document sensors ment sensor and black and black sheets. (See sheets. tttttttt 58 Close the back door. Then clean all of the rollers. (See page 38.) When U23 Double Feed Replace the paper feed roller occurs frequently, the rollers module or the retard roller mod- Then clean all...

Operating Instructions
Page 60
..., 27 I Image sensor cover 22, 24, 26, 32 60 Page Imprinter option 35 Indent 29, 31 Ink cartridge 35 Hopper 10 Hopper extension tray 10, 16 Hopper tray 13 Interface 2 M LED 11, 36 Landscape 15 Memory 2 Limit mark 13, 15 Loading documents 13 Multiple sheets 14 O OS 2 Operating environment 35 Notice 4 Option 35 Q Paper feed roller 24 Paper feed roller block shaft 27 Paper jam sensor 26 Paper jams 21 Paper path selector...
..., 27 I Image sensor cover 22, 24, 26, 32 60 Page Imprinter option 35 Indent 29, 31 Ink cartridge 35 Hopper 10 Hopper extension tray 10, 16 Hopper tray 13 Interface 2 M LED 11, 36 Landscape 15 Memory 2 Limit mark 13, 15 Loading documents 13 Multiple sheets 14 O OS 2 Operating environment 35 Notice 4 Option 35 Q Paper feed roller 24 Paper feed roller block shaft 27 Paper jam sensor 26 Paper jams 21 Paper path selector...


