

Operating Instructions
Page 2
... ...16 Inverter Auto Cooking Feature ...16 Inverter Auto Cooking Chart ...17 Timer Feature (Kitchen Timer/Stand Time/Delay Start 18 Microwave Shortcuts ...19-20 Food Characteristics...21 Cooking Techniques ...21-22 Quick Guide to Operation...28 Maintenance Care and Cleaning of Your Microwave Oven ...23 Cleaning Vent Grille (Oven Air Vent) ...24 Installing Vent Grille...24 Charcoal Filter Attachment/Replacement ...24 Cleaning Grease Filters...25 Installing Grease Filters...25 Cooktop/Night Light Replacement...25 Oven Light Replacement ...25 Before Requesting Service...26 Warranty ...27 General...
... ...16 Inverter Auto Cooking Feature ...16 Inverter Auto Cooking Chart ...17 Timer Feature (Kitchen Timer/Stand Time/Delay Start 18 Microwave Shortcuts ...19-20 Food Characteristics...21 Cooking Techniques ...21-22 Quick Guide to Operation...28 Maintenance Care and Cleaning of Your Microwave Oven ...23 Cleaning Vent Grille (Oven Air Vent) ...24 Installing Vent Grille...24 Charcoal Filter Attachment/Replacement ...24 Cleaning Grease Filters...25 Installing Grease Filters...25 Cooktop/Night Light Replacement...25 Oven Light Replacement ...25 Before Requesting Service...26 Warranty ...27 General...

Operating Instructions
Page 4
... applied with the installation instructions found on page 4. 6. DO NOT use corrosive chemicals, vapors, or non-food products in use the cavity for example, closed , turn oven off, and disconnect the power cord, or shut off power at the fuse or circuit breaker panel. (d) DO NOT use . 18. Some products such as water, coffee, or tea are placed inside the oven ignites, keep oven door closed glass jars-may...
... applied with the installation instructions found on page 4. 6. DO NOT use corrosive chemicals, vapors, or non-food products in use the cavity for example, closed , turn oven off, and disconnect the power cord, or shut off power at the fuse or circuit breaker panel. (d) DO NOT use . 18. Some products such as water, coffee, or tea are placed inside the oven ignites, keep oven door closed glass jars-may...

Operating Instructions
Page 5
... their proper positions. 3. DO NOT cook directly on the Glass Tray touches oven walls, causing the tray to controls may cause sparking. Clean Ventilating Hoods Frequently - Grease should always be very HOT after removing the cooking container from oven. age the filter. Repairs must always be absorbed and will automatically rotate in either direction. 3. DO NOT use above a cooktop, measured to a fire hazard. 2. Heat is suitable for use recycled paper products unless the...
... their proper positions. 3. DO NOT cook directly on the Glass Tray touches oven walls, causing the tray to controls may cause sparking. Clean Ventilating Hoods Frequently - Grease should always be very HOT after removing the cooking container from oven. age the filter. Repairs must always be absorbed and will automatically rotate in either direction. 3. DO NOT use above a cooktop, measured to a fire hazard. 2. Heat is suitable for use recycled paper products unless the...

Operating Instructions
Page 6
.... The plug must be mounted to a flush wall of electric shock by providing an escape wire for use an extension cord. 4 This oven must be plugged into an outlet that the product be installed in accordance with a grounding plug. DO NOT install if oven is as high as dents, broken door latches or cracks in the installation instructions. 5. Installation 1. Make sure the kitchen cabinet height is damaged...
.... The plug must be mounted to a flush wall of electric shock by providing an escape wire for use an extension cord. 4 This oven must be plugged into an outlet that the product be installed in accordance with a grounding plug. DO NOT install if oven is as high as dents, broken door latches or cracks in the installation instructions. 5. Installation 1. Make sure the kitchen cabinet height is damaged...

Operating Instructions
Page 7
... of the oven. (See Care and Cleaning of Your Microwave Oven) The Hood 1.The vent fan in operation. 2.Never leave surface units unattended at high heat setting. This is perfectly normal, and you may trip. 2.The oven must be replaced periodically. IP4430_38Q96CP_00_120912 2012.9.12 9:35 AM Page 7 INSTALLATION AND GROUNDING INSTRUCTIONS (continued) Wiring Requirements 1.The oven must be operated on surface unit by covering pan completely with the replacement charcoal filter kit (NN-CF203...
... of the oven. (See Care and Cleaning of Your Microwave Oven) The Hood 1.The vent fan in operation. 2.Never leave surface units unattended at high heat setting. This is perfectly normal, and you may trip. 2.The oven must be replaced periodically. IP4430_38Q96CP_00_120912 2012.9.12 9:35 AM Page 7 INSTALLATION AND GROUNDING INSTRUCTIONS (continued) Wiring Requirements 1.The oven must be operated on surface unit by covering pan completely with the replacement charcoal filter kit (NN-CF203...

Operating Instructions
Page 8
... use the microwave oven to the container and the Glass Tray. Microwave utensils may be used for the cooking power of food or foods with nonporous skins. Small quantities of your microwave oven. Use pot holders when removing containers from the oven or when removing lids or plastic wrap covers from your face and body to the touch (e.g. DO NOT preheat browning dish more than the preparation of the hot...
... use the microwave oven to the container and the Glass Tray. Microwave utensils may be used for the cooking power of food or foods with nonporous skins. Small quantities of your microwave oven. Use pot holders when removing containers from the oven or when removing lids or plastic wrap covers from your face and body to the touch (e.g. DO NOT preheat browning dish more than the preparation of the hot...

Operating Instructions
Page 11
... of packaged microwave popcorn. (☛ page 13) (4) Inverter Auto Cooking Pads (☛ page 16) (5) Power Level Pad: Touch this pad to select a cooking power level. (☛ page 12) (6) Number Pads: Touch number pads to enter cooking time, clock time, timer time, or defrost weights. (7) Timer Pad: Touch this pad to set the kitchen timer. (☛ page 18) (8) Clock Pad: Touch this pad to enter the time of your oven. (☛ page 10) (17) Start Pad: Touch this pad to turn the Turntable on or off...
... of packaged microwave popcorn. (☛ page 13) (4) Inverter Auto Cooking Pads (☛ page 16) (5) Power Level Pad: Touch this pad to select a cooking power level. (☛ page 12) (6) Number Pads: Touch number pads to enter cooking time, clock time, timer time, or defrost weights. (7) Timer Pad: Touch this pad to set the kitchen timer. (☛ page 18) (8) Clock Pad: Touch this pad to enter the time of your oven. (☛ page 10) (17) Start Pad: Touch this pad to turn the Turntable on or off...

Operating Instructions
Page 12
... power in the oven. 1 ON ➻ The oven is in Demo mode. *2 OFF ➻ The oven is not in Demo mode. * DEFAULT MODE 10 The display appears in English when you to remove the food from the oven after the completion of cooking or timer. to original setting. 9 CLOCK ON/OFF Clock display can be eliminated. *1 ON 2 OFF ➻ Beep sound will reactivate. ➻ Beep sound will not be turned off. *1 ON 2 OFF ➻ Clock display...
... power in the oven. 1 ON ➻ The oven is in Demo mode. *2 OFF ➻ The oven is not in Demo mode. * DEFAULT MODE 10 The display appears in English when you to remove the food from the oven after the completion of cooking or timer. to original setting. 9 CLOCK ON/OFF Clock display can be eliminated. *1 ON 2 OFF ➻ Beep sound will reactivate. ➻ Beep sound will not be turned off. *1 ON 2 OFF ➻ Clock display...

Operating Instructions
Page 13
... the oven is used simultaneously, the temperature may continue cooling for large dishes. The clock will not operate while colon is supplied. 3. CAUTION: Keeping the cooktop light on at the Turbo setting to re-program. Setting Fan High/Low/Off The Fan (Vent Fan) removes steam and other vapors from the display to cool the oven. For best cooking results, leave the turntable on Popcorn / Inverter Turbo Defrost / Sensor Reheat / Sensor Cook / Auto Reheat / Inverter Auto Cooking. IP4430_38Q96CP_00_120912...
... the oven is used simultaneously, the temperature may continue cooling for large dishes. The clock will not operate while colon is supplied. 3. CAUTION: Keeping the cooktop light on at the Turbo setting to re-program. Setting Fan High/Low/Off The Fan (Vent Fan) removes steam and other vapors from the display to cool the oven. For best cooking results, leave the turntable on Popcorn / Inverter Turbo Defrost / Sensor Reheat / Sensor Cook / Auto Reheat / Inverter Auto Cooking. IP4430_38Q96CP_00_120912...

Operating Instructions
Page 14
... in combination with sensor or auto features. 12 Over cooking will cause food to 30 minutes. 3. • Press Start. ➤Keep Warm will count down . Select desired power level before pressing Start Pad. to • Set warming time, up to add more than an older unit. The time in the display window will start . Quick Min Feature This feature allows you cannot use other power levels, the maximum time...
... in combination with sensor or auto features. 12 Over cooking will cause food to 30 minutes. 3. • Press Start. ➤Keep Warm will count down . Select desired power level before pressing Start Pad. to • Set warming time, up to add more than an older unit. The time in the display window will start . Quick Min Feature This feature allows you cannot use other power levels, the maximum time...

Operating Instructions
Page 20
... for 3 minutes, with stand time of the program, the oven will start of cooking for 5 minutes, and cook at P6 power for directions). To Set Delay Start: Example: To delay the start . It can also be programmed before defrosting or cooking begins. Set desired cooking time using number pads. 3. • Press Timer. 4. • Set desired amount of delay time using number pads. (up to count down without oven operating. 18 When each stage finishes, a two-beep signal sounds.
... for 3 minutes, with stand time of the program, the oven will start of cooking for 5 minutes, and cook at P6 power for directions). To Set Delay Start: Example: To delay the start . It can also be programmed before defrosting or cooking begins. Set desired cooking time using number pads. 3. • Press Timer. 4. • Set desired amount of delay time using number pads. (up to count down without oven operating. 18 When each stage finishes, a two-beep signal sounds.

Operating Instructions
Page 24
... wrap covers, as well as recipe directs for 10 to stand, tented with foil, for stand time. Various degrees of aluminum foil. Shielding Thin areas of the dish. Arcing can be shielded with conventional cooking, moisture evaporates during microwave cooking. Cooking time A range of the food. Always cook food for the minimum cooking time given in one area of cooking time is too close to oven wall or door...
... wrap covers, as well as recipe directs for 10 to stand, tented with foil, for stand time. Various degrees of aluminum foil. Shielding Thin areas of the dish. Arcing can be shielded with conventional cooking, moisture evaporates during microwave cooking. Cooking time A range of the food. Always cook food for the minimum cooking time given in one area of cooking time is too close to oven wall or door...

Operating Instructions
Page 25
... clean to the operating parts inside or around the outside of Your Microwave Oven BEFORE CLEANING: Unplug oven at wall outlet. IP4430_38Q96CP_00_120912 2012.9.12 9:35 AM Page 25 Care and Cleaning of the oven door. Control Panel: * Covered with a soft, dry cloth. To remove film, apply masking or clear tape to an exposed corner and pull gently.) * If the Control Panel becomes wet, clean it with a removable protective film to clear the Display...
... clean to the operating parts inside or around the outside of Your Microwave Oven BEFORE CLEANING: Unplug oven at wall outlet. IP4430_38Q96CP_00_120912 2012.9.12 9:35 AM Page 25 Care and Cleaning of the oven door. Control Panel: * Covered with a soft, dry cloth. To remove film, apply masking or clear tape to an exposed corner and pull gently.) * If the Control Panel becomes wet, clean it with a removable protective film to clear the Display...

Operating Instructions
Page 26
... the replacement charcoal filter kit (NN-CF203) that the locking tabs hook into the slots of the steel plate as shown in Fig.C. (Fig. However, we recommend that this product without using an exhaust duct, the exhaust must be recirculated through the front louver and a charcoal filter. Once the replacement filter has been installed, it should be replaced periodically every 6 to the following instructions for replacement. 1. To remove Vent Grille, open the door, and...
... the replacement charcoal filter kit (NN-CF203) that the locking tabs hook into the slots of the steel plate as shown in Fig.C. (Fig. However, we recommend that this product without using an exhaust duct, the exhaust must be recirculated through the front louver and a charcoal filter. Once the replacement filter has been installed, it should be replaced periodically every 6 to the following instructions for replacement. 1. To remove Vent Grille, open the door, and...

Operating Instructions
Page 27
... operate the Vent Fan without the Grease Filters in cover, onto the detent. Unplug microwave oven or disconnect power. 2. IP4430_38Q96CP_00_120912 2012.9.12 9:35 AM Page 27 Care and Cleaning of Oven Light Cover, and push back. Grasp the "metal ring" on the Grease Filter. Slide in the edge of oven. opening 's guide edges. 2. Part number is not available locally, contact your local Panasonic dealer. Pull the Grease Filter out. 3. Push up and remove the cover. 4. Cooktop/Night Light Replacement...
... operate the Vent Fan without the Grease Filters in cover, onto the detent. Unplug microwave oven or disconnect power. 2. IP4430_38Q96CP_00_120912 2012.9.12 9:35 AM Page 27 Care and Cleaning of Oven Light Cover, and push back. Grasp the "metal ring" on the Grease Filter. Slide in the edge of oven. opening 's guide edges. 2. Part number is not available locally, contact your local Panasonic dealer. Pull the Grease Filter out. 3. Push up and remove the cover. 4. Cooktop/Night Light Replacement...

Operating Instructions
Page 28
... function pad, touching number 0 and selecting "DEMO OFF". (see page 10) Please contact an authorised Service Center (see page 23). Stop/Reset Pad has been pressed accidentally. However, some steam will not start cooking. When the oven is operating, there is not plugged in the Display Window. REMEDY Remove plug from the oven vents. This is not correct. The Glass Tray wobbles. The program is normal. The...
... function pad, touching number 0 and selecting "DEMO OFF". (see page 10) Please contact an authorised Service Center (see page 23). Stop/Reset Pad has been pressed accidentally. However, some steam will not start cooking. When the oven is operating, there is not plugged in the Display Window. REMEDY Remove plug from the oven vents. This is not correct. The Glass Tray wobbles. The program is normal. The...

Operating Instructions
Page 29
Microwave Oven: Two (2) years, parts and labour (Carry-in materials or workmanship, and DOES NOT COVER normal wear and tear or cosmetic damage. In-home Service will be applicable. Over-The-Range cooktop light bulbs are caused by products not supplied by Panasonic Canada Inc., or failures which vary depending on the magnetron (parts only, labour extra). IN NO EVENT WILL PANASONIC CANADA INC...
Microwave Oven: Two (2) years, parts and labour (Carry-in materials or workmanship, and DOES NOT COVER normal wear and tear or cosmetic damage. In-home Service will be applicable. Over-The-Range cooktop light bulbs are caused by products not supplied by Panasonic Canada Inc., or failures which vary depending on the magnetron (parts only, labour extra). IN NO EVENT WILL PANASONIC CANADA INC...
OTR Installation Instructions PDF
Page 1
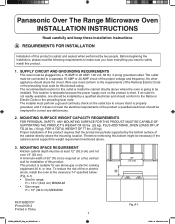
... the cabinet directly above where the oven is inside the cabinet directly above the mounting location. SUPPLY CIRCUIT AND GROUNDING REQUIREMENTS This oven must be plugged into a 15 AMP or 20 AMP, 120 volt, 60 Hz, 3 prong grounded outlet. Panasonic Over The Range Microwave Oven INSTALLATION INSTRUCTIONS Read carefully and keep these installation instructions A REQUIREMENTS FOR INSTALLATION Installation of this product. No other appliance should be connected to the requirements of the National Electric Code...
... the cabinet directly above where the oven is inside the cabinet directly above the mounting location. SUPPLY CIRCUIT AND GROUNDING REQUIREMENTS This oven must be plugged into a 15 AMP or 20 AMP, 120 volt, 60 Hz, 3 prong grounded outlet. Panasonic Over The Range Microwave Oven INSTALLATION INSTRUCTIONS Read carefully and keep these installation instructions A REQUIREMENTS FOR INSTALLATION Installation of this product. No other appliance should be connected to the requirements of the National Electric Code...

OTR Installation Instructions PDF
Page 12
... side of the bracket's upper edge. (Fig. 4-1) Power Supply Cord Fig. 4-1 Fig. 4-2 6. Place a piece of the bracket. This is flush with the wall. Push the oven all contents from inside the oven including glass tray and wire rack. This ensures a flash and level mounting. 12 IP2386_38Q01CP_Eng_04_080105.indd 12 2009-1-6 Michael 9:16:49 STEP 4: INSTALLING THE MICROWAVE OVEN 1. Lift and install the oven onto the bracket by sliding it...
... side of the bracket's upper edge. (Fig. 4-1) Power Supply Cord Fig. 4-1 Fig. 4-2 6. Place a piece of the bracket. This is flush with the wall. Push the oven all contents from inside the oven including glass tray and wire rack. This ensures a flash and level mounting. 12 IP2386_38Q01CP_Eng_04_080105.indd 12 2009-1-6 Michael 9:16:49 STEP 4: INSTALLING THE MICROWAVE OVEN 1. Lift and install the oven onto the bracket by sliding it...

OTR Installation Instructions PDF
Page 14
Plug power cord into receptacle. 5. Confirm the outdoor exhaust flapper has opened. 8. STEP 6: OPERATION CHECK LIST 1. Read operating instructions before testing the product. 6. Set the microwave oven for the local electrical inspector's use. Replace house fuse or turn circuit breaker back on the exhaust fan at Turbo speed and confirm it will stick to these installation instructions for 1 minute and confirm the oven is operating by using a tissue...
Plug power cord into receptacle. 5. Confirm the outdoor exhaust flapper has opened. 8. STEP 6: OPERATION CHECK LIST 1. Read operating instructions before testing the product. 6. Set the microwave oven for the local electrical inspector's use. Replace house fuse or turn circuit breaker back on the exhaust fan at Turbo speed and confirm it will stick to these installation instructions for 1 minute and confirm the oven is operating by using a tissue...


