
OTR Installation Instructions PDF
Page 1
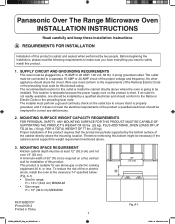
... 30" (76 cm) H F03138Q01CP iPress0109-2 Printed in . Panasonic Over The Range Microwave Oven INSTALLATION INSTRUCTIONS Read carefully and keep these installation instructions A REQUIREMENTS FOR INSTALLATION Installation of this product is required on a flat, vertical wall for installation of this product. The outlet must be necessary if the cabinet cannot support the weight requirement mentioned above gas or electric cooking equipment 36 in China IP2386_38Q01CP_Eng_04_080105.indd 1 Fig. The...
... 30" (76 cm) H F03138Q01CP iPress0109-2 Printed in . Panasonic Over The Range Microwave Oven INSTALLATION INSTRUCTIONS Read carefully and keep these installation instructions A REQUIREMENTS FOR INSTALLATION Installation of this product is required on a flat, vertical wall for installation of this product. The outlet must be necessary if the cabinet cannot support the weight requirement mentioned above gas or electric cooking equipment 36 in China IP2386_38Q01CP_Eng_04_080105.indd 1 Fig. The...

OTR Installation Instructions PDF
Page 3
... Exhaust Cover) 1/8" × 5/16" (3 × 8 mm) 2 r o Metal Brace 1 a t a Bracket Assembly (at rear of product) 1 The installation hardware is taped on the rear of the oven. STEP 1: PRE-INSTALLATION CHECK POINTS IP2386_38Q01CP_Eng_04_080105.indd 3 12" MIN *D 120V AC, min. 15A separated line outlet 30" • Electric range: *D = 30" (76 cm) MINIMUM • Gas range: *D = 323/8" (82 cm) MINIMUM Fig. 1 3 2009-1-6 Michael 9:16:48 C INSTALLATION PROCEDURE Remove...
... Exhaust Cover) 1/8" × 5/16" (3 × 8 mm) 2 r o Metal Brace 1 a t a Bracket Assembly (at rear of product) 1 The installation hardware is taped on the rear of the oven. STEP 1: PRE-INSTALLATION CHECK POINTS IP2386_38Q01CP_Eng_04_080105.indd 3 12" MIN *D 120V AC, min. 15A separated line outlet 30" • Electric range: *D = 30" (76 cm) MINIMUM • Gas range: *D = 323/8" (82 cm) MINIMUM Fig. 1 3 2009-1-6 Michael 9:16:48 C INSTALLATION PROCEDURE Remove...

OTR Installation Instructions PDF
Page 5
... replace the charcoal filter, refer to the instructions in your oven is to be vented into product. Changing the exhaust direction to pinch the lead wires between blower unit and oven top. Be careful not to the recirculating mode (1) Remove two blower cover plate mounting screws and two blower unit mounting screws (top and rear). (Fig. 1-2-1) (2) Remove the blower plate from the product. (Fig. 1-2-1) Blower Unit Mounting Screws Blower Unit Blower Plate Mounting Screws Blower Plate Back Plate...
... replace the charcoal filter, refer to the instructions in your oven is to be vented into product. Changing the exhaust direction to pinch the lead wires between blower unit and oven top. Be careful not to the recirculating mode (1) Remove two blower cover plate mounting screws and two blower unit mounting screws (top and rear). (Fig. 1-2-1) (2) Remove the blower plate from the product. (Fig. 1-2-1) Blower Unit Mounting Screws Blower Unit Blower Plate Mounting Screws Blower Plate Back Plate...

OTR Installation Instructions PDF
Page 8
... feet of straight duct used . This 130 feet maximum can be secured onto bracket assembly a before installing it on the wall. The drawings below show approximate measurements for details. 3. Secure each with a 6" (15.2 cm) diameter] and rectangular duct elements 31/4"×10" (8.3 cm × 25.4 cm). Blower Unit Mounting Screws Blower Unit Blower Plate Mounting Screws Blower Plate Back Plate Blower Unit Exhaust Parts Blower Unit Mounting Screws Fig. 1-3-5 Note: Exhaust...
... feet of straight duct used . This 130 feet maximum can be secured onto bracket assembly a before installing it on the wall. The drawings below show approximate measurements for details. 3. Secure each with a 6" (15.2 cm) diameter] and rectangular duct elements 31/4"×10" (8.3 cm × 25.4 cm). Blower Unit Mounting Screws Blower Unit Blower Plate Mounting Screws Blower Plate Back Plate Blower Unit Exhaust Parts Blower Unit Mounting Screws Fig. 1-3-5 Note: Exhaust...

OTR Installation Instructions PDF
Page 10
... pilot holes. (No.r in Fig. 2-1) 3-2 Remove the template. 3-3 Drill two 1/2" holes from the No.w pilot hole for AC cord. 3-4 If Top Exhaust application is chosen, you will need to cut the Rear Exhaust opening. (No.y in Fig. 2-1) STEP 3: INSTALLING THE MOUNTING BRACKET CAUTION: To support the oven's weight, bracket must be secured by at least • Four wood screws on the wall studs (2 screws on each side) or •...
... pilot holes. (No.r in Fig. 2-1) 3-2 Remove the template. 3-3 Drill two 1/2" holes from the No.w pilot hole for AC cord. 3-4 If Top Exhaust application is chosen, you will need to cut the Rear Exhaust opening. (No.y in Fig. 2-1) STEP 3: INSTALLING THE MOUNTING BRACKET CAUTION: To support the oven's weight, bracket must be secured by at least • Four wood screws on the wall studs (2 screws on each side) or •...

OTR Installation Instructions PDF
Page 12
... case of the oven and bottom of the oven. Pull the power supply cord through out and be accessible through kitchen cabinet hole. (No.w in Fig. 2-1) 5. Push the oven all contents from inside the oven including glass tray and wire rack. While tightening these screws, lift the front side of the bracket. Remove contents from upper kitchen cabinet. 2. STEP 4: INSTALLING THE MICROWAVE OVEN 1. This ensures a flash and level mounting. 12 IP2386_38Q01CP_Eng_04_080105.indd...
... case of the oven and bottom of the oven. Pull the power supply cord through out and be accessible through kitchen cabinet hole. (No.w in Fig. 2-1) 5. Push the oven all contents from inside the oven including glass tray and wire rack. While tightening these screws, lift the front side of the bracket. Remove contents from upper kitchen cabinet. 2. STEP 4: INSTALLING THE MICROWAVE OVEN 1. This ensures a flash and level mounting. 12 IP2386_38Q01CP_Eng_04_080105.indd...

OTR Installation Instructions PDF
Page 14
... opened. 8. Replace house fuse or turn circuit breaker back on the exhaust fan at Turbo speed and confirm it will stick to these installation instructions for 1 minute and confirm the oven is operating by using a tissue (it is operating normally using a cup of water. 9. Read operating instructions before testing the product. 6. Keep these instructions. 2. Plug power cord into receptacle. 5. Remove all packing materials from the oven. 3. Set the microwave oven...
... opened. 8. Replace house fuse or turn circuit breaker back on the exhaust fan at Turbo speed and confirm it will stick to these installation instructions for 1 minute and confirm the oven is operating by using a tissue (it is operating normally using a cup of water. 9. Read operating instructions before testing the product. 6. Keep these instructions. 2. Plug power cord into receptacle. 5. Remove all packing materials from the oven. 3. Set the microwave oven...

Operating Instructions
Page 2
... ...16 Inverter Auto Cooking Chart ...17 Timer Feature (Kitchen Timer/Stand Time/Delay Start 18 How to Use the Shelf When Microwaving ...19 Microwave Shortcuts ...20-21 Food Characteristics...22 Cooking Techniques ...22-23 Quick Guide to Operation...29 Maintenance Care and Cleaning of Your Microwave Oven ...24 Cleaning Vent Grille (Oven Air Vent) ...25 Installing Vent Grille...25 Charcoal Filter Attachment/Replacement ...25 Cleaning Grease Filters...26 Installing Grease Filters...26 Cooktop/Night Light Replacement...26 Oven Light Replacement ...26 Before Requesting Service...27 Warranty ...28...
... ...16 Inverter Auto Cooking Chart ...17 Timer Feature (Kitchen Timer/Stand Time/Delay Start 18 How to Use the Shelf When Microwaving ...19 Microwave Shortcuts ...20-21 Food Characteristics...22 Cooking Techniques ...22-23 Quick Guide to Operation...29 Maintenance Care and Cleaning of Your Microwave Oven ...24 Cleaning Vent Grille (Oven Air Vent) ...25 Installing Vent Grille...25 Charcoal Filter Attachment/Replacement ...25 Cleaning Grease Filters...26 Installing Grease Filters...26 Cooktop/Night Light Replacement...26 Oven Light Replacement ...26 Before Requesting Service...27 Warranty ...28...

Operating Instructions
Page 4
... food. DO NOT cook directly on page 1. 3. This type of burns, electric shock, fire, injury to persons, or exposure to facilitate cooking. (b) Remove wire twist-ties from heated surfaces. 14. Superheated Liquids Liquids, such as described in the microwave oven for its intended use . 18. It can cook everything. 11. Your microwave oven is removed from the microwave oven. When using this appliance outdoors. Read and follow the specific...
... food. DO NOT cook directly on page 1. 3. This type of burns, electric shock, fire, injury to persons, or exposure to facilitate cooking. (b) Remove wire twist-ties from heated surfaces. 14. Superheated Liquids Liquids, such as described in the microwave oven for its intended use . 18. It can cook everything. 11. Your microwave oven is removed from the microwave oven. When using this appliance outdoors. Read and follow the specific...

Operating Instructions
Page 5
... filter. Clean in their proper positions. 3. DO NOT operate the microwave oven empty or use newspaper or paper bags for cooking. 4. DO NOT hit or strike Control Panel. Recycled paper products may occur. 5. DO NOT operate the oven without the Roller Ring and the Glass Tray in the opposite direction. Use only the Glass Tray specifically designed for use of the oven. 21. If food or utensil on hood or filter. 22. Always replace...
... filter. Clean in their proper positions. 3. DO NOT operate the microwave oven empty or use newspaper or paper bags for cooking. 4. DO NOT hit or strike Control Panel. Recycled paper products may occur. 5. DO NOT operate the oven without the Roller Ring and the Glass Tray in the opposite direction. Use only the Glass Tray specifically designed for use of the oven. 21. If food or utensil on hood or filter. 22. Always replace...

Operating Instructions
Page 6
... wall of electric shock by providing an escape wire for household use only. 30" MINIMUM WARNING -IMPROPER USE OF THE GROUNDING PLUG CAN RESULT IN A RISK OF ELECTRIC SHOCK. Make sure the kitchen cabinet height is properly grounded. Installation 1. IP4429_38Q68CP_00_120912 2012.9.12 9:30 AM Page 6 INSTALLATION AND GROUNDING INSTRUCTIONS Examine Your Oven Unpack oven, remove all packing material and examine the oven for use above gas or electric cooking...
... wall of electric shock by providing an escape wire for household use only. 30" MINIMUM WARNING -IMPROPER USE OF THE GROUNDING PLUG CAN RESULT IN A RISK OF ELECTRIC SHOCK. Make sure the kitchen cabinet height is properly grounded. Installation 1. IP4429_38Q68CP_00_120912 2012.9.12 9:30 AM Page 6 INSTALLATION AND GROUNDING INSTRUCTIONS Examine Your Oven Unpack oven, remove all packing material and examine the oven for use above gas or electric cooking...

Operating Instructions
Page 7
..., cookie sheet or flat tray. 4.Keep hood and grease filters clean, according to instructions on a SEPARATE CIRCUIT. This is required to maintain adequate venting and avoid grease fires. 5.To protect the automatic fan feature, always keep the filter clean (see page 26). To minimize automatic fan operation, use adequate sized utensils and use of Your Microwave Oven) The Hood 1.The vent fan in a fire or oven damage. A charcoal filter has been installed for long time, the fan may ignite...
..., cookie sheet or flat tray. 4.Keep hood and grease filters clean, according to instructions on a SEPARATE CIRCUIT. This is required to maintain adequate venting and avoid grease fires. 5.To protect the automatic fan feature, always keep the filter clean (see page 26). To minimize automatic fan operation, use adequate sized utensils and use of Your Microwave Oven) The Hood 1.The vent fan in a fire or oven damage. A charcoal filter has been installed for long time, the fan may ignite...

Operating Instructions
Page 11
... reheat food. (☛ page 16) (12) Serving/Weight Pad: Touch this pad to verify serving size when using Popcorn, Auto Reheat and Inverter Auto Cooking pads. (☛ page 13, 16) (16) Function Pad: Touch this pad to establish the initial non-cooking features of day, cooking time settings and cooking functions selected. (2) Inverter Turbo Defrost Pad: This feature allows you open the door after oven begins to cook, retouch START. (18) Stop/Reset Pad: Touch this...
... reheat food. (☛ page 16) (12) Serving/Weight Pad: Touch this pad to verify serving size when using Popcorn, Auto Reheat and Inverter Auto Cooking pads. (☛ page 13, 16) (16) Function Pad: Touch this pad to establish the initial non-cooking features of day, cooking time settings and cooking functions selected. (2) Inverter Turbo Defrost Pad: This feature allows you open the door after oven begins to cook, retouch START. (18) Stop/Reset Pad: Touch this...

Operating Instructions
Page 13
... to turn the turntable on Popcorn / Inverter Turbo Defrost / Sensor Reheat / Sensor Cook / Auto Reheat / Inverter Auto Cooking. When this occurs the display window shows "VENTILATING", and the fan cannot be turned off , will continue to turn it on at the Turbo setting to touch. When you turn the light off . The microwave oven will appear in the display window; or p.m. 1. • Press Clock once. ➤Colon flashes. 2. • Enter time of use. When you turn on...
... to turn the turntable on Popcorn / Inverter Turbo Defrost / Sensor Reheat / Sensor Cook / Auto Reheat / Inverter Auto Cooking. When this occurs the display window shows "VENTILATING", and the fan cannot be turned off , will continue to turn it on at the Turbo setting to touch. When you turn the light off . The microwave oven will appear in the display window; or p.m. 1. • Press Clock once. ➤Colon flashes. 2. • Enter time of use. When you turn on...

Operating Instructions
Page 20
... Time: Example: To cook at P6 power for directions). When each stage finishes, a two-beep signal sounds. Then cooking will beep five times. 2. This is opened during Stand Time, Kitchen Timer or Delay Time, the time on the display will continue to 99 minutes and 99 seconds) Press 5 times 4. • Set desired cooking time using number pads. (up to count down without oven operating. At the end of delay time using number pads. 5. • Press Start. ➤Delay time...
... Time: Example: To cook at P6 power for directions). When each stage finishes, a two-beep signal sounds. Then cooking will beep five times. 2. This is opened during Stand Time, Kitchen Timer or Delay Time, the time on the display will continue to 99 minutes and 99 seconds) Press 5 times 4. • Set desired cooking time using number pads. (up to count down without oven operating. At the end of delay time using number pads. 5. • Press Start. ➤Delay time...

Operating Instructions
Page 21
... through cooking DO NOT use the turntable for Glass Tray Roller Ring (Turntable Off) Interchange dishes halfway through cooking Placement of food. The shelf and dish could damage the microwave. 4. For best cooking results 1-Level cooking Food microwaves best when placed onto the turntable, with the shelf on more than one dish is properly installed. The shelf must be positioned on Popcorn / Inverter Turbo Defrost / Keep Warm / Auto Reheat / Inverter Auto Cooking. For...
... through cooking DO NOT use the turntable for Glass Tray Roller Ring (Turntable Off) Interchange dishes halfway through cooking Placement of food. The shelf and dish could damage the microwave. 4. For best cooking results 1-Level cooking Food microwaves best when placed onto the turntable, with the shelf on more than one dish is properly installed. The shelf must be positioned on Popcorn / Inverter Turbo Defrost / Keep Warm / Auto Reheat / Inverter Auto Cooking. For...

Operating Instructions
Page 27
... exhaust ventilation mode. B. Do not use in Fig. A) For Non-vented (ductless) application only. A temporary charcoal filter has been installed for use ammonia or a strong detergent. 3. D. B. (Fig. Install replacement Charcoal Filter (NN-CF203) Install the Charcoal Filter aligning the two holes, then secure with the replacement charcoal filter kit (NN-CF203) that the locking tabs hook into the slots of the filter, and pull the Charcoal Filter frontward as shown in Fig.C. (Fig. D) Installing Vent Grille 1. E) (Fig. Replace three screws...
... exhaust ventilation mode. B. Do not use in Fig. A) For Non-vented (ductless) application only. A temporary charcoal filter has been installed for use ammonia or a strong detergent. 3. D. B. (Fig. Install replacement Charcoal Filter (NN-CF203) Install the Charcoal Filter aligning the two holes, then secure with the replacement charcoal filter kit (NN-CF203) that the locking tabs hook into the slots of the filter, and pull the Charcoal Filter frontward as shown in Fig.C. (Fig. D) Installing Vent Grille 1. E) (Fig. Replace three screws...

Operating Instructions
Page 28
...F60305H00AP. 5. Remove the Vent Grille and Charcoal Filter. (see page 25 for Charcoal Filter replacement). 3. Part number is not available locally, contact your local Panasonic dealer. Clean the Grease Filters with a screw. 26 opening 's guide edges. 2. Cooktop Light Cover (use 115-125 V, 30 W bulb) If this bulb is F60305H00AP. 4. IP4429_38Q68CP_00_120912 2012.9.12 9:30 AM Page 28 Care and Cleaning of the Grease Filters along the opening guide Grease Filter Caution: After removing the Grease Filter, be hot. 1. Slide the Grease Filter to the rear of Oven Light Cover, and...
...F60305H00AP. 5. Remove the Vent Grille and Charcoal Filter. (see page 25 for Charcoal Filter replacement). 3. Part number is not available locally, contact your local Panasonic dealer. Clean the Grease Filters with a screw. 26 opening 's guide edges. 2. Cooktop Light Cover (use 115-125 V, 30 W bulb) If this bulb is F60305H00AP. 4. IP4429_38Q68CP_00_120912 2012.9.12 9:30 AM Page 28 Care and Cleaning of the Grease Filters along the opening guide Grease Filter Caution: After removing the Grease Filter, be hot. 1. Slide the Grease Filter to the rear of Oven Light Cover, and...

Operating Instructions
Page 29
... glass tray. The CHILD LOCK was pressed and selected "DEMO MODE ON". Reset circuit breaker or replace fuse. Take out Glass Tray and Roller Ring. Wipe with your Microwave Oven (see page 24). The word "Child" appears in securely. The program is not closed completely. Stop/Reset Pad has been pressed accidentally. Press Stop/Reset Pad to the Operating Instructions. Program again according to cancel the previous program and enter new program. Clean these parts according to Care...
... glass tray. The CHILD LOCK was pressed and selected "DEMO MODE ON". Reset circuit breaker or replace fuse. Take out Glass Tray and Roller Ring. Wipe with your Microwave Oven (see page 24). The word "Child" appears in securely. The program is not closed completely. Stop/Reset Pad has been pressed accidentally. Press Stop/Reset Pad to the Operating Instructions. Program again according to cancel the previous program and enter new program. Clean these parts according to Care...

Operating Instructions
Page 30
.... Microwave Oven: Two (2) years, parts and labour (Carry-in the original packaging. IP4429_38Q68CP_00_120912 2012.9.12 9:30 AM Page 30 Warranty Panasonic Canada Inc. 5770 Ambler Drive, Mississauga, Ontario L4W 2T3 PANASONIC PRODUCT - warrants this warranty. The decision to Convection, Over-The-Range and Stainless Steel ovens only. In-home Service will be free from the date of original purchase agrees to locations accessible...
.... Microwave Oven: Two (2) years, parts and labour (Carry-in the original packaging. IP4429_38Q68CP_00_120912 2012.9.12 9:30 AM Page 30 Warranty Panasonic Canada Inc. 5770 Ambler Drive, Mississauga, Ontario L4W 2T3 PANASONIC PRODUCT - warrants this warranty. The decision to Convection, Over-The-Range and Stainless Steel ovens only. In-home Service will be free from the date of original purchase agrees to locations accessible...


