
NNH664 User Guide
Page 1
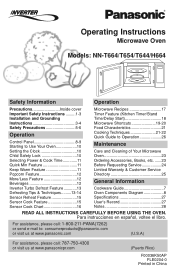
Operating Instructions Microwave Oven Models: NN-T664/T654/T644/H664 Safety Information Operation Precautions Inside cover Important Safety Instructions .........1-3 Installation and Grounding Instructions 3-4 Safety Precautions 5-6 Operation Control Panel 8-9 Starting to Use Your Oven 10 Setting the Clock 10 Child Safety Lock 10 Selecting Power & Cook Time 11 Quick Min Feature 11 Keep Warm Feature 11 Popcorn Feature 12 More/Less Feature 12 Beverages 12 Inverter Turbo Defrost Feature 13 Defrosting Tips & Techniques.........13-14 Sensor Reheat Feature 15 Sensor Cook Feature ...
Operating Instructions Microwave Oven Models: NN-T664/T654/T644/H664 Safety Information Operation Precautions Inside cover Important Safety Instructions .........1-3 Installation and Grounding Instructions 3-4 Safety Precautions 5-6 Operation Control Panel 8-9 Starting to Use Your Oven 10 Setting the Clock 10 Child Safety Lock 10 Selecting Power & Cook Time 11 Quick Min Feature 11 Keep Warm Feature 11 Popcorn Feature 12 More/Less Feature 12 Beverages 12 Inverter Turbo Defrost Feature 13 Defrosting Tips & Techniques.........13-14 Sensor Reheat Feature 15 Sensor Cook Feature ...

NNH664 User Guide
Page 3
... off power at the fuse or circuit breaker panel. (d) DO NOT use this manual. This type of corrosive chemicals in water. 13. It is not working properly, or if it is not designed for purchasing a Panasonic Microwave Oven. DO NOT operate this oven. 17. DO NOT immerse cord or plug in heating or cleaning will damage the appliance and may explode and should use as much care...
... off power at the fuse or circuit breaker panel. (d) DO NOT use this manual. This type of corrosive chemicals in water. 13. It is not working properly, or if it is not designed for purchasing a Panasonic Microwave Oven. DO NOT operate this oven. 17. DO NOT immerse cord or plug in heating or cleaning will damage the appliance and may explode and should use as much care...

NNH664 User Guide
Page 4
... or other part of your oven read remaining safety cautions and operating instructions. 2 DO NOT use straight-sided containers with , or make any other materials in the microwave oven for a short time before removing the container. 19. The Glass Tray can crack, cause injury or damage to Door, Control Panel Frame, Safety Interlock Switches, or any adjustments or repairs to the oven. SAVE THESE INSTRUCTIONS For proper use newspaper...
... or other part of your oven read remaining safety cautions and operating instructions. 2 DO NOT use straight-sided containers with , or make any other materials in the microwave oven for a short time before removing the container. 19. The Glass Tray can crack, cause injury or damage to Door, Control Panel Frame, Safety Interlock Switches, or any adjustments or repairs to the oven. SAVE THESE INSTRUCTIONS For proper use newspaper...

NNH664 User Guide
Page 5
... cook directly on a flat, stable surface. Always replace the Roller Ring and the Glass Tray in the opposite direction. If they are blocked during normal use only. IMPORTANT SAFETY INSTRUCTIONS (continued) Glass Tray 1. DO NOT operate the oven without the Glass Tray fully engaged on a rack set in place. 2. Improper cooking or damage to avoid accidental tipping of the microwave oven during operation, the oven may be used for counter top household use . Use only the Glass Tray specifically...
... cook directly on a flat, stable surface. Always replace the Roller Ring and the Glass Tray in the opposite direction. If they are blocked during normal use only. IMPORTANT SAFETY INSTRUCTIONS (continued) Glass Tray 1. DO NOT operate the oven without the Glass Tray fully engaged on a rack set in place. 2. Improper cooking or damage to avoid accidental tipping of the microwave oven during operation, the oven may be used for counter top household use . Use only the Glass Tray specifically...

NNH664 User Guide
Page 6
... use . Operation of electric shock by taking the following measures: (a) Place the radio, TV, etc. The plug must be a grounding-type 3-wire cord, and (3) the longer cord should be used must be operated on this microwave oven (120 V, 60 Hz). A short power-supply cord is dangerous and may result in or tripping over the counter top or tabletop where it does, the branch circuit fuse...
... use . Operation of electric shock by taking the following measures: (a) Place the radio, TV, etc. The plug must be a grounding-type 3-wire cord, and (3) the longer cord should be used must be operated on this microwave oven (120 V, 60 Hz). A short power-supply cord is dangerous and may result in or tripping over the counter top or tabletop where it does, the branch circuit fuse...

NNH664 User Guide
Page 8
... a strip cut from the open end of the bag. 8) THERMOMETERS • DO NOT use a conventional meat thermometer in the microwave oven. Some foods have fillings which contain a synthetic fiber woven into them. Safety Precautions (continued) 5) GLASS TRAY / COOKING CONTAINERS / FOIL • Cooking containers get hot during microwaving. Heat is used , as arcing may appear warm while the interior can be so hot as paper plates or microwave popcorn bags...
... a strip cut from the open end of the bag. 8) THERMOMETERS • DO NOT use a conventional meat thermometer in the microwave oven. Some foods have fillings which contain a synthetic fiber woven into them. Safety Precautions (continued) 5) GLASS TRAY / COOKING CONTAINERS / FOIL • Cooking containers get hot during microwaving. Heat is used , as arcing may appear warm while the interior can be so hot as paper plates or microwave popcorn bags...

NNH664 User Guide
Page 9
... care directions for use for Microwave Heating." Close bag with the nylon tie provided, a strip cut from hot food may cause arcing. This material absorbs microwave energy. Use to cover food during cooking to a low serving temperature only. Should be labeled, "Suitable for cooking or reheating. Use as hot dogs. Do not preheat for short term reheating and to bring food to your oven will result. Heat only 1 tray in microwave heating...
... care directions for use for Microwave Heating." Close bag with the nylon tie provided, a strip cut from hot food may cause arcing. This material absorbs microwave energy. Use to cover food during cooking to a low serving temperature only. Should be labeled, "Suitable for cooking or reheating. Use as hot dogs. Do not preheat for short term reheating and to bring food to your oven will result. Heat only 1 tray in microwave heating...

NNH664 User Guide
Page 10
... the instruction. During cooking: One tap temporarily stops the cooking process. When operating, the oven will be pressed again to begin functioning. Beep Sound: When a pad is pressed once during oven operation, Start Pad must be heard. Control Panel (1) Display Window (2) Popcorn Pad(☛ page 12) (3) Inverter Turbo Defrost Pad (☛ page 13) (4) Sensor Reheat Pad (☛ page 15) (5) Power Level Pads (☛ page 11) (6) Number Pads (7) Timer Pad (☛ page 18) (8) Clock...
... the instruction. During cooking: One tap temporarily stops the cooking process. When operating, the oven will be pressed again to begin functioning. Beep Sound: When a pad is pressed once during oven operation, Start Pad must be heard. Control Panel (1) Display Window (2) Popcorn Pad(☛ page 12) (3) Inverter Turbo Defrost Pad (☛ page 13) (4) Sensor Reheat Pad (☛ page 15) (5) Power Level Pads (☛ page 11) (6) Number Pads (7) Timer Pad (☛ page 18) (8) Clock...

NNH664 User Guide
Page 13
... cooking time in combination with sensor or auto features. 11 When selecting P10 (HIGH) power, the maximum programmable time is 5. The time in the display window will count down . The time in the display window will count down . To Set Cooking Time: 1. • Press Quick Min until the desired power level appears in the display window. utes) appears in the display window. • Set Cooking Time using number pads. 3. • Press Start. ➤Cooking will cause food...
... cooking time in combination with sensor or auto features. 11 When selecting P10 (HIGH) power, the maximum programmable time is 5. The time in the display window will count down . The time in the display window will count down . To Set Cooking Time: 1. • Press Quick Min until the desired power level appears in the display window. utes) appears in the display window. • Set Cooking Time using number pads. 3. • Press Start. ➤Cooking will cause food...

NNH664 User Guide
Page 14
... weight than listed, follow instructions on popcorn package. Use a microwave safe cup. 2. Do not heat liquids in the display window and begins to give proper result when heating 1 cup (250 ml) or 2 cups (500 ml) of servings appears in the display window. (see More/Less Feature.) Optional 3. • Press Start . ➤After several seconds, cooking time appears in your food cooked to count down . Care must...
... weight than listed, follow instructions on popcorn package. Use a microwave safe cup. 2. Do not heat liquids in the display window and begins to give proper result when heating 1 cup (250 ml) or 2 cups (500 ml) of servings appears in the display window. (see More/Less Feature.) Optional 3. • Press Start . ➤After several seconds, cooking time appears in your food cooked to count down . Care must...

NNH664 User Guide
Page 15
... icy in microwave safe dish. 3. Defrosting will count down. If 2 beeps sound, turn over (invert) items during STANDING TIME. 2. or 1 lb. 14 oz., enter 1.9 lbs. Place wax paper between layers. 2. Seal securely, date, and label. Remove wrapper. Juices from food can get hot and cook the food. 2. Set food in the center. Shield edges and ends if needed. (See Cooking Techniques). Defrosting will complete during defrosting. 7. Items which...
... icy in microwave safe dish. 3. Defrosting will count down. If 2 beeps sound, turn over (invert) items during STANDING TIME. 2. or 1 lb. 14 oz., enter 1.9 lbs. Place wax paper between layers. 2. Seal securely, date, and label. Remove wrapper. Juices from food can get hot and cook the food. 2. Set food in the center. Shield edges and ends if needed. (See Cooking Techniques). Defrosting will complete during defrosting. 7. Items which...

NNH664 User Guide
Page 16
... Remove defrosted pieces Drain liquid/Turn over/ Separate pieces Turn over /Shield 5 min. Break apart/Turn over/ Remove defrosted Pieces Break apart/Turn over/Shield Turn over/Shield Turn over - - - - in refrig. YES 10 min. 20 min. Turn over /Shield 20 min. Turn over /Shield ends and defrosted surface 30 min. in refrig. Defrosting Tips & Techniques (continued) FOOD DEFROST TIME at P3 mins (per lb) DURING DEFROSTING AFTER DEFROSTING...
... Remove defrosted pieces Drain liquid/Turn over/ Separate pieces Turn over /Shield 5 min. Break apart/Turn over/ Remove defrosted Pieces Break apart/Turn over/Shield Turn over/Shield Turn over - - - - in refrig. YES 10 min. 20 min. Turn over /Shield 20 min. Turn over /Shield ends and defrosted surface 30 min. in refrig. Defrosting Tips & Techniques (continued) FOOD DEFROST TIME at P3 mins (per lb) DURING DEFROSTING AFTER DEFROSTING...

NNH664 User Guide
Page 17
... Sensor, 2 beeps sound. After reheating, let stand for a few minutes. If oven cavity is no longer contained within the oven cavity. The remaining cooking time appears in the oven. For raw or uncooked foods. 3. Be sure the glass tray, the outside of the cooking containers and the inside of liquid, cover with the GENIUS SENSOR, follow these foods. 2. The oven simplifies programming. At the end of food 1. • Press Sensor Reheat. Food weight...
... Sensor, 2 beeps sound. After reheating, let stand for a few minutes. If oven cavity is no longer contained within the oven cavity. The remaining cooking time appears in the oven. For raw or uncooked foods. 3. Be sure the glass tray, the outside of the cooking containers and the inside of liquid, cover with the GENIUS SENSOR, follow these foods. 2. The oven simplifies programming. At the end of food 1. • Press Sensor Reheat. Food weight...

NNH664 User Guide
Page 18
... Recipe Serving/Weight HINTS 1. Follow manufacturers' directions for covering or (300 - 450 g) removing covers. Cover with lid or vented plastic wrap. Stir after cooking. After 2 beeps, stir or rearrange. Frozen Dinners 11 - 16 oz. Cover with no cover. If additional time is needed, continue to 10 minutes before serving. 12. Follow manufactures' directions for preparation. (single) (110, 225 g) 8. Oatmeal 0.5 - 1 cup (40 - 80 g) Place inside a microwave safe...
... Recipe Serving/Weight HINTS 1. Follow manufacturers' directions for covering or (300 - 450 g) removing covers. Cover with lid or vented plastic wrap. Stir after cooking. After 2 beeps, stir or rearrange. Frozen Dinners 11 - 16 oz. Cover with no cover. If additional time is needed, continue to 10 minutes before serving. 12. Follow manufactures' directions for preparation. (single) (110, 225 g) 8. Oatmeal 0.5 - 1 cup (40 - 80 g) Place inside a microwave safe...

NNH664 User Guide
Page 20
... oven operating. When each stage finishes, a two-beep signal sounds. A change in starting temperature of Stand Time using the timer feature, the oven is incorrectly programed. To Set Delay Start: Example: To delay the start . Press 5 times • Enter the desired Power Level (see page 11 for directions). 2. After cooking, stand time will count down without oven operating. Then cooking will count down . To Use as a kitchen timer. Set desired cooking time using number pads. 3. • Press Timer. 4. • Set desired amount of food...
... oven operating. When each stage finishes, a two-beep signal sounds. A change in starting temperature of Stand Time using the timer feature, the oven is incorrectly programed. To Set Delay Start: Example: To delay the start . Press 5 times • Enter the desired Power Level (see page 11 for directions). 2. After cooking, stand time will count down without oven operating. Then cooking will count down . To Use as a kitchen timer. Set desired cooking time using number pads. 3. • Press Timer. 4. • Set desired amount of food...

NNH664 User Guide
Page 21
.... Cover with lid or vented plastic wrap. To toast Coconut, 1/2 cup (125 ml) P10 (High) 1 Place in mins.) DIRECTIONS To separate refrigerated Bacon, 1 pound (450 g) P10 (High) 30 sec. After heating, use a plastic spatula to separate slices. To brown Ground Beef, P10 (High) 1 pound (450 g) 4 - 5 Crumble into a microwave safe colander set into microwave safe serving bowl. Microwave Shortcuts FOOD POWER TIME (in a microwave...
.... Cover with lid or vented plastic wrap. To toast Coconut, 1/2 cup (125 ml) P10 (High) 1 Place in mins.) DIRECTIONS To separate refrigerated Bacon, 1 pound (450 g) P10 (High) 30 sec. After heating, use a plastic spatula to separate slices. To brown Ground Beef, P10 (High) 1 pound (450 g) 4 - 5 Crumble into a microwave safe colander set into microwave safe serving bowl. Microwave Shortcuts FOOD POWER TIME (in a microwave...

NNH664 User Guide
Page 24
... to distribute the heat evenly. Loosen or remove plastic wrap as roasts or turkeys, halfway through cooking. To prevent overcooking, these food need a shorter amount of poultry. Always cook food for the minimum cooking time given in conventional cooking may be used for doneness. Always bring the cooked outside edges toward the center and the less cooked center portions toward the outside of aluminum foil...
... to distribute the heat evenly. Loosen or remove plastic wrap as roasts or turkeys, halfway through cooking. To prevent overcooking, these food need a shorter amount of poultry. Always cook food for the minimum cooking time given in conventional cooking may be used for doneness. Always bring the cooked outside edges toward the center and the less cooked center portions toward the outside of aluminum foil...

NNH664 User Guide
Page 25
... seep into ventilation openings. Do not use harsh detergents or abrasives. During cooking, especially under this book) PART NUMBER F00036K50AP Glass Tray F06014T01AP Roller Ring Assembly F290D9330AP For pricing quotes, call or write the Parts & Literature Department at wall outlet. Roller Ring may be Inside of Your Microwave Oven BEFORE CLEANING: Unplug oven at the phone or address listed below. It is given off from the food. (Some steam...
... seep into ventilation openings. Do not use harsh detergents or abrasives. During cooking, especially under this book) PART NUMBER F00036K50AP Glass Tray F06014T01AP Roller Ring Assembly F290D9330AP For pricing quotes, call or write the Parts & Literature Department at wall outlet. Roller Ring may be Inside of Your Microwave Oven BEFORE CLEANING: Unplug oven at the phone or address listed below. It is given off from the food. (Some steam...

NNH664 User Guide
Page 26
... circulates in Remove plug from the glass tray. The Glass Tray is not closed completely. Clean these parts according to the Operating Instructions. There is Reset circuit breaker or replace tripped or blown. The Roller Ring and oven bottom are normal: The oven causes interference with a damp cloth and Roller Ring or there is normal. Circuit breaker or fuse is a problem with the microwave oven. Stop/Reset Pad has been Program oven again...
... circulates in Remove plug from the glass tray. The Glass Tray is not closed completely. Clean these parts according to the Operating Instructions. There is Reset circuit breaker or replace tripped or blown. The Roller Ring and oven bottom are normal: The oven causes interference with a damp cloth and Roller Ring or there is normal. Circuit breaker or fuse is a problem with the microwave oven. Stop/Reset Pad has been Program oven again...

NNH664 User Guide
Page 27
... warranty gives you specific legal rights and you . If the problem is ". handling, misapplication, alteration, faulty installation, set-up adjustments, misadjustment of Puerto Rico, Inc. er or Service center. Customer Services Directory For Product Information, Operating Assistance, Literature Request, Dealer Locations, and all Customer Service inquiries please contact: 1-800-211-PANA (7262), Monday-Friday 9 am -7 pm, EST. ranty ALSO DOES NOT COVER...
... warranty gives you specific legal rights and you . If the problem is ". handling, misapplication, alteration, faulty installation, set-up adjustments, misadjustment of Puerto Rico, Inc. er or Service center. Customer Services Directory For Product Information, Operating Assistance, Literature Request, Dealer Locations, and all Customer Service inquiries please contact: 1-800-211-PANA (7262), Monday-Friday 9 am -7 pm, EST. ranty ALSO DOES NOT COVER...


