

PT47XD64 User Guide
Page 4
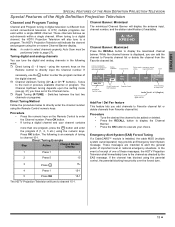
... least 20 minutes before using the buttons on the remote control and by following the on pages 28 and 29. Convergence refers to provide reasonable protection against radio and television interference in Part 15 of the following diagram shows examples of red, green and blue images on the front control panel. If this feature be displayed, with convergence problem. Information Regarding Convergence In the projection television, the image is formed by...
... least 20 minutes before using the buttons on the remote control and by following the on pages 28 and 29. Convergence refers to provide reasonable protection against radio and television interference in Part 15 of the following diagram shows examples of red, green and blue images on the front control panel. If this feature be displayed, with convergence problem. Information Regarding Convergence In the projection television, the image is formed by...

PT47XD64 User Guide
Page 5
... Information 1 Information Regarding The Use Of Video Games Computers, Or Other Fixed Image Displays 1 Information Regarding Auto Convergence 2 Information Regarding Convergence 2 Congratulations 4 Customer Record 4 Care and Cleaning 4 Specifications 4 Feature Chart 4 Installation 5 Television Location 5 Component Connection Cables 5 AC Power Supply Cord 5 Cable / Antenna Connection 5 Remote Control Battery Installation 5 First Time Setup 6 Front and Rear View of law. 3 z Read these instructions completely before operating television. Unauthorized copying and distribution is...
... Information 1 Information Regarding The Use Of Video Games Computers, Or Other Fixed Image Displays 1 Information Regarding Auto Convergence 2 Information Regarding Convergence 2 Congratulations 4 Customer Record 4 Care and Cleaning 4 Specifications 4 Feature Chart 4 Installation 5 Television Location 5 Component Connection Cables 5 AC Power Supply Cord 5 Cable / Antenna Connection 5 Remote Control Battery Installation 5 First Time Setup 6 Front and Rear View of law. 3 z Read these instructions completely before operating television. Unauthorized copying and distribution is...

PT47XD64 User Guide
Page 6
... high quality picture and sound with water or a mild detergent solution. Your PTV is available at the factory for U.S. Warning: Do not spray any type of cleaning fluid directly on the back of the TV. Power Source PT-47XD64 PT-53XD64 PT-53TWD64 (4.1A) (4.1A) (4.1A) Channel Capability ATSC/NTSC HDMI Input jack Digital Audio Out jack Component Video Inputs (Y / PB / PR) Video Input Jacks Audio Input Jacks Video...
... high quality picture and sound with water or a mild detergent solution. Your PTV is available at the factory for U.S. Warning: Do not spray any type of cleaning fluid directly on the back of the TV. Power Source PT-47XD64 PT-53XD64 PT-53TWD64 (4.1A) (4.1A) (4.1A) Channel Capability ATSC/NTSC HDMI Input jack Digital Audio Out jack Component Video Inputs (Y / PB / PR) Video Input Jacks Audio Input Jacks Video...

PT47XD64 User Guide
Page 7
...both Cable and Antenna, the Cable must be used between components. CAUTION: The weight limit of television. Cable Connection Connect the cable supplied by your convenience, optional devices such as a Satellite Receiver, a Cable Box, a DVD player, a VCR or a center channel speaker can be connected to ANTENNA Mode for ANTENNA (A) or (B) in Input Setup under Program CH in SET UP menu under Program CH (Program Channels). INSTALLATION External Shelf (mounted on back of analog or digital cable channels, a cable service connection is required. Cable / Antenna Connection...
...both Cable and Antenna, the Cable must be used between components. CAUTION: The weight limit of television. Cable Connection Connect the cable supplied by your convenience, optional devices such as a Satellite Receiver, a Cable Box, a DVD player, a VCR or a center channel speaker can be connected to ANTENNA Mode for ANTENNA (A) or (B) in Input Setup under Program CH in SET UP menu under Program CH (Program Channels). INSTALLATION External Shelf (mounted on back of analog or digital cable channels, a cable service connection is required. Cable / Antenna Connection...

PT47XD64 User Guide
Page 8
... Connect Cable to analog channel 2 on for the first time or whenever you change the antenna configuration. 6 z First time setup SELECT Input Setup Scan All Auto Scan Antenna (A) Analog MENU to return EXIT Convergence Antenna (A) Analog & Digital Antenna (B) Analog Antenna (B) Analog & Digital Convergence This menu lets you to perform convergence. Notes: • If the EXIT button is present during auto scan. Input Setup To select the configuration of RF input depending on -screen to selectively auto scan channels. Follow the instructions on the signal...
... Connect Cable to analog channel 2 on for the first time or whenever you change the antenna configuration. 6 z First time setup SELECT Input Setup Scan All Auto Scan Antenna (A) Analog MENU to return EXIT Convergence Antenna (A) Analog & Digital Antenna (B) Analog Antenna (B) Analog & Digital Convergence This menu lets you to perform convergence. Notes: • If the EXIT button is present during auto scan. Input Setup To select the configuration of RF input depending on -screen to selectively auto scan channels. Follow the instructions on the signal...

PT47XD64 User Guide
Page 9
... increase volume, navigate left pillar of the High Definition Projection Television Front Panel Rear Panel Jacks Front Panel for more than 5 seconds until the unit resets itself. 2 TV/VIDEO Changes Input source 3 CH and CH Tunes to ANT B. HDMI (High Definition Multimedia Interface) 5 Input that output fixed audio and NTSC composite video. 10 TO AUDIO AMP Analog Audio Output to connect to an analog amplifier 11 Cooling fan 10 Eject button Push this slot. 4 DIGITAL AUDIO OUT 5.1 Dolby Digital surround sound optical output. AUDIO -R 8 POWER...
... increase volume, navigate left pillar of the High Definition Projection Television Front Panel Rear Panel Jacks Front Panel for more than 5 seconds until the unit resets itself. 2 TV/VIDEO Changes Input source 3 CH and CH Tunes to ANT B. HDMI (High Definition Multimedia Interface) 5 Input that output fixed audio and NTSC composite video. 10 TO AUDIO AMP Analog Audio Output to connect to an analog amplifier 11 Cooling fan 10 Eject button Push this slot. 4 DIGITAL AUDIO OUT 5.1 Dolby Digital surround sound optical output. AUDIO -R 8 POWER...

PT47XD64 User Guide
Page 10
Consult your television to tune digital and high definition cable channels through the cable antenna. This television also utilizes a progressive scan doubler, which de-interlaces the NTSC signal and progressively scans the image. VIDEO S-VIDEO NTSC OUTPUT ANT B CableCARD TM INTERFACE HDMI SERVICE ONLY AV IN DIGITAL AUDIO OUT L AUDIO IN R VIDEO Y PB S-VIDEO PR VIDEO L L R 1 2 AUDIO COMPONENT VIDEO INPUT INPUT 1 R INPUT INPUT PROG TO AUDIO 2 3 OUT AMP CABLES NOT SUPPLIED Note: There are two set -top-box (STB) or a DVD player. Notes: • • •...
Consult your television to tune digital and high definition cable channels through the cable antenna. This television also utilizes a progressive scan doubler, which de-interlaces the NTSC signal and progressively scans the image. VIDEO S-VIDEO NTSC OUTPUT ANT B CableCARD TM INTERFACE HDMI SERVICE ONLY AV IN DIGITAL AUDIO OUT L AUDIO IN R VIDEO Y PB S-VIDEO PR VIDEO L L R 1 2 AUDIO COMPONENT VIDEO INPUT INPUT 1 R INPUT INPUT PROG TO AUDIO 2 3 OUT AMP CABLES NOT SUPPLIED Note: There are two set -top-box (STB) or a DVD player. Notes: • • •...

PT47XD64 User Guide
Page 11
... R DVI to HDMI adaptor cable Procedure • Connect the HDMI output from the external device (set top box or a DVD player to the HDMI input on the back of the PTV. • Press TV/VIDEO button on the screen in the HDMI connection, the compatible sampling frequencies are 48 KHz / 44.1Khz / 32 Khz. Also, connect the Audio Out signal from the set top box or DVD player) to page 23 for transmission of uncompressed digital video including high...
... R DVI to HDMI adaptor cable Procedure • Connect the HDMI output from the external device (set top box or a DVD player to the HDMI input on the back of the PTV. • Press TV/VIDEO button on the screen in the HDMI connection, the compatible sampling frequencies are 48 KHz / 44.1Khz / 32 Khz. Also, connect the Audio Out signal from the set top box or DVD player) to page 23 for transmission of uncompressed digital video including high...

PT47XD64 User Guide
Page 12
... system, connect an external audio amplifier TO AUDIO AMP outputs on -screen display. • See the VCR instruction manual for further instructions for main picture. • Program Out signal is available when receiving digital channel. ANT A Cable In ANT B CableCARD TM INTERFACE HDMI SERVICE ONLY A/V IN TERMINALS ON BACK OF PROJECTION TELEVISION VIDEO Y PB S-VIDEO PR VIDEO L L DIGITAL AUDIO OUT L AUDIO IN R R 1 2 AUDIO COMPONENT VIDEO INPUT INPUT 1 INPUT 2 R INPUT PROG TO AUDIO 3 OUT AMP CABLES NOT SUPPLIED EXTERNAL AMPLIFIER 90.7 MHZ Audio Adjustments •...
... system, connect an external audio amplifier TO AUDIO AMP outputs on -screen display. • See the VCR instruction manual for further instructions for main picture. • Program Out signal is available when receiving digital channel. ANT A Cable In ANT B CableCARD TM INTERFACE HDMI SERVICE ONLY A/V IN TERMINALS ON BACK OF PROJECTION TELEVISION VIDEO Y PB S-VIDEO PR VIDEO L L DIGITAL AUDIO OUT L AUDIO IN R R 1 2 AUDIO COMPONENT VIDEO INPUT INPUT 1 INPUT 2 R INPUT PROG TO AUDIO 3 OUT AMP CABLES NOT SUPPLIED EXTERNAL AMPLIFIER 90.7 MHZ Audio Adjustments •...

PT47XD64 User Guide
Page 13
...; Press RECALL to display PIP frame. • Select channels for the PIP frame by pressing PIP CH DVD/VCR CH. • Select channels for analog channels. PIP • Press to view picture source status. Swap is from Antenna (A) and video inputs signal can display digital channel as a VCR, cable box, etc. PIP AND SPLIT OPERATION Note: PIP or SPLIT frame cannot display digital channel signal. Main Picture CH # COMPONENT1 COMPONENT2 VIDEO 1/2/3/4 PIP Frame HDMI Main Picture CH # COMPONENT1 COMPONENT2 VIDEO 1/2/3/4 HDMI SPLIT Frame Search Button (PIP and...
...; Press RECALL to display PIP frame. • Select channels for the PIP frame by pressing PIP CH DVD/VCR CH. • Select channels for analog channels. PIP • Press to view picture source status. Swap is from Antenna (A) and video inputs signal can display digital channel as a VCR, cable box, etc. PIP AND SPLIT OPERATION Note: PIP or SPLIT frame cannot display digital channel signal. Main Picture CH # COMPONENT1 COMPONENT2 VIDEO 1/2/3/4 PIP Frame HDMI Main Picture CH # COMPONENT1 COMPONENT2 VIDEO 1/2/3/4 HDMI SPLIT Frame Search Button (PIP and...
PT47XD64 User Guide
Page 15
... FAV button TV-G CC SAP 1080i FULL VIVID HDMI 12:30 pm 30 Closed Caption and Program Aspect SAP indication Time remaining in Sleep Timer Audio Track 1 of 1 (English) Audio Track of digital channel Add Fav / Del Fav feature This feature lets you have set in the Channel menu. ˆ Rapid Tuning (R-TUNE) - These channels behave as directed by the EAS message. When tuning to a digital channel, the HDTV Projection Television will...
... FAV button TV-G CC SAP 1080i FULL VIVID HDMI 12:30 pm 30 Closed Caption and Program Aspect SAP indication Time remaining in Sleep Timer Audio Track 1 of 1 (English) Audio Track of digital channel Add Fav / Del Fav feature This feature lets you have set in the Channel menu. ˆ Rapid Tuning (R-TUNE) - These channels behave as directed by the EAS message. When tuning to a digital channel, the HDTV Projection Television will...

PT47XD64 User Guide
Page 18
... AUX. POWER 3. Note: Press appropriate component button on the Remote Control VCR, DVD (CD), DBS, RCVR, CBL or AUX (PVR or VCR2). VCR DVD DVD (CD) DBS RECEIVER CABLE AUX (PVR) AUX (VCR2) 16 z Device Operates Default TV TV (Panasonic Only) Panasonic Code VCR VCR (Preset) Panasonic Code DVD/CD DVD and CD (Preset) Panasonic Code DBS DBS STB & CBL STB (Preset) Panasonic DBS Code RCVR Audio Receiver (Preset) Panasonic RCVR Code CBL Cable (Preset) Panasonic CABLE Code AUX Personal Video Recorders...
... AUX. POWER 3. Note: Press appropriate component button on the Remote Control VCR, DVD (CD), DBS, RCVR, CBL or AUX (PVR or VCR2). VCR DVD DVD (CD) DBS RECEIVER CABLE AUX (PVR) AUX (VCR2) 16 z Device Operates Default TV TV (Panasonic Only) Panasonic Code VCR VCR (Preset) Panasonic Code DVD/CD DVD and CD (Preset) Panasonic Code DBS DBS STB & CBL STB (Preset) Panasonic DBS Code RCVR Audio Receiver (Preset) Panasonic RCVR Code CBL Cable (Preset) Panasonic CABLE Code AUX Personal Video Recorders...

PT47XD64 User Guide
Page 24
... - Reset each PIC Mode adjustments to display the sub sub-menu. and press OK button to factory default settings. Note: While sub sub-menu features are expanded by BBE while the width, depth and height of dialogue. To increase or decrease WARM (red) and COOL (blue) colors to freeze main picture and display it in model PT-53TWD64 only. Reduces noise in the picture (not selectable when receiving digital signal). • COLOR...
... - Reset each PIC Mode adjustments to display the sub sub-menu. and press OK button to factory default settings. Note: While sub sub-menu features are expanded by BBE while the width, depth and height of dialogue. To increase or decrease WARM (red) and COOL (blue) colors to freeze main picture and display it in model PT-53TWD64 only. Reduces noise in the picture (not selectable when receiving digital signal). • COLOR...

PT47XD64 User Guide
Page 25
... is displayed. Captions Preset Labels Manual Labels Input Labels RF input Channel Caption Antenna (A) 15-1 CHANGE Captions - TV speakers off. • HDMI In - Automatically selects Analog / Digital signal. • Digital - Use the remote control VOL or VOL to select desired channels, then press the OK button to desired stations. Captions Preset Labels Manual Labels Input Labels RF Input ABC CBS FOX NBC PBS CNN ESPN HBO Antenna A) 12-1 15-1 ˆ Input Labels - Note: Note: Only input with remote control VOL...
... is displayed. Captions Preset Labels Manual Labels Input Labels RF input Channel Caption Antenna (A) 15-1 CHANGE Captions - TV speakers off. • HDMI In - Automatically selects Analog / Digital signal. • Digital - Use the remote control VOL or VOL to select desired channels, then press the OK button to desired stations. Captions Preset Labels Manual Labels Input Labels RF Input ABC CBS FOX NBC PBS CNN ESPN HBO Antenna A) 12-1 15-1 ˆ Input Labels - Note: Note: Only input with remote control VOL...

PT47XD64 User Guide
Page 28
... CH or CH button to set the hour (AM or PM). • Press VOL to enter the next field. Use navigation buttons to set the Time of the week. Select to highlight the Timer Icon. • The television automatically turns OFF after 90 minutes will flash 3, 2 and 1 to indicate the last three (3) remaining minutes prior to quit the timer menu screen. 26 z Procedure •...
... CH or CH button to set the hour (AM or PM). • Press VOL to enter the next field. Use navigation buttons to set the Time of the week. Select to highlight the Timer Icon. • The television automatically turns OFF after 90 minutes will flash 3, 2 and 1 to indicate the last three (3) remaining minutes prior to quit the timer menu screen. 26 z Procedure •...

PT47XD64 User Guide
Page 29
...the Ant B input. Program Channel OK Input Setup Cable only Auto Scan Manual Program Connect Cable to Antenna (A) Signal Meter Change your selection. Lets you select antenna, program channels, select analog and digital closed caption, Convergence, Auto Power On, Image Shift and Zoom Adjust. Press VOL or VOL to select Cable Only, Cable/Antenna or Antenna Only. • Press OK button to return Signal Meter ˆ Signal Meter - ENGLISH Set Up This menu lets you specify Antenna mode (Cable only, Cable/Antenna or Antenna only). Procedure • Press MENU to display the Main...
...the Ant B input. Program Channel OK Input Setup Cable only Auto Scan Manual Program Connect Cable to Antenna (A) Signal Meter Change your selection. Lets you select antenna, program channels, select analog and digital closed caption, Convergence, Auto Power On, Image Shift and Zoom Adjust. Press VOL or VOL to select Cable Only, Cable/Antenna or Antenna Only. • Press OK button to return Signal Meter ˆ Signal Meter - ENGLISH Set Up This menu lets you specify Antenna mode (Cable only, Cable/Antenna or Antenna only). Procedure • Press MENU to display the Main...

PT47XD64 User Guide
Page 30
... you set Auto Power On, adjust Convergence, select Image Shift On or Off and Zoom Adjust. ˆ Auto Power On - Press VOL or VOL to select or press OK button to view the digital captioning. You can set your preferences to return EXIT Zoom Adjust ˆ Convergence Note: Only use the remote control buttons while adjusting convergence. To display Closed Captioning. • On Mute - The colors sub-menu lets you choose to display the submenu for a long time. Closed Caption (Colors) Colors Foreground...
... you set Auto Power On, adjust Convergence, select Image Shift On or Off and Zoom Adjust. ˆ Auto Power On - Press VOL or VOL to select or press OK button to view the digital captioning. You can set your preferences to return EXIT Zoom Adjust ˆ Convergence Note: Only use the remote control buttons while adjusting convergence. To display Closed Captioning. • On Mute - The colors sub-menu lets you choose to display the submenu for a long time. Closed Caption (Colors) Colors Foreground...

PT47XD64 User Guide
Page 31
... display red center correction screen. • • Note: Use the navigation buttons on the remote control keypad to display red correction screen. • Press the 1 through the cable input. Procedure • Press OK button to display the BLUE center correction screen, repeat procedure for an extended period of color protrusion. You may have to subscribe to select: • CONVERGENCE ADJ. - Zoom Adjust Size V- Procedure • Press OK to enter convergence sub-menu...
... display red center correction screen. • • Note: Use the navigation buttons on the remote control keypad to display red correction screen. • Press the 1 through the cable input. Procedure • Press OK button to display the BLUE center correction screen, repeat procedure for an extended period of color protrusion. You may have to subscribe to select: • CONVERGENCE ADJ. - Zoom Adjust Size V- Procedure • Press OK to enter convergence sub-menu...
PT47XD64 User Guide
Page 36
... Video Multiple Image / Color shift in image retention on when turned on /off. (refer to prevent image burn-in Wire. Adjust Convergence (refer to page 27). Program the Remote Control Again. Poor ATSC signal strength. Check signal meter (refer to pages 28 and 29). Adjust Antenna Location and Connection. Move television from Electrical Appliances, Lights, Vehicles and Medical Equipment. Check Cable Connections. Check television SPEAKERS on , changing channels or screen. (refer pg. 28) within a duration of two (2) hours of viewing. ENGLISH TROUBLESHOOTING...
... Video Multiple Image / Color shift in image retention on when turned on /off. (refer to prevent image burn-in Wire. Adjust Convergence (refer to page 27). Program the Remote Control Again. Poor ATSC signal strength. Check signal meter (refer to pages 28 and 29). Adjust Antenna Location and Connection. Move television from Electrical Appliances, Lights, Vehicles and Medical Equipment. Check Cable Connections. Check television SPEAKERS on , changing channels or screen. (refer pg. 28) within a duration of two (2) hours of viewing. ENGLISH TROUBLESHOOTING...

PT47XD64 User Guide
Page 38
...Rear View of the HDTV Projection Television 7 Front Control Panel 8 Front Panel 7 G Glossay and Acronyms 33 H HDMI (High Definition Multimedia Interface) input connection 9 I Image Shift 28 Important Information 1 Important Information Regarding the use of Video Games 1 Information Regarding Auto Convergence 2 Information Regarding Convergence 2 Information Regarding memory cards 24 Input Labels 23 Input Setup 6, 27 Inserting and Removing SD or PCMCIA card 24 Installation 5 Interval 25 L Lock 30 Lock Set 30 M Main Picture Freeze Feature 12 Manual Labels 23 Manual Program 27 Menu button 12 Menu...
...Rear View of the HDTV Projection Television 7 Front Control Panel 8 Front Panel 7 G Glossay and Acronyms 33 H HDMI (High Definition Multimedia Interface) input connection 9 I Image Shift 28 Important Information 1 Important Information Regarding the use of Video Games 1 Information Regarding Auto Convergence 2 Information Regarding Convergence 2 Information Regarding memory cards 24 Input Labels 23 Input Setup 6, 27 Inserting and Removing SD or PCMCIA card 24 Installation 5 Interval 25 L Lock 30 Lock Set 30 M Main Picture Freeze Feature 12 Manual Labels 23 Manual Program 27 Menu button 12 Menu...

