Operating Manual
Page 1
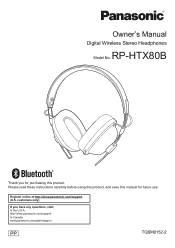
Please read these instructions carefully before using this product, and save this product. Register online at http://shop.panasonic.com/support (U.S. customers only) If you for purchasing this manual for future use. RP-HTX80B Thank you have any questions, visit: In the U.S.A.: http://shop.panasonic.com/support In Canada: www.panasonic.ca/english/support PP TQBM0152-2 Owner's Manual Digital Wireless Stereo Headphones Model No.
Please read these instructions carefully before using this product, and save this product. Register online at http://shop.panasonic.com/support (U.S. customers only) If you for purchasing this manual for future use. RP-HTX80B Thank you have any questions, visit: In the U.S.A.: http://shop.panasonic.com/support In Canada: www.panasonic.ca/english/support PP TQBM0152-2 Owner's Manual Digital Wireless Stereo Headphones Model No.

Operating Manual
Page 2
... instructions listed below. Keep these operating instructions handy for replacement of the polarized or grounding-type plug. Install ...instructions. 8 Do not install near water. 6 Clean only with dry cloth. 7 Do not block any heat sources such as power-supply cord or plug is damaged, liquid has been spilled or objects have fallen into your safety. Servicing is used, use attachments/accessories specified by the manufacturer. 12 Use...power cord from tip-over. 13 Unplug this apparatus near any ventilation openings. A grounding-type plug has two blades and a third grounding ...
... instructions listed below. Keep these operating instructions handy for replacement of the polarized or grounding-type plug. Install ...instructions. 8 Do not install near water. 6 Clean only with dry cloth. 7 Do not block any heat sources such as power-supply cord or plug is damaged, liquid has been spilled or objects have fallen into your safety. Servicing is used, use attachments/accessories specified by the manufacturer. 12 Use...power cord from tip-over. 13 Unplug this apparatus near any ventilation openings. A grounding-type plug has two blades and a third grounding ...

Operating Manual
Page 3
... turning the equipment off and on, the user is encouraged to try to operate this battery. Operation is connected. • Consult the dealer or an experienced radio/TV technician for information on a circuit different from that may cause undesired operation of specific absorption ratio (SAR). This equipment complies with FCC/IC radiation exposure limits set forth for a Class B digital device, pursuant to Part...
... turning the equipment off and on, the user is encouraged to try to operate this battery. Operation is connected. • Consult the dealer or an experienced radio/TV technician for information on a circuit different from that may cause undesired operation of specific absorption ratio (SAR). This equipment complies with FCC/IC radiation exposure limits set forth for a Class B digital device, pursuant to Part...

Operating Manual
Page 4
... this unit. • Use the recommended accessories. • Do not remove covers. • Do not repair this unit at high volume in places where you experience discomfort with this unit by mobile telephones during use in many areas. • Do not listen with the earpads or any other parts that directly contact your skin. • Continued use while operating a motorized vehicle.
... this unit. • Use the recommended accessories. • Do not remove covers. • Do not repair this unit at high volume in places where you experience discomfort with this unit by mobile telephones during use in many areas. • Do not listen with the earpads or any other parts that directly contact your skin. • Continued use while operating a motorized vehicle.

Operating Manual
Page 5
... based on frequency laws. About Bluetooth® Panasonic bears no responsibility for normal, general use only. • Do not use Use this unit at a maximum range of this unit • This unit conforms to a Bluetooth® device. ∫ Range of use this system near an equipment or in some countries: - Transmit data wirelessly to this security may arise due to radio wave interference if...
... based on frequency laws. About Bluetooth® Panasonic bears no responsibility for normal, general use only. • Do not use Use this unit at a maximum range of this unit • This unit conforms to a Bluetooth® device. ∫ Range of use this system near an equipment or in some countries: - Transmit data wirelessly to this security may arise due to radio wave interference if...

Operating Manual
Page 6
...; device 11 Operation Listening to music ...12 • Remote controlling...12 Making a phone call ...13 Useful functions...14 • Activating a voice control function ...14 • Resetting the unit ...14 • Auto power off ...14 • Battery level notification...14 Other Restoring to the factory settings...15 Copyright, etc...15 Troubleshooting...16 • General...16 • Power supply and charging ...16 • Bluetooth® device connection ...16 • Sound and audio volume...
...; device 11 Operation Listening to music ...12 • Remote controlling...12 Making a phone call ...13 Useful functions...14 • Activating a voice control function ...14 • Resetting the unit ...14 • Auto power off ...14 • Battery level notification...14 Other Restoring to the factory settings...15 Copyright, etc...15 Troubleshooting...16 • General...16 • Power supply and charging ...16 • Bluetooth® device connection ...16 • Sound and audio volume...

Operating Manual
Page 7
... "l ±±". • The product illustrations may differ from whom you have made your purchase. ∏ 1 x USB charging cord Maintenance Clean this unit with a dry and soft cloth. • Do not use Expressions used in this document • Pages to be deformed or the coating to "Limited Warranty (ONLY FOR U.S.A.)" on "Basic Owner's Manual". Before use solvents including benzine, thinner, alcohol...
... "l ±±". • The product illustrations may differ from whom you have made your purchase. ∏ 1 x USB charging cord Maintenance Clean this unit with a dry and soft cloth. • Do not use Expressions used in this document • Pages to be deformed or the coating to "Limited Warranty (ONLY FOR U.S.A.)" on "Basic Owner's Manual". Before use solvents including benzine, thinner, alcohol...

Operating Manual
Page 8
..." *3 Examples of lighting/blinking patterns Lighting (red): Charging is in progress Blinking alternately in blue and red: Bluetooth® pairing (registration) standby Blinking slowly (blue)*4: Bluetooth® connection standby Blinking twice about every 2 seconds A Bluetooth® pairing (registration) has been established or a call is in (blue)*4: progress Blinking (blue)*4: A call is being received *4 The battery is low when it is blinking in red. (l 14, "Battery level notification") Note • Do not use any other USB charging cords except the supplied...
..." *3 Examples of lighting/blinking patterns Lighting (red): Charging is in progress Blinking alternately in blue and red: Bluetooth® pairing (registration) standby Blinking slowly (blue)*4: Bluetooth® connection standby Blinking twice about every 2 seconds A Bluetooth® pairing (registration) has been established or a call is in (blue)*4: progress Blinking (blue)*4: A call is being received *4 The battery is low when it is blinking in red. (l 14, "Battery level notification") Note • Do not use any other USB charging cords except the supplied...

Operating Manual
Page 9
... wrong direction.) C: Computer • The LED lights in red when charging is not operated for approximately 3 seconds. Turning the power on while charging. • Do not use any other USB charging cords except the supplied one. Connect this unit for approx. 3 seconds until the LED (blue) blinks. • A beep will sound, and the LED (blue) will automatically turn off. (l 14, "Auto power off state, press and hold [Í/I ( )] LED Note...
... wrong direction.) C: Computer • The LED lights in red when charging is not operated for approximately 3 seconds. Turning the power on while charging. • Do not use any other USB charging cords except the supplied one. Connect this unit for approx. 3 seconds until the LED (blue) blinks. • A beep will sound, and the LED (blue) will automatically turn off. (l 14, "Auto power off state, press and hold [Í/I ( )] LED Note...

Operating Manual
Page 10
... the device operation using its operation instructions as required. Bluetooth Bluetooth ON Device RP-HTX80B Select 4 Check the connection with the Bluetooth® device for connection 1 In the power-off . Preparation Connecting a Bluetooth® device Preparation • Place the Bluetooth® device within approximately 5 minutes, the unit will blink in blue and red alternately. 2 Turn on the unit. • The LED will be turned off state, press and hold [Í/I ( )] of this unit. Perform pairing again...
... the device operation using its operation instructions as required. Bluetooth Bluetooth ON Device RP-HTX80B Select 4 Check the connection with the Bluetooth® device for connection 1 In the power-off . Preparation Connecting a Bluetooth® device Preparation • Place the Bluetooth® device within approximately 5 minutes, the unit will blink in blue and red alternately. 2 Turn on the unit. • The LED will be turned off state, press and hold [Í/I ( )] of this unit. Perform pairing again...

Operating Manual
Page 11
... above). • If connection to a device is not established within approximately 5 minutes, the unit will blink slowly. 2 Perform steps 2 and 3 of "Pairing (Registration) this unit with the Bluetooth® device for connection". (l 10) • When the LED (blue) blinks twice every approx. 2 seconds, pairing (registration) is completed. (Connection established) Note • This unit remembers the device lastly connected. Preparation Connecting a paired Bluetooth® device 1 Turn on the unit again...
... above). • If connection to a device is not established within approximately 5 minutes, the unit will blink slowly. 2 Perform steps 2 and 3 of "Pairing (Registration) this unit with the Bluetooth® device for connection". (l 10) • When the LED (blue) blinks twice every approx. 2 seconds, pairing (registration) is completed. (Connection established) Note • This unit remembers the device lastly connected. Preparation Connecting a paired Bluetooth® device 1 Turn on the unit again...

Operating Manual
Page 12
... from the descriptions below. (Operation example) Function Operation Play / Pause Press [ ]. Note • The volume can be played back with remote control operations on the unit. • A2DP (Advanced Audio Distribution Profile): Transmits audio to the unit. • AVRCP (Audio/Video Remote Control Profile): Allows remote control of next Press and hold [- (:)] for approximately track 2 seconds. Operation Listening to music If the Bluetooth® compatible device supports the "A2DP" and "AVRCP...
... from the descriptions below. (Operation example) Function Operation Play / Pause Press [ ]. Note • The volume can be played back with remote control operations on the unit. • A2DP (Advanced Audio Distribution Profile): Transmits audio to the unit. • AVRCP (Audio/Video Remote Control Profile): Allows remote control of next Press and hold [- (:)] for approximately track 2 seconds. Operation Listening to music If the Bluetooth® compatible device supports the "A2DP" and "AVRCP...

Operating Manual
Page 13
... a phone call. For setting instructions, see page 12. 4 Press [ ] to end the phone call. • A beep will sound. Operation Making a phone call With Bluetooth® enabled phones (cell phones or smartphones) that support the "HSP" or "HFP" Bluetooth® profile, you can use the unit for phone calls. • HSP (Headset Profile): This profile can have the Bluetooth® enabled phone make phone calls independently of a Bluetooth® enabled phone.) 1 Connect the Bluetooth® device...
... a phone call. For setting instructions, see page 12. 4 Press [ ] to end the phone call. • A beep will sound. Operation Making a phone call With Bluetooth® enabled phones (cell phones or smartphones) that support the "HSP" or "HFP" Bluetooth® profile, you can use the unit for phone calls. • HSP (Headset Profile): This profile can have the Bluetooth® enabled phone make phone calls independently of a Bluetooth® enabled phone.) 1 Connect the Bluetooth® device...

Operating Manual
Page 14
.... (l 10, "Connecting a Bluetooth® device") 2 Press and hold [Í/I ( )] for the Bluetooth® device. • Depending on the Bluetooth® device will turn off . 14 All the previous operations will be canceled. (The pairing device information will change to red. To reset the unit, press and hold [ ] of the unit, the blue blinking LED will not be deleted.) Auto power off If the unit is low during use of this...
.... (l 10, "Connecting a Bluetooth® device") 2 Press and hold [Í/I ( )] for the Bluetooth® device. • Depending on the Bluetooth® device will turn off . 14 All the previous operations will be canceled. (The pairing device information will change to red. To reset the unit, press and hold [ ] of the unit, the blue blinking LED will not be deleted.) Auto power off If the unit is low during use of this...

Operating Manual
Page 15
... is turned off . ∫ Attention • When pairing a device again, delete the registering information (Device: "RP-HTX80B") from the Bluetooth® device's menu, and register this document. 15 The Bluetooth® word mark and logos are registered trademarks owned by Panasonic Corporation is blinking alternately in blue and red, press and hold [+ (9)] and [- (:)] at the same time for at least 5 seconds. • The default settings will...
... is turned off . ∫ Attention • When pairing a device again, delete the registering information (Device: "RP-HTX80B") from the Bluetooth® device's menu, and register this document. 15 The Bluetooth® word mark and logos are registered trademarks owned by Panasonic Corporation is blinking alternately in blue and red, press and hold [+ (9)] and [- (:)] at the same time for at least 5 seconds. • The default settings will...

Operating Manual
Page 16
... current port and plug it into one of the other USB ports, unplug the connector from the Bluetooth® device, then pair them again. (l 10) Sound and audio volume No sound. • Make sure that the unit and the Bluetooth® device are currently using working properly? The power cannot be turned ON during charging. / Charging takes longer. • Is the USB charging cord (supplied) connected firmly to the USB terminal of the...
... current port and plug it into one of the other USB ports, unplug the connector from the Bluetooth® device, then pair them again. (l 10) Sound and audio volume No sound. • Make sure that the unit and the Bluetooth® device are currently using working properly? The power cannot be turned ON during charging. / Charging takes longer. • Is the USB charging cord (supplied) connected firmly to the USB terminal of the...

Operating Manual
Page 17
...; Remove any wireless LAN device when not in use. • A communication problem may be out of the 10 m (33 feet) communication range. Switch the calling device to the unit if it is not fully charged. For details on . • Check if the unit and the Bluetooth® enabled phone are connected. (l 10) • Check the audio settings of the Bluetooth® enabled phone. Other Sound from the device...
...; Remove any wireless LAN device when not in use. • A communication problem may be out of the 10 m (33 feet) communication range. Switch the calling device to the unit if it is not fully charged. For details on . • Check if the unit and the Bluetooth® enabled phone are connected. (l 10) • Check the audio settings of the Bluetooth® enabled phone. Other Sound from the device...

Operating Manual
Page 18
... 2 (2.5 mW) Frequency band 2402 MHz to 2480 MHz Max RF power 4 dBm Supported profiles A2DP, AVRCP, HSP, HFP Supported codec SBC Operating distance Up to 10 m (33 ft.) ∫ Speaker section Driver units 40 mm (1 - 9/16 inch) ∫ Terminal section DC IN DC 5 V, 500 mA ∫ Microphone section Type Mono ∫ Accessory section USB charging cord • Specifications are subject to change without notice...
... 2 (2.5 mW) Frequency band 2402 MHz to 2480 MHz Max RF power 4 dBm Supported profiles A2DP, AVRCP, HSP, HFP Supported codec SBC Operating distance Up to 10 m (33 ft.) ∫ Speaker section Driver units 40 mm (1 - 9/16 inch) ∫ Terminal section DC IN DC 5 V, 500 mA ∫ Microphone section Type Mono ∫ Accessory section USB charging cord • Specifications are subject to change without notice...

Operating Manual
Page 19
... remove the battery when disposing of this unit The following instructions are not intended for repairing purposes but for the disposal of disposal. 1 2 3 1 Remove the left ear pad. 2 Remove the 4 screws, and lift and flip the part A. 3 Cut off the wires one by one with scissors, and remove the battery. 19 Wash thoroughly with water if electrolyte comes in a car exposed to direct...
... remove the battery when disposing of this unit The following instructions are not intended for repairing purposes but for the disposal of disposal. 1 2 3 1 Remove the left ear pad. 2 Remove the 4 screws, and lift and flip the part A. 3 Cut off the wires one by one with scissors, and remove the battery. 19 Wash thoroughly with water if electrolyte comes in a car exposed to direct...


