Touch Panel For Pdp
Page 1
Please keep this product, please read these instructions completely. English TQZW464 ® Operating Instructions Touch Panel Model No. TY-TP42P8-S TY-TP50P8-S Before connecting, operating or adjusting this manual for future reference.
Please keep this product, please read these instructions completely. English TQZW464 ® Operating Instructions Touch Panel Model No. TY-TP42P8-S TY-TP50P8-S Before connecting, operating or adjusting this manual for future reference.

Touch Panel For Pdp
Page 2
... 5 Accessories 6 Touch panel unit 6 Setup procedure 7 Attachment of the touch panel to the plasma display 8 Connection between the computer and plasma display .......... 10 Installation of the USB driver 11 In case of Windows 98SE 12 In case of Windows ME 14 In case of Windows 2000 16 In case of Windows XP 18 Installation of the Touch Panel Driver 21 Uninstallation of the Touch Panel Driver 22 Setup the program 23 Troubleshooting 34 Specifications...
... 5 Accessories 6 Touch panel unit 6 Setup procedure 7 Attachment of the touch panel to the plasma display 8 Connection between the computer and plasma display .......... 10 Installation of the USB driver 11 In case of Windows 98SE 12 In case of Windows ME 14 In case of Windows 2000 16 In case of Windows XP 18 Installation of the Touch Panel Driver 21 Uninstallation of the Touch Panel Driver 22 Setup the program 23 Troubleshooting 34 Specifications...

Touch Panel For Pdp
Page 3
... be used for a long time, unplug the USB cable. • To ensure safety, be sure to grip the connector. • Unplugging by discoloration. Do not move the equipment after attaching the touch panel unit to the plasma display. • The weight of the plasma display will be exposed to the touch panel unit and may cause malfunction. To prevent incorrect operation, do...
... be used for a long time, unplug the USB cable. • To ensure safety, be sure to grip the connector. • Unplugging by discoloration. Do not move the equipment after attaching the touch panel unit to the plasma display. • The weight of the plasma display will be exposed to the touch panel unit and may cause malfunction. To prevent incorrect operation, do...

Touch Panel For Pdp
Page 4
... • Locations near powerful light sources (This is dangerous to fall or be sure not to touch the infrared transmissive area on the screen until the PC has completed the starting OS • After turning on the PC, be inserted into the equipment through openings. Do not place containers that the power supply used conforms to touch the infrared transmissive...
... • Locations near powerful light sources (This is dangerous to fall or be sure not to touch the infrared transmissive area on the screen until the PC has completed the starting OS • After turning on the PC, be inserted into the equipment through openings. Do not place containers that the power supply used conforms to touch the infrared transmissive...

Touch Panel For Pdp
Page 6
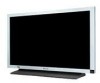
...-ROM (1) • USB driver software • Touch Panel Driver software Mounting screws [A] for Mounting brackets [A, B] TY-TP42P8-S (8) TY-TP50P8-S (10) Mounting bracket for USB cable (1) Mounting brackets [C] TY-TP50P8-S (2) Left Right Mounting screws for USB cable (2) Mounting screws for Mounting brackets [C] TY-TP50P8-S (4) Touch panel unit (Front) (Rear) USB Pen OFF ON Light receiver for optional touch pen (TY-TPEN6) This is for receiving light signals from the special-purpose touch pen. Pen Selection switch OFF ON ON: Touch pen mode (when using the optional touch pen) OFF...
...-ROM (1) • USB driver software • Touch Panel Driver software Mounting screws [A] for Mounting brackets [A, B] TY-TP42P8-S (8) TY-TP50P8-S (10) Mounting bracket for USB cable (1) Mounting brackets [C] TY-TP50P8-S (2) Left Right Mounting screws for USB cable (2) Mounting screws for Mounting brackets [C] TY-TP50P8-S (4) Touch panel unit (Front) (Rear) USB Pen OFF ON Light receiver for optional touch pen (TY-TPEN6) This is for receiving light signals from the special-purpose touch pen. Pen Selection switch OFF ON ON: Touch pen mode (when using the optional touch pen) OFF...

Touch Panel For Pdp
Page 7
Setup procedure 1 Attachment of the touch panel to the plasma display 2 Connection between the computer and the plasma display 3 Installation of USB Driver 4 Installation of Touch Panel Driver 5 Setup Program P 8 P 10 P 11 P 21 P 23 7
Setup procedure 1 Attachment of the touch panel to the plasma display 2 Connection between the computer and the plasma display 3 Installation of USB Driver 4 Installation of Touch Panel Driver 5 Setup Program P 8 P 10 P 11 P 21 P 23 7

Touch Panel For Pdp
Page 10
... sequence: 1: Plasma Display, 2: Computer. (3) Switch the plasma display input signal to the computer. (4) After the computer OS starts up the touch panel driver software. (See page 21) • If the infrared transmissive part of the screen is rated at 500 mA. (1) Connect the plasma display and computer with the VGA cable. (2) Turn on the touch panel. Mounting bracket for USB cable (accessory) Installation of the USB driver In case of Windows 98 Second Edition...
... sequence: 1: Plasma Display, 2: Computer. (3) Switch the plasma display input signal to the computer. (4) After the computer OS starts up the touch panel driver software. (See page 21) • If the infrared transmissive part of the screen is rated at 500 mA. (1) Connect the plasma display and computer with the VGA cable. (2) Turn on the touch panel. Mounting bracket for USB cable (accessory) Installation of the USB driver In case of Windows 98 Second Edition...

Touch Panel For Pdp
Page 11
... Microsoft serial mouse input. This makes it possible to operate existing applications and develop new applications employing the touch panel as if it were a mouse. • Enables the changing of touch panel operation settings by converting touch panel output data into that require large amounts of CPU time (for application programs that simulates the output of the USB Driver Function The control software provides the following functionality. • Supplies a software interface...
... Microsoft serial mouse input. This makes it possible to operate existing applications and develop new applications employing the touch panel as if it were a mouse. • Enables the changing of touch panel operation settings by converting touch panel output data into that require large amounts of CPU time (for application programs that simulates the output of the USB Driver Function The control software provides the following functionality. • Supplies a software interface...

Touch Panel For Pdp
Page 13
... "Universal Serial Bus controllers". 5 Confirm that "USBSerial for Touch Panel V2 (COMx)" is found in "Universal Serial Bus controllers". 6 Click on this wizard. 8 The new hardware window is displayed again, and the driver for the assumed COM port is finished. 13 As for the COM port number, the setup number varies in "Ports [COM&LPT]". (COMx) is the COM port number for Touch Panel V2" is found in the use environment...
... "Universal Serial Bus controllers". 5 Confirm that "USBSerial for Touch Panel V2 (COMx)" is found in "Universal Serial Bus controllers". 6 Click on this wizard. 8 The new hardware window is displayed again, and the driver for the assumed COM port is finished. 13 As for the COM port number, the setup number varies in "Ports [COM&LPT]". (COMx) is the COM port number for Touch Panel V2" is found in the use environment...

Touch Panel For Pdp
Page 15
...]". (COMx) is the COM port number for Touch Panel V2" is found in the use environment of the PC. 4 Next, double-click "Universal Serial Bus controllers". 5 Confirm that "MATSUSHITA USB-Serial Bridge for using a touch panel. As for the COM port number, the setup number varies in "Universal Serial Bus controllers". 6 Click on this button. Installation of the USB Driver COM port number is confirmed with "Device Manager" 1 Click on [Start] [Settings] [Control Panel] Double-click on...
...]". (COMx) is the COM port number for Touch Panel V2" is found in the use environment of the PC. 4 Next, double-click "Universal Serial Bus controllers". 5 Confirm that "MATSUSHITA USB-Serial Bridge for using a touch panel. As for the COM port number, the setup number varies in "Universal Serial Bus controllers". 6 Click on this button. Installation of the USB Driver COM port number is confirmed with "Device Manager" 1 Click on [Start] [Settings] [Control Panel] Double-click on...

Touch Panel For Pdp
Page 16
... a USB cable. (see page 10) When a USB cable is connected, it is recognized as a new hardware, and a message is indicated. 2 Choose this item. 3 Click on this button. Installation of the USB Driver In case of Windows 2000 Install USB Driver First, PC is started, and then Windows is inserted into the CD-ROM drive. Next, touch panel and PC are connected with USB driver software is started. Setup Wizard will start. 1 Click on this button...
... a USB cable. (see page 10) When a USB cable is connected, it is recognized as a new hardware, and a message is indicated. 2 Choose this item. 3 Click on this button. Installation of the USB Driver In case of Windows 2000 Install USB Driver First, PC is started, and then Windows is inserted into the CD-ROM drive. Next, touch panel and PC are connected with USB driver software is started. Setup Wizard will start. 1 Click on this button...

Touch Panel For Pdp
Page 17
... recognized as new hardware once again, and the screen on the left is indicated. 6 Click on this button. Confirm that "USB-Serial for Touch Panel V2 (COMx)" is the COM port number for the COM port number, the setup number varies in "Ports [COM&LPT]". (COMx) is found in the use environment of the PC. As for using a touch panel. Installation of the USB Driver "Driver Files Search Results" is displayed. Then...
... recognized as new hardware once again, and the screen on the left is indicated. 6 Click on this button. Confirm that "USB-Serial for Touch Panel V2 (COMx)" is the COM port number for the COM port number, the setup number varies in "Ports [COM&LPT]". (COMx) is found in the use environment of the PC. As for using a touch panel. Installation of the USB Driver "Driver Files Search Results" is displayed. Then...

Touch Panel For Pdp
Page 20
...'t use environment of the PC. Installation of the USB Driver About the COM port When it is set up, the USB driver is recognized as a new hardware, and a setup wizard is indicated when it is connected to a port which is different from the USB port which did the setup of the driver. In that Windows XP Service Pack 1 (or later) is re-connected to the USB port, where the driver was setup. It...
...'t use environment of the PC. Installation of the USB Driver About the COM port When it is set up, the USB driver is recognized as a new hardware, and a setup wizard is indicated when it is connected to a port which is different from the USB port which did the setup of the driver. In that Windows XP Service Pack 1 (or later) is re-connected to the USB port, where the driver was setup. It...

Touch Panel For Pdp
Page 21
... of Touch Panel Driver. Start the set-up automatically the next time the unit is turned on. 3 Click to end installation of control software installers (one for Windows 98SE and Windows ME, and one for the OS you are using . The setup program will assume here that this button to continue. 2 Click to the OS you are using .) (3) Click the [OK] button. In the default, it and then install the new driver software. The...
... of Touch Panel Driver. Start the set-up automatically the next time the unit is turned on. 3 Click to end installation of control software installers (one for Windows 98SE and Windows ME, and one for the OS you are using . The setup program will assume here that this button to continue. 2 Click to the OS you are using .) (3) Click the [OK] button. In the default, it and then install the new driver software. The...

Touch Panel For Pdp
Page 22
Click the [Yes] button. Then proceed to uninstall the Setup Program. USB driver software Load the included CD-ROM into the CD-ROM drive, run the program "Un-Installer.exe" on the CD-ROM, and follow the instructions on the [Change and delete] button. (5) The file delete confirmation screen will begin. Note: You cannot delete the program using one of the "Control Panel". Uninstall will be...
Click the [Yes] button. Then proceed to uninstall the Setup Program. USB driver software Load the included CD-ROM into the CD-ROM drive, run the program "Un-Installer.exe" on the CD-ROM, and follow the instructions on the [Change and delete] button. (5) The file delete confirmation screen will begin. Note: You cannot delete the program using one of the "Control Panel". Uninstall will be...

Touch Panel For Pdp
Page 23
... any key for some reason, use these buttons. Performing setup in the initial state saves the modified contents in "tpdrv.ini" setting file in operation when closing the window. Adds a Setup Program short cut onto the task bar. Calibration Mode (see page 26) Target is completed. Touch a target (Press any button displays the setting window relative to that item to the driver software in "C:\Program Files\tpdrv" folder. Setup program The setup program...
... any key for some reason, use these buttons. Performing setup in the initial state saves the modified contents in "tpdrv.ini" setting file in operation when closing the window. Adds a Setup Program short cut onto the task bar. Calibration Mode (see page 26) Target is completed. Touch a target (Press any button displays the setting window relative to that item to the driver software in "C:\Program Files\tpdrv" folder. Setup program The setup program...

Touch Panel For Pdp
Page 24
If it is selected. Setup program Setup of basic settings This sets the COM port of PC. (1) Normal Please select this mode when you caliblate normally. (2) Special Please select this mode if you can not caliblate normally. (ex:display is zoomed.) Communication Port Calibration Mode 24 When "Auto connect" is chosen, driver software detects it automatically, and it isn't possible to connect automatically, choose a connecting port. The port being used for connection with the touch panel is set up. Connecting port number will vary depending upon the environment of connecting PC.
If it is selected. Setup program Setup of basic settings This sets the COM port of PC. (1) Normal Please select this mode when you caliblate normally. (2) Special Please select this mode if you can not caliblate normally. (ex:display is zoomed.) Communication Port Calibration Mode 24 When "Auto connect" is chosen, driver software detects it automatically, and it isn't possible to connect automatically, choose a connecting port. The port being used for connection with the touch panel is set up. Connecting port number will vary depending upon the environment of connecting PC.

Touch Panel For Pdp
Page 32
... button. • Off The function switch of the Touch Panel setting program menu. After that only the next touch corresponds to change this tool is inoperative. In Windows use "slow" mouse setting when you want to the pressing operation of double click area. Setup program User Setting The following window is displayed. Touching the tool establishes that the normal left mouse button operation is set time, it works the same as double click. Click Mode...
... button. • Off The function switch of the Touch Panel setting program menu. After that only the next touch corresponds to change this tool is inoperative. In Windows use "slow" mouse setting when you want to the pressing operation of double click area. Setup program User Setting The following window is displayed. Touching the tool establishes that the normal left mouse button operation is set time, it works the same as double click. Click Mode...

Touch Panel For Pdp
Page 35
...; × 0.16 ″) 6.0 mm × 6.0 mm (0.24 ″ × 0.24 ″) Infrared system Terminal No. Specifications Model Number Type Power Source Voltage Electric current Supply system Touch Panel Detection system Panel window (W × H) Detection range (W × H) Effective detection range Resolution (W × H) Detection pitch Output system Number of incidence: 90°) Flat panel (Flat type) 1,073 mm × 659 mm × 69...
...; × 0.16 ″) 6.0 mm × 6.0 mm (0.24 ″ × 0.24 ″) Infrared system Terminal No. Specifications Model Number Type Power Source Voltage Electric current Supply system Touch Panel Detection system Panel window (W × H) Detection range (W × H) Effective detection range Resolution (W × H) Detection pitch Output system Number of incidence: 90°) Flat panel (Flat type) 1,073 mm × 659 mm × 69...

Touch Panel For Pdp
Page 36
... M1005T0 Specifications External dimensions TY-TP42P8-S Unit: mm (Inch) 63.9 (2.5) 63.9 (2.5) 1,073 (42.2) 945.2 (37.2) 63.9 (2.5) 659 (25.9) 518 (20.4) 25.5 (1.0) 63.9 (2.5) External dimensions TY-TP50P8-S Unit: mm (Inch) 63.9 (2.5) 138 (5.4) 63.9 (2.5) 797 (31.4) 1,257 (49.5) 1,106 (43.5) 138 (5.4) 61 (2.4) 8 (0.3) 35.5 (1.4) 63.9 (2.5) 773 (30.4) 645.2 (25.4) 25.5 (1.0) 63.9 (2.5) 230 (9.1) 797 (31.4) 230 (9.1) 61 (2.4) 8 (0.3) 35.5 (1.4) Customer's Record The model number and serial number of...
... M1005T0 Specifications External dimensions TY-TP42P8-S Unit: mm (Inch) 63.9 (2.5) 63.9 (2.5) 1,073 (42.2) 945.2 (37.2) 63.9 (2.5) 659 (25.9) 518 (20.4) 25.5 (1.0) 63.9 (2.5) External dimensions TY-TP50P8-S Unit: mm (Inch) 63.9 (2.5) 138 (5.4) 63.9 (2.5) 797 (31.4) 1,257 (49.5) 1,106 (43.5) 138 (5.4) 61 (2.4) 8 (0.3) 35.5 (1.4) 63.9 (2.5) 773 (30.4) 645.2 (25.4) 25.5 (1.0) 63.9 (2.5) 230 (9.1) 797 (31.4) 230 (9.1) 61 (2.4) 8 (0.3) 35.5 (1.4) Customer's Record The model number and serial number of...


