
Leaflet
Page 1
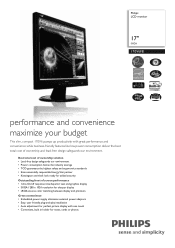
... like low power consumption deliver the best total cost of screen performance • 12ms On/off response time:Superior text and graphics display • SXGA 1280 x 1024 resolution for sharper display • sRGB ensures color matching between display and printouts Great convenience • Embedded power supply eliminates external power adaptors • Easy, user friendly plug-and-play installation • Auto adjustment for perfect picture display with one touch •...
... like low power consumption deliver the best total cost of screen performance • 12ms On/off response time:Superior text and graphics display • SXGA 1280 x 1024 resolution for sharper display • sRGB ensures color matching between display and printouts Great convenience • Embedded power supply eliminates external power adaptors • Easy, user friendly plug-and-play installation • Auto adjustment for perfect picture display with one touch •...

Leaflet
Page 2
...Hz • Optimum Resolution: 1280 x 1024 @ 60 Hz • Factory Preset Modes: 15 modes • User definable modes: 50 modes • Video Dot Rate: 140 MHz • Horizontal Scanning Frequency: 30 - 83 kHz • Vertical Scanning Frequency: 56 - 76 Hz • sRGB Connectivity • Signal Input: VGA (Analog ) • Video Sync Input Signal: Composite Sync, Separate Sync, Sync on Green Convenience • User convenience: On-screen Display • Monitor Controls: Auto, Brightness Control, Left/ Right, Menu (OK), Power On/Off, Up/Down • OSD Languages: English, French, German...
...Hz • Optimum Resolution: 1280 x 1024 @ 60 Hz • Factory Preset Modes: 15 modes • User definable modes: 50 modes • Video Dot Rate: 140 MHz • Horizontal Scanning Frequency: 30 - 83 kHz • Vertical Scanning Frequency: 56 - 76 Hz • sRGB Connectivity • Signal Input: VGA (Analog ) • Video Sync Input Signal: Composite Sync, Separate Sync, Sync on Green Convenience • User convenience: On-screen Display • Monitor Controls: Auto, Brightness Control, Left/ Right, Menu (OK), Power On/Off, Up/Down • OSD Languages: English, French, German...
User manual
Page 2
...:///D|/My%20Documents/dfu/170V6/english/170v6/safety/safety.htm (1 of the monitor's electronics. q Do not block the ventilation holes on the LCD panel. The screen may result in your monitor, please turn the power off immediately and disconnect the power cord. q To avoid the risk of shock or permanent damage to the set, do not lift the monitor by placing your hand...
...:///D|/My%20Documents/dfu/170V6/english/170v6/safety/safety.htm (1 of the monitor's electronics. q Do not block the ventilation holes on the LCD panel. The screen may result in your monitor, please turn the power off immediately and disconnect the power cord. q To avoid the risk of shock or permanent damage to the set, do not lift the monitor by placing your hand...

User manual
Page 4
... About This Manual Guide • Notational Descriptions About This Guide This electronic user's guide is intended for this document. q About This Electronic User's Manual gives an overview of how to your monitor. q On-Screen Display provides information on adjusting the settings on the warranty applicable to use the monitor. It includes the following subsections describe notational conventions used as the technical specifications for anyone who uses the Philips LCD Monitor.
... About This Manual Guide • Notational Descriptions About This Guide This electronic user's guide is intended for this document. q About This Electronic User's Manual gives an overview of how to your monitor. q On-Screen Display provides information on adjusting the settings on the warranty applicable to use the monitor. It includes the following subsections describe notational conventions used as the technical specifications for anyone who uses the Philips LCD Monitor.

User manual
Page 6
...; Product Features Product Information • Lead-free Product • Technical • Specifications Resolution & Product Features Preset Modes • Philips Pixel 170V6 Defect Policy • Automatic Power Saving • Physical Specification • Pin q Best Total Cost of Ownership solution r Lead-free display protects your display device does not harm the environment. Lead-free display helps protect your health and promotes environmentally sound recovery and disposal of 6)2006-02...
...; Product Features Product Information • Lead-free Product • Technical • Specifications Resolution & Product Features Preset Modes • Philips Pixel 170V6 Defect Policy • Automatic Power Saving • Physical Specification • Pin q Best Total Cost of Ownership solution r Lead-free display protects your display device does not harm the environment. Lead-free display helps protect your health and promotes environmentally sound recovery and disposal of 6)2006-02...
User manual
Page 7
...%20Documents/dfu/170V6/english/170v6/product/product.htm (2 of 6)2006-02-27 10:33:33 AM Video - Sync • Input signal levels • Sync input signal • Sync polarities • Video interface Optical characteristics • Contrast ratio • Brightness • Peak contrast angle 0.264 x 0.264 mm 1280 x 1024 pixels R.G.B. Product Information • Pixel Pitch • LCD Panel type • Effective viewing area • Display Colors SCANNING Vertical refresh rate Horizontal Frequency VIDEO • Video dot rate • Input impedance -
...%20Documents/dfu/170V6/english/170v6/product/product.htm (2 of 6)2006-02-27 10:33:33 AM Video - Sync • Input signal levels • Sync input signal • Sync polarities • Video interface Optical characteristics • Contrast ratio • Brightness • Peak contrast angle 0.264 x 0.264 mm 1280 x 1024 pixels R.G.B. Product Information • Pixel Pitch • LCD Panel type • Effective viewing area • Display Colors SCANNING Vertical refresh rate Horizontal Frequency VIDEO • Video dot rate • Input impedance -

User manual
Page 9
... ENERGY STAR® Partner, PHILIPS has determined that this automatic power saving feature: Power Management Definition VESA Mode Video H-sync V-sync Power Used LED color Active Sleep Switch Off ON OFF OFF Yes Yes < 30 W Green No No < 1 W Amber - - < 1W Off This monitor is detected, the monitor will 'wake up' automatically. RETURN TO TOP OF THE PAGE Physical Specifications • Dimension (WxHxD) * • Weight • Tilt • Power supply 375 x 390 x 200...
... ENERGY STAR® Partner, PHILIPS has determined that this automatic power saving feature: Power Management Definition VESA Mode Video H-sync V-sync Power Used LED color Active Sleep Switch Off ON OFF OFF Yes Yes < 30 W Green No No < 1 W Amber - - < 1W Off This monitor is detected, the monitor will 'wake up' automatically. RETURN TO TOP OF THE PAGE Physical Specifications • Dimension (WxHxD) * • Weight • Tilt • Power supply 375 x 390 x 200...

User manual
Page 12
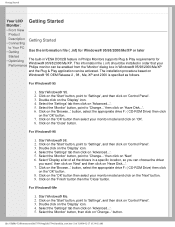
... View Product Description • The Base • Getting Started • Optimizing Performance UP and DOWN buttons are used in adjusting the OSD of your monitor. POWER button switches your monitor. When the UP and DOWN arrow buttons are also used when adjusting the OSD of your monitor on. Installing Your LCD Monitor Front View • Produt Description • Connecting to the OSD controls. OK button which when pressed will show up. Automatically adjust the horizontal position, vertical position, phase and clock setting. BRIGHTNESS...
... View Product Description • The Base • Getting Started • Optimizing Performance UP and DOWN buttons are used in adjusting the OSD of your monitor. POWER button switches your monitor. When the UP and DOWN arrow buttons are also used when adjusting the OSD of your monitor on. Installing Your LCD Monitor Front View • Produt Description • Connecting to the OSD controls. OK button which when pressed will show up. Automatically adjust the horizontal position, vertical position, phase and clock setting. BRIGHTNESS...

User manual
Page 13
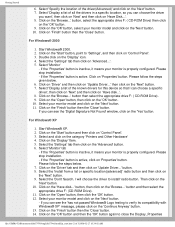
...-by pressing the 'OK' button once. This is shown in OSD main controls called RESOLUTION. Note: You can also install the Flat Panel Adjust (FP Adjust) program, a program for getting the best performance out of 3)2006-02-27 10:33:34 AM Installing Your LCD Monitor Rear View 1 Kensington anti-thief lock 2 VGA input 3 AC power input RETURN TO TOP OF THE PAGE Optimizing Performance q For best performance, ensure that your...
...-by pressing the 'OK' button once. This is shown in OSD main controls called RESOLUTION. Note: You can also install the Flat Panel Adjust (FP Adjust) program, a program for getting the best performance out of 3)2006-02-27 10:33:34 AM Installing Your LCD Monitor Rear View 1 Kensington anti-thief lock 2 VGA input 3 AC power input RETURN TO TOP OF THE PAGE Optimizing Performance q For best performance, ensure that your...

User manual
Page 25
... settings when installing new peripherals. USB automatically determines resources (like driver software and bus bandwidth) required by peripherals. Glossary TFT(thin film transistor) Usually made from amorphous silicon (a-Si) and used as a switch to as ports. USB also eliminates adjustment of a hub allows connection to simplify USB connectivity from the user's perspective providing low cost and complexity. Each hub converts a single attachment point into true Plug...
... settings when installing new peripherals. USB automatically determines resources (like driver software and bus bandwidth) required by peripherals. Glossary TFT(thin film transistor) Usually made from amorphous silicon (a-Si) and used as a switch to as ports. USB also eliminates adjustment of a hub allows connection to simplify USB connectivity from the user's perspective providing low cost and complexity. Each hub converts a single attachment point into true Plug...

User manual
Page 31
..., power off and re-power on monitor to 1280x1024 pixels (17"). 3. In the Windows Start Menu, select Settings/Control Panel. Select Settings, then Control Panel. Unplug all cables, then connect your PC to verify that your computer and repeat step 2 and 3 to the monitor that the monitor can display. Turn on your monitor and then turn on the Advanced button. Q: What should I do if the screen shows 'Cannot display this video mode'? • LCD Panel Technology A: Recommended video mode for Philips...
..., power off and re-power on monitor to 1280x1024 pixels (17"). 3. In the Windows Start Menu, select Settings/Control Panel. Select Settings, then Control Panel. Unplug all cables, then connect your PC to verify that your computer and repeat step 2 and 3 to the monitor that the monitor can display. Turn on your monitor and then turn on the Advanced button. Q: What should I do if the screen shows 'Cannot display this video mode'? • LCD Panel Technology A: Recommended video mode for Philips...
User manual
Page 32
... available resolutions. Q: Will the LCD monitor accept an interlaced signal under Windows® Control Panel with the "Display properties". If an Interlace signal is of much less relevance for LCD monitors. How do ? icm files) or a driver disk when you for your user manual to recall all of a single button - Monitor drivers (.inf and . A: Simply press the OK button, then select 'Reset' to install the drivers. A: The AUTO adjustment key restores the optimal screen position, phase...
... available resolutions. Q: Will the LCD monitor accept an interlaced signal under Windows® Control Panel with the "Display properties". If an Interlace signal is of much less relevance for LCD monitors. How do ? icm files) or a driver disk when you for your user manual to recall all of a single button - Monitor drivers (.inf and . A: Simply press the OK button, then select 'Reset' to install the drivers. A: The AUTO adjustment key restores the optimal screen position, phase...

User manual
Page 34
... help you adjust monitor settings such as Contrast, Brightness, Horizontal Position, Vertical Position, Phase and Clock for optimal performance. A: 1. Follow the instructions step by step to your system's video controller. You may need a cable adapter to connect the monitor to optimize image performance with standard PCs, Macs and workstations. Q: What is shown in terms of 8)2006-02-27 10:33:46 AM You can find the best display settings by double clicking the shortcut. Q: Are Philips LCD monitors Plug...
... help you adjust monitor settings such as Contrast, Brightness, Horizontal Position, Vertical Position, Phase and Clock for optimal performance. A: 1. Follow the instructions step by step to your system's video controller. You may need a cable adapter to connect the monitor to optimize image performance with standard PCs, Macs and workstations. Q: What is shown in terms of 8)2006-02-27 10:33:46 AM You can find the best display settings by double clicking the shortcut. Q: Are Philips LCD monitors Plug...

User manual
Page 35
... is colored with "port gridlock." file:///D|/My%20Documents/dfu/170V6/english/170v6/safety/saf_faq.htm (5 of complicated IRQ settings -- There are LCDs made? Without USB, PCs are then glued to the host, usually a PC. Q: What is assembled into true Plug-and-Play! Polarizers are normally limited to make the color filter. USB makes necessary resources available without user intervention. for add-on digital items...
... is colored with "port gridlock." file:///D|/My%20Documents/dfu/170V6/english/170v6/safety/saf_faq.htm (5 of complicated IRQ settings -- There are LCDs made? Without USB, PCs are then glued to the host, usually a PC. Q: What is assembled into true Plug-and-Play! Polarizers are normally limited to make the color filter. USB makes necessary resources available without user intervention. for add-on digital items...

User manual
Page 36
... electrode. A: On each pixel intersection, requiring less current to the propagation of the light is called the 'polarization direction'. The molecular arrangement of the TFT LCD panel, a data source drive and a gate drive are the advantages of each cell is connected with electrodes and impressed with an analog RGB signal. The TFT has a fundamentally different structure than a CRT: Each cell has an...
... electrode. A: On each pixel intersection, requiring less current to the propagation of the light is called the 'polarization direction'. The molecular arrangement of the TFT LCD panel, a data source drive and a gate drive are the advantages of each cell is connected with electrodes and impressed with an analog RGB signal. The TFT has a fundamentally different structure than a CRT: Each cell has an...
User manual
Page 37
.../dfu/170V6/english/170v6/safety/saf_faq.htm (7 of a CRT monitor -- FAQs (Frequently Asked Questions) method. A: Unlike a CDT monitor, the TFT LCD panel has a fixed resolution. Since the vertical/horizontal frequency for this monitor is 10. Usually, the viewing angle refers to give a wider viewing angle. Many ways to widen the viewing angle are currently being developed and the most common approach is to optimize the display for this...
.../dfu/170V6/english/170v6/safety/saf_faq.htm (7 of a CRT monitor -- FAQs (Frequently Asked Questions) method. A: Unlike a CDT monitor, the TFT LCD panel has a fixed resolution. Since the vertical/horizontal frequency for this monitor is 10. Usually, the viewing angle refers to give a wider viewing angle. Many ways to widen the viewing angle are currently being developed and the most common approach is to optimize the display for this...

User manual
Page 39
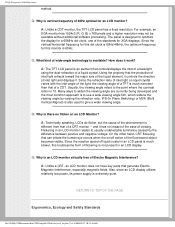
... user. q Re-power on monitor to the Quick Set-Up Guide). Screen says q Make sure the vertical sync of input signal is turned on . Common Problems • Regulatory Information • Other Related Information Having this problem No Picture (Power LED not lit) Check these solutions, contact your nearest Philips dealer. q Make sure the signal cable is properly connected to your computer. (Also refer to start over again if you have tried these items q Make sure the power cord...
... user. q Re-power on monitor to the Quick Set-Up Guide). Screen says q Make sure the vertical sync of input signal is turned on . Common Problems • Regulatory Information • Other Related Information Having this problem No Picture (Power LED not lit) Check these solutions, contact your nearest Philips dealer. q Make sure the signal cable is properly connected to your computer. (Also refer to start over again if you have tried these items q Make sure the power cord...
User manual
Page 40
... the LCD monitor has a fixed life span. The screen is properly connected to flicker, please contact your dealer). This usually disappears after -image appears q Adjust the contrast and brightness on standard Macintosh or IBM-compatible PCs running Microsoft Windows. q It may be imprinted in OSD Main Controls. q Press the Auto button. q Eliminate the vertical bars using the Horizontal Position and/or Vertical Position in the screen and leave an afterimage. Horizontal flicker appears q Press the Auto button...
... the LCD monitor has a fixed life span. The screen is properly connected to flicker, please contact your dealer). This usually disappears after -image appears q Adjust the contrast and brightness on standard Macintosh or IBM-compatible PCs running Microsoft Windows. q It may be imprinted in OSD Main Controls. q Press the Auto button. q Eliminate the vertical bars using the Horizontal Position and/or Vertical Position in the screen and leave an afterimage. Horizontal flicker appears q Press the Auto button...
User manual
Page 68
... on the 'Display' icon. 4. Click on the 'Start' button, point to Your PC • Getting Use the information file ( .inf) for Windows® 95/98/2000/Me/XP or later Started • Optimizing The built-in VESA DDC2B feature in Philips Monitors supports Plug & Play requirements for Windows® 95/98/2000/Me/XP. Select the 'Monitor' button, then click on 'Control Panel'. 3. Select the 'Settings' tab then...
... on the 'Display' icon. 4. Click on the 'Start' button, point to Your PC • Getting Use the information file ( .inf) for Windows® 95/98/2000/Me/XP or later Started • Optimizing The built-in VESA DDC2B feature in Philips Monitors supports Plug & Play requirements for Windows® 95/98/2000/Me/XP. Select the 'Monitor' button, then click on 'Control Panel'. 3. Select the 'Settings' tab then...
User manual
Page 69
Select 'Display a list of all the drivers in a specific location, so you can see the 'has not passed Windows® Logo testing to 'Settings', and then click on 'Advanced...'. 5. Click on 'Have Disk...'. 8. Select your monitor model and click on the 'Finish' button then the 'Close' button. Click on the 'Next' button. 11. Start Windows® XP. 2. Select 'Monitor' tab - If the 'Properties' button is...
Select 'Display a list of all the drivers in a specific location, so you can see the 'has not passed Windows® Logo testing to 'Settings', and then click on 'Advanced...'. 5. Click on 'Have Disk...'. 8. Select your monitor model and click on the 'Finish' button then the 'Close' button. Click on the 'Next' button. 11. Start Windows® XP. 2. Select 'Monitor' tab - If the 'Properties' button is...


