

User manual
Page 2
... literature closely to prevent operating and maintenance problems. WARNING: TO PREVENT FIRE OR SHOCK HAZARD, DO NOT EXPOSE THIS EQUIPMENT TO RAIN OR MOISTURE. Remember, to protection by one of your model. NO USER-SERVICEABLE PARTS INSIDE. For the safety of your PHILIPS warranty. EEDED Congratulations on our uncompromising commitment to your total satisfaction. W I THIN 10 D Dear PHILIPS product owner: Thank...
... literature closely to prevent operating and maintenance problems. WARNING: TO PREVENT FIRE OR SHOCK HAZARD, DO NOT EXPOSE THIS EQUIPMENT TO RAIN OR MOISTURE. Remember, to protection by one of your model. NO USER-SERVICEABLE PARTS INSIDE. For the safety of your PHILIPS warranty. EEDED Congratulations on our uncompromising commitment to your total satisfaction. W I THIN 10 D Dear PHILIPS product owner: Thank...

User manual
Page 3
... mounted to Article 820-40 of the National Electric Code, ANSI/NFPA No. 701984, provides information with recommended international global safety standards for a long time. The power supply cord or the plug has been damaged; or E. Outdoor Antenna Grounding - Follow all servicing to avoid injury from the apparatus. 11. Clean only with + and - Install in any of the cabinet. Only use...
... mounted to Article 820-40 of the National Electric Code, ANSI/NFPA No. 701984, provides information with recommended international global safety standards for a long time. The power supply cord or the plug has been damaged; or E. Outdoor Antenna Grounding - Follow all servicing to avoid injury from the apparatus. 11. Clean only with + and - Install in any of the cabinet. Only use...
User manual
Page 4
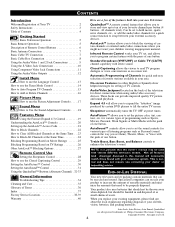
...Television Operation 5 Basic Remote Operation 5 Description of Remote Control Buttons 6 Basic Antenna Connection 7 Basic Cable TV Connection 7 Basic Cable Box Connection 8 Using the Audio/Video 1 and 2 Jack Connections 9 Using the S-Video Jack Connections 10 Using Component Video Jack Connections 11 Using the Audio/Video Outputs 12 Install Menu How to use the Language Control 13 How to use the Tuner Mode Control 14 How to Auto Program TV Channels 15 How to Add or Delete Channels 16 Picture Menu How to use the Picture Adjustment Controls . . . . .17 Sound Menu How to Use the Sound...
...Television Operation 5 Basic Remote Operation 5 Description of Remote Control Buttons 6 Basic Antenna Connection 7 Basic Cable TV Connection 7 Basic Cable Box Connection 8 Using the Audio/Video 1 and 2 Jack Connections 9 Using the S-Video Jack Connections 10 Using Component Video Jack Connections 11 Using the Audio/Video Outputs 12 Install Menu How to use the Language Control 13 How to use the Tuner Mode Control 14 How to Auto Program TV Channels 15 How to Add or Delete Channels 16 Picture Menu How to use the Picture Adjustment Controls . . . . .17 Sound Menu How to Use the Sound...

User manual
Page 6
... the Closed Captioning options. Also can be displayed on the TV screen. "MUTE" will be used to turn itself off . Press the Power button to back out of time. A/CH Button - (Alternate Channel) Press to automatically turn the TV on -screen menu until it disappears from different factory pre-defined sound settings. Choose from 5 different factory pre-defined picture settings. NUMBERED (0-9) Buttons - AV Button - Works with video gaming). AUTO SOUND Button - VOL(ume) + or - Press the Sleep button to set the Sound Menu options...
... the Closed Captioning options. Also can be displayed on the TV screen. "MUTE" will be used to turn itself off . Press the Power button to back out of time. A/CH Button - (Alternate Channel) Press to automatically turn the TV on -screen menu until it disappears from different factory pre-defined sound settings. Choose from 5 different factory pre-defined picture settings. NUMBERED (0-9) Buttons - AV Button - Works with video gaming). AUTO SOUND Button - VOL(ume) + or - Press the Sleep button to set the Sound Menu options...

User manual
Page 7
... round Cable Company supplied cable to the TV. buttons to scroll the channels. BASIC ANTENNA TELEVISION CONNECTION Acombination antenna receives normal broadcast channels (VHF 2-13 and UHF 14-69). Your connection is easy because there is only one 75Ω (ohm) antenna plug on the TV. Direct Cable Connections: Direct Cable Connection: Cable signal coming from Antenna Jack Panel Back of TV ANT 75‰ Monitor out AV1 in VIDEO Y L/Mono AUDIO Pb AV2 in R Pr COMPONENT VIDEO INPUT S-VIDEO Jack Panel Back...
... round Cable Company supplied cable to the TV. buttons to scroll the channels. BASIC ANTENNA TELEVISION CONNECTION Acombination antenna receives normal broadcast channels (VHF 2-13 and UHF 14-69). Your connection is easy because there is only one 75Ω (ohm) antenna plug on the TV. Direct Cable Connections: Direct Cable Connection: Cable signal coming from Antenna Jack Panel Back of TV ANT 75‰ Monitor out AV1 in VIDEO Y L/Mono AUDIO Pb AV2 in R Pr COMPONENT VIDEO INPUT S-VIDEO Jack Panel Back...

User manual
Page 8
... Cable Box. buttons on the TV remote control to tune to the AV1 Audio L & R Input jacks on the cable box. Cable Box Connection (with Audio/Video Outputs Outputs): This connection will supply Stereo sound to complete the connection. Connect the other end to the AV1 channel for the cable box signal. Monitor out AV1 in VIDEO Y L/Mono AUDIO Pb AV2 in R Pr COMPONENT VIDEO INPUT Jack Panel Back of TV S-VIDEO 6 ANT 75‰ Monitor out AV1 in VIDEO Y L/Mono AUDIO Pb AV2 in R Pr COMPONENT VIDEO INPUT S-VIDEO Jack Panel Back of the Cable Box...
... Cable Box. buttons on the TV remote control to tune to the AV1 Audio L & R Input jacks on the cable box. Cable Box Connection (with Audio/Video Outputs Outputs): This connection will supply Stereo sound to complete the connection. Connect the other end to the AV1 channel for the cable box signal. Monitor out AV1 in VIDEO Y L/Mono AUDIO Pb AV2 in R Pr COMPONENT VIDEO INPUT Jack Panel Back of TV S-VIDEO 6 ANT 75‰ Monitor out AV1 in VIDEO Y L/Mono AUDIO Pb AV2 in R Pr COMPONENT VIDEO INPUT S-VIDEO Jack Panel Back of the Cable Box...

User manual
Page 10
...), DVD (digital video discs), video games, and S-VHS VCR (video cassette recorder) tapes than the normal antenna picture connections. SVHS AUDIO Pb R Pr COMPONENT VIDEO INPUT S-VIDEO 3 Connect one end of the S-VIDEO CABLE to the S-VIDEO jack on the back of the TV. AV2 CVI AV1 24 2 Monitor out AV1 in VIDEO Y L/Mono AV2 in 1 2 Connect other ends of the AUDIO (red and white) CABLES to the AUDIO (left and right) OUT jacks on the rear of the VCR. 5 Turn...
...), DVD (digital video discs), video games, and S-VHS VCR (video cassette recorder) tapes than the normal antenna picture connections. SVHS AUDIO Pb R Pr COMPONENT VIDEO INPUT S-VIDEO 3 Connect one end of the S-VIDEO CABLE to the S-VIDEO jack on the back of the TV. AV2 CVI AV1 24 2 Monitor out AV1 in VIDEO Y L/Mono AV2 in 1 2 Connect other ends of the AUDIO (red and white) CABLES to the AUDIO (left and right) OUT jacks on the rear of the VCR. 5 Turn...

User manual
Page 11
... is connected as with your DVD or digital accessory owner's manual for definitions and connection details. BACK OF TV 1 Monitor out AV1 in VIDEO Y L/Mono AUDIO Pb 2 AV2 in R Pr COMPONENT VIDEO INPUT S-VIDEO COMPONENT VIDEO CABLES (Green, Blue, Red) AUDIO CABLES (RED/WHITE) COMP VIDEO Y Pb Pr S-VIDEO VIDEO AUDIO R OUT OUT OUT L 3 5 ACCESSORY DEVICE EQUIPPED WITH CONPONENT VIDEO OUTPUTS. 11 USING THE CVI (COMPONENT VIDEO INPUT) JACKS Component Video inputs provide for the highest possible color and picture resolution in the playback of digital signal source...
... is connected as with your DVD or digital accessory owner's manual for definitions and connection details. BACK OF TV 1 Monitor out AV1 in VIDEO Y L/Mono AUDIO Pb 2 AV2 in R Pr COMPONENT VIDEO INPUT S-VIDEO COMPONENT VIDEO CABLES (Green, Blue, Red) AUDIO CABLES (RED/WHITE) COMP VIDEO Y Pb Pr S-VIDEO VIDEO AUDIO R OUT OUT OUT L 3 5 ACCESSORY DEVICE EQUIPPED WITH CONPONENT VIDEO OUTPUTS. 11 USING THE CVI (COMPONENT VIDEO INPUT) JACKS Component Video inputs provide for the highest possible color and picture resolution in the playback of digital signal source...

User manual
Page 12
... VIDEO plug. JACK PANEL Located on the back of the TV 3 VIDEO CABLE (Yellow) 5 ANTENNA IN OUT ANTENNA OUT VIDEO IN OUT L AUDIO R IN Monitor out VIDEO L/Mono AUDIO AV1 in Y Pb AV2 in VIDEO Y L/Mono AUDIO Pb R Pr COMPONENT VIDEO INPUT AUDIO CABLES (Red & White) S-VIDEO 1 R L AUX/TV INPUT PHONO INPUT 2 AUDIO SYSTEM with a VCR or used to connect an external audio system for the proper hookup of the yellow Video Cable to view a pre-recorded tape. Please contact your amplifier or sound...
... VIDEO plug. JACK PANEL Located on the back of the TV 3 VIDEO CABLE (Yellow) 5 ANTENNA IN OUT ANTENNA OUT VIDEO IN OUT L AUDIO R IN Monitor out VIDEO L/Mono AUDIO AV1 in Y Pb AV2 in VIDEO Y L/Mono AUDIO Pb R Pr COMPONENT VIDEO INPUT AUDIO CABLES (Red & White) S-VIDEO 1 R L AUX/TV INPUT PHONO INPUT 2 AUDIO SYSTEM with a VCR or used to connect an external audio system for the proper hookup of the yellow Video Cable to view a pre-recorded tape. Please contact your amplifier or sound...

User manual
Page 14
... to change the TV's signal input to either ANTENNA, CABLE, or AUTO mode. 6 When finished, press the STATUS /EXIT button to remove the on the type of signal to look for. (From a Cable TV signal or a normal Antenna signal.) In the AUTO mode, when the AUTO PROGRAM feature is activated, the TV will automatically set itself to select either ANTENNA, CABLE or AUTO mode. When AUTO is activated. When ANTENNA is selected, channels 1-125 are available. Main Picture Sound Features Install Brightness Color Picture...
... to change the TV's signal input to either ANTENNA, CABLE, or AUTO mode. 6 When finished, press the STATUS /EXIT button to remove the on the type of signal to look for. (From a Cable TV signal or a normal Antenna signal.) In the AUTO mode, when the AUTO PROGRAM feature is activated, the TV will automatically set itself to select either ANTENNA, CABLE or AUTO mode. When AUTO is activated. When ANTENNA is selected, channels 1-125 are available. Main Picture Sound Features Install Brightness Color Picture...

User manual
Page 15
... cable signal connection has been completed before AUTO PROGRAM is selected, channels 1-125 are available. HELPFUL HINT When CABLE is activated. 1 Press the MENU button on the remote to show the on the type of channels. When ANTENNA is activated. This makes it detects when the AUTO PROGRAM feature is selected, channels 269 are available. Main Picture Sound Features Install Brightness Color Picture Sharpness Tint More... 2 1 46 VOL 2 4 3 5 Main Picture Sound Features Install Language Tuner Mode Auto Program Channel Edit Install Language Tuner Mode Auto Program Channel...
... cable signal connection has been completed before AUTO PROGRAM is selected, channels 1-125 are available. HELPFUL HINT When CABLE is activated. 1 Press the MENU button on the remote to show the on the type of channels. When ANTENNA is activated. This makes it detects when the AUTO PROGRAM feature is selected, channels 269 are available. Main Picture Sound Features Install Brightness Color Picture Sharpness Tint More... 2 1 46 VOL 2 4 3 5 Main Picture Sound Features Install Language Tuner Mode Auto Program Channel Edit Install Language Tuner Mode Auto Program Channel...

User manual
Page 18
... ᮤ button to turn the adjust or turn the control On or Off. 6 When finished, press the STATUS /EXIT button to remove the menu from the TV's screen. AVL: (Auto Volume Leveler) Press the ᮣ or ᮤ buttons to turn the control On or Off. Main Picture Sound Features Install Brightness Color Picture Sharpness Tint More... 1 5 VOL 2 4 2 46 3 5 Sound Treble Boost Bass Boost Balance AVL On Sound 18 Main Picture Sound Features Install Treble...
... ᮤ button to turn the adjust or turn the control On or Off. 6 When finished, press the STATUS /EXIT button to remove the menu from the TV's screen. AVL: (Auto Volume Leveler) Press the ᮣ or ᮤ buttons to turn the control On or Off. Main Picture Sound Features Install Brightness Color Picture Sharpness Tint More... 1 5 VOL 2 4 2 46 3 5 Sound Treble Boost Bass Boost Balance AVL On Sound 18 Main Picture Sound Features Install Treble...

User manual
Page 24
... Format Timer Start Time Stop Time Channel Activate Display Features AutoLock Format Access Code - - - - When ON is selected, ALL available channels will be blocked again. "XXXX" shows on the Access Code display as you don't want to Block All the television's channels. Main Picture Sound Features Install Brightness Color Picture Sharpness Tint More... 2 4 1 7 9 3 VOL 2 5 4 8 7 6 NOTE: The 0,7,1,1 access code shown on -screen menu. 2 Press the CURSOR UP ▲ or DOWN ▼ button until the word FEATURES is powered...
... Format Timer Start Time Stop Time Channel Activate Display Features AutoLock Format Access Code - - - - When ON is selected, ALL available channels will be blocked again. "XXXX" shows on the Access Code display as you don't want to Block All the television's channels. Main Picture Sound Features Install Brightness Color Picture Sharpness Tint More... 2 4 1 7 9 3 VOL 2 5 4 8 7 6 NOTE: The 0,7,1,1 access code shown on -screen menu. 2 Press the CURSOR UP ▲ or DOWN ▼ button until the word FEATURES is powered...

User manual
Page 29
... STATUS /EXIT button to remove the menu from the TV's screen or let the option time out and disappear from the four Closed Caption options (CC Off, CC 1, CC 2, CC Mute). CC Off 3 HELPFUL HINT Not all Closed Caption modes (CC1, or CC2) necessarily being used to set the TV to turn the Closed Caption mode "ON" whenever the MUTE button on the remote to display the current Closed Caption setting. 2 Press the...
... STATUS /EXIT button to remove the menu from the TV's screen or let the option time out and disappear from the four Closed Caption options (CC Off, CC 1, CC 2, CC Mute). CC Off 3 HELPFUL HINT Not all Closed Caption modes (CC1, or CC2) necessarily being used to set the TV to turn the Closed Caption mode "ON" whenever the MUTE button on the remote to display the current Closed Caption setting. 2 Press the...
User manual
Page 31
... the remote control. These setting affect the Sound menu's Bass, Treble, AVL, and Incredible Surround controls To select any of the screen. 2 Press the AUTO SOUND button repeatedly to select between the four settings. This changes the settings in the middle of the options follow the directions below. 1 Press the AUTO SOUND button on -screen menu's sound controls. Personal Note: Only the PERSONAL control can be changed by the user), Theatre (for movie viewing), Music (for musical programming...
... the remote control. These setting affect the Sound menu's Bass, Treble, AVL, and Incredible Surround controls To select any of the screen. 2 Press the AUTO SOUND button repeatedly to select between the four settings. This changes the settings in the middle of the options follow the directions below. 1 Press the AUTO SOUND button on -screen menu's sound controls. Personal Note: Only the PERSONAL control can be changed by the user), Theatre (for movie viewing), Music (for musical programming...

User manual
Page 34
... TUNER MODES are set - If necessary, replace them with AA Heavy Duty (Zinc Chloride) or Alkaline batteries. • Clean the remote control and the remote control sensor win- TROUBLESHOOTING No Power • Check the TV power cord. Unplug the TV, wait 10 seconds, then reinsert the plug into the TV's memory. • Check to find all available channels. • Press the AV button on a wall switch. No Sound...
... TUNER MODES are set - If necessary, replace them with AA Heavy Duty (Zinc Chloride) or Alkaline batteries. • Clean the remote control and the remote control sensor win- TROUBLESHOOTING No Power • Check the TV power cord. Unplug the TV, wait 10 seconds, then reinsert the plug into the TV's memory. • Check to find all available channels. • Press the AV button on a wall switch. No Sound...

User manual
Page 35
... the TV is viewed on the picture tubes. Use a clean, dry cloth to display the same images on screen too frequently, because subtle ghost images can be DVD disks, laser disks, video games, CD-i disks, videotapes, digital television boxes, broadcast channels, cable channels, satellite channels, and others in the same location on the TV screen. PLACEMENT OF THE TV • To avoid cabinet warping, cabinet color changes, and increased chance...
... the TV is viewed on the picture tubes. Use a clean, dry cloth to display the same images on screen too frequently, because subtle ghost images can be DVD disks, laser disks, video games, CD-i disks, videotapes, digital television boxes, broadcast channels, cable channels, satellite channels, and others in the same location on the TV screen. PLACEMENT OF THE TV • To avoid cabinet warping, cabinet color changes, and increased chance...

User manual
Page 36
... that screws (or pushes) directly onto a 75 Ohm input found on the back of the TV, these connectors (phono type plug) are held in order to connect to quickly confirm what channel number is in a limited channel list. Tuner Mode • Feature control settings made available for user adjustments. Twin Lead Wire • The more recent Televisions and VCRs. Settings for signal connections (antenna or cable TV), plus channel program memory are used for the input of audio and video signals. Audio/Video Inputs...
... that screws (or pushes) directly onto a 75 Ohm input found on the back of the TV, these connectors (phono type plug) are held in order to connect to quickly confirm what channel number is in a limited channel list. Tuner Mode • Feature control settings made available for user adjustments. Twin Lead Wire • The more recent Televisions and VCRs. Settings for signal connections (antenna or cable TV), plus channel program memory are used for the input of audio and video signals. Audio/Video Inputs...

User manual
Page 37
...26 Auto Picture Control 30 Auto Program Control 15 Auto Sound Control 31 AVL Control 18 Balance Control 18 Bass Boost Control 18 Brightness Control 17 Cable Box Connection 8 Cable TV Connection (Basic Connection 7 Care and Cleaning 35 Channel Edit Control 16 Closed Caption Control 29 Color Control 17 Color Temperature Control 17 Component Video Inputs 11 Contrast + Control 17 Dynamic Noise Reduction (DNR) Control 17 Factory Service Information 38-39 Format (Expand 4:3) Control 19 Glossary of Terms 36 Index 37 Language Control 13 Picture Control 17 Remote Control Buttons...
...26 Auto Picture Control 30 Auto Program Control 15 Auto Sound Control 31 AVL Control 18 Balance Control 18 Bass Boost Control 18 Brightness Control 17 Cable Box Connection 8 Cable TV Connection (Basic Connection 7 Care and Cleaning 35 Channel Edit Control 16 Closed Caption Control 29 Color Control 17 Color Temperature Control 17 Component Video Inputs 11 Contrast + Control 17 Dynamic Noise Reduction (DNR) Control 17 Factory Service Information 38-39 Format (Expand 4:3) Control 19 Glossary of Terms 36 Index 37 Language Control 13 Picture Control 17 Remote Control Buttons...
Leaflet
Page 2
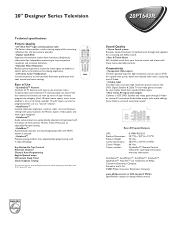
... settings. Any Button-On Top Controls Alternate Channel Channel Auto-Programming English/Spanish menu 240-minute Sleep Timer Closed Caption viewing This television receiver provides display of the FCC rules. Connectivity • Component Video inputs The best possible input for high resolution sources such as a "source" selector. • AutoPicture™ Instantly optimizes brightness, contrast, color, tint and sharpness settings with picture presets for even better detail than standard Video inputs. • Rear stereo AV inputs and outputs Connect a VCR, DVD, Satellite and video game...
... settings. Any Button-On Top Controls Alternate Channel Channel Auto-Programming English/Spanish menu 240-minute Sleep Timer Closed Caption viewing This television receiver provides display of the FCC rules. Connectivity • Component Video inputs The best possible input for high resolution sources such as a "source" selector. • AutoPicture™ Instantly optimizes brightness, contrast, color, tint and sharpness settings with picture presets for even better detail than standard Video inputs. • Rear stereo AV inputs and outputs Connect a VCR, DVD, Satellite and video game...


