
User manual
Page 7
... (4:3 aspect ratio) set. Analog channels are diminished or eliminated. ZOOM expands, or zooms, the picture both vertically and horizontally, eliminating or reducing the size of the picture horizontally. NATIVE (16:9) 4:3 ZOOM PANORAMIC press the FORMAT button once to the next mode. FORMAT Button Selecting a Picture Format Using the Remote Control Use your TV's picture-format modes with video sources you connect to the ANTENNA, CABLE AV1, AV2, AV3, AV4, AV5, SIDE inputs on screen...
... (4:3 aspect ratio) set. Analog channels are diminished or eliminated. ZOOM expands, or zooms, the picture both vertically and horizontally, eliminating or reducing the size of the picture horizontally. NATIVE (16:9) 4:3 ZOOM PANORAMIC press the FORMAT button once to the next mode. FORMAT Button Selecting a Picture Format Using the Remote Control Use your TV's picture-format modes with video sources you connect to the ANTENNA, CABLE AV1, AV2, AV3, AV4, AV5, SIDE inputs on screen...
User manual
Page 8
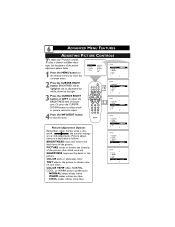
... select anoth- Picture adjust- COOL makes whites more blue. er picture control to exit the menu. PICTURE 2,3 BRIGHTNESS PICTURE SHARPNESS COLOR TINT 4 Press the INFO/EXIT button to adjust. 6 ADVANCED MENU FEATURES ADJUSTING PICTURE CONTROLS T o adjust your TV picture controls, select a channel and follow these steps. PICTURE SOUND FEATURES INSTALL BRIGHTNESS PICTURE SHARPNESS COLOR TINT PICTURE BRIGHTNESS PICTURE SHARPNESS COLOR TINT 2 Press the CURSOR RIGHT button. tered , the control settings are described as follows: BRIGHTNESS raises and lowers the black level of...
... select anoth- Picture adjust- COOL makes whites more blue. er picture control to exit the menu. PICTURE 2,3 BRIGHTNESS PICTURE SHARPNESS COLOR TINT 4 Press the INFO/EXIT button to adjust. 6 ADVANCED MENU FEATURES ADJUSTING PICTURE CONTROLS T o adjust your TV picture controls, select a channel and follow these steps. PICTURE SOUND FEATURES INSTALL BRIGHTNESS PICTURE SHARPNESS COLOR TINT PICTURE BRIGHTNESS PICTURE SHARPNESS COLOR TINT 2 Press the CURSOR RIGHT button. tered , the control settings are described as follows: BRIGHTNESS raises and lowers the black level of...

User manual
Page 10
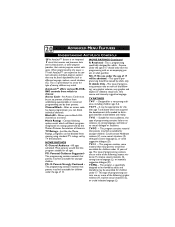
... the MENU button to return to show the onscreen menu. To save your adjustments to enter the MANUAL CONVERGE submenu. Press the CURSOR DOWN button repeatedly until SAVE MULTIPOINT is highlighted. PICTURE vergence at specific points on the TV screen. 1 Press the MENU button to the MANUAL CONVERGE menu. Press MANUAL CONVERGE CONVERGE RED CONVERGE BLUE MULTIPOINT RED MULTIPOINT BLUE SAVE MULTIPOINT the CURSOR RIGHT button to adjust picture con- 8 ADVANCED MENU FEATURES ADJUSTING CONVERGENCE: MULTIPOINT RED/BLUE T he Multipoint Red/Blue Convergence controls allow you...
... the MENU button to return to show the onscreen menu. To save your adjustments to enter the MANUAL CONVERGE submenu. Press the CURSOR DOWN button repeatedly until SAVE MULTIPOINT is highlighted. PICTURE vergence at specific points on the TV screen. 1 Press the MENU button to the MANUAL CONVERGE menu. Press MANUAL CONVERGE CONVERGE RED CONVERGE BLUE MULTIPOINT RED MULTIPOINT BLUE SAVE MULTIPOINT the CURSOR RIGHT button to adjust picture con- 8 ADVANCED MENU FEATURES ADJUSTING CONVERGENCE: MULTIPOINT RED/BLUE T he Multipoint Red/Blue Convergence controls allow you...

User manual
Page 16
... Fixed or Variable. 5 Press the MENU button to go back and CURSOR DOWN button to either constant INCR . 14 ADVANCED MENU FEATURES ADJUSTING AUDIO OUT, DIG OUT, SPEAKERS If you have digital audio equipment connected to the TV, select the type of Dolby Laboratories. SURROUND or variable output. 1 Press the MENU button on an external audio sys- If you have connected the TV's AUDIO OUTPUT jacks to the AUDIO SOUND INPUT jacks on the remote control...
... Fixed or Variable. 5 Press the MENU button to go back and CURSOR DOWN button to either constant INCR . 14 ADVANCED MENU FEATURES ADJUSTING AUDIO OUT, DIG OUT, SPEAKERS If you have digital audio equipment connected to the TV, select the type of Dolby Laboratories. SURROUND or variable output. 1 Press the MENU button on an external audio sys- If you have connected the TV's AUDIO OUTPUT jacks to the AUDIO SOUND INPUT jacks on the remote control...

User manual
Page 21
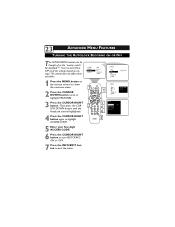
... TV will not shut off.. • Thirty seconds before the set changes to the channel you set the TIME, START TIME, STOP TIME, and CHANNEL, you must activate the Timer for it to operate. FEATURES TIMER TIME 1 START TIME STOP TIME CHANNEL ACTIVATE 8:06 PM 3 Press the CURSOR RIGHT button to work ONCE or DAILY. PICTURE SOUND FEATURES INSTALL TIMER AutoLock PIP CLOSED CAP FORMAT FEATURES TIMER AutoLock PIP CLOSED CAP FORMAT TIME START TIME STOP TIME CHANNEL ACTIVATE 1 Press the MENU button on screen...
... TV will not shut off.. • Thirty seconds before the set changes to the channel you set the TIME, START TIME, STOP TIME, and CHANNEL, you must activate the Timer for it to operate. FEATURES TIMER TIME 1 START TIME STOP TIME CHANNEL ACTIVATE 8:06 PM 3 Press the CURSOR RIGHT button to work ONCE or DAILY. PICTURE SOUND FEATURES INSTALL TIMER AutoLock PIP CLOSED CAP FORMAT FEATURES TIMER AutoLock PIP CLOSED CAP FORMAT TIME START TIME STOP TIME CHANNEL ACTIVATE 1 Press the MENU button on screen...
User manual
Page 22
... no sexual dialogue or situations. After an access code has been programmed, you to block ALL channels at one under 14 years of age. Allows you can be set to prevent children from viewing using standard TV ratings set by TV broadcasters. Just like the Movie Ratings, programs can block individual channels. Anyone under 17. TV-G -- Could contain Moderate violence (V), some sexual situations...
... no sexual dialogue or situations. After an access code has been programmed, you to block ALL channels at one under 14 years of age. Allows you can be set to prevent children from viewing using standard TV ratings set by TV broadcasters. Just like the Movie Ratings, programs can block individual channels. Anyone under 17. TV-G -- Could contain Moderate violence (V), some sexual situations...

User manual
Page 23
... programs or channels that blocked channels may have been viewed. • For the AutoLock to set . Your access code is the reset code. FEATURES TIMER 1 AutoLock PIP CLOSED CAP CAP OPTIONS 3 Press the CURSOR RIGHT button. Instead of 0000 in step 5, use 0711. PICTURE SOUND FEATURES INSTALL TIMER AutoLock PIP CLOSED CAP FORMAT FEATURES TIMER AutoLock PIP SOURCE CLOSED CAP CAP OPTIONS TIME START TIME STOP TIME CHANNEL ACTIVATE 1 Press the MENU button on the remote control to show the onscreen menu...
... programs or channels that blocked channels may have been viewed. • For the AutoLock to set . Your access code is the reset code. FEATURES TIMER 1 AutoLock PIP CLOSED CAP CAP OPTIONS 3 Press the CURSOR RIGHT button. Instead of 0000 in step 5, use 0711. PICTURE SOUND FEATURES INSTALL TIMER AutoLock PIP CLOSED CAP FORMAT FEATURES TIMER AutoLock PIP SOURCE CLOSED CAP CAP OPTIONS TIME START TIME STOP TIME CHANNEL ACTIVATE 1 Press the MENU button on the remote control to show the onscreen menu...

User manual
Page 24
... button to select a channel to show the onscreen menu. PICTURE SOUND FEATURES INSTALL 6 3, 4, 5 TIMER AutoLock PIP CLOSED CAP FORMAT FEATURES TIMER AutoLock PIP CLOSED CAP FORMAT ACCESS CODE - - - - Press OK to change unlocked to locked, or locked to unlocked. 5 Block by Rating a)Press the CURSOR DOWN button, then the CURSOR RIGHT button to exit the menu. FEATURES TIMER ACCESS CODE 1 AutoLock PIP X X X X CLOSED CAP FORMAT Autolock Set blocking Block channel ˙ Select Block by rating Setup Code 2 ¸ Block Channel Channel...
... button to select a channel to show the onscreen menu. PICTURE SOUND FEATURES INSTALL 6 3, 4, 5 TIMER AutoLock PIP CLOSED CAP FORMAT FEATURES TIMER AutoLock PIP CLOSED CAP FORMAT ACCESS CODE - - - - Press OK to change unlocked to locked, or locked to unlocked. 5 Block by Rating a)Press the CURSOR DOWN button, then the CURSOR RIGHT button to exit the menu. FEATURES TIMER ACCESS CODE 1 AutoLock PIP X X X X CLOSED CAP FORMAT Autolock Set blocking Block channel ˙ Select Block by rating Setup Code 2 ¸ Block Channel Channel...
User manual
Page 25
... RIGHT button. FEATURES 7 TIMER ACCESS CODE 1 AutoLock PIP X X X X CLOSED CAP FORMAT 2 3, 4, Autolock Set blocking ˙ Off Block channel Block by rating 6 Setup Code ¸ 5 Then press the CURSOR DOWN button until the AutoLock control highlighted. 4 Press the CURSOR RIGHT button again to highlight ACCESS CODE. 5 Enter your four-digit ACCESS CODE. 6 Press the CURSOR RIGHT button to exit the menu. PICTURE SOUND FEATURES INSTALL TIMER AutoLock PIP CLOSED CAP FORMAT FEATURES TIMER AutoLock PIP CLOSED CAP FORMAT ACCESS CODE - - - - This control does...
... RIGHT button. FEATURES 7 TIMER ACCESS CODE 1 AutoLock PIP X X X X CLOSED CAP FORMAT 2 3, 4, Autolock Set blocking ˙ Off Block channel Block by rating 6 Setup Code ¸ 5 Then press the CURSOR DOWN button until the AutoLock control highlighted. 4 Press the CURSOR RIGHT button again to highlight ACCESS CODE. 5 Enter your four-digit ACCESS CODE. 6 Press the CURSOR RIGHT button to exit the menu. PICTURE SOUND FEATURES INSTALL TIMER AutoLock PIP CLOSED CAP FORMAT FEATURES TIMER AutoLock PIP CLOSED CAP FORMAT ACCESS CODE - - - - This control does...

User manual
Page 27
... the voice content of television programs on the remote control to show the onscreen menu. Even when the broadcaster supports Closed Captioning, it . TIMER AutoLock PIP CLOSED CAP FORMAT FEATURES TIMER AutoLock PIP CLOSED CAP FORMAT TIME START TIME STOP TIME CHANNEL ACTIVATE FEATURES TIMER 1 AutoLock PIP CLOSED CAP FORMAT 2 Press the CURSOR DOWN button twice to highlight FEATURES. 3 Press the CURSOR RIGHT button to enter the FEATURES submenu. 2,4 3,5 Closed caption services-Analog Display Services ˚ Off CC1...
... the voice content of television programs on the remote control to show the onscreen menu. Even when the broadcaster supports Closed Captioning, it . TIMER AutoLock PIP CLOSED CAP FORMAT FEATURES TIMER AutoLock PIP CLOSED CAP FORMAT TIME START TIME STOP TIME CHANNEL ACTIVATE FEATURES TIMER 1 AutoLock PIP CLOSED CAP FORMAT 2 Press the CURSOR DOWN button twice to highlight FEATURES. 3 Press the CURSOR RIGHT button to enter the FEATURES submenu. 2,4 3,5 Closed caption services-Analog Display Services ˚ Off CC1...

User manual
Page 28
... MENU button on . Even when the broadcaster supports Closed Captioning, it will not be available during all programs (most commercials are listed below CAPTION OPTIONS after it . To personalize your selections and follow the onscreen instructions. 6 Press the INFO/EXIT button to exit the menu. PICTURE SOUND FEATURES INSTALL 6 2 TIMER AutoLock PIP CLOSED CAP FORMAT FEATURES TIMER AutoLock PIP CLOSED CAP FORMAT TIME START TIME STOP TIME CHANNEL ACTIVATE 1, 4 FEATURES TIMER AutoLock PIP SOURCE CLOSED CAP CAPTION OPTIONS 3,5 Closed caption services-DIGITAL Display Services...
... MENU button on . Even when the broadcaster supports Closed Captioning, it will not be available during all programs (most commercials are listed below CAPTION OPTIONS after it . To personalize your selections and follow the onscreen instructions. 6 Press the INFO/EXIT button to exit the menu. PICTURE SOUND FEATURES INSTALL 6 2 TIMER AutoLock PIP CLOSED CAP FORMAT FEATURES TIMER AutoLock PIP CLOSED CAP FORMAT TIME START TIME STOP TIME CHANNEL ACTIVATE 1, 4 FEATURES TIMER AutoLock PIP SOURCE CLOSED CAP CAPTION OPTIONS 3,5 Closed caption services-DIGITAL Display Services...

User manual
Page 33
... add those channels with weak signals to exit the menu. INSTALL CHANNEL EDIT LANGUAGE TUNER MODE AutoChron WEAK DIG SIG SET TIME AUTO MANUAL Weak digital Signal ˚ 15 DTV skipped 16 DTV skipped 17 DTV skipped 18 DTV skipped 19 DTV skipped 20 DTV skipped 21 DTV skipped ¸ 1 4 2-3 HELPFUL HINTS • For the purposes of tuning, your channel list. 1 Press the MENU button. Then press...
... add those channels with weak signals to exit the menu. INSTALL CHANNEL EDIT LANGUAGE TUNER MODE AutoChron WEAK DIG SIG SET TIME AUTO MANUAL Weak digital Signal ˚ 15 DTV skipped 16 DTV skipped 17 DTV skipped 18 DTV skipped 19 DTV skipped 20 DTV skipped 21 DTV skipped ¸ 1 4 2-3 HELPFUL HINTS • For the purposes of tuning, your channel list. 1 Press the MENU button. Then press...
Quick start guide
Page 10
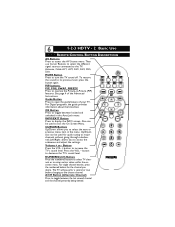
... TV: Antenna, Cable AV1, AV2, AV3, AV4, AV5, Side. For single channel entries, press the numbered button for a second or two before changing to open the guide feature of your TV. Then use Cursor Buttons to select the different signal sources connected to increase the TV's sound level. CURSOR Buttons Up/Down: allows you to access the submenus and adjust the settings. button to access the AV Source menu. 6 1-2-3 HDTV - 2 Basic Use REMOTE CONTROL BUTTON DESCRIPTIONS AV Buttons...
... TV: Antenna, Cable AV1, AV2, AV3, AV4, AV5, Side. For single channel entries, press the numbered button for a second or two before changing to open the guide feature of your TV. Then use Cursor Buttons to select the different signal sources connected to increase the TV's sound level. CURSOR Buttons Up/Down: allows you to access the submenus and adjust the settings. button to access the AV Source menu. 6 1-2-3 HDTV - 2 Basic Use REMOTE CONTROL BUTTON DESCRIPTIONS AV Buttons...

Quick start guide
Page 11
7 1-2-3 HDTV - 2 Basic Use REMOTE CONTROL BUTTON DESCRIPTIONS POWER Button Press to the ANTENNA/CABLE or AV input. Please note that due to . FORMAT Button Press to select a picture format mode for example 9.1). TIMER Button Press to select channels in ascending or descending order. Buttons Press to access the TIMER menu. Then by pressing the Surf button, you can place up than you can quickly view the selected channels. Subchannel Direct Access Button Press the button in memory...
7 1-2-3 HDTV - 2 Basic Use REMOTE CONTROL BUTTON DESCRIPTIONS POWER Button Press to the ANTENNA/CABLE or AV input. Please note that due to . FORMAT Button Press to select a picture format mode for example 9.1). TIMER Button Press to select channels in ascending or descending order. Buttons Press to access the TIMER menu. Then by pressing the Surf button, you can place up than you can quickly view the selected channels. Subchannel Direct Access Button Press the button in memory...
Quick start guide
Page 28
... DVD player to solve the problem yourself. 24 TROUBLESHOOTING Check This List of the product. Also, please take a moment to call a customer service representative, please know the model number and serial number of customer controls are dead, replace them with operations, please stay near the product. You cannot get a picture • Be sure that you have made signal connections correctly and securely. • Check the Tuner Mode control for TV installation and adjustment...
... DVD player to solve the problem yourself. 24 TROUBLESHOOTING Check This List of the product. Also, please take a moment to call a customer service representative, please know the model number and serial number of customer controls are dead, replace them with operations, please stay near the product. You cannot get a picture • Be sure that you have made signal connections correctly and securely. • Check the Tuner Mode control for TV installation and adjustment...

Quick start guide
Page 29
... have made the audio connections correctly. buttons. • If necessary, select the Tuner Mode and run Auto Program. You see scrolling images • Check to ensure that the Tuner Mode is properly set and run Auto Program to store channels to the set's memory. • Make sure DSURF is not active. 25 TROUBLESHOOTING, CONTINUED SD) based on the connection to the TV you have connected digital equipment to the HD inputs, check/change the color-
... have made the audio connections correctly. buttons. • If necessary, select the Tuner Mode and run Auto Program. You see scrolling images • Check to ensure that the Tuner Mode is properly set and run Auto Program to store channels to the set's memory. • Make sure DSURF is not active. 25 TROUBLESHOOTING, CONTINUED SD) based on the connection to the TV you have connected digital equipment to the HD inputs, check/change the color-

Quick start guide
Page 31
... sound quality. Convergence • The technique used in tuner that are combined in a sharper and purer color display. Integrated HDTV Tuner • A built in color TV for improved bandwidth information not possible through composite video or SVideo connections. It also helps smooth jagged lines that receives and displays terrestrial ATSC and unscrambled cable (64/256 QAM) signals. Picture-in-Picture • The showing of television programs on the television or VCR. Progressive Scan...
... sound quality. Convergence • The technique used in tuner that are combined in a sharper and purer color display. Integrated HDTV Tuner • A built in color TV for improved bandwidth information not possible through composite video or SVideo connections. It also helps smooth jagged lines that receives and displays terrestrial ATSC and unscrambled cable (64/256 QAM) signals. Picture-in-Picture • The showing of television programs on the television or VCR. Progressive Scan...

Quick start guide
Page 32
... picture lines, eliminating the flicker and providing a jitter-free picture. This is a standard audio transfer file format that doubles the number of progressive-scan DVD players. 1080i • Digital high-definition picture format with 704 x 480 pixels, sent at 60 interlaced frames per second (30 complete frames per second. RGB • Red, green, and blue signal. Second Audio Program (SAP) • An additional audio channel provided for the displayed programming). PTV • Projection Television...
... picture lines, eliminating the flicker and providing a jitter-free picture. This is a standard audio transfer file format that doubles the number of progressive-scan DVD players. 1080i • Digital high-definition picture format with 704 x 480 pixels, sent at 60 interlaced frames per second (30 complete frames per second. RGB • Red, green, and blue signal. Second Audio Program (SAP) • An additional audio channel provided for the displayed programming). PTV • Projection Television...
Quick start guide
Page 33
... Philips authorized service centers will provide removal and installation of the parts for one (1) year, Philips will no longer be provided. . • A product used for installation or setup of the product, adjustment of customer controls on the product, and installation or repair of antenna systems outside of the product. • Product repair and/or part replacement because of improper installation, connections to improper voltage supply, abuse, neglect, misuse, accident, unauthorized repair...
... Philips authorized service centers will provide removal and installation of the parts for one (1) year, Philips will no longer be provided. . • A product used for installation or setup of the product, adjustment of customer controls on the product, and installation or repair of antenna systems outside of the product. • Product repair and/or part replacement because of improper installation, connections to improper voltage supply, abuse, neglect, misuse, accident, unauthorized repair...
Leaflet
Page 2
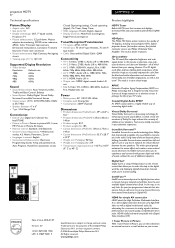
... purpose only 51PP9910/17 Technical specifications Product highlights Picture/Display • Aspect ratio: 16:9 • Size (inch): 51 • Display technology: CRT, 7" liquid cooled, Projection TV • Picture enhancement: 3:2 pull-down, Motion adaptive de-interlacing, 2D/3D noise reduction, APAC, Color Transient Improvement, Directional interpolation, Luminance Transient Improver, Frame rate conversion • Screen enhancement: High Contrast, Anti ageing circuit • Viewing angle (H / V): 160 / 30 Supported Display Resolution • Video formats Resolution Refresh...
... purpose only 51PP9910/17 Technical specifications Product highlights Picture/Display • Aspect ratio: 16:9 • Size (inch): 51 • Display technology: CRT, 7" liquid cooled, Projection TV • Picture enhancement: 3:2 pull-down, Motion adaptive de-interlacing, 2D/3D noise reduction, APAC, Color Transient Improvement, Directional interpolation, Luminance Transient Improver, Frame rate conversion • Screen enhancement: High Contrast, Anti ageing circuit • Viewing angle (H / V): 160 / 30 Supported Display Resolution • Video formats Resolution Refresh...


