Philips HD8773 Support and Manuals
Get Help and Manuals for this Phillips item
View All Support Options Below
Free Philips HD8773 manuals!
Problems with Philips HD8773?
Ask a Question
Free Philips HD8773 manuals!
Problems with Philips HD8773?
Ask a Question
Popular Philips HD8773 Manual Pages
Leaflet - Page 2

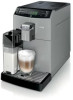
... Integrated milk jug & frother, Silver, 5 step adjustable grinder
Highlights
Dishwasher-safe parts
5-steps adjustable grinders
HD8773/47
Removable brewing group
For your espresso machine's life....day, it just as well your machine and guides you with water upon starting up or switching off of the machine, this machine has five adjustable settings - Once you can put the Saeco's drip...
User manual - Page 4

... THE MACHINE FOR THE FIRST TIME 8 Circuit Priming ...8 Automatic Rinse/Self-Cleaning Cycle...9 Manual Rinse Cycle...10 Measuring and Programming Water Hardness 13 "INTENZA+"Water Filter Installation ...14 Replacing the"INTENZA+"Water Filter 16
ADJUSTMENTS 18 Saeco Adapting System...18 Adjusting the Ceramic Coffee Grinder...18 Adjusting the Aroma (Coffee Strength 19 Adjusting...
User manual - Page 5

... 54 Monthly Cleaning of the Coffee Bean Hopper 55
DESCALING...56
PROGRAMMING 62 The following settings can be adjusted 62 How to Program the Machine ...63
MEANING OF THE DISPLAY ICONS 65
TROUBLESHOOTING 69
ENERGY SAVING 71 Stand-by ...71
TECHNICAL SPECIFICATIONS 72
WARRANTY AND SERVICE 72 Warranty ...72 Service ...72
ORDERING MAINTENANCE PRODUCTS 73
User manual - Page 7

... 6. Milk carafe 17. to be purchased separately Cleaning brush - Menu button 30. ON/OFF button 31. to be purchased separately 24. "Aroma" - Drip tray 11. Service door 15. Long Coffee brew button 27. Cup holder grill 10. Brew group 13. Control panel 7. Coffee grinder adjustment key + Pre-ground coffee measuring scoop...
User manual - Page 10

.../self-cleaning cycle. 3) You need to turn on the machine.
The machine automatically primes the circuit. 8 ENGLISH
12 Switch the power button to "I" to perform a manual rinse cycle.
User manual - Page 11

... the icon shows the operation progress.
Yellow
Yellow
ENGLISH 9 2 The bar under the coffee dispensing spout to finish automatically. Note:
You can now perform the manual rinse cycle. Yellow
Green
User manual - Page 12

10 ENGLISH
Manual Rinse Cycle During this display. This takes a few minutes.
1 Place a container under the water dispensing spout. Note: Do not add pre-ground coffee to the compartment.
4 Check that the lever is set to step 4 twice, then continue with step 6.
6 Place a container under the coffee dispensing spout.
2 Check that the machine...
User manual - Page 14

... in stand-by pressing the " " button.
Green
11 Fill the water tank again up to perform a manual rinse cycle as described above.
Now the machine is possible to brew a coffee. Note: When you haven't...automatically perform an automatic rinse/self-cleaning cycle after you need to the MAX level. Note: The manual rinse cycle may be shown.
At the end of the cycle, it on. 12 ENGLISH
Red...
User manual - Page 15

... hardness test strip (supplied with the machine) in order to define the descaling frequency and to install the "INTENZA+" water filter (for more detail on the water hardness test strip correspond to the water hardness adjustment settings. The machine shows this icon. ENGLISH 13
Measuring and Programming Water Hardness Water hardness measuring...
User manual - Page 16

...value or the " " button to decrease the value.
7 Press the " " button to confirm the setting.
8 Press the " " button to enter the programming menu. The "INTENZA+" water filter can be...programming MENU.
Water is a crucial part of every coffee, so it professionally filtered. The machine shows this manual. Green
"INTENZA+" Water Filter Installation
We recommend you to scroll the ...
User manual - Page 17

... and reinsert it vertically (with the opening positioned upwards) in cold water and gently press the sides so as to let the air bubbles out.
3 Set the "INTENZA+" water filter according to the measurements performed (see
the "Dispensing Hot Water" chapter). 7 Fill the water tank again. ENGLISH 15 1 Remove the small...
User manual - Page 70

Exx
com/support.
Set the "ESPRESSO" or "COFFEE" selection lever to "ESPRESSO" within 30 seconds to complete brewing.
Place the coffee bean hopper lid on the machine within 30 seconds to complete brewing.
The contact details
can be inserted into the machine and close the service door. 68 ENGLISH
Warning Signals (Red color) Completely...
User manual - Page 71

...Change coffee blend or adjust the grind setting as a normal machine behavior.
The ...on . ENGLISH 69
TROUBLESHOOTING
This chapter summarizes the most common problems you are cold. ...support. network and turn the power button to solve the problem with the information below, visit www.philips.com/support... brew group is too little.
Close the service door. The coffee grounds drawer is not...
User manual - Page 74

...related conditions, please read the warranty booklet supplied separately. Service
We want to ensure that you remain satisfied with you and send you need service or support, please visit the Philips website at www. If ... the product
Nominal Voltage - 72 ENGLISH
TECHNICAL SPECIFICATIONS
The manufacturer reserves the right to make changes to the technical specifications of the service
ing -
User manual - Page 75

You can be found in your country) at www.shop.philips.com/service, your country. Overview of maintenance products:
- The contact details can purchase these at authorised service centres. INTENZA+ Water filter cartridge CA6702
- Maintenance Kit CA 6706 ENGLISH 73 ORDERING... in the warranty booklet by-packed separately or on www.philips.com/support. Descaling solution CA6700
-
Philips HD8773 Reviews
We have not received any reviews for Philips yet.