
Leaflet
Page 3
...: 120 V Weight and dimensions • Weight of product: 13 kg • Dimensions of Koninklijke Philips N.V. Specifications are the property of product (WxDxH): 205 x 460 x 360 mm Design • Color: Stainless steel & black • HD8966/47 Issue date 2019-11-22 Version: 4.0.1 © 2019 Koninklijke Philips N.V. or their respective owners. All Rights reserved. Super-automatic...
...: 120 V Weight and dimensions • Weight of product: 13 kg • Dimensions of Koninklijke Philips N.V. Specifications are the property of product (WxDxH): 205 x 460 x 360 mm Design • Color: Stainless steel & black • HD8966/47 Issue date 2019-11-22 Version: 4.0.1 © 2019 Koninklijke Philips N.V. or their respective owners. All Rights reserved. Super-automatic...

User manual
Page 2
Allow to persons. 8. Do not place on or taking off ", then remove plug from outlet when not in water or other than intended use. 13. Save these instructions. To protect against fire, electric shock and injury to appliance first, then plug cord into wall outlet. Do not use of table ...
Allow to persons. 8. Do not place on or taking off ", then remove plug from outlet when not in water or other than intended use. 13. Save these instructions. To protect against fire, electric shock and injury to appliance first, then plug cord into wall outlet. Do not use of table ...
User manual
Page 4
... from the support that you need to HD8966. CONTENTS IMPORTANT...4 Safety Instructions...4 Warnings ...4 Cautions ...6 Electromagnetic Fields ...7 Disposal ...7 INSTALLATION 8 Product Overview ...8 General Description ...9 PREPARING FOR USE 10 Machine Packaging...10 Machine Installation...10 Demo Mode Function ...12 USING THE MACHINE FOR THE FIRST TIME 13 Language Selection...13 Automatic Rinse/Cleaning Cycle ...14 Manual...
... from the support that you need to HD8966. CONTENTS IMPORTANT...4 Safety Instructions...4 Warnings ...4 Cautions ...6 Electromagnetic Fields ...7 Disposal ...7 INSTALLATION 8 Product Overview ...8 General Description ...9 PREPARING FOR USE 10 Machine Packaging...10 Machine Installation...10 Demo Mode Function ...12 USING THE MACHINE FOR THE FIRST TIME 13 Language Selection...13 Automatic Rinse/Cleaning Cycle ...14 Manual...

User manual
Page 10
8 INSTALLATION Product Overview 4 1c 2 1b 1a 3 5 6 7 8 9 10 11 12 13 14 18 15 16 17 19 20 21 22 45 44 27 28 29 23 24 30 25 26 31 32 33 46 47 34 35 36 37 38 39 40 41 42 43
8 INSTALLATION Product Overview 4 1c 2 1b 1a 3 5 6 7 8 9 10 11 12 13 14 18 15 16 17 19 20 21 22 45 44 27 28 29 23 24 30 25 26 31 32 33 46 47 34 35 36 37 38 39 40 41 42 43

User manual
Page 11
...-ground coffee compartment 6. Water hardness test strip 27. Hot Milk button 36. Power button 22. Drip tray (internal) 12. Protection lid 18. Coffee grounds drawer 13. "Aroma" -
...-ground coffee compartment 6. Water hardness test strip 27. Hot Milk button 36. Power button 22. Drip tray (internal) 12. Protection lid 18. Coffee grounds drawer 13. "Aroma" -

User manual
Page 14
To exit the demo, disconnect the power cord and turn on the machine. 12 ENGLISH 11 Insert the plug into the socket located on the back of the machine. 12 Insert the plug on the other end of the machine to "I" to turn on the machine. 14 Press the button to turn the machine back on. DEMO MODE ON Demo Mode Function The machine is equipped with suitable power voltage. 13 Switch the power button on the back of the power cord into a wall socket with an operation simulating function. By keeping the " " button pressed for more than 8 seconds, the machine enters the demo mode.
To exit the demo, disconnect the power cord and turn on the machine. 12 ENGLISH 11 Insert the plug into the socket located on the back of the machine. 12 Insert the plug on the other end of the machine to "I" to turn on the machine. 14 Press the button to turn the machine back on. DEMO MODE ON Demo Mode Function The machine is equipped with suitable power voltage. 13 Switch the power button on the back of the power cord into a wall socket with an operation simulating function. By keeping the " " button pressed for more than 8 seconds, the machine enters the demo mode.

User manual
Page 15
... will perform an automatic rinse/cleaning cycle. 3) You need to confirm. HEATING UP... 3 The machine is shown. LINGUA ITALIANO ENGLISH DEUTSCH FRANÇAIS ENGLISH 13 USING THE MACHINE FOR THE FIRST TIME When using the machine for the first time, the following display is in warm-up phase. Select the...
... will perform an automatic rinse/cleaning cycle. 3) You need to confirm. HEATING UP... 3 The machine is shown. LINGUA ITALIANO ENGLISH DEUTSCH FRANÇAIS ENGLISH 13 USING THE MACHINE FOR THE FIRST TIME When using the machine for the first time, the following display is in warm-up phase. Select the...

User manual
Page 19
At the end of the warm-up to 13 until the water tank is ready to perform a manual rinse cycle as described above. Now the machine is empty, then continue with step 15. Following ... INSERT WATER SPOUT 12 Press the " " button. PROFILE SAECO 15 At the end, fill the water tank again up phase, the machine starts dispensing water. 13 After dispensing water, remove and empty the container. 14 Repeat the operations from step 10 to the MAX level.
At the end of the warm-up to 13 until the water tank is ready to perform a manual rinse cycle as described above. Now the machine is empty, then continue with step 15. Following ... INSERT WATER SPOUT 12 Press the " " button. PROFILE SAECO 15 At the end, fill the water tank again up phase, the machine starts dispensing water. 13 After dispensing water, remove and empty the container. 14 Repeat the operations from step 10 to the MAX level.

User manual
Page 24
ACTIVATE FILTER INSERT WATER SPOUT 15 Press " " to confirm. 14 Check that the water dispensing spout is correctly installed. ACTIVATE FILTER INSERT FILTER. FILL WATER TANK 13 Press " " to confirm. 16 Place a container under the hot water dispensing spout. 22 ENGLISH 11 Put the "INTENZA+" water filter into the machine. Press it down until it cannot move any further. 12 Fill the water tank with fresh water up to the MAX level and put it back into the empty water tank.
ACTIVATE FILTER INSERT WATER SPOUT 15 Press " " to confirm. 14 Check that the water dispensing spout is correctly installed. ACTIVATE FILTER INSERT FILTER. FILL WATER TANK 13 Press " " to confirm. 16 Place a container under the hot water dispensing spout. 22 ENGLISH 11 Put the "INTENZA+" water filter into the machine. Press it down until it cannot move any further. 12 Fill the water tank with fresh water up to the MAX level and put it back into the empty water tank.

User manual
Page 74
72 ENGLISH F 10 Insert the fitting (F) into the milk frothing device by pressing it up to the carafe dispenser. C 13 Insert the fitting (B) into the milk frother. A B 14 Insert the suction tube with the fitting (A) into the suction tube. D E 12 Attach the top (C) to its limit. 11 Insert the milk frothing device (D) into the support (E).
72 ENGLISH F 10 Insert the fitting (F) into the milk frothing device by pressing it up to the carafe dispenser. C 13 Insert the fitting (B) into the milk frother. A B 14 Insert the suction tube with the fitting (A) into the suction tube. D E 12 Attach the top (C) to its limit. 11 Insert the milk frothing device (D) into the support (E).

User manual
Page 78
... Turn the brew group back to remove any coffee grounds. Perform the operation when the machine has been turned off for at least one hour. 13 Make sure that the brew group is locked into the position described in the following step. 15 When you reach the position shown in this...
... Turn the brew group back to remove any coffee grounds. Perform the operation when the machine has been turned off for at least one hour. 13 Make sure that the brew group is locked into the position described in the following step. 15 When you reach the position shown in this...

User manual
Page 84
... cycle progress. Insert the milk carafe into the machine. Press the " " button to confirm. 82 ENGLISH CARAFE CLEANING PLACE CONTAINER UNDER THE CARAFE DISPENSING SPOUT 13 Place a large container (1.5 l) under the dispensing spout. The machine starts dispensing the solution through the milk dispensing spout.
... cycle progress. Insert the milk carafe into the machine. Press the " " button to confirm. 82 ENGLISH CARAFE CLEANING PLACE CONTAINER UNDER THE CARAFE DISPENSING SPOUT 13 Place a large container (1.5 l) under the dispensing spout. The machine starts dispensing the solution through the milk dispensing spout.

User manual
Page 93
..., the machine may require several refills for rinsing. RINSING FILL HALF CARAFE WITH WATER. Press the " " button. Press the " " button. RINSING EMPTY INTERNAL DRIP TRAY 13 Empty the drip tray (internal) and place it back under both the milk carafe dispenser and the coffee dispensing spout. Then press the " " button. RINSING...
..., the machine may require several refills for rinsing. RINSING FILL HALF CARAFE WITH WATER. Press the " " button. Press the " " button. RINSING EMPTY INTERNAL DRIP TRAY 13 Empty the drip tray (internal) and place it back under both the milk carafe dispenser and the coffee dispensing spout. Then press the " " button. RINSING...
User manual
Page 102
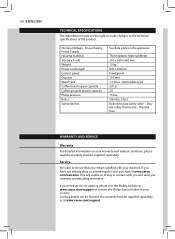
... detailed information on the appliance Thermoplastic Material/Metal 210 x 360 x 460 mm 13 kg 800-1200mm Front panel 110 mm 1.7 litres - If you need service or support, please visit the Philips website at www.saeco.com/support or contact the Philips Saeco hotline in the warranty booklet supplied separately or at www.saeco...
... detailed information on the appliance Thermoplastic Material/Metal 210 x 360 x 460 mm 13 kg 800-1200mm Front panel 110 mm 1.7 litres - If you need service or support, please visit the Philips website at www.saeco.com/support or contact the Philips Saeco hotline in the warranty booklet supplied separately or at www.saeco...