Operation Manual
Page 2
... Using CD TEXT functions 23 • Displaying titles on CD TEXT discs 23 • Scrolling titles in a safe place for buying this manual 4 Precautions 4 Use and care of the remote control 5 • Installing the battery 5 • Using the remote control 5 Protecting your unit from theft 5 • Removing the front panel 6 • Attaching the front panel 6 What's What 7 • Head unit 7 • Remote control 8 Power ON/OFF Turning the unit on 9 Selecting a source 9 Turning the unit off 9 Tuner Listening to operate your model...
... Using CD TEXT functions 23 • Displaying titles on CD TEXT discs 23 • Scrolling titles in a safe place for buying this manual 4 Precautions 4 Use and care of the remote control 5 • Installing the battery 5 • Using the remote control 5 Protecting your unit from theft 5 • Removing the front panel 6 • Attaching the front panel 6 What's What 7 • Head unit 7 • Remote control 8 Power ON/OFF Turning the unit on 9 Selecting a source 9 Turning the unit off 9 Tuner Listening to operate your model...
Operation Manual
Page 3
...; Adjusting subwoofer settings 30 Adjusting source levels 30 Initial Settings Adjusting initial settings 31 Setting the time 31 Setting the FM tuning step 32 Setting the AM tuning step 32 Switching the warning tone 32 Switching the auxiliary setting 32 Switching the dimmer setting 33 Switching the rear output setting 33 Other Functions Setting the time display on or off 34 Using the AUX source 34 • Selecting AUX as the source 34 • Setting the AUX title 34 Additional Information CD player and care 35 CD-R/CD-RW discs...
...; Adjusting subwoofer settings 30 Adjusting source levels 30 Initial Settings Adjusting initial settings 31 Setting the time 31 Setting the FM tuning step 32 Setting the AM tuning step 32 Switching the warning tone 32 Switching the auxiliary setting 32 Switching the dimmer setting 33 Switching the rear output setting 33 Other Functions Setting the time display on or off 34 Using the AUX source 34 • Selecting AUX as the source 34 • Setting the AUX title 34 Additional Information CD player and care 35 CD-R/CD-RW discs...
Operation Manual
Page 4
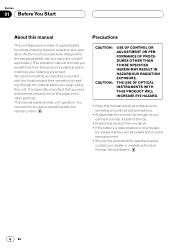
... yourself with the remote control. It is disconnected or discharged, the preset memory will help you can perform the same operations with the functions and their operation by reading through the manual before you read and observe precautions on this page and in other sections. We recommend that you begin using this unit. Precautions CAUTION: CAUTION: USE OF CONTROL OR ADJUSTMENT OR PERFORMANCE OF...
... yourself with the remote control. It is disconnected or discharged, the preset memory will help you can perform the same operations with the functions and their operation by reading through the manual before you read and observe precautions on this page and in other sections. We recommend that you begin using this unit. Precautions CAUTION: CAUTION: USE OF CONTROL OR ADJUSTMENT OR PERFORMANCE OF...
Operation Manual
Page 5
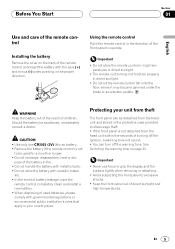
... display and the buttons tightly when removing or attaching. • Avoid subjecting the front panel to operate. Using the remote control Point the remote control in the protective case provided to discourage theft. • If the front panel is not to be swallowed, immediately consult a doctor. CAUTION • Use only one CR2025 (3V) lithium battery. • Remove the battery if the remote control is not detached from the head unit...
... display and the buttons tightly when removing or attaching. • Avoid subjecting the front panel to operate. Using the remote control Point the remote control in the protective case provided to discourage theft. • If the front panel is not to be swallowed, immediately consult a doctor. CAUTION • Use only one CR2025 (3V) lithium battery. • Remove the battery if the remote control is not detached from the head unit...
Operation Manual
Page 7
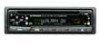
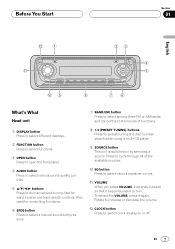
... functions. 8 1-6 (PRESET TUNING) buttons Press for preset tuning and disc number search when using a multi-CD player. 9 SOURCE button This unit is switched on or off. VOLUME When you press VOLUME, it extends outward so that it again. Rotate to increase or decrease the volume. = CLOCK button Press to do manual seek tuning, fast forward, reverse and track search controls. EQ 09 8 AUDIO SELECT SFEQ 4 5 76 What's What Head unit 1 DISPLAY button Press to select different displays. 2 FUNCTION button Press to select functions. 3 OPEN button...
... functions. 8 1-6 (PRESET TUNING) buttons Press for preset tuning and disc number search when using a multi-CD player. 9 SOURCE button This unit is switched on or off. VOLUME When you press VOLUME, it extends outward so that it again. Rotate to increase or decrease the volume. = CLOCK button Press to do manual seek tuning, fast forward, reverse and track search controls. EQ 09 8 AUDIO SELECT SFEQ 4 5 76 What's What Head unit 1 DISPLAY button Press to select different displays. 2 FUNCTION button Press to select functions. 3 OPEN button...
Operation Manual
Page 9
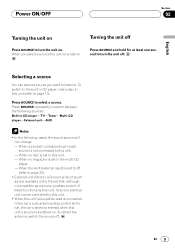
... this unit. When no disc is set in the future) that, although incompatible as a source, enables control of basic functions by this unit. • When this unit's blue/white lead is connected to the car's auto-antenna relay control terminal, the car's antenna extends when this unit's source is not connected to the built-in CD player, load a disc in the multi-CD player. - To switch to this unit. - When no magazine is turned on. Power...
... this unit. When no disc is set in the future) that, although incompatible as a source, enables control of basic functions by this unit. • When this unit's blue/white lead is connected to the car's auto-antenna relay control terminal, the car's antenna extends when this unit's source is not connected to the built-in CD player, load a disc in the multi-CD player. - To switch to this unit. - When no magazine is turned on. Power...
Operation Manual
Page 10
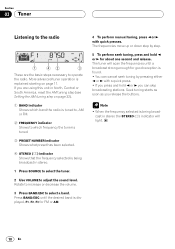
... broadcast in stereo. 1 Press SOURCE to select the tuner. 2 Use VOLUME to adjust the sound level. Note • When the frequency selected is found. • You can cancel seek tuning by step. 5 To perform seek tuning, press and hold 2 or 3 for FM or AM. 4 To perform manual tuning, press 2 or 3 with a quick press. • If you press and hold 2 or 3 you can skip broadcasting stations. Rotate...
... broadcast in stereo. 1 Press SOURCE to select the tuner. 2 Use VOLUME to adjust the sound level. Note • When the frequency selected is found. • You can cancel seek tuning by step. 5 To perform seek tuning, press and hold 2 or 3 for FM or AM. 4 To perform manual tuning, press 2 or 3 with a quick press. • If you press and hold 2 or 3 you can skip broadcasting stations. Rotate...
Operation Manual
Page 11
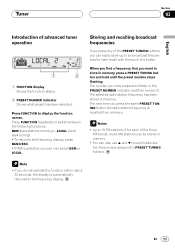
... in memory press a PRESET TUNING button and hold until the preset number stops flashing. The next time you press the same PRESET TUNING button the radio station frequency is selected, you want to store in memory. • You can only select BSM or LOCAL. The number you do not operate the function within about 30 seconds, the display is automatically returned to PRESET TUNING buttons. Note • If you have pressed will flash in memory. The selected radio station frequency...
... in memory press a PRESET TUNING button and hold until the preset number stops flashing. The next time you press the same PRESET TUNING button the radio station frequency is selected, you want to store in memory. • You can only select BSM or LOCAL. The number you do not operate the function within about 30 seconds, the display is automatically returned to PRESET TUNING buttons. Note • If you have pressed will flash in memory. The selected radio station frequency...
Operation Manual
Page 12
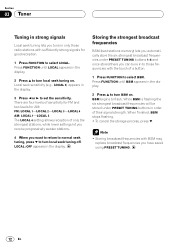
... strongest broadcast frequencies BSM (best stations memory) lets you automatically store the six strongest broadcast frequencies under PRESET TUNING buttons in the display. 2 Press 5 to turn local seek tuning off. Local seek sensitivity (e.g., LOCAL 2) appears in to those radio stations with BSM may replace broadcast frequencies you have saved using PRESET TUNING. 12 En LOCAL :OFF appears in only those frequencies with the touch of a button. 1 Press FUNCTION to set the...
... strongest broadcast frequencies BSM (best stations memory) lets you automatically store the six strongest broadcast frequencies under PRESET TUNING buttons in the display. 2 Press 5 to turn local seek tuning off. Local seek sensitivity (e.g., LOCAL 2) appears in to those radio stations with BSM may replace broadcast frequencies you have saved using PRESET TUNING. 12 En LOCAL :OFF appears in only those frequencies with the touch of a button. 1 Press FUNCTION to set the...
Operation Manual
Page 13
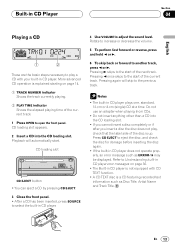
... built-in CD player. 4 Use VOLUME to adjust the sound level. CD loading slot appears. 2 Insert a CD into the CD loading slot. • If you cannot insert a disc completely or if after you insert a disc the disc does not play a CD with CD TEXT function. • A CD TEXT disc is a CD featuring recorded text information such as ERROR-14 may be displayed. Playback will...
... built-in CD player. 4 Use VOLUME to adjust the sound level. CD loading slot appears. 2 Insert a CD into the CD loading slot. • If you cannot insert a disc completely or if after you insert a disc the disc does not play a CD with CD TEXT function. • A CD TEXT disc is a CD featuring recorded text information such as ERROR-14 may be displayed. Playback will...
Operation Manual
Page 17
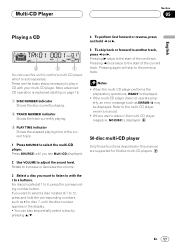
... displayed. 2 Use VOLUME to select the multi-CD player. Pressing again will skip to another track, press 2 or 3. Notes • When the multi-CD player performs the preparatory operations, READY is explained starting on page 18. 1 DISC NUMBER indicator Shows the disc currently playing. 2 TRACK NUMBER indicator Shows the track currently playing. 3 PLAY TIME indicator Shows the elapsed playing time of the current track. 1 Press SOURCE to adjust the sound level...
... displayed. 2 Use VOLUME to select the multi-CD player. Pressing again will skip to another track, press 2 or 3. Notes • When the multi-CD player performs the preparatory operations, READY is explained starting on page 18. 1 DISC NUMBER indicator Shows the disc currently playing. 2 TRACK NUMBER indicator Shows the track currently playing. 3 PLAY TIME indicator Shows the elapsed playing time of the current track. 1 Press SOURCE to adjust the sound level...
Operation Manual
Page 25
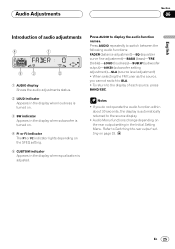
... En 25 Press AUDIO repeatedly to the source display. • Audio Menu functions change depending on page 33. Refer to Switching the rear output setting on the rear output setting in the display when equalization is automatically returned to switch between the following audio functions: FADER (balance adjustment)-EQ (equalizer curve fine adjustment)-BASS (bass)-TRE (treble)-LOUD (loudness)-SUB.W (subwoofer output)-80HZ0 (subwoofer setting adjustment)-SLA (source level adjustment) • When selecting the FM tuner as the source, you do not operate the audio function within about 30...
... En 25 Press AUDIO repeatedly to the source display. • Audio Menu functions change depending on page 33. Refer to Switching the rear output setting on the rear output setting in the display when equalization is automatically returned to switch between the following audio functions: FADER (balance adjustment)-EQ (equalizer curve fine adjustment)-BASS (bass)-TRE (treble)-LOUD (loudness)-SUB.W (subwoofer output)-80HZ0 (subwoofer setting adjustment)-SLA (source level adjustment) • When selecting the FM tuner as the source, you do not operate the audio function within about 30...
Operation Manual
Page 26
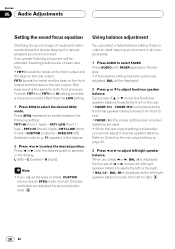
... :L9 - Each press of 5 or ∞ moves the front/rear speaker balance towards the left )-C (center)-R (right) Note • If you adjust the bass or treble, CUSTOM memorizes an SFEQ mode in the display. Even greater listening enjoyment will be obtained if seating positions are used. • When the rear output setting is subwoofer, you press 2 or 3, BAL : 0 is the same for personal...
... :L9 - Each press of 5 or ∞ moves the front/rear speaker balance towards the left )-C (center)-R (right) Note • If you adjust the bass or treble, CUSTOM memorizes an SFEQ mode in the display. Even greater listening enjoyment will be obtained if seating positions are used. • When the rear output setting is subwoofer, you press 2 or 3, BAL : 0 is the same for personal...
Operation Manual
Page 27
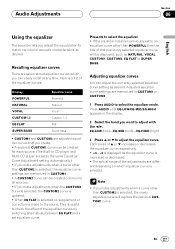
...: Display POWERFUL NATURAL VOCAL CUSTOM1, 2 EQ FLAT SUPER BASS Equalizer curve Powerful Natural Vocal Custom 1, 2 Flat Super bass • CUSTOM1 and CUSTOM2 are set equalizer curve. Press EQ to select the equalizer. • If the equalizer has been previously set to an equalizer curve other than CUSTOM2 is selected, the equalizer curve settings are memorized in CD player and Multi-CD player are adjusted equalizer curves that previously selected equalizer curve will replace...
...: Display POWERFUL NATURAL VOCAL CUSTOM1, 2 EQ FLAT SUPER BASS Equalizer curve Powerful Natural Vocal Custom 1, 2 Flat Super bass • CUSTOM1 and CUSTOM2 are set equalizer curve. Press EQ to select the equalizer. • If the equalizer has been previously set to an equalizer curve other than CUSTOM2 is selected, the equalizer curve settings are memorized in CD player and Multi-CD player are adjusted equalizer curves that previously selected equalizer curve will replace...

Operation Manual
Page 29
... subwoofer, then turn subwoofer output off . When the rear output setting is now off frequency and the Treble level. Subwoofer output is subwoofer, you can be adjusted. 1 Press AUDIO to select LOUD. Each press of 5 or ∞ increases or decreases the treble level. +6 - -6 displayed as the level is connected to the rear output, first, switch the rear output setting to select SUB.W. LOUD :OFF appears in the display. For more details, see Switching the rear output setting on . and high-sound ranges at low volume. 1 Press AUDIO...
... subwoofer, then turn subwoofer output off . When the rear output setting is now off frequency and the Treble level. Subwoofer output is subwoofer, you can be adjusted. 1 Press AUDIO to select LOUD. Each press of 5 or ∞ increases or decreases the treble level. +6 - -6 displayed as the level is connected to the rear output, first, switch the rear output setting to select SUB.W. LOUD :OFF appears in the display. For more details, see Switching the rear output setting on . and high-sound ranges at low volume. 1 Press AUDIO...
Operation Manual
Page 31
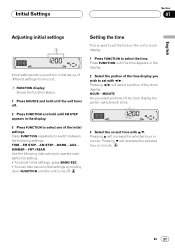
... unit's clock display. 1 Press FUNCTION to set with 5/∞. DIMMER-FRT+REAR Use the following settings: TIME-FM STEP-AM STEP-WARN-AUX- Press FUNCTION until FM STEP appears in the display. 3 Press FUNCTION to operate each particular setting. • To cancel initial settings, press BAND/ESC. • You can also cancel initial settings by holding down FUNCTION until the unit turns off . 2 Press FUNCTION and hold until the time appears in the display. 2 Select...
... unit's clock display. 1 Press FUNCTION to set with 5/∞. DIMMER-FRT+REAR Use the following settings: TIME-FM STEP-AM STEP-WARN-AUX- Press FUNCTION until FM STEP appears in the display. 3 Press FUNCTION to operate each particular setting. • To cancel initial settings, press BAND/ESC. • You can also cancel initial settings by holding down FUNCTION until the unit turns off . 2 Press FUNCTION and hold until the time appears in the display. 2 Select...
Operation Manual
Page 32
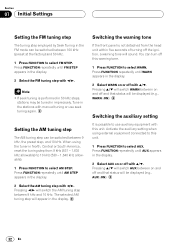
... kHz steps, stations may be tuned in the display. 2 Select the FM tuning step with 2/3. Setting the AM tuning step The AM tuning step can be switched between 9 kHz and 10 kHz. You can turn off the ignition, a warning tone will appear in the display. Activate the auxiliary setting when using the tuner in North, Central or South America, reset the tuning step from the head unit within five seconds...
... kHz steps, stations may be tuned in the display. 2 Select the FM tuning step with 2/3. Setting the AM tuning step The AM tuning step can be switched between 9 kHz and 10 kHz. You can turn off the ignition, a warning tone will appear in the display. Activate the auxiliary setting when using the tuner in North, Central or South America, reset the tuning step from the head unit within five seconds...
Operation Manual
Page 33
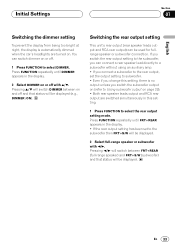
... subwoofer output on (refer to Using subwoofer output on page 29). • Both rear speaker leads output and RCA rear output are turned on. If you switch the rear output setting to the subwoofer, you can switch dimmer on or off. 1 Press FUNCTION to the subwoofer then FRT+S/W will be displayed (e.g., DIMMER :ON). You can connect a rear speaker lead directly to a subwoofer without using an auxiliary amp. • If you connect a subwoofer to the rear output, set to select DIMMER. Pressing 5/∞ will switch DIMMER between FRT+REAR (full-range speaker...
... subwoofer output on (refer to Using subwoofer output on page 29). • Both rear speaker leads output and RCA rear output are turned on. If you switch the rear output setting to the subwoofer, you can switch dimmer on or off. 1 Press FUNCTION to the subwoofer then FRT+S/W will be displayed (e.g., DIMMER :ON). You can connect a rear speaker lead directly to a subwoofer without using an auxiliary amp. • If you connect a subwoofer to the rear output, set to select DIMMER. Pressing 5/∞ will switch DIMMER between FRT+REAR (full-range speaker...

Operation Manual
Page 34
... the AUX source can turn the time display on even when the sources are off. Section 08 Other Functions Setting the time display on or off You can be changed. 1 After you have selected AUX as the source, press FUNCTION and hold until AUX appears in the display. • If the auxiliary setting is not switched on, AUX cannot be selected. Press CLOCK to select AUX as the source Press SOURCE to select the time display. X Y Z, numbers and symbols in 1 2 3 ... @ # < order. Selecting AUX...
... the AUX source can turn the time display on even when the sources are off. Section 08 Other Functions Setting the time display on or off You can be changed. 1 After you have selected AUX as the source, press FUNCTION and hold until AUX appears in the display. • If the auxiliary setting is not switched on, AUX cannot be selected. Press CLOCK to select AUX as the source Press SOURCE to select the time display. X Y Z, numbers and symbols in 1 2 3 ... @ # < order. Selecting AUX...
Operation Manual
Page 36
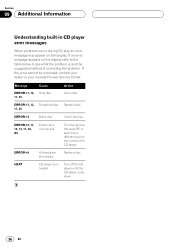
... your nearest Pioneer Service Center. Replace disc. Section 09 Additional Information Understanding built-in CD player error messages When problems occur during CD play an error message may appear on the display refer to the table below to the CD player. ERROR-11, 12, Scratched disc Replace disc. 17, 30 ERROR-14 Blank disc Check the disc. HEAT CD player overheated Turn off the CD player until the CD player cools down...
... your nearest Pioneer Service Center. Replace disc. Section 09 Additional Information Understanding built-in CD player error messages When problems occur during CD play an error message may appear on the display refer to the table below to the CD player. ERROR-11, 12, Scratched disc Replace disc. 17, 30 ERROR-14 Blank disc Check the disc. HEAT CD player overheated Turn off the CD player until the CD player cools down...


