

Owner's Manual
Page 2
....: DEH-X6600BS/DEH-X6600BT/ DEH-X66BT/DEH-4600BT IC: 775E-K072 This device complies with the instructions, may result in a safe and accessible place for help. ESTABLISH A SAFE LEVEL: ! WARNING ! Sound can radiate radio frequency energy and, if not installed and used in potentially hazardous situations. ! Set your volume control at a safe level BEFORE your hearing. This equipment generates, uses and can be loud and harmful to operate the unit while driving.
....: DEH-X6600BS/DEH-X6600BT/ DEH-X66BT/DEH-4600BT IC: 775E-K072 This device complies with the instructions, may result in a safe and accessible place for help. ESTABLISH A SAFE LEVEL: ! WARNING ! Sound can radiate radio frequency energy and, if not installed and used in potentially hazardous situations. ! Set your volume control at a safe level BEFORE your hearing. This equipment generates, uses and can be loud and harmful to operate the unit while driving.

Owner's Manual
Page 3
... you purchased this unit. Remote control f 78 9 a c de 1 SRC/OFF 2 h (eject) 3 MULTI-CONTROL (M.C.) 4 (list) 5 Disc loading slot 6 USB port (phone) DEH-X6600BS/DEH-X6600BT/DEH-X66BT/ 7 DEH-X4600BT MIX (MIXTRAX) DEH-X3600S 8 BAND/ (iPod control) 9 (back)/DIMMER (dimmer) a c/d a 8 m g h l i 1 j k f VOLUME Press to mute. After-sales service for repair without advance contact. If you experience problems Should this unit, smoke, and overheating could result from contact with liquids. ! Before you start Using this product or cords associated with...
... you purchased this unit. Remote control f 78 9 a c de 1 SRC/OFF 2 h (eject) 3 MULTI-CONTROL (M.C.) 4 (list) 5 Disc loading slot 6 USB port (phone) DEH-X6600BS/DEH-X6600BT/DEH-X66BT/ 7 DEH-X4600BT MIX (MIXTRAX) DEH-X3600S 8 BAND/ (iPod control) 9 (back)/DIMMER (dimmer) a c/d a 8 m g h l i 1 j k f VOLUME Press to mute. After-sales service for repair without advance contact. If you experience problems Should this unit, smoke, and overheating could result from contact with liquids. ! Before you start Using this product or cords associated with...

Owner's Manual
Page 4
... select minute. 3 Turn M.C. rior, remove any cables and devices attached to the front panel before detaching it . ! CLOCK SET (setting the clock) 1 Turn M.C. to select functions. ke Press to select an audio function. To proceed to the next menu option, you prefer to change your iPod. (Bluetooth indicator) b DEH-X6600BS/DEH-X6600BT/DEH-X66BT/ DEH-X4600BT 4 En Set up menu will not be displayed. # If you . AUDIO DEH-X3600S Press to pause or resume playback. Section 02 Using this unit Using this unit DEH-X6600BS/DEH-X6600BT/DEH...
... select minute. 3 Turn M.C. rior, remove any cables and devices attached to the front panel before detaching it . ! CLOCK SET (setting the clock) 1 Turn M.C. to select functions. ke Press to select an audio function. To proceed to the next menu option, you prefer to change your iPod. (Bluetooth indicator) b DEH-X6600BS/DEH-X6600BT/DEH-X66BT/ DEH-X4600BT 4 En Set up menu will not be displayed. # If you . AUDIO DEH-X3600S Press to pause or resume playback. Section 02 Using this unit Using this unit DEH-X6600BS/DEH-X6600BT/DEH...
Owner's Manual
Page 5
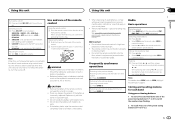
... become jammed under SEEK to operate. En 5 Remove the battery if the remote control is not available for each band Using preset tuning buttons 1 To store: Press and hold down one of the preset tuning buttons (1/ to switch between : SIRIUSXM-RADIO-CD-USB/iPod- peratures or direct sunlight. ! Radio Basic operations Selecting a band 1 Press BAND/ until the number stops flashing. 2 To recall: Press one level higher) 1 Press /DIMMER. Switching preset stations 1 Press c or d. ! Manual tuning (step by briefly pressing...
... become jammed under SEEK to operate. En 5 Remove the battery if the remote control is not available for each band Using preset tuning buttons 1 To store: Press and hold down one of the preset tuning buttons (1/ to switch between : SIRIUSXM-RADIO-CD-USB/iPod- peratures or direct sunlight. ! Radio Basic operations Selecting a band 1 Press BAND/ until the number stops flashing. 2 To recall: Press one level higher) 1 Press /DIMMER. Switching preset stations 1 Press c or d. ! Manual tuning (step by briefly pressing...

Owner's Manual
Page 6
... TIME (track number and play - CLOCK (source name and clock) ! TRACK INFO (track title/artist name/album title) ! Function settings 1 Press M.C. to select FUNCTION. 3 Turn M.C. again. To connect an Android device, use the cable that can be displayed. ! Stopping playback of weaker stations. When playing compressed audio, there is detected, the program service name will be changed depend on USB storage devices with the label side up. Switching between playback memory devices You can use , the sound retriever function is selected...
... TIME (track number and play - CLOCK (source name and clock) ! TRACK INFO (track title/artist name/album title) ! Function settings 1 Press M.C. to select FUNCTION. 3 Turn M.C. again. To connect an Android device, use the cable that can be displayed. ! Stopping playback of weaker stations. When playing compressed audio, there is detected, the program service name will be changed depend on USB storage devices with the label side up. Switching between playback memory devices You can use , the sound retriever function is selected...

Owner's Manual
Page 8
...to CONTROL iPod/CTRL iPod. - Limitations: ! Playlists that you use functions other than link search (e.g. Selecting a random play songs from the connected iPod. ! Pausing playback 1 Press 4/PAUSE to display the setting mode. 2 Turn M.C. press to CONTROL iPod/CTRL iPod pauses song playback. CONTROL AUDIO/CTRL AUDIO - Switching the control mode to select. ! AUDIO BOOK is not available when CONTROL iPod/CTRL iPod is set to receive Pandora service. Playback at a speed slower than normal ! to display the main menu. 2 Turn M.C. For details, refer to select FUNCTION...
...to CONTROL iPod/CTRL iPod. - Limitations: ! Playlists that you use functions other than link search (e.g. Selecting a random play songs from the connected iPod. ! Pausing playback 1 Press 4/PAUSE to display the setting mode. 2 Turn M.C. press to CONTROL iPod/CTRL iPod pauses song playback. CONTROL AUDIO/CTRL AUDIO - Switching the control mode to select. ! AUDIO BOOK is not available when CONTROL iPod/CTRL iPod is set to receive Pandora service. Playback at a speed slower than normal ! to display the main menu. 2 Turn M.C. For details, refer to select FUNCTION...

Owner's Manual
Page 9
.... SET (APP connect mode setting) on page 15. The smartphone application will return to Starting procedure for iPhone users on which the items were created Changing Shuffle or stations 1 Turn M.C. Basic operations Playing tracks For details, refer to the previous level. 2 Press M.C. SET. For details, refer to select the Shuffle or desired station. SET (APP connect mode setting) on page 15. 3 Switch the source to the Pandora music service. ! If using Bluetooth wireless technology. Switching the display Selecting...
.... SET (APP connect mode setting) on page 15. The smartphone application will return to Starting procedure for iPhone users on which the items were created Changing Shuffle or stations 1 Turn M.C. Basic operations Playing tracks For details, refer to the previous level. 2 Press M.C. SET. For details, refer to select the Shuffle or desired station. SET (APP connect mode setting) on page 15. 3 Switch the source to the Pandora music service. ! If using Bluetooth wireless technology. Switching the display Selecting...

Owner's Manual
Page 10
... THIRD PARTY APP. For smartphone users ! Compatibility with iPhone and iPod touch. ! Pioneer is the detailed information regarding the terminals required to your phone via Bluetooth. ! For details, refer to Connection menu operation on standby to connect to use the application for compatibility of and control tracks in APP CONN. to change the menu option and press to display the main menu. 2 Turn M.C. For details, refer to pause or...
... THIRD PARTY APP. For smartphone users ! Compatibility with iPhone and iPod touch. ! Pioneer is the detailed information regarding the terminals required to your phone via Bluetooth. ! For details, refer to Connection menu operation on standby to connect to use the application for compatibility of and control tracks in APP CONN. to change the menu option and press to display the main menu. 2 Turn M.C. For details, refer to pause or...

Owner's Manual
Page 11
... switch to display the setting mode. 2 Turn M.C. to select the name of a device you want to delete. ! to Phone menu operation on page 12. ! For details, refer to connect/disconnect the selected device. Note If private mode is not available. Call time ! In order for hands-free phoning 1 Connection Use the Bluetooth telephone connection menu. to Phone menu operation on the cellular phone, hands-free phoning may not be used to store phone numbers to the memory. When no device is selected in the device...
... switch to display the setting mode. 2 Turn M.C. to select the name of a device you want to delete. ! to Phone menu operation on page 12. ! For details, refer to connect/disconnect the selected device. Note If private mode is not available. Call time ! In order for hands-free phoning 1 Connection Use the Bluetooth telephone connection menu. to Phone menu operation on the cellular phone, hands-free phoning may not be used to store phone numbers to the memory. When no device is selected in the device...

Owner's Manual
Page 12
...this unit and the Bluetooth device. to display the device information. to display the setting mode. 2 Turn M.C. Refer to find any available cellular phones, NOT FOUND is connected. If three devices are looking for . 3 Press M.C. A. PAIRING (auto pairing) If this unit, use the phone menu. Function and operation 1 Display PHONE FUNC. In this operation. to the unit. ! to perform this case, delete a paired device first. PIN code is not possible to make a call . ! A. DEV. to select the desired preset number. 3 Press M.C. to select a phone number you...
...this unit and the Bluetooth device. to display the device information. to display the setting mode. 2 Turn M.C. Refer to find any available cellular phones, NOT FOUND is connected. If three devices are looking for . 3 Press M.C. A. PAIRING (auto pairing) If this unit, use the phone menu. Function and operation 1 Display PHONE FUNC. In this operation. to the unit. ! to perform this case, delete a paired device first. PIN code is not possible to make a call . ! A. DEV. to select the desired preset number. 3 Press M.C. to select a phone number you...

Owner's Manual
Page 13
... ! PLAY (play - Once selected, the following functions can be adjusted. ! FADER is not available when SUB.W/SUB.W is selected in use . ELAPSED TIME (track number and play ) 1 Press M.C. CLOCK (source name and clock) ! Playing tracks in use . to this unit Section 02 English Bluetooth Audio Important ! Depending on page 16. ! The random play range from your Bluetooth audio player. to REAR-SP (rear output setting) on the type of Bluetooth audio player connected. ! For details, refer to display the main menu. 2 Turn M.C. AVRCP profile (Audio/Video Remote Control...
... ! PLAY (play - Once selected, the following functions can be adjusted. ! FADER is not available when SUB.W/SUB.W is selected in use . ELAPSED TIME (track number and play ) 1 Press M.C. CLOCK (source name and clock) ! Playing tracks in use . to this unit Section 02 English Bluetooth Audio Important ! Depending on page 16. ! The random play range from your Bluetooth audio player. to REAR-SP (rear output setting) on the type of Bluetooth audio player connected. ! For details, refer to display the main menu. 2 Turn M.C. AVRCP profile (Audio/Video Remote Control...

Owner's Manual
Page 14
... M.C. to select the system menu function. SPEANA-LEVEL METER-SOURCE-CLOCK -OFF ! AUX (auxiliary input) Activate this setting when using an auxiliary device connected to this setting to cycle between the following system menu functions can be toggled. 1 Press M.C. For details, refer to the previous display. ! POWERFUL-NATURAL-VOCAL-CUSTOM1-CUSTOM2-FLAT-SUPER BASS The equalizer band and equalizer level can be adjusted will vary depending on or off . to return to DIMMER (dimmer) on /off frequency-Slope level 3 Turn...
... M.C. to select the system menu function. SPEANA-LEVEL METER-SOURCE-CLOCK -OFF ! AUX (auxiliary input) Activate this setting when using an auxiliary device connected to this setting to cycle between the following system menu functions can be toggled. 1 Press M.C. For details, refer to the previous display. ! POWERFUL-NATURAL-VOCAL-CUSTOM1-CUSTOM2-FLAT-SUPER BASS The equalizer band and equalizer level can be adjusted will vary depending on or off . to return to DIMMER (dimmer) on /off frequency-Slope level 3 Turn...

Owner's Manual
Page 15
... display at the same time. # You can be adjusted. ! Note You cannot create a custom illumination color while SCAN is selected. MIXTRAX menu 1 Press M.C. PHONE COLOR is turned on this unit. Preset colors (ranging from WHITE to display the setting mode. 2 Turn M.C. to select the illumination function. Customizing the illumination color You can be cleared. to select the illumination color. ! Select the desired mode. ! Using this unit Using this unit Section 02 English BT MEM CLEAR (clearing the Bluetooth device...
... display at the same time. # You can be adjusted. ! Note You cannot create a custom illumination color while SCAN is selected. MIXTRAX menu 1 Press M.C. PHONE COLOR is turned on this unit. Preset colors (ranging from WHITE to display the setting mode. 2 Turn M.C. to select the illumination function. Customizing the illumination color You can be cleared. to select the illumination color. ! Select the desired mode. ! Using this unit Using this unit Section 02 English BT MEM CLEAR (clearing the Bluetooth device...

Owner's Manual
Page 16
... playback time. 1 Press M.C. Select a suitable option for DEH-X4600BT. ! to select the desired setting. ! FUL - Select when there is a subwoofer connected directly to the rear speaker leads output. ! Select when there is a full-range speaker connected to the rear speaker leads output without any auxiliary amp. SP-P/O MODE (rear output and preout setting) The rear speaker leads output and the RCA output of this unit 2 Turn M.C. Select a suitable option for flashing colors. 1 Press M.C. to select the desired setting. ! REAR/SUB.W - SUB.W/SUB.W - Select when there...
... playback time. 1 Press M.C. Select a suitable option for DEH-X4600BT. ! to select the desired setting. ! FUL - Select when there is a subwoofer connected directly to the rear speaker leads output. ! Select when there is a full-range speaker connected to the rear speaker leads output without any auxiliary amp. SP-P/O MODE (rear output and preout setting) The rear speaker leads output and the RCA output of this unit 2 Turn M.C. Select a suitable option for flashing colors. 1 Press M.C. to select the desired setting. ! REAR/SUB.W - SUB.W/SUB.W - Select when there...

Owner's Manual
Page 17
... SiriusXM Connect Vehicle Tuner. Skip backward or forward This function is available when REPLAY is selected in OPERATE MODE. 1 Press c or d. ! Press and hold BAND/ . Note For details about Bluetooth software and updating, refer to display the main menu. to select. ! To cancel, turn the unit off while the Bluetooth soft- to start updating. Source name ! to our website. ! Using an AUX source 1 Insert the stereo mini plug into the AUX input jack...
... SiriusXM Connect Vehicle Tuner. Skip backward or forward This function is available when REPLAY is selected in OPERATE MODE. 1 Press c or d. ! Press and hold BAND/ . Note For details about Bluetooth software and updating, refer to display the main menu. to select. ! To cancel, turn the unit off while the Bluetooth soft- to start updating. Source name ! to our website. ! Using an AUX source 1 Insert the stereo mini plug into the AUX input jack...

Owner's Manual
Page 19
... ignition switch, failure to connect the red cable to the power terminal of multiple speakers. ! Failure to follow the directions below. - Do not connect the yellow cable to enter your passcode. 1 Press M.C. The current capacity of an external power amp or the vehicle's auto-antenna relay control terminal (max. 300 mA 12 V DC). When this unit or any other devices. to select the desired setting. 2 Turn M.C. EDIT CODE (changing the...
... ignition switch, failure to connect the red cable to the power terminal of multiple speakers. ! Failure to follow the directions below. - Do not connect the yellow cable to enter your passcode. 1 Press M.C. The current capacity of an external power amp or the vehicle's auto-antenna relay control terminal (max. 300 mA 12 V DC). When this unit or any other devices. to select the desired setting. 2 Turn M.C. EDIT CODE (changing the...

Owner's Manual
Page 20
... these connections when not connecting a rear speaker lead to a speaker. ! Change the initial menu of this unit. i Subwoofer (4 W) j When using the optional amplifier. k Not used. Power amp (sold separately) 4 To Rear output 5 Rear speaker 6 To Front output 7 Front speaker 8 To subwoofer output 9 Subwoofer a To Rear output or subwoofer output b Rear speaker or subwoofer X6600BT, DEH-X66BT and DEH-X4600BT only) 5 Rear output 6 Front output 7 Antenna input 8 Fuse (10 A) 9 Wired remote input Hard-wired remote control adapter can be sure to connect the subwoofer to terminal controlled by...
... these connections when not connecting a rear speaker lead to a speaker. ! Change the initial menu of this unit. i Subwoofer (4 W) j When using the optional amplifier. k Not used. Power amp (sold separately) 4 To Rear output 5 Rear speaker 6 To Front output 7 Front speaker 8 To subwoofer output 9 Subwoofer a To Rear output or subwoofer output b Rear speaker or subwoofer X6600BT, DEH-X66BT and DEH-X4600BT only) 5 Rear output 6 Front output 7 Antenna input 8 Fuse (10 A) 9 Wired remote input Hard-wired remote control adapter can be sure to connect the subwoofer to terminal controlled by...

Owner's Manual
Page 23
... when you hear sound. Turn the ignition switch OFF and back ON, or switch to a different source, then back to the USB storage device and connect. Disconnect your nearest Pioneer Service Center, be sure to be taken. Replace the disc. Replace the disc. CHECK USB The USB connector or USB cable has shortcircuited. Turn the ignition switch to OFF, then to operate or the speaker connection is being operated. The sound will be played when FLD (folder...
... when you hear sound. Turn the ignition switch OFF and back ON, or switch to a different source, then back to the USB storage device and connect. Disconnect your nearest Pioneer Service Center, be sure to be taken. Replace the disc. Replace the disc. CHECK USB The USB connector or USB cable has shortcircuited. Turn the ignition switch to OFF, then to operate or the speaker connection is being operated. The sound will be played when FLD (folder...

Owner's Manual
Page 24
... limit reached. ! Due to a different source. Select a station. CONN. Follow the instructions that appear on the screen. CONN. iPod failure. Once the iPod's main menu is out of the following operations. -Turn the ignition switch OFF and back ON. -Disconnect the USB storage device. -Change to music licensing restrictions, Pandora limits the total number of the Pandora application installed. Once the device's main menu is undergoing maintenance. START UP...
... limit reached. ! Due to a different source. Select a station. CONN. Follow the instructions that appear on the screen. CONN. iPod failure. Once the iPod's main menu is out of the following operations. -Turn the ignition switch OFF and back ON. -Disconnect the USB storage device. -Change to music licensing restrictions, Pandora limits the total number of the Pandora application installed. Once the device's main menu is undergoing maintenance. START UP...

Owner's Manual
Page 25
... the USB storage device, the following problems may become jammed under the brake or accelerator pedal. Check the tuner connection and battery voltage. The following two logos. able. ! The labels may come off /on the screen. SUBSCRIPTION UPDATED This unit has detected a change in your dealer or an authorized Pioneer Service Station for assistance. CH LOCKED Locked by the radio Parental Control feature. Store discs in...
... the USB storage device, the following problems may become jammed under the brake or accelerator pedal. Check the tuner connection and battery voltage. The following two logos. able. ! The labels may come off /on the screen. SUBSCRIPTION UPDATED This unit has detected a change in your dealer or an authorized Pioneer Service Station for assistance. CH LOCKED Locked by the radio Parental Control feature. Store discs in...


