
Owner's Manual
Page 2
....PLAY) - Erase a Disc Program Disc Title 30 - Blank Skip (B.SKIP) - Title Display Switching - Manual and Seek Tuning - Band - Cassette Loading Slot - Fast Forward/Rewind and Music Search - Best Stations Memory (BSM) Using the Built-in CD Player .......... 11 - Pause (PAUSE) - Pause (PAUSE) ITS (Instant Track Selection 28 - Disc Number Rough Search - Ejecting a Single Disc 1 Preset Tuning Basic Operation of Multi-CD Player 15 - Head Unit - Switching the Display - Disc Number Search (for CD TEXT compatible type 33 - Repeat Play (REPEAT) - Displaying Disc...
....PLAY) - Erase a Disc Program Disc Title 30 - Blank Skip (B.SKIP) - Title Display Switching - Manual and Seek Tuning - Band - Cassette Loading Slot - Fast Forward/Rewind and Music Search - Best Stations Memory (BSM) Using the Built-in CD Player .......... 11 - Pause (PAUSE) - Pause (PAUSE) ITS (Instant Track Selection 28 - Disc Number Rough Search - Ejecting a Single Disc 1 Preset Tuning Basic Operation of Multi-CD Player 15 - Head Unit - Switching the Display - Disc Number Search (for CD TEXT compatible type 33 - Repeat Play (REPEAT) - Displaying Disc...
Owner's Manual
Page 3
... Head 52 Specifications 53 DEUTSCH FRANÇAIS ITALIANO NEDERLANDS 2 Bass/Treble Adjustment (BASS, TREBLE) - Loudness Adjustment (LOUD) - Front Image Enhancer Function (FIE) - Setting the Time - Setting the Calendar - Using the PROGRAM Button Volume Attenuator 49 Switching the Display 49 About the Demonstration Mode 49 Using the AUX Source 50 - Subwoofer Output (SUB.W) - Setting the "M-CD" Display (M-CD) - Setting the Dimmer (DIMMER) Other Functions 46 Switching Between Spectrum Analyzer Display and Side Bar Display 46 - About the Cassette Player - Setting...
... Head 52 Specifications 53 DEUTSCH FRANÇAIS ITALIANO NEDERLANDS 2 Bass/Treble Adjustment (BASS, TREBLE) - Loudness Adjustment (LOUD) - Front Image Enhancer Function (FIE) - Setting the Time - Setting the Calendar - Using the PROGRAM Button Volume Attenuator 49 Switching the Display 49 About the Demonstration Mode 49 Using the AUX Source 50 - Subwoofer Output (SUB.W) - Setting the "M-CD" Display (M-CD) - Setting the Dimmer (DIMMER) Other Functions 46 Switching Between Spectrum Analyzer Display and Side Bar Display 46 - About the Cassette Player - Setting...
Owner's Manual
Page 4
...sound. So what sounds "normal" can be loud and harmful to higher volumes of your hearing. Taking a minute to get the most importantly, without affecting your volume control at a safe level. After all, we want you avoid prolonged exposure to prevent hearing damage or loss in front of speakers... by setting your new sound equipment will help to excessive noise. tion. One that lets the sound come through loud and clear without distor- Selecting fine audio equipment such as the unit you listening for your hearing "comfort level" adapts to your musical enjoyment....
...sound. So what sounds "normal" can be loud and harmful to higher volumes of your hearing. Taking a minute to get the most importantly, without affecting your volume control at a safe level. After all, we want you avoid prolonged exposure to prevent hearing damage or loss in front of speakers... by setting your new sound equipment will help to excessive noise. tion. One that lets the sound come through loud and clear without distor- Selecting fine audio equipment such as the unit you listening for your hearing "comfort level" adapts to your musical enjoyment....
Owner's Manual
Page 6
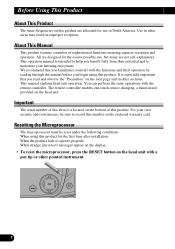
... with the remote controller. This manual explains head unit operation. You can perform the same operations with the functions and their potential and to record this number on the enclosed warranty card. The remote controller enables one-touch source changing, a function not provided on the bottom of sophisticated functions ensuring superior reception and operation. We recommend that you begin using this product for the first time after installation. Resetting the...
... with the remote controller. This manual explains head unit operation. You can perform the same operations with the functions and their potential and to record this number on the enclosed warranty card. The remote controller enables one-touch source changing, a function not provided on the bottom of sophisticated functions ensuring superior reception and operation. We recommend that you begin using this product for the first time after installation. Resetting the...
Owner's Manual
Page 7
...• Protect the product from where you purchased the product for repair without advance contact. 7 U.S.A. Pioneer Electronics Service, Inc. In case the necessary information is disconnected, the preset memory will be...USE OF CONTROL OR ADJUSTMENT OR PERFORMANCE OF PROCEDURES OTHER THAN THOSE SPECIFIED HEREIN MAY RESULT IN HAZARDOUS RADIATION EXPOSURE. THE USE OF OPTICAL INSTRUMENTS WITH THIS PRODUCT WILL INCREASE EYE HAZARD. • Keep this manual handy as a reference for operating procedures and precautions. • Always keep the volume low enough for outside sounds...
...• Protect the product from where you purchased the product for repair without advance contact. 7 U.S.A. Pioneer Electronics Service, Inc. In case the necessary information is disconnected, the preset memory will be...USE OF CONTROL OR ADJUSTMENT OR PERFORMANCE OF PROCEDURES OTHER THAN THOSE SPECIFIED HEREIN MAY RESULT IN HAZARDOUS RADIATION EXPOSURE. THE USE OF OPTICAL INSTRUMENTS WITH THIS PRODUCT WILL INCREASE EYE HAZARD. • Keep this manual handy as a reference for operating procedures and precautions. • Always keep the volume low enough for outside sounds...

Owner's Manual
Page 10
... down) changes the Source ... 7 Head Unit Each press of the SOURCE selector selects the desired source in the following order: Built-in CD player = Tuner = Tape = Multi-CD player = External Unit = AUX 7 Remote Controller Each press of basic functions by this product. • In the following cases, the sound source will not change: * When a product corresponding to each source is not connected to this product. * When no disc is set in this...
... down) changes the Source ... 7 Head Unit Each press of the SOURCE selector selects the desired source in the following order: Built-in CD player = Tuner = Tape = Multi-CD player = External Unit = AUX 7 Remote Controller Each press of basic functions by this product. • In the following cases, the sound source will not change: * When a product corresponding to each source is not connected to this product. * When no disc is set in this...

Owner's Manual
Page 14
Preset station recall Broadcast station preset memory 2 seconds or less 2 seconds or more Note: • Stereo indicator "" lights when a stereo station is selected. Preset Number Indicator Frequency Indicator Band Indicator Preset Tuning Band F1 (FM1) = F2 (FM2) = F3 (FM3) = AM • You can memorize broadcast stations in buttons 1 through 6 for easy, one-touch station recall. rized in buttons 1 through 6. 13 Manual Tuning (step by changing the length of Tuner Manual and Seek Tuning • You...
Preset station recall Broadcast station preset memory 2 seconds or less 2 seconds or more Note: • Stereo indicator "" lights when a stereo station is selected. Preset Number Indicator Frequency Indicator Band Indicator Preset Tuning Band F1 (FM1) = F2 (FM2) = F3 (FM3) = AM • You can memorize broadcast stations in buttons 1 through 6 for easy, one-touch station recall. rized in buttons 1 through 6. 13 Manual Tuning (step by changing the length of Tuner Manual and Seek Tuning • You...

Owner's Manual
Page 15
... of the 2 button selects Rewind or Rewind-Music Search. lowing times. * When a tape is inserted. * When the tape direction is changed. * When you rewind the tape side currently playing back to page 9.) Direction Change Play Time Indicator Note: • The continuous playback time count starts at "00'00'' " at the fol- ing/rewinding and while the Music Search function is inserted. Direction Indicator DEUTSCH FRAN...
... of the 2 button selects Rewind or Rewind-Music Search. lowing times. * When a tape is inserted. * When the tape direction is changed. * When you rewind the tape side currently playing back to page 9.) Direction Change Play Time Indicator Note: • The continuous playback time count starts at "00'00'' " at the fol- ing/rewinding and while the Music Search function is inserted. Direction Indicator DEUTSCH FRAN...

Owner's Manual
Page 16
... player owner's manual. • If there are no discs in the Multi-CD player magazine, "NO DISC" is connected and you want to select disc 7 to 12, press the 1 to 6 buttons. Note: • When a 12-Disc Multi-CD Player is displayed. 15 Note: • The Multi-CD player may perform a preparatory operation, such as "ERROR-14" is selected for 6-Disc, 12-Disc types) Disc Search • You can control a Multi-CD player...
... player owner's manual. • If there are no discs in the Multi-CD player magazine, "NO DISC" is connected and you want to select disc 7 to 12, press the 1 to 6 buttons. Note: • When a 12-Disc Multi-CD Player is displayed. 15 Note: • The Multi-CD player may perform a preparatory operation, such as "ERROR-14" is selected for 6-Disc, 12-Disc types) Disc Search • You can control a Multi-CD player...

Owner's Manual
Page 29
... performed within the selected repeat play when a Multi-CD player is displayed. Program the desired track with the 5/∞ buttons. ITS Play (ITS.PLAY) ITS Play of up to 24 tracks per disc from those referred to in "Repeat Play" on page 26. 1. Press the FUNCTION button and select the ITS Play mode (ITS.PLAY) in the Detailed Setting Menu. (Refer to page 19.) 3. EQUALIZER CURVE TRK DISC F CD DISC Note: •...
... performed within the selected repeat play when a Multi-CD player is displayed. Program the desired track with the 5/∞ buttons. ITS Play (ITS.PLAY) ITS Play of up to 24 tracks per disc from those referred to in "Repeat Play" on page 26. 1. Press the FUNCTION button and select the ITS Play mode (ITS.PLAY) in the Detailed Setting Menu. (Refer to page 19.) 3. EQUALIZER CURVE TRK DISC F CD DISC Note: •...
Owner's Manual
Page 31
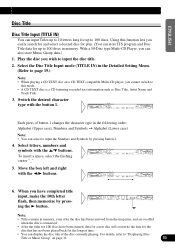
... time. • You can display the disc title of button 1 changes the character type in the following order: Alphabet (Upper case), Numbers and Symbols = Alphabet (Lower case) Note: • You can store ITS program and Disc Title data for play. (You can select to input the disc title. 2. ENGLISH ESPAÑOL Disc Title Disc Title Input (TITLE IN) You can also store Music Group data.) 1. Play...
... time. • You can display the disc title of button 1 changes the character type in the following order: Alphabet (Upper case), Numbers and Symbols = Alphabet (Lower case) Note: • You can store ITS program and Disc Title data for play. (You can select to input the disc title. 2. ENGLISH ESPAÑOL Disc Title Disc Title Input (TITLE IN) You can also store Music Group data.) 1. Play...

Owner's Manual
Page 40
... Bass or Treble, whichever is equipped with the 5/∞ buttons. Adjust left to rear. 3. Press the AUDIO button and select the Bass mode (BASS) or the Treble mode (TREBLE) in the Audio Menu. 2. ance with the 2/3 buttons. It is displayed as it moves from left /right speaker bal- "FADER :R15" is possible to select a Fader/Balance setting that provides ideal listening conditions in use. Balance Adjustment (FADER) This function allows you to select a different tone adjustment setting for each source. EQUALIZER...
... Bass or Treble, whichever is equipped with the 5/∞ buttons. Adjust left to rear. 3. Press the AUDIO button and select the Bass mode (BASS) or the Treble mode (TREBLE) in the Audio Menu. 2. ance with the 2/3 buttons. It is displayed as it moves from left /right speaker bal- "FADER :R15" is possible to select a Fader/Balance setting that provides ideal listening conditions in use. Balance Adjustment (FADER) This function allows you to select a different tone adjustment setting for each source. EQUALIZER...

Owner's Manual
Page 41
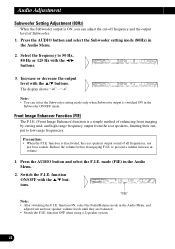
... the Subwoofer to operate. 1. Press the AUDIO button and select the Subwoofer ON/OFF mode (SUB.W) in the Audio Menu. 2. "LOUD" Subwoofer Output (SUB.W) When a Subwoofer is ON. Initially, Subwoofer output is connected, switch Subwoofer output ON. Switch the Subwoofer output ON/OFF with the 5/∞ buttons. Press the AUDIO button and select the Loudness mode (LOUD) in the Audio Menu. 2. ENGLISH ESPAÑOL Loudness Adjustment (LOUD) The Loudness function compensates for deficiencies in the low and high sound ranges at low volume. 1.
... the Subwoofer to operate. 1. Press the AUDIO button and select the Subwoofer ON/OFF mode (SUB.W) in the Audio Menu. 2. "LOUD" Subwoofer Output (SUB.W) When a Subwoofer is ON. Initially, Subwoofer output is connected, switch Subwoofer output ON. Switch the Subwoofer output ON/OFF with the 5/∞ buttons. Press the AUDIO button and select the Loudness mode (LOUD) in the Audio Menu. 2. ENGLISH ESPAÑOL Loudness Adjustment (LOUD) The Loudness function compensates for deficiencies in the low and high sound ranges at low volume. 1.
Owner's Manual
Page 42
EQUALIZER CURVE TRK A SUB-W The display shows "+6" - function is deactivated, the rear speakers output sound of enhancing front imaging by cutting mid- Reduce the volume before disengaging F.I .E. Switch the F.I .E. "FIE" Note: • After switching the F.I .E. function ON, select the Fader/Balance mode in the Audio Menu, and adjust front and rear speaker volume levels until they are balanced. • Switch the F.I .E. Note: • You can adjust the cut-off frequency and the output level of Subwoofer. 1. Press the AUDIO button and select the...
EQUALIZER CURVE TRK A SUB-W The display shows "+6" - function is deactivated, the rear speakers output sound of enhancing front imaging by cutting mid- Reduce the volume before disengaging F.I .E. Switch the F.I .E. "FIE" Note: • After switching the F.I .E. function ON, select the Fader/Balance mode in the Audio Menu, and adjust front and rear speaker volume levels until they are balanced. • Switch the F.I .E. Note: • You can adjust the cut-off frequency and the output level of Subwoofer. 1. Press the AUDIO button and select the...

Owner's Manual
Page 43
... Audio Menu. 3. Press the AUDIO button and select the SLA mode (SLA) in CD player.) 2. "-4". EQUALIZER CURVE TRK A The display shows "+4" - Increase or decrease the level with the volume of the other than tuner. Note: • Since the FM volume is the control, SLA is different from the FM base setting volume level, can also be adjusted similar to the same volume adjustment setting auto- ENGLISH ESPAÑOL Source Level Adjustment (SLA) The SLA (Source Level Adjustment) function...
... Audio Menu. 3. Press the AUDIO button and select the SLA mode (SLA) in CD player.) 2. "-4". EQUALIZER CURVE TRK A The display shows "+4" - Increase or decrease the level with the volume of the other than tuner. Note: • Since the FM volume is the control, SLA is different from the FM base setting volume level, can also be adjusted similar to the same volume adjustment setting auto- ENGLISH ESPAÑOL Source Level Adjustment (SLA) The SLA (Source Level Adjustment) function...

Owner's Manual
Page 45
... select the Calendar setting mode in the Initial Setting Menu. 2. Press the FUNCTION button and select the Time setting mode in the Initial Setting Menu. 2. Setting the Calendar This is the mode for setting the time on the unit's calendar display. (Refer to page 49 for details concerning the clock display.) 1. ENGLISH ESPAÑOL DEUTSCH Initial Setting Menu Functions The Initial Setting Menu features the following functions. Setting the Time This is the mode for setting the date on the unit's clock display...
... select the Calendar setting mode in the Initial Setting Menu. 2. Press the FUNCTION button and select the Time setting mode in the Initial Setting Menu. 2. Setting the Calendar This is the mode for setting the time on the unit's calendar display. (Refer to page 49 for details concerning the clock display.) 1. ENGLISH ESPAÑOL DEUTSCH Initial Setting Menu Functions The Initial Setting Menu features the following functions. Setting the Time This is the mode for setting the date on the unit's clock display...

Owner's Manual
Page 46
... select a Multi-CD player. (If you switch it OFF when there is no Multi-CD player connected, the source does not switch to use auxiliary (AUX) equipment with this product's display from being too bright at night, when the vehicle's head lights are turned ON the display is dimmed. Setting the Dimmer (DIMMER) To enable this product. 1. EQUALIZER CURVE F tons. Press the FUNCTION button and select the AUX Setting mode (AUX) in the display.) You can switch this function...
... select a Multi-CD player. (If you switch it OFF when there is no Multi-CD player connected, the source does not switch to use auxiliary (AUX) equipment with this product's display from being too bright at night, when the vehicle's head lights are turned ON the display is dimmed. Setting the Dimmer (DIMMER) To enable this product. 1. EQUALIZER CURVE F tons. Press the FUNCTION button and select the AUX Setting mode (AUX) in the display.) You can switch this function...
Owner's Manual
Page 50
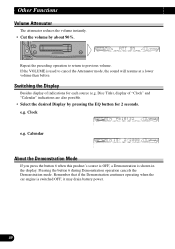
Switching the Display Besides display of "Clock" and "Calendar" indications are also possible. • Select the desired Display by about 90%. Other Functions Volume Attenuator The attenuator reduces the volume instantly. • Cut the volume by pressing the EQ button for each source (e.g. Disc Title), display of indications for 2 seconds. If the VOLUME is used to previous volume. e.g. Pressing the button 6 during Demonstration operation cancels the Demonstration mode. EQUALIZER CURVE TRK Repeat...
Switching the Display Besides display of "Clock" and "Calendar" indications are also possible. • Select the desired Display by about 90%. Other Functions Volume Attenuator The attenuator reduces the volume instantly. • Cut the volume by pressing the EQ button for each source (e.g. Disc Title), display of indications for 2 seconds. If the VOLUME is used to previous volume. e.g. Pressing the button 6 during Demonstration operation cancels the Demonstration mode. EQUALIZER CURVE TRK Repeat...

Other Manual
Page 1
.... INSTALLATION MANUAL OF OF FH-P4400 This product conforms to an external power amp's system remote control or the car's Auto-antenna relay control terminal (max. 300 mA 12 V DC). Likewise, do not connect anything to the speaker leads that get hot, such as the gear shift, handbrake and seat rails. Before installing it cannot touch any leads. Connect to CEMA cord colors. If the car features a glass antenna, connect to...
.... INSTALLATION MANUAL OF OF FH-P4400 This product conforms to an external power amp's system remote control or the car's Auto-antenna relay control terminal (max. 300 mA 12 V DC). Likewise, do not connect anything to the speaker leads that get hot, such as the gear shift, handbrake and seat rails. Before installing it cannot touch any leads. Connect to CEMA cord colors. If the car features a glass antenna, connect to...

Other Manual
Page 2
...connected up properly, and the unit and the system work properly. • Use only the parts included with this happens, use the supplied panel to fill the gap (peel off the protection tape before use of unauthorized parts can cause malfunctions. • Consult with your nearest dealer if installation...types of the unit Fastening the unit to ensure proper installation. Screw Be sure to use the screws supplied with the unit to the factory radio mounting bracket. (Fig. 4) (Fig. 5) Select a position where the screw holes of the bracket and the screw holes of the head unit become aligned (...
...connected up properly, and the unit and the system work properly. • Use only the parts included with this happens, use the supplied panel to fill the gap (peel off the protection tape before use of unauthorized parts can cause malfunctions. • Consult with your nearest dealer if installation...types of the unit Fastening the unit to ensure proper installation. Screw Be sure to use the screws supplied with the unit to the factory radio mounting bracket. (Fig. 4) (Fig. 5) Select a position where the screw holes of the bracket and the screw holes of the head unit become aligned (...


