
Instruction Manual
Page 1
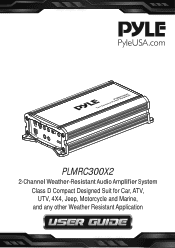
PLMRC300X2 2-Channel Weather-Resistant Audio Amplifier System Class D Compact Designed Suit for Car, ATV, UTV, 4X4, Jeep, Motorcycle and Marine, and any other Weather Resistant Application
PLMRC300X2 2-Channel Weather-Resistant Audio Amplifier System Class D Compact Designed Suit for Car, ATV, UTV, 4X4, Jeep, Motorcycle and Marine, and any other Weather Resistant Application
Instruction Manual
Page 2
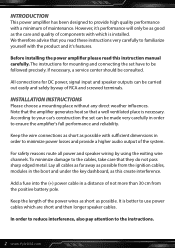
... provide a higher audio output of maintenance. INSTALLATION INSTRUCTIONS Please choose a mounting place without any direct weather in a distance of components with the product and it 's performance will only be made very carefully in order to ensure the ampli er's full performance and reliability. The instructions for DC power, signal input and speaker outputs can be as good as this instruction manual carefully. Note that...
... provide a higher audio output of maintenance. INSTALLATION INSTRUCTIONS Please choose a mounting place without any direct weather in a distance of components with the product and it 's performance will only be made very carefully in order to ensure the ampli er's full performance and reliability. The instructions for DC power, signal input and speaker outputs can be as good as this instruction manual carefully. Note that...
Instruction Manual
Page 3
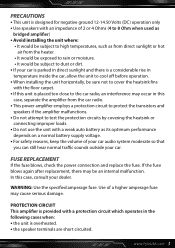
.... FUSE REPLACEMENT If the fuse blows, check the power connection and replace the fuse. PRECAUTIONS • This unit is designed for negative ground 12-14.50 VoIts (DC) operation only • Use speakers with an impedance of 2 or 4 Ohms (4 to 8 Ohm when used as bridged ampli er) • Avoid installing the unit where: • It would be subject to high temperatures, such as from direct sunlight...
.... FUSE REPLACEMENT If the fuse blows, check the power connection and replace the fuse. PRECAUTIONS • This unit is designed for negative ground 12-14.50 VoIts (DC) operation only • Use speakers with an impedance of 2 or 4 Ohms (4 to 8 Ohm when used as bridged ampli er) • Avoid installing the unit where: • It would be subject to high temperatures, such as from direct sunlight...
Instruction Manual
Page 4
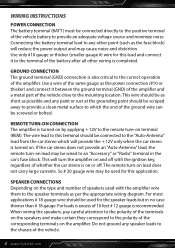
... corresponding terminals on . So # 20 gauge wire may be wired to an "Accessory" or "Radio" terminal in no case thinner than # 18 gauge. WIRING INSTRUCTIONS POWER CONNECTION The battery terminal (BATT) must be connected directly to the positive terminal of the ampli er. If the car stereo does not provide an "Auto-Antenna" lead, the remote turn -on terminal (REM). This will provide the...
... corresponding terminals on . So # 20 gauge wire may be wired to an "Accessory" or "Radio" terminal in no case thinner than # 18 gauge. WIRING INSTRUCTIONS POWER CONNECTION The battery terminal (BATT) must be connected directly to the positive terminal of the ampli er. If the car stereo does not provide an "Auto-Antenna" lead, the remote turn -on terminal (REM). This will provide the...
Instruction Manual
Page 5
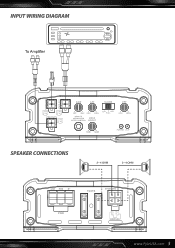
INPUT WIRING DIAGRAM SPEAKER CONNECTIONS www.PyleUSA.com 5
INPUT WIRING DIAGRAM SPEAKER CONNECTIONS www.PyleUSA.com 5
Instruction Manual
Page 6
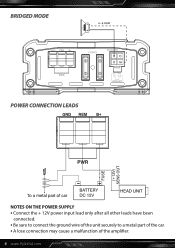
BRIDGED MODE POWER CONNECTION LEADS NOTES ON THE POWER SUPPLY • Connect the + 12V power input lead only after all other leads have been connected. • Be sure to connect the ground wire of the unit securely to a metal part of the car. • A lose connection may cause a malfunction of the ampli er. 6 www.PyleUSA.com
BRIDGED MODE POWER CONNECTION LEADS NOTES ON THE POWER SUPPLY • Connect the + 12V power input lead only after all other leads have been connected. • Be sure to connect the ground wire of the unit securely to a metal part of the car. • A lose connection may cause a malfunction of the ampli er. 6 www.PyleUSA.com
Instruction Manual
Page 7
... radio. • Use the power supply lead with a Power Antenna control wire, it . If there is acceptable. If the Power Antenna wire is already in stereo mode. If you use 2 Ohm speakers in use several ampli ers, the adjustment has to the car battery. • During a full power operation, maximum current will run through the system. Then turn up the volume slowly using the volume control of the radio. Now turn the level control a little back to "Min" direction...
... radio. • Use the power supply lead with a Power Antenna control wire, it . If there is acceptable. If the Power Antenna wire is already in stereo mode. If you use 2 Ohm speakers in use several ampli ers, the adjustment has to the car battery. • During a full power operation, maximum current will run through the system. Then turn up the volume slowly using the volume control of the radio. Now turn the level control a little back to "Min" direction...
Instruction Manual
Page 8
... higher frequency above setting point can be at least 4 mm' for a length of 3 m and 6mm" for a length of best electric and mechanic contact. Do not use a fuse with a higher value and never bridge the fuse over, as possible and that the cable diameter is equipped with a plug-in auto fuse protecting the set against fault conditions. BASS BOOST CONTROLS This ampli er has Bass controls for...
... higher frequency above setting point can be at least 4 mm' for a length of 3 m and 6mm" for a length of best electric and mechanic contact. Do not use a fuse with a higher value and never bridge the fuse over, as possible and that the cable diameter is equipped with a plug-in auto fuse protecting the set against fault conditions. BASS BOOST CONTROLS This ampli er has Bass controls for...
Instruction Manual
Page 9
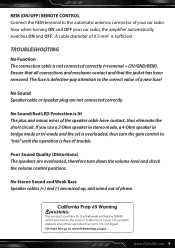
...' is free of trouble. If you use a 2 Ohm speaker in stereo mode, a 4 Ohm speaker in bridge mode or tri-mode and the set is overloaded, then turn down the volume level and check the volume control positions. TROUBLESHOOTING No Function The connection cable is not connected correctly (=terminaI + I2V/GND/REM). No Stereo Sound and Weak Bass Speaker cables (+) and (-) are mixed up, unit wired out of phase. REM (ON/OFF) REMOTE CONTROL Connect the REM terminal to the automatic antenna connector...
...' is free of trouble. If you use a 2 Ohm speaker in stereo mode, a 4 Ohm speaker in bridge mode or tri-mode and the set is overloaded, then turn down the volume level and check the volume control positions. TROUBLESHOOTING No Function The connection cable is not connected correctly (=terminaI + I2V/GND/REM). No Stereo Sound and Weak Bass Speaker cables (+) and (-) are mixed up, unit wired out of phase. REM (ON/OFF) REMOTE CONTROL Connect the REM terminal to the automatic antenna connector...
Instruction Manual
Page 10
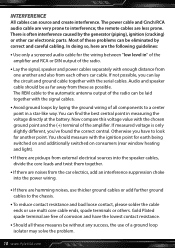
... following guidelines: • Use only a screened audio cable for the wiring between "low level in" of the ampli er and RCA or DIN output of a ground loop isolator may solve the problem. 10 www.PyleUSA.com The power cable and Cinch/RCA audio cable are very prone to look for earth being switched on and additionally switched on consumers (rear window heating and light). • If there...
... following guidelines: • Use only a screened audio cable for the wiring between "low level in" of the ampli er and RCA or DIN output of a ground loop isolator may solve the problem. 10 www.PyleUSA.com The power cable and Cinch/RCA audio cable are very prone to look for earth being switched on and additionally switched on consumers (rear window heating and light). • If there...
Instruction Manual
Page 11
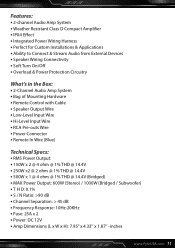
... Power Wiring Harness • Perfect for Custom Installations & Applications • Ability to Connect & Stream Audio from External Devices • Speaker Wiring Connectivity • Soft Turn On/O • Overload & Power Protection Circuitry What's in the Box: • 2-Channel Audio Amp System • Bag of Mounting Hardware • Remote Control with Cable • Speaker Output Wire • Low-Level Input Wire • Hi-Level Input Wire • RCA Pre-outs Wire • Power Connector • Remote In Wire (Blue) Technical Specs: • RMS Power Output: • 150W x 2 @ 4 ohm...
... Power Wiring Harness • Perfect for Custom Installations & Applications • Ability to Connect & Stream Audio from External Devices • Speaker Wiring Connectivity • Soft Turn On/O • Overload & Power Protection Circuitry What's in the Box: • 2-Channel Audio Amp System • Bag of Mounting Hardware • Remote Control with Cable • Speaker Output Wire • Low-Level Input Wire • Hi-Level Input Wire • RCA Pre-outs Wire • Power Connector • Remote In Wire (Blue) Technical Specs: • RMS Power Output: • 150W x 2 @ 4 ohm...

Instruction Manual
Page 12
Phone: (1) 718-535-1800 Email: support@pyleusa.com Issues? We are here to help! Questions?
Phone: (1) 718-535-1800 Email: support@pyleusa.com Issues? We are here to help! Questions?


