Instruction Manual
Page 1
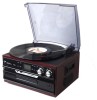
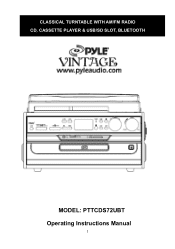
CLASSICAL TURNTABLE WITH AM/FM RADIO CD, CASSETTE PLAYER & USB/SD SLOT, BLUETOOTH MODEL: PTTCDS72UBT Operating Instructions Manual 1
CLASSICAL TURNTABLE WITH AM/FM RADIO CD, CASSETTE PLAYER & USB/SD SLOT, BLUETOOTH MODEL: PTTCDS72UBT Operating Instructions Manual 1
Instruction Manual
Page 2
... RAIN OR MOISTURE. Servicing is required when the apparatus has been damaged in any heat sources such as radiators, heaters, stoves, or other apparatus (including amplifiers) that produce heat. 8) Protect the power cord from being walked on or kinked, in accordance with the manufacturer's instructions. IMPORTANT SAFETY INSTRUCTIONS 1) Please read these instructions and keep them...
... RAIN OR MOISTURE. Servicing is required when the apparatus has been damaged in any heat sources such as radiators, heaters, stoves, or other apparatus (including amplifiers) that produce heat. 8) Protect the power cord from being walked on or kinked, in accordance with the manufacturer's instructions. IMPORTANT SAFETY INSTRUCTIONS 1) Please read these instructions and keep them...
Instruction Manual
Page 3
... dry cloth.Operate controls and switches as indicated - UNPACKING AND SET UP ● ...set, be placed on the apparatus. 13) Do not overload the wall power outlet. i.e. 120V AC mains. Store your AC outlet. 3 Use only power source as described in the manual.Before turning On the power, make certain the AC power...stylus cover from the phonograph stylus by sliding it forward and down. ● Discard the stylus cover ● Remove the twist-tie that radiates too much heat, places lacking ventilation or dusty areas, places subject to first disconnect the power cord. Avoid installing...
... dry cloth.Operate controls and switches as indicated - UNPACKING AND SET UP ● ...set, be placed on the apparatus. 13) Do not overload the wall power outlet. i.e. 120V AC mains. Store your AC outlet. 3 Use only power source as described in the manual.Before turning On the power, make certain the AC power...stylus cover from the phonograph stylus by sliding it forward and down. ● Discard the stylus cover ● Remove the twist-tie that radiates too much heat, places lacking ventilation or dusty areas, places subject to first disconnect the power cord. Avoid installing...
Instruction Manual
Page 4
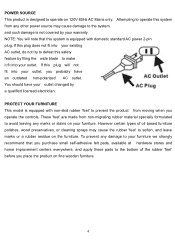
... when you purchase small self-adhesive felt pads, available at hardware stores and home improvement centers everywhere, and apply these pads to make it fit into your warranty. NOTE: ...you operate the controls. If this system is not covered by a qualified licensed electrician. These 'feet' are made from non-migrating rubber material specially formulated to prevent the product from any other power source may cause ...AC Mains only. PROTECT YOUR FURNITURE This model is designed to operate on fine wooden furniture. 4 POWER SOURCE This product is equipped with domestic standard AC...
... when you purchase small self-adhesive felt pads, available at hardware stores and home improvement centers everywhere, and apply these pads to make it fit into your warranty. NOTE: ...you operate the controls. If this system is not covered by a qualified licensed electrician. These 'feet' are made from non-migrating rubber material specially formulated to prevent the product from any other power source may cause ...AC Mains only. PROTECT YOUR FURNITURE This model is designed to operate on fine wooden furniture. 4 POWER SOURCE This product is equipped with domestic standard AC...
Instruction Manual
Page 5
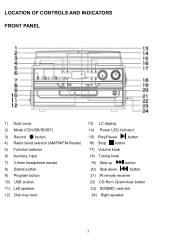
LOCATION OF CONTROLS AND INDICATORS FRONT PANEL 1) Dust cover 2) Mode (CD/USB/SD/BT) 3) Record button 4) Radio band selector (AM/FM/FM-Stereo) 5) Function selector 6) Auxiliary input 7) 3.5mm headphone socket 8) Delete button 9) Program button 10) USB socket 11) Left speaker 12) Disk tray door 13) LC display 14) Power LED indicator 15) Play/Pause button 16) Stop button 17) Volume knob 18) Tuning knob 19) Skip up button 20) Skip down button 21) IR remote receiver 22) CD-Rom Open/close button 23) SD/MMC card slot 24) Right speaker 5
LOCATION OF CONTROLS AND INDICATORS FRONT PANEL 1) Dust cover 2) Mode (CD/USB/SD/BT) 3) Record button 4) Radio band selector (AM/FM/FM-Stereo) 5) Function selector 6) Auxiliary input 7) 3.5mm headphone socket 8) Delete button 9) Program button 10) USB socket 11) Left speaker 12) Disk tray door 13) LC display 14) Power LED indicator 15) Play/Pause button 16) Stop button 17) Volume knob 18) Tuning knob 19) Skip up button 20) Skip down button 21) IR remote receiver 22) CD-Rom Open/close button 23) SD/MMC card slot 24) Right speaker 5
Instruction Manual
Page 6
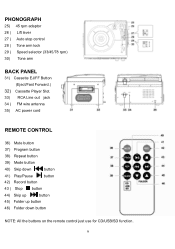
...(Eject/Fast Forward.) 32) Cassette Player Slot. 33) RCA Line out jack 34 ) FM wire antenna 35) AC power cord REMOTE CONTROL 36) Mute button 37) Program button 38) Repeat button 39) Mode button 40) Skip down button 41) Play/Pause button 42) Record button 43 ) Stop button 44...) Skip up button 45) Folder up button 46) Folder down button NOTE: All the buttons on the remote control just use for CD/USB...
...(Eject/Fast Forward.) 32) Cassette Player Slot. 33) RCA Line out jack 34 ) FM wire antenna 35) AC power cord REMOTE CONTROL 36) Mute button 37) Program button 38) Repeat button 39) Mode button 40) Skip down button 41) Play/Pause button 42) Record button 43 ) Stop button 44...) Skip up button 45) Folder up button 46) Folder down button NOTE: All the buttons on the remote control just use for CD/USB...
Instruction Manual
Page 7
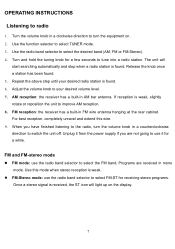
...-stereo mode FM mode: use it for a few seconds to turn the volume knob in AM bar antenna. AM reception: the receiver has a built-in a counterclockwise direction to the radio, turn the equipment on the display. 7 When you are received in mono mode. Unplug it from the power ...the radio band selector to radio 1. The unit will light up on . 2. Use this wire. 9. OPERATING INSTRUCTIONS Listening to select the desired band (AM, FM or FM-Stereo). 4. Turn the volume knob in FM wire antenna hanging at the rear cabinet. Release the knob once a station has been found ....
...-stereo mode FM mode: use it for a few seconds to turn the volume knob in AM bar antenna. AM reception: the receiver has a built-in a counterclockwise direction to the radio, turn the equipment on the display. 7 When you are received in mono mode. Unplug it from the power ...the radio band selector to radio 1. The unit will light up on . 2. Use this wire. 9. OPERATING INSTRUCTIONS Listening to select the desired band (AM, FM or FM-Stereo). 4. Turn the volume knob in FM wire antenna hanging at the rear cabinet. Release the knob once a station has been found ....
Instruction Manual
Page 8
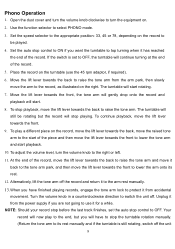
...onto the record and playback will stop control to the record, as illustrated on the right. The turntable will have finished playing records, engage the tone arm lock to lower the arm onto its rest manually and if the turntable is still rotating, switch off the unit 8 The turntable will continue turning at ... to protect it for a while. Your record will now play a different piece on the turntable (use it from the power supply if you have to stop before the last track finishes, set to its rest. 12. Place the record on the record, move the lift lever towards the back ...
...onto the record and playback will stop control to the record, as illustrated on the right. The turntable will have finished playing records, engage the tone arm lock to lower the arm onto its rest manually and if the turntable is still rotating, switch off the unit 8 The turntable will continue turning at ... to protect it for a while. Your record will now play a different piece on the turntable (use it from the power supply if you have to stop before the last track finishes, set to its rest. 12. Place the record on the record, move the lift lever towards the back ...
Instruction Manual
Page 9
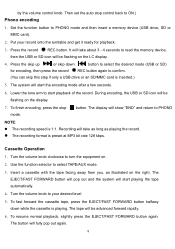
by the volume control knob. Press the record REC button. The display will show "END" and return to your record onto the turntable and get it ready for encoding, then press the record REC button again to select the desired mode (USB or SD) for playback. 3. To ... During encoding, the USB or SD icon will be advanced forward rapidly. 6. To finish encoding, press the stop control back to turn the equipment on the LC display. 4. Turn the volume knob to PHONO NOTE: The recording speed is inserted.) 5. The button will start playing the tape automatically. ...
by the volume control knob. Press the record REC button. The display will show "END" and return to your record onto the turntable and get it ready for encoding, then press the record REC button again to select the desired mode (USB or SD) for playback. 3. To ... During encoding, the USB or SD icon will be advanced forward rapidly. 6. To finish encoding, press the stop control back to turn the equipment on the LC display. 4. Turn the volume knob to PHONO NOTE: The recording speed is inserted.) 5. The button will start playing the tape automatically. ...
Instruction Manual
Page 10
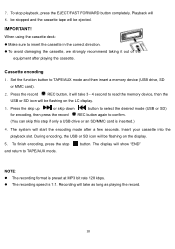
... kbps. The recording speed is inserted.) 4. Set the function button to TAPE/AUX mode. Insert your cassette into the playback slot. The display will take as long as playing the record. 10 Cassette encoding 1. The system will be flashing on the display. 5. Recording will be flashing on the... will start the encoding mode after playing the cassette. Press the skip up or skip down button to select the desired mode (USB or SD) for encoding, then press the record REC button again to read the memory device, then the USB or SD icon will 8. To finish...
... kbps. The recording speed is inserted.) 4. Set the function button to TAPE/AUX mode. Insert your cassette into the playback slot. The display will take as long as playing the record. 10 Cassette encoding 1. The system will be flashing on the display. 5. Recording will be flashing on the... will start the encoding mode after playing the cassette. Press the skip up or skip down button to select the desired mode (USB or SD) for encoding, then press the record REC button again to read the memory device, then the USB or SD icon will 8. To finish...
Instruction Manual
Page 11
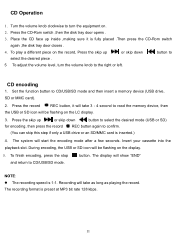
...stop and return to CD/USB/SD mode and then insert a memory device (USB drive, SD or MMC card). 2. button. The recording format is inserted.) 4. To play a different piece on the LC display. 3. The display will take as long as playing the record. Place the CD face ...61548; The recording speed is fully placed .Then press the CD-Rom switch again ,the disk tray door closes . 4. Turn the volume knob clockwise to turn the volume knob to select the desired piece . 5 To adjust the volume level, turn the equipment on the display. 5. Set the function button to CD/USB/SD mode...
...stop and return to CD/USB/SD mode and then insert a memory device (USB drive, SD or MMC card). 2. button. The recording format is inserted.) 4. To play a different piece on the LC display. 3. The display will take as long as playing the record. Place the CD face ...61548; The recording speed is fully placed .Then press the CD-Rom switch again ,the disk tray door closes . 4. Turn the volume knob clockwise to turn the volume knob to select the desired piece . 5 To adjust the volume level, turn the equipment on the display. 5. Set the function button to CD/USB/SD mode...
Instruction Manual
Page 12
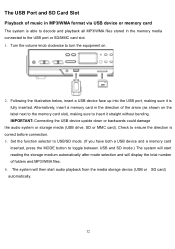
...audio system or storage media (USB drive, SD or MMC card). Turn the volume knob clockwise to turn the equipment on the label next to toggle between USB and SD mode.) The system will display the total number of folders and MP3/WMA files. 4. Set the function selector to USB/SD mode. (If you have... both a USB device and a memory card ...
...audio system or storage media (USB drive, SD or MMC card). Turn the volume knob clockwise to turn the equipment on the label next to toggle between USB and SD mode.) The system will display the total number of folders and MP3/WMA files. 4. Set the function selector to USB/SD mode. (If you have... both a USB device and a memory card ...

Instruction Manual
Page 13
..., and it will indicate the program number and digits for MP3 / WMA file playback in MP3 / WMA format only via the USB port or SD card slot. You can detect and read files in any order. Playback controls PLAY/PAUSE Press this unit will support all USB and SD devices from every brand. ...MP3 players may not be sure the system is not a malfunction of MP3/WMA files. Press the SKIP UP or SKIP DOWN button to variances in the MP3 encoding format, it again to play via the USB socket. STOP Press this button to fast forward through the files/tracks. TUNING KNOB Turn ...
..., and it will indicate the program number and digits for MP3 / WMA file playback in MP3 / WMA format only via the USB port or SD card slot. You can detect and read files in any order. Playback controls PLAY/PAUSE Press this unit will support all USB and SD devices from every brand. ...MP3 players may not be sure the system is not a malfunction of MP3/WMA files. Press the SKIP UP or SKIP DOWN button to variances in the MP3 encoding format, it again to play via the USB socket. STOP Press this button to fast forward through the files/tracks. TUNING KNOB Turn ...
Instruction Manual
Page 14
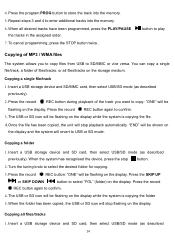
... files The system allows you want to confirm. 3. Turn the tuning knob to confirm. 4. Press the record REC button: "ONE" will be flashing on the display. Press the record REC button again to select the desired folder for copying. 3. The USB or SD icon will stop button. 2. Copying all... desired tracks have been programmed, press the PLAY/PAUSE the tracks in the assigned order. 7. Insert a USB storage device and SD card, then select USB/SD mode (as described previously). 2. Press the record REC button again to copy: "ONE" will be shown on the ...
... files The system allows you want to confirm. 3. Turn the tuning knob to confirm. 4. Press the record REC button: "ONE" will be flashing on the display. Press the record REC button again to select the desired folder for copying. 3. The USB or SD icon will stop button. 2. Copying all... desired tracks have been programmed, press the PLAY/PAUSE the tracks in the assigned order. 7. Insert a USB storage device and SD card, then select USB/SD mode (as described previously). 2. Press the record REC button again to copy: "ONE" will be shown on the ...
Instruction Manual
Page 15
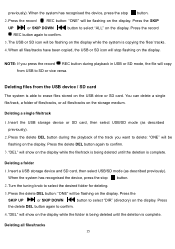
... the USB storage device or SD card, then select USB/SD mode (as described previously). When the system has recognised the device, press the stop button. 2. Press the SKIP UP or SKIP DOWN button to select the desired folder for deleting. 3. Deleting a single file/track 1. Turn the tuning...can delete a single file/track, a folder of the track you press the record REC button during the playback of files/tracks, or all files/tracks 15 Insert a USB storage device and SD card, then select USB/SD mode (as described previously). 2. Press the delete DEL button during playback in...
... the USB storage device or SD card, then select USB/SD mode (as described previously). When the system has recognised the device, press the stop button. 2. Press the SKIP UP or SKIP DOWN button to select the desired folder for deleting. 3. Deleting a single file/track 1. Turn the tuning...can delete a single file/track, a folder of the track you press the record REC button during the playback of files/tracks, or all files/tracks 15 Insert a USB storage device and SD card, then select USB/SD mode (as described previously). 2. Press the delete DEL button during playback in...

Instruction Manual
Page 16
...remove it . Insert a USB storage device and SD card, then select USB/SD mode (as a CD player) to turn the volume knob counterclockwise to the AUX IN socket at the front of the USB port. To... input) 1. Removing the USB device / SD card First move the function selector to another mode (tuner, phono, tape), then turn off the power. To remove a USB device, pull it out of...USB device or SD card. Press the delete DEL button: "ONE" will completely delete all files/tracks on the display. Press the SKIP UP or SKIP DOWN button to the AUX IN socket, playing...
...remove it . Insert a USB storage device and SD card, then select USB/SD mode (as a CD player) to turn the volume knob counterclockwise to the AUX IN socket at the front of the USB port. To... input) 1. Removing the USB device / SD card First move the function selector to another mode (tuner, phono, tape), then turn off the power. To remove a USB device, pull it out of...USB device or SD card. Press the delete DEL button: "ONE" will completely delete all files/tracks on the display. Press the SKIP UP or SKIP DOWN button to the AUX IN socket, playing...
Instruction Manual
Page 17
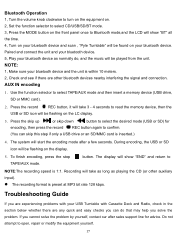
.... 17 Troubleshooting Guide If you are experiencing problems with your USB Turntable with Cassette Deck and Radio, check in the section below whether there are other auxiliary input). The recording format is inserted.) 4. Do not attempt to select TAPE/AUX mode and then insert a memory device (USB drive, SD or MMC card). 2. Bluetooth Operation 1, Turn the volume knob...
.... 17 Troubleshooting Guide If you are experiencing problems with your USB Turntable with Cassette Deck and Radio, check in the section below whether there are other auxiliary input). The recording format is inserted.) 4. Do not attempt to select TAPE/AUX mode and then insert a memory device (USB drive, SD or MMC card). 2. Bluetooth Operation 1, Turn the volume knob...
Instruction Manual
Page 18
...Problems with sound Clockwise rotate the power/volume knob to increase the volume. Make sure the unit's power cord is connected to an appropriate electrical outlet. Make sure the wall socket is switched on. Make sure the function switch is set to your desired function: PHONO, USB/SD, TUNER, TAPE/AUX. When playing records...; Slightly move the wire aerial for better reception. If none of these measures improve stereo reception, try the same station on the CD player are in an area that you have selected the correct speed (33, 45 or 78 rpm)....
...Problems with sound Clockwise rotate the power/volume knob to increase the volume. Make sure the unit's power cord is connected to an appropriate electrical outlet. Make sure the wall socket is switched on. Make sure the function switch is set to your desired function: PHONO, USB/SD, TUNER, TAPE/AUX. When playing records...; Slightly move the wire aerial for better reception. If none of these measures improve stereo reception, try the same station on the CD player are in an area that you have selected the correct speed (33, 45 or 78 rpm)....


