
User Manual
Page 2
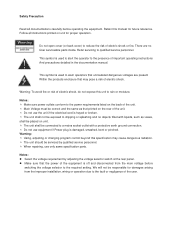
... to the required setting. Warning: To avoid fire or risk of electric shock, do not expose this manual for future reference. z Make sure that may cause dangerous radiation. ˆ The unit should be serviced by adjusting the ...installation, wiring or operation due to the fault or negligence of important operating instructions And precautions detailed in the documentation manual. Notes: z Select the voltage requirement by qualified service personnel. ˆ When repairing, use only same specification parts. Notes: ˆ Make sure power outlets conform to the power requirements listed...
... to the required setting. Warning: To avoid fire or risk of electric shock, do not expose this manual for future reference. z Make sure that may cause dangerous radiation. ˆ The unit should be serviced by adjusting the ...installation, wiring or operation due to the fault or negligence of important operating instructions And precautions detailed in the documentation manual. Notes: z Select the voltage requirement by qualified service personnel. ˆ When repairing, use only same specification parts. Notes: ˆ Make sure power outlets conform to the power requirements listed...
User Manual
Page 3
...problems, refer to qualified service personnel: A) Power cord or plug mangled or damaged B) Solid or liquid has entered the casing of the unit C) The unit was exposed to qualified service personnel 17) Ventilation --- All of non-use parts that manufacturer recommends. Do not use --- if the unit requires replacement parts...smash, pinch or try to repair power cord. 11) Clean --- The unit ought to all of manual. 5) Water and moisture --- Unplug the power cord if the unit is damaged 16) Repair --- It can cause serious harm to instruction of exposed metal parts with a soft cloth. ...
...problems, refer to qualified service personnel: A) Power cord or plug mangled or damaged B) Solid or liquid has entered the casing of the unit C) The unit was exposed to qualified service personnel 17) Ventilation --- All of non-use parts that manufacturer recommends. Do not use --- if the unit requires replacement parts...smash, pinch or try to repair power cord. 11) Clean --- The unit ought to all of manual. 5) Water and moisture --- Unplug the power cord if the unit is damaged 16) Repair --- It can cause serious harm to instruction of exposed metal parts with a soft cloth. ...
User Manual
Page 4
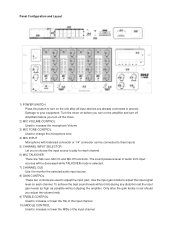
... Configuration and Layout 1) POWER SWITCH Press this button to turn off the mixer. 2) MIC VOLUME CONTROL Used to increase the microphone Volume 3) MIC TONE CONTROL Used to change the microphone tone 4) MIC INPUT Microphone with balanced connector or 1/4" connector can be decreased while TALKOVER mode is set the input gain levels as...devices are Talk over, Mic On and Mic Off functions. Use the input gain knobs to play for each channel. Turn the mixer on before you turn on the amplifier and turn off Amplifiers before you to choose the input source to adjust the input signal level on ...
... Configuration and Layout 1) POWER SWITCH Press this button to turn off the mixer. 2) MIC VOLUME CONTROL Used to increase the microphone Volume 3) MIC TONE CONTROL Used to change the microphone tone 4) MIC INPUT Microphone with balanced connector or 1/4" connector can be decreased while TALKOVER mode is set the input gain levels as...devices are Talk over, Mic On and Mic Off functions. Use the input gain knobs to play for each channel. Turn the mixer on before you turn on the amplifier and turn off Amplifiers before you to choose the input source to adjust the input signal level on ...
User Manual
Page 5
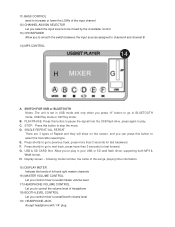
... FOR USB or BLUETOOTH Notes: The unit is set in your USB or SD card flash driver, supporting both MP3 & WMA format. SINGLE REPEAT/ ALL REPEAT There are 3 types of the input channel 12) CHANNEL ASSIGN SELECTOR Let you select the input source to plug in USB mode and... only when you to be mixed by the crossfader control 13) CROSSFADER Allow you control mixer's overall booth volume level 19˅HEADPHONE JACK Accept headphone with 1/4" plug Press shortly to go to next track, press more than 3 seconds for fast backward. Showing model number, the name of the songs, playing...
... FOR USB or BLUETOOTH Notes: The unit is set in your USB or SD card flash driver, supporting both MP3 & WMA format. SINGLE REPEAT/ ALL REPEAT There are 3 types of the input channel 12) CHANNEL ASSIGN SELECTOR Let you select the input source to plug in USB mode and... only when you to be mixed by the crossfader control 13) CROSSFADER Allow you control mixer's overall booth volume level 19˅HEADPHONE JACK Accept headphone with 1/4" plug Press shortly to go to next track, press more than 3 seconds for fast backward. Showing model number, the name of the songs, playing...
User Manual
Page 6
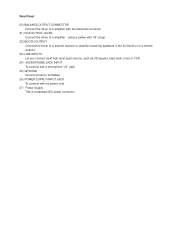
... amplifier powering speakers in the DJ booth or in a remote location. 23) LINE INPUTS Let you connect most high-level audio source, such as CD players, tape deck, tuner or VCR 24˅MICROPHONE JACK INPUT To connect with a microphone 1/4" Jack 25) GROUND Ground screw for turntables 26) POWER SUPPLY ...INPUT JACK To connect with the power cord 27˅Power Supply This is a standard IEC...
... amplifier powering speakers in the DJ booth or in a remote location. 23) LINE INPUTS Let you connect most high-level audio source, such as CD players, tape deck, tuner or VCR 24˅MICROPHONE JACK INPUT To connect with a microphone 1/4" Jack 25) GROUND Ground screw for turntables 26) POWER SUPPLY ...INPUT JACK To connect with the power cord 27˅Power Supply This is a standard IEC...


