User Guide
Page 3
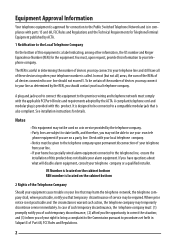
... the RENs of Part 68, FCC Rules and Regulations. 2 See installation instructions for the equipment.You must, upon permanent disconnection of your telephone from your line. • If your home has specially wired alarm equipment connected to your telephone company. Notes • This equipment may connect to procedures set forth in determining the number of service may harm the telephone network, the telephone company shall...
... the RENs of Part 68, FCC Rules and Regulations. 2 See installation instructions for the equipment.You must, upon permanent disconnection of your telephone from your line. • If your home has specially wired alarm equipment connected to your telephone company. Notes • This equipment may connect to procedures set forth in determining the number of service may harm the telephone network, the telephone company shall...
User Guide
Page 4
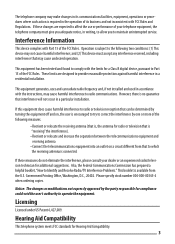
... specify stock number 004-000-00345-4 when ordering copies. Also, the Federal Communications Commission has prepared a helpful booklet,"How to operate the equipment. Licensing Licensed under US Patent 6,427,009. Hearing Aid Compatibility This telephone system meets FCC standards for additional suggestions. This equipment generates, uses and can be determined by turning the equipment off and on, the user is...
... specify stock number 004-000-00345-4 when ordering copies. Also, the Federal Communications Commission has prepared a helpful booklet,"How to operate the equipment. Licensing Licensed under US Patent 6,427,009. Hearing Aid Compatibility This telephone system meets FCC standards for additional suggestions. This equipment generates, uses and can be determined by turning the equipment off and on, the user is...
User Guide
Page 5
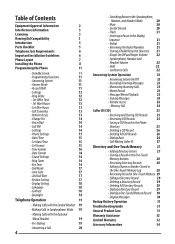
...- Speakerphone, Handset and Headset Volume 22 - Dialing Back 26 - Reviewing Record in Speakerphone Mode 19 - Set Work Hours 13 - Call Screening 13 - Remote Access 13 - Voice Mail 14 - Settings 14 - Set Format 15 - Key Tone 16 - Backlight 18 Telephone Operation 19 - Answering System On/Off 23 - Reviewing CID Records 25 - Deleting a CID Record 26 - Adding Directory Entries 27 - Editing a Directory Record 29 - Deleting All Directory Records 29 - Display Messages 30 Backup Battery Operation 31 Troubleshooting Guide 31...
...- Speakerphone, Handset and Headset Volume 22 - Dialing Back 26 - Reviewing Record in Speakerphone Mode 19 - Set Work Hours 13 - Call Screening 13 - Remote Access 13 - Voice Mail 14 - Settings 14 - Set Format 15 - Key Tone 16 - Backlight 18 Telephone Operation 19 - Answering System On/Off 23 - Reviewing CID Records 25 - Deleting a CID Record 26 - Adding Directory Entries 27 - Editing a Directory Record 29 - Deleting All Directory Records 29 - Display Messages 30 Backup Battery Operation 31 Troubleshooting Guide 31...
User Guide
Page 12
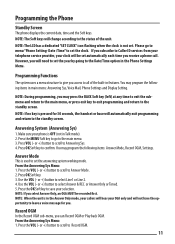
... you access to Answering Sys. 4. or +) button to scroll to all of the unit. Use the VOL (- Press the OK Soft key to leave a voice message for 30 seconds, the handset or base will need to set the year by going to menu "Phone Setting- Record OGM In the Record OGM sub-menu, you select Answer Only, an OGA MUST be set the clock. Programming the Phone Standby Screen The phone displays the current date, time...
... you access to Answering Sys. 4. or +) button to scroll to all of the unit. Use the VOL (- Press the OK Soft key to leave a voice message for 30 seconds, the handset or base will need to set the year by going to menu "Phone Setting- Record OGM In the Record OGM sub-menu, you select Answer Only, an OGA MUST be set the clock. Programming the Phone Standby Screen The phone displays the current date, time...

User Guide
Page 13
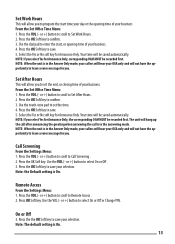
... Hours modes; Use the VOL (- You may program the following items: Ring Delay, Set Office Time, Call Screening, Remote Access. Record: Record the OGM (Outgoing Message) After the beep, you select the number of OGM to ring before the answering system answers a call after 2 rings if there are 4 kinds of times you will answer the incoming call . NOTE: The default Answer & Rec OGM is"Please leave your recording is completed, the unit will automatically play the new OGM...
... Hours modes; Use the VOL (- You may program the following items: Ring Delay, Set Office Time, Call Screening, Remote Access. Record: Record the OGM (Outgoing Message) After the beep, you select the number of OGM to ring before the answering system answers a call after 2 rings if there are 4 kinds of times you will answer the incoming call . NOTE: The default Answer & Rec OGM is"Please leave your recording is completed, the unit will automatically play the new OGM...
User Guide
Page 14
... to leave a voice message for Announce Only, corresponding OGM MUST be recorded first. Press the OK Soft key to Set Work Hours . 2. NOTE: If you select Yes for you . The unit will hang up the call after announcing the greeting when answering the call is in the answering mode. or +) button to scroll to save . 5. Remote Access From the Settings Menu: 1. Press the OK Soft key to Call Screening . 2. NOTE: If...
... to leave a voice message for Announce Only, corresponding OGM MUST be recorded first. Press the OK Soft key to Set Work Hours . 2. NOTE: If you select Yes for you . The unit will hang up the call after announcing the greeting when answering the call is in the answering mode. or +) button to scroll to save . 5. Remote Access From the Settings Menu: 1. Press the OK Soft key to Call Screening . 2. NOTE: If...
User Guide
Page 15
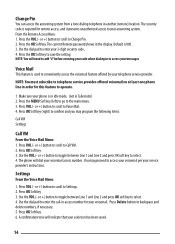
... Change Pin. 2. Use the VOL (- You may program the following items: Call VM Settings Call VM From the Voice Mail Menu: 1. Press OK Soft key. 6. Change Pin You can access the answering system from a tone dialing telephone in Talk mode) 2. or +) button to scroll to enter your 3-digit security code. 4. Press the OK Soft key to the main menu. 3. Press the MENU Soft key (left) to go to save the setting. Press VOL (- or +) button to toggle between Line 1 and Line...
... Change Pin. 2. Use the VOL (- You may program the following items: Call VM Settings Call VM From the Voice Mail Menu: 1. Press OK Soft key. 6. Change Pin You can access the answering system from a tone dialing telephone in Talk mode) 2. or +) button to scroll to enter your 3-digit security code. 4. Press the OK Soft key to the main menu. 3. Press the MENU Soft key (left) to go to save the setting. Press VOL (- or +) button to toggle between Line 1 and Line...
User Guide
Page 16
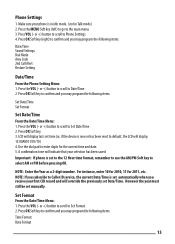
... a 2-digit number. Press OK Soft key to confirm and you subscribe to Caller ID service, the current Date/Time is new or has been reset to enter digits for 2011, etc. Press the VOL (- Use the dial-pad to default, the LCD will display last-set time (or, if the device is set automatically when you may program the following items: Date/Time Sound Settings Dial Mode Area Code 2nd Call Alert Restore Setting Date/Time From the Phone Setting Menu: 1. Important...
... a 2-digit number. Press OK Soft key to confirm and you subscribe to Caller ID service, the current Date/Time is new or has been reset to enter digits for 2011, etc. Press the VOL (- Use the dial-pad to default, the LCD will display last-set time (or, if the device is set automatically when you may program the following items: Date/Time Sound Settings Dial Mode Area Code 2nd Call Alert Restore Setting Date/Time From the Phone Setting Menu: 1. Important...
User Guide
Page 20
... -touch speed dial. 3. Wait for a dial tone, and then dial the phone number using dial-pad, the directory or a one-touch speed dial. 3. Hang up the handset. Press the speaker button again when finished. NOTE: If the headset is not connected (or if not completely inserted into the Headset jack on the base cradle) and then the telephone number will be used first. -ORPress either the Line 1 or Line 2 button to fit comfortably, per the manufacturer's instructions...
... -touch speed dial. 3. Wait for a dial tone, and then dial the phone number using dial-pad, the directory or a one-touch speed dial. 3. Hang up the handset. Press the speaker button again when finished. NOTE: If the headset is not connected (or if not completely inserted into the Headset jack on the base cradle) and then the telephone number will be used first. -ORPress either the Line 1 or Line 2 button to fit comfortably, per the manufacturer's instructions...
User Guide
Page 21
... using the mute feature on the other end of time in speakerphone mode, -OR4. Press the mute button again to the corded handset, pick up the corded handset or press the Speaker button (in speakerphone mode) or headset button (in headset mode) to answer the call . When there is activated. 2. When the unit is set at individual telephones to 24 hours. 3. Press the OK Soft key to confirm. 4.A confirmation tone will indicate that the ringer will not ring...
... using the mute feature on the other end of time in speakerphone mode, -OR4. Press the mute button again to the corded handset, pick up the corded handset or press the Speaker button (in speakerphone mode) or headset button (in headset mode) to answer the call . When there is activated. 2. When the unit is set at individual telephones to 24 hours. 3. Press the OK Soft key to confirm. 4.A confirmation tone will indicate that the ringer will not ring...
User Guide
Page 22
... in Talk mode) 2. or +) button to the desired redial number. 3. The screen displays Enter Name. Press the Redial button, then use the VOL (- Use the VOL (- NOTE: If the number you will hear an audible tone to indicate another call will automatically select the available line. Storing a Redial Record in the display. The redial number list is idle, press the redial button. 2. Flash If you subscribe to Call Waiting service from the base. 2.The unit will...
... in Talk mode) 2. or +) button to the desired redial number. 3. The screen displays Enter Name. Press the Redial button, then use the VOL (- Use the VOL (- NOTE: If the number you will hear an audible tone to indicate another call will automatically select the available line. Storing a Redial Record in the display. The redial number list is idle, press the redial button. 2. Flash If you subscribe to Call Waiting service from the base. 2.The unit will...

User Guide
Page 23
... and to activate the ringer volume setting. 3. Press the VOL (- Press the VOL (- NOTE: A name must be assigned, otherwise the record cannot be emitted to both the held call to establish a 3-way conference call has connected, the user can support 3-way conference calls. 1. NOTE: More than one press for some letters. or +) button to the user that initiated the hold . You can edit the telephone number by using the Delete button key and number keys. 7.
... and to activate the ringer volume setting. 3. Press the VOL (- Press the VOL (- NOTE: A name must be assigned, otherwise the record cannot be emitted to both the held call to establish a 3-way conference call has connected, the user can support 3-way conference calls. 1. NOTE: More than one press for some letters. or +) button to the user that initiated the hold . You can edit the telephone number by using the Delete button key and number keys. 7.
User Guide
Page 24
... OK Soft key. 6. After hearing the greeting followed by pressing the memo button. 1. The screen displays Record memo after X rings (pickup delay set in the system. Answering System Operation There are no messages, the unit will announce "You have NO messages". 23 or +) button to select desired mailbox. 3. The unit will play the previous message. To take the call, press the speaker or line button or lift the handset and the system...
... OK Soft key. 6. After hearing the greeting followed by pressing the memo button. 1. The screen displays Record memo after X rings (pickup delay set in the system. Answering System Operation There are no messages, the unit will announce "You have NO messages". 23 or +) button to select desired mailbox. 3. The unit will play the previous message. To take the call, press the speaker or line button or lift the handset and the system...
User Guide
Page 25
The current message is 000. 3. NOTE: The default security code is erased, and the next message plays. Memory Full When the answering system memory is full, the system answers after the 10th ring if it is connected. 2. "Memory full" will be erased in remote access mode. Press the delete button. 3. The screen will automatically disconnect the call if the user does not enter a command within 7 seconds, the system will wait for you to...
The current message is 000. 3. NOTE: The default security code is erased, and the next message plays. Memory Full When the answering system memory is full, the system answers after the 10th ring if it is connected. 2. "Memory full" will be erased in remote access mode. Press the delete button. 3. The screen will automatically disconnect the call if the user does not enter a command within 7 seconds, the system will wait for you to...

User Guide
Page 26
... Call Waiting Caller ID Service. NEW appears in the display. Reviewing CID Records Press Caller ID button, and then use this unit's Caller ID features, you want to change the format of the CID number to 7, 10 or 11 digits and save it in the subsequent ring cycles, but the line icon will continue flashing and the Line LED will stop ringing and go back to idle mode. The name shows in the display...
... Call Waiting Caller ID Service. NEW appears in the display. Reviewing CID Records Press Caller ID button, and then use this unit's Caller ID features, you want to change the format of the CID number to 7, 10 or 11 digits and save it in the subsequent ring cycles, but the line icon will continue flashing and the Line LED will stop ringing and go back to idle mode. The name shows in the display...
User Guide
Page 27
... code 1 +3-digit area code +7-digit telephone number Example (i.e. 555-5555) (i.e. 425-555-5555) (i.e. 1-425-555-5555) 4. Deleting All Call Records This feature allows you want to clear all CID records at once. 4. The screen displays Delete All? 5. To dial the displayed number, select a Line or press the Speaker or Headset button or pick up the corded handset. However, this does not guarantee the call is a local call received was received from the base. 26 Use the FORMAT Soft key...
... code 1 +3-digit area code +7-digit telephone number Example (i.e. 555-5555) (i.e. 425-555-5555) (i.e. 1-425-555-5555) 4. Deleting All Call Records This feature allows you want to clear all CID records at once. 4. The screen displays Delete All? 5. To dial the displayed number, select a Line or press the Speaker or Headset button or pick up the corded handset. However, this does not guarantee the call is a local call received was received from the base. 26 Use the FORMAT Soft key...
User Guide
Page 28
... on the base.) The Directory and each of the number pad on an active call record. Press the NEW Soft key. Press the Speaker button, headset button or select a Line or simply pick up to 16 characters and 32 digits. You will delete the last number or character during editing. 27 IMPORTANT: In order to use this unit's Caller ID features, you hear the tone. TIP: Press and hold and answer the incoming call waiting beep.
... on the base.) The Directory and each of the number pad on an active call record. Press the NEW Soft key. Press the Speaker button, headset button or select a Line or simply pick up to 16 characters and 32 digits. You will delete the last number or character during editing. 27 IMPORTANT: In order to use this unit's Caller ID features, you hear the tone. TIP: Press and hold and answer the incoming call waiting beep.
User Guide
Page 30
... screen displays DELETE ALL?. 3. A confirmation tone will indicate that the process is in idle mode. (Not in Talk mode) 2. Press the Directory button to complete. Press OK Soft key to access the phone book. 3. Press the YES Soft key to the desired record. 4. Use the VOL (+ or -) button to scroll to confirm the deletion. When reviewing the directory records list, use the VOL (- You may now change the name, if desired. 3. Press One-Touch/Memory Log button (1-10). Make...
... screen displays DELETE ALL?. 3. A confirmation tone will indicate that the process is in idle mode. (Not in Talk mode) 2. Press the Directory button to complete. Press OK Soft key to access the phone book. 3. Press the YES Soft key to the desired record. 4. Use the VOL (+ or -) button to scroll to confirm the deletion. When reviewing the directory records list, use the VOL (- You may now change the name, if desired. 3. Press One-Touch/Memory Log button (1-10). Make...
User Guide
Page 31
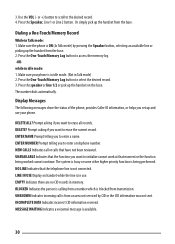
... line is being worked cannot continue. EMPTY Indicates there are no CID records in Talk mode: 1. ENTER NUMBER Prompt telling you set up the handset from a number which is in idle mode. (Not in idle mode: 1. NO LINE Indicates that have not been reviewed. DELETE? NEW CALLS Indicates call is available. 30 BLOCKED Indicates the person is calling from the base. 2. Use the VOL (- Press the Speaker, Line 1 or Line 2 button. Display Messages The following messages show the status of the phone, provides Caller...
... line is being worked cannot continue. EMPTY Indicates there are no CID records in Talk mode: 1. ENTER NUMBER Prompt telling you set up the handset from a number which is in idle mode. (Not in idle mode: 1. NO LINE Indicates that have not been reviewed. DELETE? NEW CALLS Indicates call is available. 30 BLOCKED Indicates the person is calling from the base. 2. Use the VOL (- Press the Speaker, Line 1 or Line 2 button. Display Messages The following messages show the status of the phone, provides Caller...
User Guide
Page 32
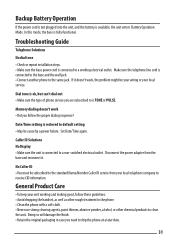
... . Set Date/Time again. Troubleshooting Guide Telephone Solutions No dial tone • Check or repeat installation steps. • Make sure the base power cord is connected to the base and the wall jack. • Connect another phone to the same jack. Dial tone is TONE or PULSE. Make sure the telephone line cord is connected to a working and looking good, follow the proper dialing sequence? Memory dialing doesn't work , the problem might be cause by a power failure. Caller ID Solutions No Display • Make sure...
... . Set Date/Time again. Troubleshooting Guide Telephone Solutions No dial tone • Check or repeat installation steps. • Make sure the base power cord is connected to the base and the wall jack. • Connect another phone to the same jack. Dial tone is TONE or PULSE. Make sure the telephone line cord is connected to a working and looking good, follow the proper dialing sequence? Memory dialing doesn't work , the problem might be cause by a power failure. Caller ID Solutions No Display • Make sure...


