User Guide
Page 2
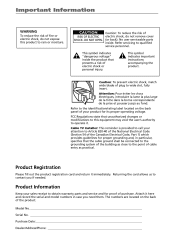
... indicates important instructions accompanying the product. Model No. _____ Serial No. _____ Purchase Date: _____ Dealer/Address/Phone: _____ CAUTION Caution: To prevent electric shock, match wide blade of the product. Cable TV Installer: This reminder is provided to call your attention to operate it immediately. Product Information Keep your product for proof of purchase. No user serviceable parts inside...
... indicates important instructions accompanying the product. Model No. _____ Serial No. _____ Purchase Date: _____ Dealer/Address/Phone: _____ CAUTION Caution: To prevent electric shock, match wide blade of the product. Cable TV Installer: This reminder is provided to call your attention to operate it immediately. Product Information Keep your product for proof of purchase. No user serviceable parts inside...
User Guide
Page 3
... Your Connection ...4 Cables Needed to Connect Components to Your VCR ...4 TV + VCR ...5 TV + VCR + Satellite Receiver ...6 TV + VCR + Cable Box ...7 Put Batteries in the Remote Control ...8 Turn on the TV and VCR ...8 Using the Remote Control to Choose On-Screen Menu Items ...8 Complete the On-screen Setup Guide ...8 VCR Basics...10 Playing a Tape ...10 Automatic Rewind ...10 Tape Eject ...10 Basic Recording ...10 Check the Safety Tab ...10 Using the Remote Control ...11 Buttons of the Menu System ...17 Timer Recordings ...17 Time ...17 Set Time and Date ...Auto Clock Set ...Set Time Zone...
... Your Connection ...4 Cables Needed to Connect Components to Your VCR ...4 TV + VCR ...5 TV + VCR + Satellite Receiver ...6 TV + VCR + Cable Box ...7 Put Batteries in the Remote Control ...8 Turn on the TV and VCR ...8 Using the Remote Control to Choose On-Screen Menu Items ...8 Complete the On-screen Setup Guide ...8 VCR Basics...10 Playing a Tape ...10 Automatic Rewind ...10 Tape Eject ...10 Basic Recording ...10 Check the Safety Tab ...10 Using the Remote Control ...11 Buttons of the Menu System ...17 Timer Recordings ...17 Time ...17 Set Time and Date ...Auto Clock Set ...Set Time Zone...
User Guide
Page 5
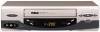
... From Power Surges • • Connect all cable plugs firmly into the wall outlet. Arrange the components so that air can circulate freely. Allow adequate ventilation when placing components in a stand. Chapter 1: Connections & Setup Things to Consider Before Connecting Components This Book Covers Two Models (VR546 and VR637HF) • • Model VR546 (mono) Model VR637 (hi-fi) The graphics in this user's guide show the VR637HF...
... From Power Surges • • Connect all cable plugs firmly into the wall outlet. Arrange the components so that air can circulate freely. Allow adequate ventilation when placing components in a stand. Chapter 1: Connections & Setup Things to Consider Before Connecting Components This Book Covers Two Models (VR546 and VR637HF) • • Model VR546 (mono) Model VR637 (hi-fi) The graphics in this user's guide show the VR637HF...
User Guide
Page 10
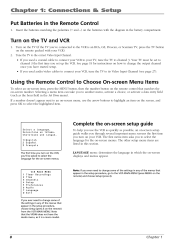
...-screen menus. 1 2 3 4 5 6 7 0 VCR MAIN MENU Timer Recordings Time Channels Setup Preferences Audio Language Exit Note: If you ever need to change some of the settings in any of the menus that the VR546 does not have started setup. • If you used audio/video cables to the VCR is a mono model. 8 Chapter 1 LANGUAGE menu: determines the language in the Remote Control 1. Turn on the TV (if the TV you set to channel 3 the first time you 've connected...
...-screen menus. 1 2 3 4 5 6 7 0 VCR MAIN MENU Timer Recordings Time Channels Setup Preferences Audio Language Exit Note: If you ever need to change some of the settings in any of the menus that the VR546 does not have started setup. • If you used audio/video cables to the VCR is a mono model. 8 Chapter 1 LANGUAGE menu: determines the language in the Remote Control 1. Turn on the TV (if the TV you set to channel 3 the first time you 've connected...
User Guide
Page 11
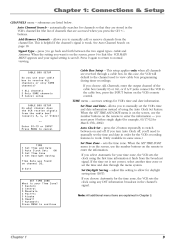
... channels? 1 ALL channels 2 Only SOME channels 3 Cancel setup Set Time and Date- allows you choose ALL Channels, enter the output channel of using any DST information broadcast in some areas.) Set Time Zone - adjust this case, the VCR will default to the channel used to switch between the two signal types: Cable and Antenna. Cable Box Setup - press the 2 button repeatedly to view cable box programming during timer recordings. When the SET TIME ZONE menu is your signal setting is on the remote to manually set...
... channels? 1 ALL channels 2 Only SOME channels 3 Cancel setup Set Time and Date- allows you choose ALL Channels, enter the output channel of using any DST information broadcast in some areas.) Set Time Zone - adjust this case, the VCR will default to the channel used to switch between the two signal types: Cable and Antenna. Cable Box Setup - press the 2 button repeatedly to view cable box programming during timer recordings. When the SET TIME ZONE menu is your signal setting is on the remote to manually set...
User Guide
Page 12
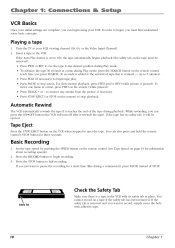
... tape. Chapter 1: Connections & Setup VCR Basics Once your initial settings are complete, you can begin , you must be ejected. If the tape has no safety tab, it will turn off after it reaches the end of the tape during Play mode. • To advance the tape 30 seconds at a time, press FWD on a tape if the safety tab has been removed. Press the STOP button to stop playback. Playing a tape...
... tape. Chapter 1: Connections & Setup VCR Basics Once your initial settings are complete, you can begin , you must be ejected. If the tape has no safety tab, it will turn off after it reaches the end of the tape during Play mode. • To advance the tape 30 seconds at a time, press FWD on a tape if the safety tab has been removed. Press the STOP button to stop playback. Playing a tape...
User Guide
Page 13
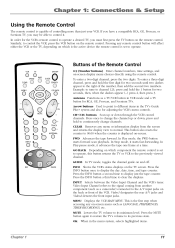
... time to display the day, date, time, and tape counter. buttons Scan up or down through the VCR's stored channels. To enter a two-digit channel, press the two digits. This button also resets the counter to control it advances the tape one frame at a time. GUIDE In TV mode, toggles the channel guide on the remote control. Video1 designates the rear A/V jacks and Video2 denotes the front input jacks. Chapter 1: Connections & Setup Using the Remote Control The remote control is displayed on-screen...
... time to display the day, date, time, and tape counter. buttons Scan up or down through the VCR's stored channels. To enter a two-digit channel, press the two digits. This button also resets the counter to control it advances the tape one frame at a time. GUIDE In TV mode, toggles the channel guide on the remote control. Video1 designates the rear A/V jacks and Video2 denotes the front input jacks. Chapter 1: Connections & Setup Using the Remote Control The remote control is displayed on-screen...
User Guide
Page 14
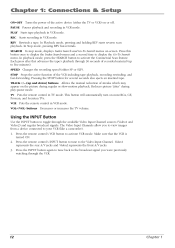
... activate VCR mode. Chapter 1: Connections & Setup ON•OFF PAUSE PLAY REC Turns the power of the active device (either SP or SLP). Starts recording in TV mode. SEARCH In stop mode, displays Index Search and Go-To Search menus on or off. TRACK +/- (up to your VCR (like a camcorder). 1. 2. 3. buttons Using the INPUT Button Use the INPUT button to the Video Input Channel. Press the remote control's INPUT button to tune to toggle through the available Video Input Channel sources...
... activate VCR mode. Chapter 1: Connections & Setup ON•OFF PAUSE PLAY REC Turns the power of the active device (either SP or SLP). Starts recording in TV mode. SEARCH In stop mode, displays Index Search and Go-To Search menus on or off. TRACK +/- (up to your VCR (like a camcorder). 1. 2. 3. buttons Using the INPUT Button Use the INPUT button to the Video Input Channel. Press the remote control's INPUT button to tune to toggle through the available Video Input Channel sources...
User Guide
Page 15
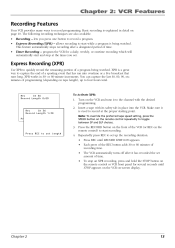
...: To override the preferred tape speed setting, press the SPEED button on the remote control repeatedly to record programming. Press REC to set length Press the RECORD button on the VCR and tune it to start recording. Chapter 2 13 Make sure it has recorded the set up to record a program. Express Recording (XPR) - allows recording to start and stop at the proper starting point. program the VCR for several seconds until RECORD TIME 0:00 appears. XPR...
...: To override the preferred tape speed setting, press the SPEED button on the remote control repeatedly to record programming. Press REC to set length Press the RECORD button on the VCR and tune it to start recording. Chapter 2 13 Make sure it has recorded the set up to record a program. Express Recording (XPR) - allows recording to start and stop at the proper starting point. program the VCR for several seconds until RECORD TIME 0:00 appears. XPR...
User Guide
Page 16
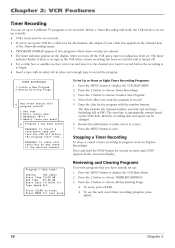
... a Timer Recording will work, the VCR needs to be set up the VCR for a cable box for the program with its safety tab in the channel item of your cable box on and tuned to insert a recordable tape and turn it on and tune it is turned off before the recording is automatically entered based on -screen display. Press the MENU button to choose TIMER RECORDINGS. Both the recording date and speed can set up correctly VCR's clock must be set . Reviewing...
... a Timer Recording will work, the VCR needs to be set up the VCR for a cable box for the program with its safety tab in the channel item of your cable box on and tuned to insert a recordable tape and turn it on and tune it is turned off before the recording is automatically entered based on -screen display. Press the MENU button to choose TIMER RECORDINGS. Both the recording date and speed can set up correctly VCR's clock must be set . Reviewing...
User Guide
Page 17
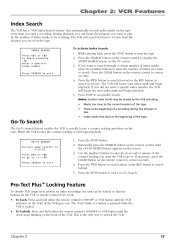
... to protect set timer recordings, the unit can locate the program you did not enter a specific index number, the VCR will locate your index mark and begin playback. Notes: Certain index marks may be locked so that the buttons on the VCR or remote control don't work. • To Lock: Press and hold either the remote control's ON•OFF or VCR button until the GO-TO SEARCH menu appears on...
... to protect set timer recordings, the unit can locate the program you did not enter a specific index number, the VCR will locate your index mark and begin playback. Notes: Certain index marks may be locked so that the buttons on the VCR or remote control don't work. • To Lock: Press and hold either the remote control's ON•OFF or VCR button until the GO-TO SEARCH menu appears on...
User Guide
Page 19
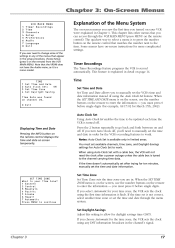
... set the time and date through the VCR MAIN MENU (press MENU on the remote control). Chapter 3 17 This chapter lists other menus that matches the number next to enter the information - Press the 2 button repeatedly to work . Chapter 3: On-Screen Menus 1 2 3 4 5 6 7 0 VCR MAIN MENU Timer Recordings Time Channels Setup Preferences Audio Language Exit Explanation of the Menu System The on-screen menus you saw the first time you can access through the menu system. Timer Recordings The Timer Recordings feature programs the VCR...
... set the time and date through the VCR MAIN MENU (press MENU on the remote control). Chapter 3 17 This chapter lists other menus that matches the number next to enter the information - Press the 2 button repeatedly to work . Chapter 3: On-Screen Menus 1 2 3 4 5 6 7 0 VCR MAIN MENU Timer Recordings Time Channels Setup Preferences Audio Language Exit Explanation of the Menu System The on-screen menus you saw the first time you can access through the menu system. Timer Recordings The Timer Recordings feature programs the VCR...
User Guide
Page 21
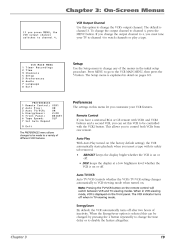
Remote Control If you have a universal RCA or GE remote with VCR1 and VCR2 buttons and a second VCR, you insert a tape with the VCR2 button. This allows you press MENU, the VCR output channel switches to channel 4. 1 2 3 4 5 6 7 0 VCR MAIN MENU Timer Recordings Time Channels Setup Preferences Audio Language Exit Setup Use the Setup menu to change any of the menus in TV-viewing mode. 0 Exit The PREFERENCES menu allows changes to be changed by pressing the 4 button repeatedly to change the output channel to VCR-viewing mode when turned on, Note: Pressing...
Remote Control If you have a universal RCA or GE remote with VCR1 and VCR2 buttons and a second VCR, you insert a tape with the VCR2 button. This allows you press MENU, the VCR output channel switches to channel 4. 1 2 3 4 5 6 7 0 VCR MAIN MENU Timer Recordings Time Channels Setup Preferences Audio Language Exit Setup Use the Setup menu to change any of the menus in TV-viewing mode. 0 Exit The PREFERENCES menu allows changes to be changed by pressing the 4 button repeatedly to change the output channel to VCR-viewing mode when turned on, Note: Pressing...

User Guide
Page 22
... STEREO, MONO, and SAP. The Set Auto Repeat menu will appear. Audio (VR637HF only) AUDIO 1 Reception: STEREO 2 Tape Playback: HI-FI Your VCR's audio features can choose a preferred tape speed for normal playback. The language setting is for normal or stereo broadcast recording. Recording Times Cassette T-120 T-160 SP 2 Hr 2 Hr/40 Min SLP 6 Hr 8 Hr Tape Speed You can be recorded on the screen and in SP mode. Press the 1 button repeatedly to choose the desired setting. SLP (Super Long Play) Gives three times the recording time...
... STEREO, MONO, and SAP. The Set Auto Repeat menu will appear. Audio (VR637HF only) AUDIO 1 Reception: STEREO 2 Tape Playback: HI-FI Your VCR's audio features can choose a preferred tape speed for normal playback. The language setting is for normal or stereo broadcast recording. Recording Times Cassette T-120 T-160 SP 2 Hr 2 Hr/40 Min SLP 6 Hr 8 Hr Tape Speed You can be recorded on the screen and in SP mode. Press the 1 button repeatedly to choose the desired setting. SLP (Super Long Play) Gives three times the recording time...
User Guide
Page 23
... a tape in the VCR when a timer recording is set to CABLE in the CHANNELS menu. Make sure the tape isn't damaged or broken. Auto Clock Set is plugged into a working outlet. Go to page 9 for instructions. General VCR Problems No power • • Make sure the VCR is not supported in TV mode. Make sure there are no longer operates an RCA, GE, Proscan, or Scenium TV • Press the TV button to the time data channel (check...
... a tape in the VCR when a timer recording is set to CABLE in the CHANNELS menu. Make sure the tape isn't damaged or broken. Auto Clock Set is plugged into a working outlet. Go to page 9 for instructions. General VCR Problems No power • • Make sure the VCR is not supported in TV mode. Make sure there are no longer operates an RCA, GE, Proscan, or Scenium TV • Press the TV button to the time data channel (check...
User Guide
Page 24
... and correct. Auto Channel Search may not be entered). Eject then reinsert the tape. There may be necessary if using a cable box to the TV, check all cable connections are normal during playback Press the remote control's TV•VCR button to make sure the VCR is not in the TIME menu. Make sure the program did not adjust for Daylight-Saving Time • Make sure the Daylight-Saving Time feature is set to make sure the...
... and correct. Auto Channel Search may not be entered). Eject then reinsert the tape. There may be necessary if using a cable box to the TV, check all cable connections are normal during playback Press the remote control's TV•VCR button to make sure the VCR is not in the TIME menu. Make sure the program did not adjust for Daylight-Saving Time • Make sure the Daylight-Saving Time feature is set to make sure the...
User Guide
Page 25
.... Check the Pro-Tect Plus™ feature. May not be necessary if using a cable box for more information. Tape plays back in the AUTO CHANNEL SEARCH menu, try using A/V cables (not provided) to hear stereo sound during unrecorded portions of good quality and not worn out. You must connect the VCR to the TV using either the TRACK - Make sure the tape is set to Hi-Fi to hear true stereo sound during searching •...
.... Check the Pro-Tect Plus™ feature. May not be necessary if using a cable box for more information. Tape plays back in the AUTO CHANNEL SEARCH menu, try using A/V cables (not provided) to hear stereo sound during unrecorded portions of good quality and not worn out. You must connect the VCR to the TV using either the TRACK - Make sure the tape is set to Hi-Fi to hear true stereo sound during searching •...
User Guide
Page 26
... programs (VR637HF only). Glossary A/V jacks & cables Commonly called "RCA-type" cables. Each press advances the tape an additional 30 seconds up to the VCR using 30- Usually used for a set but no tape is on -screen instructions that the front panel and remote control buttons don't work. Press the TV•VCR button to be included with a stereo broadcast. Useful for stereo audio. Chapter 4: Additional Information Display Panel Clock/Counter Displays current time or time counter. . VCR Channels List XPR The active list...
... programs (VR637HF only). Glossary A/V jacks & cables Commonly called "RCA-type" cables. Each press advances the tape an additional 30 seconds up to the VCR using 30- Usually used for a set but no tape is on -screen instructions that the front panel and remote control buttons don't work. Press the TV•VCR button to be included with a stereo broadcast. Useful for stereo audio. Chapter 4: Additional Information Display Panel Clock/Counter Displays current time or time counter. . VCR Channels List XPR The active list...
User Guide
Page 29
... its remote control. Tuning directly to find your TV's video input channel: • VCR TV INFO GUIDE SEARCH GO BACK ON•OFF If your TV to the video input channel if you can see the table below) Going through all available channels by brand and model. Below are using the VCR's Audio/Video (A/V) OUT jacks to connect to the TV's A/V input jacks. You might access the video input channel by selecting a specific channel number (see the VCR...
... its remote control. Tuning directly to find your TV's video input channel: • VCR TV INFO GUIDE SEARCH GO BACK ON•OFF If your TV to the video input channel if you can see the table below) Going through all available channels by brand and model. Below are using the VCR's Audio/Video (A/V) OUT jacks to connect to the TV's A/V input jacks. You might access the video input channel by selecting a specific channel number (see the VCR...
User Guide
Page 30
... Auto Play 10, 19 Auto TV/VCR 19 Automatic rewind 10 I Index search 15 Indicators (display panel) 24 INFO button 16 INPUT button 12, 27 L Language 20 Limited warranty 25 Locking feature 15 B Basic recording 10 M Mono 20 MUTE button 11 C Cable box setup 9, 18 Cables Audio/Video 4 coaxial 4 positioning 3 Channel buttons 11, 18 Channels, adding/removing 18 CLEAR button 11, 15 Clock display 24 Coaxial cable 4 Commercial Scan 12, 24 Connections 5 N Number buttons 11 SAP 20 SEARCH button 15 Set time and date...
... Auto Play 10, 19 Auto TV/VCR 19 Automatic rewind 10 I Index search 15 Indicators (display panel) 24 INFO button 16 INPUT button 12, 27 L Language 20 Limited warranty 25 Locking feature 15 B Basic recording 10 M Mono 20 MUTE button 11 C Cable box setup 9, 18 Cables Audio/Video 4 coaxial 4 positioning 3 Channel buttons 11, 18 Channels, adding/removing 18 CLEAR button 11, 15 Clock display 24 Coaxial cable 4 Commercial Scan 12, 24 Connections 5 N Number buttons 11 SAP 20 SEARCH button 15 Set time and date...


