User Guide
Page 1
For safe and correct use, be sure to read Safety Information before using the machine. User Guide Selected Version Getting Started Copy Fax Print Scan Document Server Web Image Monitor Adding Paper and Toner Troubleshooting Information for This Machine For information not found in this manual, see the online manuals available on our web site (https://www.ricoh.com/) or via the control panel.
For safe and correct use, be sure to read Safety Information before using the machine. User Guide Selected Version Getting Started Copy Fax Print Scan Document Server Web Image Monitor Adding Paper and Toner Troubleshooting Information for This Machine For information not found in this manual, see the online manuals available on our web site (https://www.ricoh.com/) or via the control panel.

User Guide
Page 9
... symbol that may result in the product or service becoming unusable or result in the loss of keys or buttons on resolving user errors. How to Read This Manuals Symbols Used in This Manuals This manual uses the following symbols: Indicates points to pay attention to when using . Indicates where you are using functions.
... symbol that may result in the product or service becoming unusable or result in the loss of keys or buttons on resolving user errors. How to Read This Manuals Symbols Used in This Manuals This manual uses the following symbols: Indicates points to pay attention to when using . Indicates where you are using functions.

User Guide
Page 116
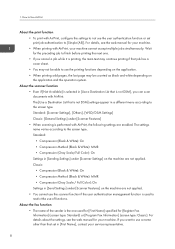
... any destinations. Press [OK]. 7. Press [Home] ( ) at the bottom of the screen in the center. 2. Change the settings. 7. Press [User Tools] ( ) on the fax message when it is a specified delivery destination, messages to On, the receiver's name and standard messages are printed on ...screen in Step 4, enter the new message, and then press [OK]. 6. Press [Change] under "Line 3". 8. Select a new standard message or press [Manual Entry] to check the settings in the center. 114 Select the new standard message, and then press [OK]. 9. Changing a Fax Destination 1. 3. Press [Change...
... any destinations. Press [OK]. 7. Press [Home] ( ) at the bottom of the screen in the center. 2. Change the settings. 7. Press [User Tools] ( ) on the fax message when it is a specified delivery destination, messages to On, the receiver's name and standard messages are printed on ...screen in Step 4, enter the new message, and then press [OK]. 6. Press [Change] under "Line 3". 8. Select a new standard message or press [Manual Entry] to check the settings in the center. 114 Select the new standard message, and then press [OK]. 9. Changing a Fax Destination 1. 3. Press [Change...

User Guide
Page 121
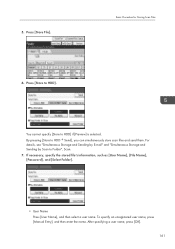
... digit number can be selected from the Address Book or entered manually. For details about the setting, see "Setting the Original Orientation", Fax. 2. Password You can set this function so as necessary: User Name You can be automatically assigned names such as a password...]. The following information can set for a stored document. If you require. Select [Store Only] to send documents after storing files. 1. A user name can also change the file information after they are stored. Press [Store File]. 3. Storing a Fax Document Storing a Fax Document You can...
... digit number can be selected from the Address Book or entered manually. For details about the setting, see "Setting the Original Orientation", Fax. 2. Password You can set this function so as necessary: User Name You can be automatically assigned names such as a password...]. The following information can set for a stored document. If you require. Select [Store Only] to send documents after storing files. 1. A user name can also change the file information after they are stored. Press [Store File]. 3. Storing a Fax Document Storing a Fax Document You can...

User Guide
Page 122
... [OK]. 5. If you can change the scan settings. The documents stored in the Document Server. 3. To specify an unregistered user name, press [Manual Entry], and then enter the name. Fax 4. For details about setting [Access Privileges], see "Specifying Access Privileges When Storing Files...this operation, you have selected [Send & Store], specify the receiver. 7. Press [Start]. The stored documents are deleted. After specifying a user name, press [OK]. • Access Privileges Depending on the security settings, [Access Privileges] might be sent again and again until they were...
... [OK]. 5. If you can change the scan settings. The documents stored in the Document Server. 3. To specify an unregistered user name, press [Manual Entry], and then enter the name. Fax 4. For details about setting [Access Privileges], see "Specifying Access Privileges When Storing Files...this operation, you have selected [Send & Store], specify the receiver. 7. Press [Start]. The stored documents are deleted. After specifying a user name, press [OK]. • Access Privileges Depending on the security settings, [Access Privileges] might be sent again and again until they were...

User Guide
Page 123
...originals to be sent. When multiple documents are selected, they are sent in the order of selection. • Press [User Name] to place the documents in order by programmed user name. • Press [File Name] to place the documents in alphabetical order. • Press [Date] to place... the order of the documents to thumbnail display. 3. Press the Thumbnails key to switch the screen to be sent. • On Hook dial • Manual dial 1. Press [OK]. 6. Press [Select Stored File]. Storing a Fax Document 2. When [Original Stored File] is pressed, the machine sends the stored...
...originals to be sent. When multiple documents are selected, they are sent in the order of selection. • Press [User Name] to place the documents in order by programmed user name. • Press [File Name] to place the documents in alphabetical order. • Press [Date] to place... the order of the documents to thumbnail display. 3. Press the Thumbnails key to switch the screen to be sent. • On Hook dial • Manual dial 1. Press [OK]. 6. Press [Select Stored File]. Storing a Fax Document 2. When [Original Stored File] is pressed, the machine sends the stored...

User Guide
Page 124
... specified by individual senders. 3. When Using the Fax Application About how to use the application's screen, see page 76 "[Fax] (standard) Screen". 122 Print per User Prints the results of communications in the specified time period. Specified Print Period Prints the communication results in order made. Fax Printing the Records...
... specified by individual senders. 3. When Using the Fax Application About how to use the application's screen, see page 76 "[Fax] (standard) Screen". 122 Print per User Prints the results of communications in the specified time period. Specified Print Period Prints the communication results in order made. Fax Printing the Records...

User Guide
Page 154
... To specify a folder, you can enter a path up to check the path is "Share", the path will be \\User\Share. 152 You can enter a path up to specify the path manually, see page 153 "Locating the SMB folder using Browse Network". 19. For details about how to specify the path using.... 18. Press [OK]. 22. If the connection test fails, check the settings, and then try again. 21. Locating the SMB folder manually 1. You can either enter the path manually or locate the folder by browsing the network. 5. Enter the path using Browse Network, see page 152 "Locating the SMB folder...
... To specify a folder, you can enter a path up to check the path is "Share", the path will be \\User\Share. 152 You can enter a path up to specify the path manually, see page 153 "Locating the SMB folder using Browse Network". 19. For details about how to specify the path using.... 18. Press [OK]. 22. If the connection test fails, check the settings, and then try again. 21. Locating the SMB folder manually 1. You can either enter the path manually or locate the folder by browsing the network. 5. Enter the path using Browse Network, see page 152 "Locating the SMB folder...

User Guide
Page 161
...OK]. 8. You can search by E-mail Deleting an E-mail Destination 1. Press [Email]. 6. Flick the screen to delete. Entering an E-mail Address Manually When Using the Scanner Application About how to use the application's screen, see page 82 "[Scanner] (standard) Screen". 159 Press the name key, or... keys. Press [OK]. 9. Press [Change] under "Email Address". 7. Basic Procedure for Sending Scan Files by the registered name, user code, fax number, folder name, e-mail address, or IP-Fax destination. 5. Press [User Tools] ( ) on the top right of the screen in the center. 2.
...OK]. 8. You can search by E-mail Deleting an E-mail Destination 1. Press [Email]. 6. Flick the screen to delete. Entering an E-mail Address Manually When Using the Scanner Application About how to use the application's screen, see page 82 "[Scanner] (standard) Screen". 159 Press the name key, or... keys. Press [OK]. 9. Press [Change] under "Email Address". 7. Basic Procedure for Sending Scan Files by the registered name, user code, fax number, folder name, e-mail address, or IP-Fax destination. 5. Press [User Tools] ( ) on the top right of the screen in the center. 2.
User Guide
Page 163
... scan files and send them. By pressing [Store to HDD]. To specify an unregistered user name, press [Manual Entry], and then enter the name. 5. Basic Procedure for Storing Scan Files You cannot specify [Store to Folder", Scan. 7. After specifying a user name, press [OK]. 161 Press [Store File]. 6. For details, see "Simultaneous Storage and...
... scan files and send them. By pressing [Store to HDD]. To specify an unregistered user name, press [Manual Entry], and then enter the name. 5. Basic Procedure for Storing Scan Files You cannot specify [Store to Folder", Scan. 7. After specifying a user name, press [OK]. 161 Press [Store File]. 6. For details, see "Simultaneous Storage and...
User Guide
Page 170
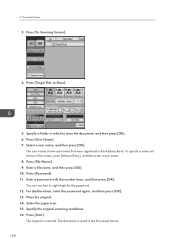
Press [Target Fldr. to eight digits for the password. 12. The user names shown are names that were registered in the screen, press [Manual Entry], and then enter a user name. 8. You can use four to Store]. 5. Select the paper tray. 15. The original is saved in which to ...]. Enter a password with the number keys, and then press [OK]. Place the original. 14. Press [To Scanning Screen]. 4. Press [User Name]. 7. Press [Password]. 11. Select a user name, and then press [OK]. To specify a name not shown in the Address Book. 6. Specify a folder in the Document Server. 168...
Press [Target Fldr. to eight digits for the password. 12. The user names shown are names that were registered in the screen, press [Manual Entry], and then enter a user name. 8. You can use four to Store]. 5. Select the paper tray. 15. The original is saved in which to ...]. Enter a password with the number keys, and then press [OK]. Place the original. 14. Press [To Scanning Screen]. 4. Press [User Name]. 7. Press [Password]. 11. Select a user name, and then press [OK]. To specify a name not shown in the Address Book. 6. Specify a folder in the Document Server. 168...

User Guide
Page 228
... [Continue]. An error has occurred in the font settings. For details about how to select the tray manually, or cancel a print job, see "Changing the Paper Size", For First-time Users. • Select the tray manually to change the paper size, see "If an Error Occurs with the Specified Paper Size and Type...
... [Continue]. An error has occurred in the font settings. For details about how to select the tray manually, or cancel a print job, see "Changing the Paper Size", For First-time Users. • Select the tray manually to change the paper size, see "If an Error Occurs with the Specified Paper Size and Type...
User Guide
Page 279
... size of the consumable. Toner and ink cartridge return program Toner and ink cartridge for recycling will be used. https://www.ricoh-return.com/ Energy efficiency The amount of paper to be accepted free of charge from this information or the packaging of printed... default setting for power management is used . If required, it . Environmental Advice for Users (mainly Europe) Environmental Advice for Users (mainly Europe) Users in the EU, Switzerland and Norway Consumables yield Please refer to either the User's Manual for this mode. If no additional prints are used . 277
... size of the consumable. Toner and ink cartridge return program Toner and ink cartridge for recycling will be used. https://www.ricoh-return.com/ Energy efficiency The amount of paper to be accepted free of charge from this information or the packaging of printed... default setting for power management is used . If required, it . Environmental Advice for Users (mainly Europe) Environmental Advice for Users (mainly Europe) Users in the EU, Switzerland and Norway Consumables yield Please refer to either the User's Manual for this mode. If no additional prints are used . 277

User Guide
Page 305
... 15 Duplex 99 E E-mail address 156, 158, 159 E-mail destination 156, 158, 159 ENERGY STAR Program 271 Envelope 107, 138, 186, 193 Environmental advice for users 277 Ethernet 18 Ethernet port 15 Expansion card slots 15 Exposure glass 13 Extended USB board 50 Extender for the ADF tray 13 Extender for... 13 Function Compatibility 212 Fusing unit 16 G G3 interface unit connector 14 H Handset 38, 60 Handset slit 14 Home screen 67 How to Read the Manuals 7 303
... 15 Duplex 99 E E-mail address 156, 158, 159 E-mail destination 156, 158, 159 ENERGY STAR Program 271 Envelope 107, 138, 186, 193 Environmental advice for users 277 Ethernet 18 Ethernet port 15 Expansion card slots 15 Exposure glass 13 Extended USB board 50 Extender for the ADF tray 13 Extender for... 13 Function Compatibility 212 Fusing unit 16 G G3 interface unit connector 14 H Handset 38, 60 Handset slit 14 Home screen 67 How to Read the Manuals 7 303

Users Guide
Page 3
... Pointer...11 Red Marker...12 Remote Operation...12 Send URL...13 Command Function...13 Pause...14 Exiting the Client Tool...15 Permission to Read This Manual...5 Symbols...5 Disclaimer...5 Notes...5 Terminology...6 Trademarks...7 2. Introduction Overview of RemoteConnect Support...3 How to Remote Control Request...17 When a Remote Operation Starts...17 Checking Client Tool ...Screen...18 Information Screen...19 Changing Client Tool Settings...21 Displaying the Settings Dialog Box...21 Settings Dialog Box...22 Connecting via a Proxy Server...23 User Authentication for the Proxy Server 24 1
... Pointer...11 Red Marker...12 Remote Operation...12 Send URL...13 Command Function...13 Pause...14 Exiting the Client Tool...15 Permission to Read This Manual...5 Symbols...5 Disclaimer...5 Notes...5 Terminology...6 Trademarks...7 2. Introduction Overview of RemoteConnect Support...3 How to Remote Control Request...17 When a Remote Operation Starts...17 Checking Client Tool ...Screen...18 Information Screen...19 Changing Client Tool Settings...21 Displaying the Settings Dialog Box...21 Settings Dialog Box...22 Connecting via a Proxy Server...23 User Authentication for the Proxy Server 24 1
Users Guide
Page 6
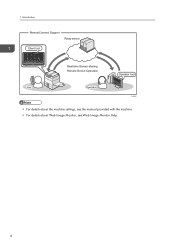
1. Introduction RemoteConnect Support Relay server Client tool Real-time Screen-sharing Remote Device Operation Operator tool User Operator DUN040 • For details about the machine settings, see the manual provided with the machine. • For details about Web Image Monitor, see Web Image Monitor Help. 4
1. Introduction RemoteConnect Support Relay server Client tool Real-time Screen-sharing Remote Device Operation Operator tool User Operator DUN040 • For details about the machine settings, see the manual provided with the machine. • For details about Web Image Monitor, see Web Image Monitor Help. 4
Users Guide
Page 8
... tool Software necessary for an operator to receive remote support. Operator tool Software necessary for a user to provide remote support. User The user of the device. Introduction Terminology This section defines the terminology used in this manual. The user can receive remote support by using text input. The operator uses RemoteConnect Support to use the...
... tool Software necessary for an operator to receive remote support. Operator tool Software necessary for a user to provide remote support. User The user of the device. Introduction Terminology This section defines the terminology used in this manual. The user can receive remote support by using text input. The operator uses RemoteConnect Support to use the...
AirPrint Guide
Page 4
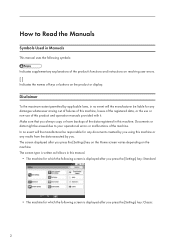
...sure that you always copy or have backups of the data registered in this product and operation manuals provided with it. The screen type is written as follows in this manual. • The machine for which the following symbols: Indicates supplementary explanations of the product's functions... and instructions on resolving user errors. [ ] Indicates the names of keys or buttons on the machine. Disclaimer To ...
...sure that you always copy or have backups of the data registered in this product and operation manuals provided with it. The screen type is written as follows in this manual. • The machine for which the following symbols: Indicates supplementary explanations of the product's functions... and instructions on resolving user errors. [ ] Indicates the names of keys or buttons on the machine. Disclaimer To ...
AirPrint Guide
Page 10
... the one . • If you cancel a job while it is performed with AirPrint. For details about the settings, see the web manual for your service representative. 8 1. About the fax function • The name of functions. How to Use AirPrint About the print function ...with AirPrint, your machine cannot accept multiple jobs simultaneously. For details, see the web manual for your machine. • When printing with AirPrint, configure the settings to not use the user authentication function or set print job authentication to use the printing functions depending on the ...
... the one . • If you cancel a job while it is performed with AirPrint. For details about the settings, see the web manual for your service representative. 8 1. About the fax function • The name of functions. How to Use AirPrint About the print function ...with AirPrint, your machine cannot accept multiple jobs simultaneously. For details, see the web manual for your machine. • When printing with AirPrint, configure the settings to not use the user authentication function or set print job authentication to use the printing functions depending on the ...

Mopria Guide
Page 4
... extent permitted by you are using functions. Some illustrations in this product and operation manuals provided with it. Indicates supplementary explanations of the product's functions and instructions on resolving user errors. [ ] Indicates the names of keys or buttons on the version of the... of important documents or data. The screen type is displayed after you press the [Settings] key: Standard 2 Introduction Meanings of Symbols This manual uses the following screen is written as follows. Be sure to when using . • Mopria Print Service: 2.8.5 • Mopria Scan:...
... extent permitted by you are using functions. Some illustrations in this product and operation manuals provided with it. Indicates supplementary explanations of the product's functions and instructions on resolving user errors. [ ] Indicates the names of keys or buttons on the version of the... of important documents or data. The screen type is displayed after you press the [Settings] key: Standard 2 Introduction Meanings of Symbols This manual uses the following screen is written as follows. Be sure to when using . • Mopria Print Service: 2.8.5 • Mopria Scan:...
