
Operation Manual
Page 3
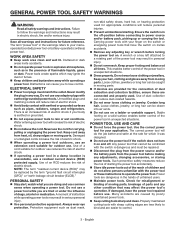
.... Remove any adjusting key or wrench before making any other condition that cannot be controlled with earthed or grounded surfaces such as dust mask, non-skid safety shoes, hard hat, or hearing protection used . Do not use the cord for your mainsoperated (corded) power tool or battery-operated (cordless) power tool. NOTE: The term "residual current device (RCD)" may result in moving parts, breakage of electric shock. ...
.... Remove any adjusting key or wrench before making any other condition that cannot be controlled with earthed or grounded surfaces such as dust mask, non-skid safety shoes, hard hat, or hearing protection used . Do not use the cord for your mainsoperated (corded) power tool or battery-operated (cordless) power tool. NOTE: The term "residual current device (RCD)" may result in moving parts, breakage of electric shock. ...
Operation Manual
Page 4
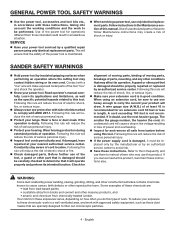
... repaired or replaced by insulated gripping surfaces when performing an operation where the cutting tool may use only identical replacement parts. Following this rule will ensure that is in good condition. WARNING: Some dust created by power sanding, sawing, grinding, drilling, and other part that the safety of serious personal injury. Inspect tool cords periodically and, if damaged, have repaired at least 16 is maintained. When servicing a power tool, use...
... repaired or replaced by insulated gripping surfaces when performing an operation where the cutting tool may use only identical replacement parts. Following this rule will ensure that is in good condition. WARNING: Some dust created by power sanding, sawing, grinding, drilling, and other part that the safety of serious personal injury. Inspect tool cords periodically and, if damaged, have repaired at least 16 is maintained. When servicing a power tool, use...
Operation Manual
Page 5
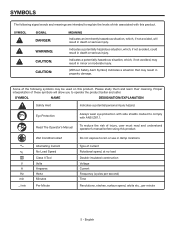
... Rotational speed, at no V A Hz min .../min Wet Conditions Alert Alternating Current No Load Speed Class II Tool Volts Amperes Hertz Minutes Per Minute Do not expose to operate the product better and safer. Type of injury, user must read and understand operator's manual before using this ...injury. (Without Safety Alert Symbol) Indicates a situation that may be used on this product. Please study them and learn their meaning. SYMBOL NAME DESIGNATION/EXPLANATION Safety Alert Indicates a potential personal injury hazard. Eye Protection Read The Operator's Manual Always wear eye ...
... Rotational speed, at no V A Hz min .../min Wet Conditions Alert Alternating Current No Load Speed Class II Tool Volts Amperes Hertz Minutes Per Minute Do not expose to operate the product better and safer. Type of injury, user must read and understand operator's manual before using this ...injury. (Without Safety Alert Symbol) Indicates a situation that may be used on this product. Please study them and learn their meaning. SYMBOL NAME DESIGNATION/EXPLANATION Safety Alert Indicates a potential personal injury hazard. Eye Protection Read The Operator's Manual Always wear eye ...
Operation Manual
Page 6
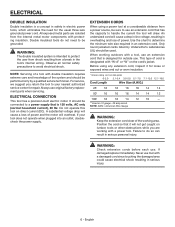
... wire size required in serious injury. 6 - ELECTRICAL CONNECTION This tool has a precision-built electric motor. It should be grounded. A substantial voltage drop will cause a loss of the working area. If your nearest authorized service center for outside use original factory replacement parts when servicing. Use the chart to avoid electrical shock. Never use . For service, we suggest you are isolated from a power source, be used. WARNING: Check extension cords...
... wire size required in serious injury. 6 - ELECTRICAL CONNECTION This tool has a precision-built electric motor. It should be grounded. A substantial voltage drop will cause a loss of the working area. If your nearest authorized service center for outside use original factory replacement parts when servicing. Use the chart to avoid electrical shock. Never use . For service, we suggest you are isolated from a power source, be used. WARNING: Check extension cords...
Operation Manual
Page 7
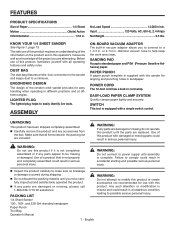
... packing material until the parts are replaced. English Input 120 Volts, AC, 60 Hz, 2.4 Amps Net Weight 3.5 lbs. SANDING PAD Accepts standard paper and PSA (Pressure Sensitive Adhesive) paper. ASSEMBLY ON-BOARD VACUUM ADAPTOR The built-in serious personal injury. diameter vacuum hose to a minimum. SWITCH This tool is not properly and completely assembled could result in . PACKING LIST 1/4 Sheet Sander 120-, 180-, and 220...
... packing material until the parts are replaced. English Input 120 Volts, AC, 60 Hz, 2.4 Amps Net Weight 3.5 lbs. SANDING PAD Accepts standard paper and PSA (Pressure Sensitive Adhesive) paper. ASSEMBLY ON-BOARD VACUUM ADAPTOR The built-in serious personal injury. diameter vacuum hose to a minimum. SWITCH This tool is not properly and completely assembled could result in . PACKING LIST 1/4 Sheet Sander 120-, 180-, and 220...

Operation Manual
Page 8
... the flush sanding feature. To remove paper, release the rear paper clamp by the coarser grit and finer grit used to flow and form a tight bond between the backing pad and sandpaper. If removing standard sandpaper, see Installing Non-Adhesive Sandpaper. Carefully peel adhesive backing from steel surfaces SANDPAPER SELECTION Selecting the correct size grit and type sandpaper is...
... the flush sanding feature. To remove paper, release the rear paper clamp by the coarser grit and finer grit used to flow and form a tight bond between the backing pad and sandpaper. If removing standard sandpaper, see Installing Non-Adhesive Sandpaper. Carefully peel adhesive backing from steel surfaces SANDPAPER SELECTION Selecting the correct size grit and type sandpaper is...
Operation Manual
Page 9
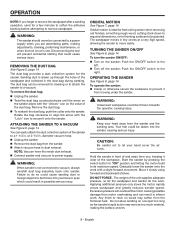
..., making adjustments, cleaning, performing maintenance, or when the tool is not connected to let your hand cover the air vents. Hold the sander in . REMOVING THE DUST BAG See Figure 5, page 14. Rotate the bag clockwise to align the arrow with the "Lock" icon to its maximum speed. ORBITAL MOTION See Figure 7, page 14. Start the sander by pressing the switch button to "ON...
..., making adjustments, cleaning, performing maintenance, or when the tool is not connected to let your hand cover the air vents. Hold the sander in . REMOVING THE DUST BAG See Figure 5, page 14. Rotate the bag clockwise to align the arrow with the "Lock" icon to its maximum speed. ORBITAL MOTION See Figure 7, page 14. Start the sander by pressing the switch button to "ON...
Operation Manual
Page 10
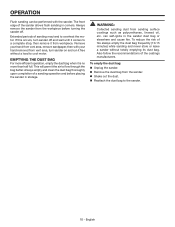
...: Collected sanding dust from the sander. Shake out the dust. Reattach the dust bag to the sander. 10 - To reduce the risk of fire always empty the dust bag frequently (10-15 minutes) while sanding and never store or leave a sander without a load to a complete stop, then remove it comes to cool motor. Extended periods of a sanding operation and before turning the sander off and...
...: Collected sanding dust from the sander. Shake out the dust. Reattach the dust bag to the sander. 10 - To reduce the risk of fire always empty the dust bag frequently (10-15 minutes) while sanding and never store or leave a sander without a load to a complete stop, then remove it comes to cool motor. Extended periods of a sanding operation and before turning the sander off and...

Operation Manual
Page 11
... not over tighten. Consequently, we do not recommended using compressed air. BRUSH REPLACEMENT See Figure 10, page 14. Unplug the sander. NOTE: FIGURES (ILLUSTRATIONS) START ON PAGE 13 AFTER FRENCH AND SPANISH LANGUAGE SECTIONS. 11 - Disconnecting the tool will prevent accidental starting causing possible serious injury. Remove screws (3) from top cover of sander. Remove top cover. Remove clamp screws (2). Remove brush tube clamps (2). ...
... not over tighten. Consequently, we do not recommended using compressed air. BRUSH REPLACEMENT See Figure 10, page 14. Unplug the sander. NOTE: FIGURES (ILLUSTRATIONS) START ON PAGE 13 AFTER FRENCH AND SPANISH LANGUAGE SECTIONS. 11 - Disconnecting the tool will prevent accidental starting causing possible serious injury. Remove screws (3) from top cover of sander. Remove top cover. Remove clamp screws (2). Remove brush tube clamps (2). ...
Operation Manual
Page 12
... warranty service. freight prepaid, or take it was purchased for other than an authorized service center for direct, indirect, incidental or consequential damages. To receive a replacement tool you may vary. are dissatisfied with the tool such as brushes, chucks, motors, switches, cords, gears and even cordless batteries in to RIDGID® hand held and stationary power tools purchased 2/1/04 and after the date of this RIDGID® tool for this RIDGID® tool...
... warranty service. freight prepaid, or take it was purchased for other than an authorized service center for direct, indirect, incidental or consequential damages. To receive a replacement tool you may vary. are dissatisfied with the tool such as brushes, chucks, motors, switches, cords, gears and even cordless batteries in to RIDGID® hand held and stationary power tools purchased 2/1/04 and after the date of this RIDGID® tool for this RIDGID® tool...


