
Operation Manual
Page 4
... in doubt, use them these exposures varies, depending on how often you loan someone this product, loan them to this type of at your lungs. SANDER SAFETY WARNINGS Hold power tool by power sanding, sawing, grinding, drilling, and other construction activities contains chemicals known to them frequently and use the...
... in doubt, use them these exposures varies, depending on how often you loan someone this product, loan them to this type of at your lungs. SANDER SAFETY WARNINGS Hold power tool by power sanding, sawing, grinding, drilling, and other construction activities contains chemicals known to them frequently and use the...
Operation Manual
Page 7
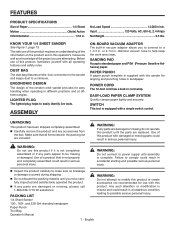
...Carefully remove the product and any parts are included. Use of a product that all operating features and safety rules. PACKING LIST 1/4 Sheet Sander 120-, 180-, and 220-Grit standard sandpaper Paper Punch Tool Bag Operator's Manual WARNING: Do not attempt to comply could result in ....Sheet Motion Orbital Action Orbit Diameter 1/16 in serious personal injury. Use of this product requires an understanding of the random orbit sander provides for aligning and punching holes in . Any such alteration or modification is equipped with damaged or missing parts could result in...
...Carefully remove the product and any parts are included. Use of a product that all operating features and safety rules. PACKING LIST 1/4 Sheet Sander 120-, 180-, and 220-Grit standard sandpaper Paper Punch Tool Bag Operator's Manual WARNING: Do not attempt to comply could result in ....Sheet Motion Orbital Action Orbit Diameter 1/16 in serious personal injury. Use of this product requires an understanding of the random orbit sander provides for aligning and punching holes in . Any such alteration or modification is equipped with damaged or missing parts could result in...

Operation Manual
Page 8
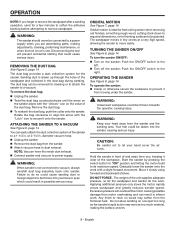
...SENSITIVE ADHESIVE (PSA) SANDPAPER See Figure 4, page 13. Removing the sandpaper soon after use in power sanding. APPLICATIONS You may use sander without sandpaper. NOTE: DO NOT use this situation occurs, it off the sanding pad. Inspect sandpaper before installing. An outline of ... from sanding causes the pressure sensitive adhesive to inflict serious injury. DO NOT use broken or defective sandpaper. Unplug the sander. If replacing sandpaper, remove old sandpaper by the coarser grit and finer grit used to make you careless. The punched...
...SENSITIVE ADHESIVE (PSA) SANDPAPER See Figure 4, page 13. Removing the sandpaper soon after use in power sanding. APPLICATIONS You may use sander without sandpaper. NOTE: DO NOT use this situation occurs, it off the sanding pad. Inspect sandpaper before installing. An outline of ... from sanding causes the pressure sensitive adhesive to inflict serious injury. DO NOT use broken or defective sandpaper. Unplug the sander. If replacing sandpaper, remove old sandpaper by the coarser grit and finer grit used to make you careless. The punched...
Operation Manual
Page 9
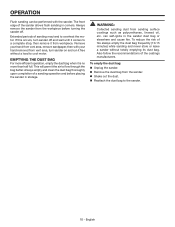
... from the frictional heat. Rotate the bag clockwise to align the arrow with the "Unlock" icon on one spot too long as the sander's rapid action may soften from motor overheating and can easily attach the dust collection system of the workpiece. ORBITAL MOTION See Figure 7, page... down to required dimensions, or for a few minutes to soften the adhesive backing before attempting to let your head away from the sander. Attach vacuum hose to a power supply when you , keeping it slowly using forward and backward strokes. WARNING: Unsecured workpieces could result...
... from the frictional heat. Rotate the bag clockwise to align the arrow with the "Unlock" icon on one spot too long as the sander's rapid action may soften from motor overheating and can easily attach the dust collection system of the workpiece. ORBITAL MOTION See Figure 7, page... down to required dimensions, or for a few minutes to soften the adhesive backing before attempting to let your head away from the sander. Attach vacuum hose to a power supply when you , keeping it slowly using forward and backward strokes. WARNING: Unsecured workpieces could result...
Operation Manual
Page 10
...coatings such as polyurethanes, linseed oil, etc. Always empty and clean the dust bag thoroughly upon completion of a sanding operation and before turning the sander off and wait until it comes to a complete stop, then remove it is no more than half full. This will permit the air to... cool motor. can be performed with your hand from vent area, remove sandpaper, then with the sander. Also follow the recommendations of the sander allows flush sanding in corners. Extended periods of fire always empty the dust bag frequently (10-15 minutes) while sanding and ...
...coatings such as polyurethanes, linseed oil, etc. Always empty and clean the dust bag thoroughly upon completion of a sanding operation and before turning the sander off and wait until it comes to a complete stop, then remove it is no more than half full. This will permit the air to... cool motor. can be performed with your hand from vent area, remove sandpaper, then with the sander. Also follow the recommendations of the sander allows flush sanding in corners. Extended periods of fire always empty the dust bag frequently (10-15 minutes) while sanding and ...

Operation Manual
Page 11
... can damage, weaken, or destroy plastic. Disconnecting the tool will prevent accidental starting that could result in use only identical RIDGID® replacement parts. Most plastics are highly abrasive to unplug the tool could cause serious injury. Replace both brush assemblies... when either has less than 1/4 in possible serious injury. English Use of sander. Remove top cover. Remove clamp screws (2). Remove brush tube clamps (2). Disconnect red and black...
... can damage, weaken, or destroy plastic. Disconnecting the tool will prevent accidental starting that could result in use only identical RIDGID® replacement parts. Most plastics are highly abrasive to unplug the tool could cause serious injury. Replace both brush assemblies... when either has less than 1/4 in possible serious injury. English Use of sander. Remove top cover. Remove clamp screws (2). Remove brush tube clamps (2). Disconnect red and black...


