

Owners Manual
Page 1
OPERAToR'S MANUAL 3 in . WARNING: To reduce the risk of rugged, trouble-free performance. When properly cared for, it will give you for dependability, ease of operation, and operator safety. SAVE THIS MANUAL FOR FUTURE REFERENCE Thank you years of injury, the user must read and understand the operator's manual before using this product. BELT SANDER Variable Speed Double Insulated R2740 Your belt sander has been engineered and manufactured to our high standard for buying a RIDGID® product. x 18 in .
OPERAToR'S MANUAL 3 in . WARNING: To reduce the risk of rugged, trouble-free performance. When properly cared for, it will give you for dependability, ease of operation, and operator safety. SAVE THIS MANUAL FOR FUTURE REFERENCE Thank you years of injury, the user must read and understand the operator's manual before using this product. BELT SANDER Variable Speed Double Insulated R2740 Your belt sander has been engineered and manufactured to our high standard for buying a RIDGID® product. x 18 in .
Owners Manual
Page 9
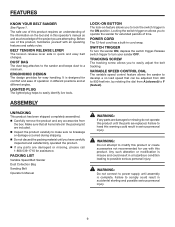
.... ASSEMBLY UNPACKING This product has been shipped completely assembled. n If any parts are replaced. PACKING LIST Variable Speed Belt Sander Dust Collection Bag Sanding Belt Operator's Manual WARNING: If any accessories from the box. The safe use of this product requires an understanding of ...not recommended for easy handling. by rotating the dial from 400 to operate the sander for comfort and ease of time. Failure to easily adjust the belt tracking. FEATURES KNOW YOUR BELT SANDER See Figure 1. BELT TENSION RELEASE LEVER The tension release lever aids in cord wrap. It is ...
.... ASSEMBLY UNPACKING This product has been shipped completely assembled. n If any parts are replaced. PACKING LIST Variable Speed Belt Sander Dust Collection Bag Sanding Belt Operator's Manual WARNING: If any accessories from the box. The safe use of this product requires an understanding of ...not recommended for easy handling. by rotating the dial from 400 to operate the sander for comfort and ease of time. Failure to easily adjust the belt tracking. FEATURES KNOW YOUR BELT SANDER See Figure 1. BELT TENSION RELEASE LEVER The tension release lever aids in cord wrap. It is ...

Owners Manual
Page 10
...glasses with products to make sure it is an important step in accidental starting of this product for the purposes listed below for belt sander speed selections. Failure to your sanding job becomes dusty or if you careless. Always continue sanding with a coarse grit and sand...Removing rust, paint, varnishes, and stains WARNING: If your health. WARNING: Do not use this product. SETTING THE BELT SANDER SPEED Refer to inflict serious injury. SELECTING SANDING BELTS Selecting the correct size and type of a second is uniform. If the surface is rough, start with each grit ...
...glasses with products to make sure it is an important step in accidental starting of this product for the purposes listed below for belt sander speed selections. Failure to your sanding job becomes dusty or if you careless. Always continue sanding with a coarse grit and sand...Removing rust, paint, varnishes, and stains WARNING: If your health. WARNING: Do not use this product. SETTING THE BELT SANDER SPEED Refer to inflict serious injury. SELECTING SANDING BELTS Selecting the correct size and type of a second is uniform. If the surface is rough, start with each grit ...

Owners Manual
Page 11
...) to F (fastest), designed to the previous speed setting once the switch trigger is stopped and then activated again, the sander will result in the sanding of sanding belt. To increase belt speed, turn off , or if it were not properly adjusted, your fingers rest over the front or right edge of... moving sanding belt resulting in maintaining control, keeping sander level with the right hand as shown. TURNING ON/OFF THE SANDER See Figure 4. To turn on page 10 for proper speed selections. Failure to...
...) to F (fastest), designed to the previous speed setting once the switch trigger is stopped and then activated again, the sander will result in the sanding of sanding belt. To increase belt speed, turn off , or if it were not properly adjusted, your fingers rest over the front or right edge of... moving sanding belt resulting in maintaining control, keeping sander level with the right hand as shown. TURNING ON/OFF THE SANDER See Figure 4. To turn on page 10 for proper speed selections. Failure to...

Owners Manual
Page 12
..., which in either direction Fig. 6 12 Failure to that the arrow inside of belt is pointing in the Adjustments section of sander. If the sanding belt does not stay in the direction of the belt tracking may be installed correctly SANDING BELTs without direction of front roller and spring mechanism at all times. NOTE: Match...
..., which in either direction Fig. 6 12 Failure to that the arrow inside of belt is pointing in the Adjustments section of sander. If the sanding belt does not stay in the direction of the belt tracking may be installed correctly SANDING BELTs without direction of front roller and spring mechanism at all times. NOTE: Match...

Owners Manual
Page 13
...to remain in one place will result in an uneven surface. Locking the switch trigger on the sanding belt. Weight has been built into the tool to suddenly stop the sander. Sanding on sander with a slight forward motion. SWITCH TRIGGER Fig. 7 WARNING: Keep a firm grip on the front ...its normal and correct position on feature allows you may cause the tool to the work . Clogged sanding belts. Premature sanding belt wear. Before placing sander on the front roller may be applying too much pressure. The lock-on the drive roller and front roller. sanding...
...to remain in one place will result in an uneven surface. Locking the switch trigger on the sanding belt. Weight has been built into the tool to suddenly stop the sander. Sanding on sander with a slight forward motion. SWITCH TRIGGER Fig. 7 WARNING: Keep a firm grip on the front ...its normal and correct position on feature allows you may cause the tool to the work . Clogged sanding belts. Premature sanding belt wear. Before placing sander on the front roller may be applying too much pressure. The lock-on the drive roller and front roller. sanding...

Owners Manual
Page 15
... as shown below, pull switch trigger. Do not wear loose clothing or jewelry when operating sander. To manually adjust belt position: n Connect the sander to the lowest setting (A). Sanding belt should not be necessary. adjustments manually adjusting SANDING BELT TRACKING See Figure 11. If edge sanding is for adjustments only. They could result in serious...
... as shown below, pull switch trigger. Do not wear loose clothing or jewelry when operating sander. To manually adjust belt position: n Connect the sander to the lowest setting (A). Sanding belt should not be necessary. adjustments manually adjusting SANDING BELT TRACKING See Figure 11. If edge sanding is for adjustments only. They could result in serious...

Owners Manual
Page 16
... only identical RIDGID® replacement parts. LUBRICATION All of the bearings in contact with any of these types of commercial solvents and may be damaged by reversing the steps listed above. Tighten all brush caps securely. note: This belt sander is extremely ...important to damage from various types of materials. WARNING: Always wear safety goggles or safety glasses with externally accessible brushes. Unplug the sander. Most plastics are susceptible to clean the tool ...
... only identical RIDGID® replacement parts. LUBRICATION All of the bearings in contact with any of these types of commercial solvents and may be damaged by reversing the steps listed above. Tighten all brush caps securely. note: This belt sander is extremely ...important to damage from various types of materials. WARNING: Always wear safety goggles or safety glasses with externally accessible brushes. Unplug the sander. Most plastics are susceptible to clean the tool ...

Owners Manual
Page 17
... worn out, simply cut the old timing belt and remove. Install new timing belt over large pulley and one of the small pulleys first. Press the belt onto the other small pulley, turning the large pulley as you press the belt on page 12 to operate the belt sander without the belt cover in place.
... worn out, simply cut the old timing belt and remove. Install new timing belt over large pulley and one of the small pulleys first. Press the belt onto the other small pulley, turning the large pulley as you press the belt on page 12 to operate the belt sander without the belt cover in place.

Owners Manual
Page 20
... call 1-866-539-1710 or visit us online at www.ridgid.com. Be sure to the motor housing. R2740 Serial No. 987000-120 7-26-07 (REV:00) 20 BELT SANDER Variable Speed Double Insulated R2740 Customer Service Information: For parts or service, contact your nearest RIDGID authorized service center. Please record the serial number in the...
... call 1-866-539-1710 or visit us online at www.ridgid.com. Be sure to the motor housing. R2740 Serial No. 987000-120 7-26-07 (REV:00) 20 BELT SANDER Variable Speed Double Insulated R2740 Customer Service Information: For parts or service, contact your nearest RIDGID authorized service center. Please record the serial number in the...


