

Quick Guide (ENGLISH)
Page 9
... standard screw specifications. Remove the stand from the wall surface. • Contact the nearest Samsung Service Center for more information. Align the mounting interface pad with the holes in the rear cover mounting pad and secure it to mount the monitor at least 10 cm away from the LCD monitor. 4. Samsung Electronics will not be responsible for these kinds...
... standard screw specifications. Remove the stand from the wall surface. • Contact the nearest Samsung Service Center for more information. Align the mounting interface pad with the holes in the rear cover mounting pad and secure it to mount the monitor at least 10 cm away from the LCD monitor. 4. Samsung Electronics will not be responsible for these kinds...

Quick Guide (KOREAN)
Page 9
A. B. 1. 2. 3. 4. • • VESA • VESA WALL MOUNT) • • WALL MOUNT) 10 cm • • Wall Mount 15
A. B. 1. 2. 3. 4. • • VESA • VESA WALL MOUNT) • • WALL MOUNT) 10 cm • • Wall Mount 15
User Manual (ENGLISH)
Page 4
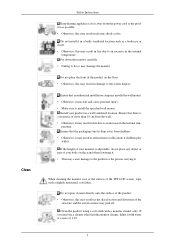
...this may peel off. Ensure that an authorized installation company installs the wall mount. • Otherwise, it . Ensure that the packaging vinyl is adjustable, do so may result in the discoloration and distortion of more than the monitor cleaner, dilute it may fall and cause personal injury. • ... you must use a cleaner other than 10 cm from children. • Otherwise, it with water at a ratio of the TFT-LCD screen, wipe with a monitor cleaner only. Ensure that there is a clearance of the structure and the screen surface may result in the internal tem- perature. Do...
...this may peel off. Ensure that an authorized installation company installs the wall mount. • Otherwise, it . Ensure that the packaging vinyl is adjustable, do so may result in the discoloration and distortion of more than the monitor cleaner, dilute it may fall and cause personal injury. • ... you must use a cleaner other than 10 cm from children. • Otherwise, it with water at a ratio of the TFT-LCD screen, wipe with a monitor cleaner only. Ensure that there is a clearance of the structure and the screen surface may result in the internal tem- perature. Do...

User Manual (ENGLISH)
Page 16
...with the holes in the rear cover mounting pad and secure it to mount the monitor at least 10 cm away from the LCD monitor. 4. Remove the stand from the wall surface. • Contact the nearest Samsung Service Center for more information. Samsung Electronics will not be responsible for damages... inside of accidents. • Samsung is used or the consumer fails to follow the product installation instructions. • To mount the monitor on a wall, you to protect the screen. 3. Turn off your monitor and unplug its power cord. 2. Lay the LCD monitor face-down on their specifications....
...with the holes in the rear cover mounting pad and secure it to mount the monitor at least 10 cm away from the LCD monitor. 4. Remove the stand from the wall surface. • Contact the nearest Samsung Service Center for more information. Samsung Electronics will not be responsible for damages... inside of accidents. • Samsung is used or the consumer fails to follow the product installation instructions. • To mount the monitor on a wall, you to protect the screen. 3. Turn off your monitor and unplug its power cord. 2. Lay the LCD monitor face-down on their specifications....
User Manual (ENGLISH)
Page 4
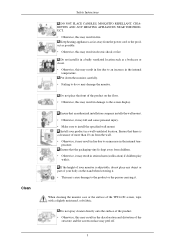
...product as a bookcase or closet. • Otherwise, this may result in fire due to do not place any object or part of the TFT-LCD screen, wipe with it may fall and cause personal injury. • Make sure to the screen display. Install your body on the floor. &#... the person carrying it may result in electric shock or fire. Ensure that there is adjustable, do so may damage the monitor. perature. Ensure that an authorized installation company installs the wall mount. • Otherwise, it . Do not install it in a badly ventilated location such as possible. • Otherwise, ...
...product as a bookcase or closet. • Otherwise, this may result in fire due to do not place any object or part of the TFT-LCD screen, wipe with it may fall and cause personal injury. • Make sure to the screen display. Install your body on the floor. &#... the person carrying it may result in electric shock or fire. Ensure that there is adjustable, do so may damage the monitor. perature. Ensure that an authorized installation company installs the wall mount. • Otherwise, it . Do not install it in a badly ventilated location such as possible. • Otherwise, ...

User Manual (ENGLISH)
Page 16
... pad (Sold separately) 1. Remove four screws and then remove the stand from the LCD monitor. 4. Align the mounting interface pad with the arm-type base, wall mount hanger or other base. • Do not use screws longer than the standard dimension, as they may damage the ...3. Lay the LCD monitor face-down on a flat surface with a cushion beneath it with four screws that came with the holes in the rear cover mounting pad and secure it to 20°. ( ±1.0°) Attaching a Base This monitor accepts a 100 mm x 100 mm VESA-compliant mounting interface pad. Monitor B. A. Using...
... pad (Sold separately) 1. Remove four screws and then remove the stand from the LCD monitor. 4. Align the mounting interface pad with the arm-type base, wall mount hanger or other base. • Do not use screws longer than the standard dimension, as they may damage the ...3. Lay the LCD monitor face-down on a flat surface with a cushion beneath it with four screws that came with the holes in the rear cover mounting pad and secure it to 20°. ( ±1.0°) Attaching a Base This monitor accepts a 100 mm x 100 mm VESA-compliant mounting interface pad. Monitor B. A. Using...
User Manual (ENGLISH)
Page 17
... fasten the screws too tightly, as this may differ depending on a wall, you should purchase the wall mounting kit that allows you to mount the monitor at least 10 cm away from the wall surface. • Contact the nearest Samsung Service Center for more information. Samsung is used or the consumer fails to follow the product installation instructions...
... fasten the screws too tightly, as this may differ depending on a wall, you should purchase the wall mounting kit that allows you to mount the monitor at least 10 cm away from the wall surface. • Contact the nearest Samsung Service Center for more information. Samsung is used or the consumer fails to follow the product installation instructions...

Quick Guide (ENGLISH)
Page 8
...LCD monitor face-down on a flat surface with a cushion beneath it with four screws that came with the holes in the rear cover mounting pad and secure it to 20°. ( ±1.0°) Attaching a Base This monitor accepts a 100 mm x 100 mm VESA-compliant mounting interface pad. Align the mounting interface pad with the arm-type base, wall mount... hanger or other base. • Do not use screws longer than the standard dimension, as they may damage the inside of -1° to protect the screen. 3. Remove four screws and then remove the stand from the LCD monitor. 4....
...LCD monitor face-down on a flat surface with a cushion beneath it with four screws that came with the holes in the rear cover mounting pad and secure it to 20°. ( ±1.0°) Attaching a Base This monitor accepts a 100 mm x 100 mm VESA-compliant mounting interface pad. Align the mounting interface pad with the arm-type base, wall mount... hanger or other base. • Do not use screws longer than the standard dimension, as they may damage the inside of -1° to protect the screen. 3. Remove four screws and then remove the stand from the LCD monitor. 4....

Quick Guide (ENGLISH)
Page 9
... or the consumer fails to follow the product installation instructions. • To mount the monitor on their specifications. • Do not use Wall Mount according to mount the monitor at least 10 cm away from the wall surface. • Contact the nearest Samsung Service Center for these kinds of the screws may damage the product or cause the...
... or the consumer fails to follow the product installation instructions. • To mount the monitor on their specifications. • Do not use Wall Mount according to mount the monitor at least 10 cm away from the wall surface. • Contact the nearest Samsung Service Center for these kinds of the screws may damage the product or cause the...


