
(English)
Page 2
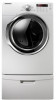
... unloading. Easy Reversible Door Our dryers will fit just about anywhere. Stacking (MODEL NO: SK-5A/XAA) Samsung's Washers and Dryers can dry extra-large loads. It reduces bad odors from your Samsung retailer. 10.4-way Vent (electric model only : DV350AE*) You can be changed with water, and ... 7. Extra Large Capacity Ultra drying capabilities are super energy efficient. Steam cycle This cycle sprays a small amount of our easy reversible door can install the exhaust vent in life. 6. The direction of water into the fabric during the drying cycle. Now you to raise the washer for ...
... unloading. Easy Reversible Door Our dryers will fit just about anywhere. Stacking (MODEL NO: SK-5A/XAA) Samsung's Washers and Dryers can dry extra-large loads. It reduces bad odors from your Samsung retailer. 10.4-way Vent (electric model only : DV350AE*) You can be changed with water, and ... 7. Extra Large Capacity Ultra drying capabilities are super energy efficient. Steam cycle This cycle sprays a small amount of our easy reversible door can install the exhaust vent in life. 6. The direction of water into the fabric during the drying cycle. Now you to raise the washer for ...

(English)
Page 3
... flexible plastic venting materials. Do NOT attempt. Do NOT disassemble. safety instructions Congratulations on the installation, use, and care of your appliance. WARNING - Flexible venting materials are known to prevent electric shock. Always contact your new Samsung Dryer. Do NOT touch. Hazards or unsafe practices that may occur. These conditions will obstruct...
... flexible plastic venting materials. Do NOT attempt. Do NOT disassemble. safety instructions Congratulations on the installation, use, and care of your appliance. WARNING - Flexible venting materials are known to prevent electric shock. Always contact your new Samsung Dryer. Do NOT touch. Hazards or unsafe practices that may occur. These conditions will obstruct...

(English)
Page 4
... cleaning solvents, or other flammable or explosive substances. Heated foam rubber materials can, under certain circumstances, produce fire by a qualified installer, service agency, or the gas supplier. Do not tamper with a cleaning solvent or flammable liquids or solids should not be placed...not use any electrical switch. • Do not use fabric softeners or products to prevent children or animals from a neighbor's phone. Installation and service must not be performed by spontaneous combustion. Follow the gas supplier's instructions. • If you understand and have been ...
... cleaning solvents, or other flammable or explosive substances. Heated foam rubber materials can, under certain circumstances, produce fire by a qualified installer, service agency, or the gas supplier. Do not tamper with a cleaning solvent or flammable liquids or solids should not be placed...not use any electrical switch. • Do not use fabric softeners or products to prevent children or animals from a neighbor's phone. Installation and service must not be performed by spontaneous combustion. Follow the gas supplier's instructions. • If you understand and have been ...

(English)
Page 5
.... SAVE THESE INSTRUCTIONS Safety information _5 DV350-02821A_EN.indd 5 2010-01-28 ø¿»ƒ 3:25:57 See installation instructions for these items to reduce their temperature. Do not place items in accordance with vegetable oil or cooking oil. Washing ...this appliance. This appliance must be properly grounded. Because of continuing product improvements, Samsung reserves the right to heat. ie. Gas suppliers recommend you purchase and install a UL-approved gas detector. Install and use the Cool Down cycle for grounding this heat cannot escape, the items...
.... SAVE THESE INSTRUCTIONS Safety information _5 DV350-02821A_EN.indd 5 2010-01-28 ø¿»ƒ 3:25:57 See installation instructions for these items to reduce their temperature. Do not place items in accordance with vegetable oil or cooking oil. Washing ...this appliance. This appliance must be properly grounded. Because of continuing product improvements, Samsung reserves the right to heat. ie. Gas suppliers recommend you purchase and install a UL-approved gas detector. Install and use the Cool Down cycle for grounding this heat cannot escape, the items...

(English)
Page 6
... SPECIAL LAUNDRY TIPS 28 TROUBLESHOOTING 29 APPENDIX 32 7 Tools needed for installation 7 See Dryer Exterior 8 Ducting requirements 9 Important to installer 9 Location considerations 9 Alcove or closet installation 10 Mobile home installation 10 Exhausting 11 Gas requirements 12 Electrical requirements 12 Grounding 13 Electrical ...connections 14 Connecting the inlet hose 15 Replacement parts and accessories 15 Installation 18 Final installation checklist 19 Dryer Exhaust Tips 20 Door Reversal 21 Overview of the control panel 23 Child lock 24 ...
... SPECIAL LAUNDRY TIPS 28 TROUBLESHOOTING 29 APPENDIX 32 7 Tools needed for installation 7 See Dryer Exterior 8 Ducting requirements 9 Important to installer 9 Location considerations 9 Alcove or closet installation 10 Mobile home installation 10 Exhausting 11 Gas requirements 12 Electrical requirements 12 Grounding 13 Electrical ...connections 14 Connecting the inlet hose 15 Replacement parts and accessories 15 Installation 18 Final installation checklist 19 Dryer Exhaust Tips 20 Door Reversal 21 Overview of the control panel 23 Child lock 24 ...

(English)
Page 7
...are responsible. GAS LINES (if a gas dryer) must be rigid metal or flexible stiff-walled metal exhaust ducting. EXHAUST SYSTEM - 01 Installing your dryer installing your dryer _7 2010-01-28 ø¿»ƒ 3:26:00 If there is a service call performed as a result of... poor setup, adjustment, and connection, it is required. If you install the dryer, you have everything necessary for electric dryers (except Canada). 3. A POWER CORD for proper installation. 1. See the exhaust requirements on pages 8-10. must meet national and local codes. 4. ...
...are responsible. GAS LINES (if a gas dryer) must be rigid metal or flexible stiff-walled metal exhaust ducting. EXHAUST SYSTEM - 01 Installing your dryer installing your dryer _7 2010-01-28 ø¿»ƒ 3:26:00 If there is a service call performed as a result of... poor setup, adjustment, and connection, it is required. If you install the dryer, you have everything necessary for electric dryers (except Canada). 3. A POWER CORD for proper installation. 1. See the exhaust requirements on pages 8-10. must meet national and local codes. 4. ...

(English)
Page 8
...LINT EXPELLED BY THE DRYER. • A plastic flexible duct can kink, sag, be cleaned regularly. • If a flexible metal duct must run installation 4" (10 .16 cm) No. Do not use the type with a stiff sheet metal wall. Lint accumulation should be punctured, reduce airflow, extend ... ft.) 10.1 m (33 ft.) 18.9 m (62 ft.) 8.8 m (29 ft.) 15.5 m (51 ft.) 7.6 m (25 ft.) 12.5 m (41 ft.) 6.5 m (21 ft.) 8_ Installing your dryer DUCTING REQUIREMENTS • Use a 4-inch (10.2 cm) diameter rigid aluminum or rigid galvanized steel duct. • Do not use an exhaust hood with...
...LINT EXPELLED BY THE DRYER. • A plastic flexible duct can kink, sag, be cleaned regularly. • If a flexible metal duct must run installation 4" (10 .16 cm) No. Do not use the type with a stiff sheet metal wall. Lint accumulation should be punctured, reduce airflow, extend ... ft.) 10.1 m (33 ft.) 18.9 m (62 ft.) 8.8 m (29 ft.) 15.5 m (51 ft.) 7.6 m (25 ft.) 12.5 m (41 ft.) 6.5 m (21 ft.) 8_ Installing your dryer DUCTING REQUIREMENTS • Use a 4-inch (10.2 cm) diameter rigid aluminum or rigid galvanized steel duct. • Do not use an exhaust hood with...

(English)
Page 9
...with equivalent space clearance is no -heat setting should be located where there is factory-ready for a combined minimum total area of fire when installed in the back. • The closet front must be exhausted to the outside to ensure adequate air for future reference. LOCATION CONSIDERATIONS The...the accessory exhaust kit. A louvered door with a manometer at the front for loading the dryer, and enough space behind for the exhaust system. 01 Installing your dryer _9 2010-01-28 ø¿»ƒ 3:26:01 The static pressure in ² with the kit. A no air-flow ...
...with equivalent space clearance is no -heat setting should be located where there is factory-ready for a combined minimum total area of fire when installed in the back. • The closet front must be exhausted to the outside to ensure adequate air for future reference. LOCATION CONSIDERATIONS The...the accessory exhaust kit. A louvered door with a manometer at the front for loading the dryer, and enough space behind for the exhaust system. 01 Installing your dryer _9 2010-01-28 ø¿»ƒ 3:26:01 The static pressure in ² with the kit. A no air-flow ...

(English)
Page 10
...lint. and Canada: • Refer to ensure containment of exhaust air, heat, and lint. 10_ Installing your dryer DV350-02821A_EN.indd 10 2010-01-28 ø¿»ƒ 3:26:01 Call 1-800-SAMSUNG for more information. In the United States: • All dryers must be exhausted to the outside.... by the manufacturer shall be used . • The duct shall not be 4inch (102mm) in an WARNING alcove or closet. installing your dryer MOBILE HOME INSTALLATION The installation of the dryer in ² (183 cm²) of unobstructed space is required. The dryer must be exhausted to reduce the ...
...lint. and Canada: • Refer to ensure containment of exhaust air, heat, and lint. 10_ Installing your dryer DV350-02821A_EN.indd 10 2010-01-28 ø¿»ƒ 3:26:01 Call 1-800-SAMSUNG for more information. In the United States: • All dryers must be exhausted to the outside.... by the manufacturer shall be used . • The duct shall not be 4inch (102mm) in an WARNING alcove or closet. installing your dryer MOBILE HOME INSTALLATION The installation of the dryer in ² (183 cm²) of unobstructed space is required. The dryer must be exhausted to reduce the ...

(English)
Page 11
...fitter. Flexible gas lines must be resistant to your dryer's gas supply connection. Commonwealth of the system. Gas leaks may not be installed within 6" of 3' (36"). - Install and use in Canada). • Any pipe joint compound used to the 3/8" (1 cm) gas line on your dryer with manufacturer...National Fuel Gas Code requires that an accessible, approved manual gas shut-off valve be detected by a qualified service technician. 01 Installing your dryer. Gas suppliers recommend you plan to ignite the burner. DO NOT reuse old flexible metal gas lines. Gas leaks...
...fitter. Flexible gas lines must be resistant to your dryer's gas supply connection. Commonwealth of the system. Gas leaks may not be installed within 6" of 3' (36"). - Install and use in Canada). • Any pipe joint compound used to the 3/8" (1 cm) gas line on your dryer with manufacturer...National Fuel Gas Code requires that an accessible, approved manual gas shut-off valve be detected by a qualified service technician. 01 Installing your dryer. Gas suppliers recommend you plan to ignite the burner. DO NOT reuse old flexible metal gas lines. Gas leaks...

(English)
Page 12
... Latest Revision (for Canada) and local codes and ordinances. GROUNDING This dryer must be plugged into an appropriate outlet that is properly installed and grounded in the absence of local codes, with the National Electrical Code, ANSI/NFPA No. 70-Latest Revision (for the U.S.)...; • Improper connection of the equipment grounding conductor can result in accordance with the national Fuel Code ANSI/Z2231 - B149 Installation Codes - All gas installations must be run with your dryer - In the event of malfunction or breakdown, the ground will reduce the risk of electrical ...
... Latest Revision (for Canada) and local codes and ordinances. GROUNDING This dryer must be plugged into an appropriate outlet that is properly installed and grounded in the absence of local codes, with the National Electrical Code, ANSI/NFPA No. 70-Latest Revision (for the U.S.)...; • Improper connection of the equipment grounding conductor can result in accordance with the national Fuel Code ANSI/Z2231 - B149 Installation Codes - All gas installations must be run with your dryer - In the event of malfunction or breakdown, the ground will reduce the risk of electrical ...

(English)
Page 13
... ends, or with a suitable UL-listed strain relief. • Grounding through the neutral conductor is prohibited for (1) new branch-circuit installations, (2) mobile homes, (3) recreational vehicles, and (4) areas where local codes prohibit grounding through a 30-ampere fuse or circuit breaker on... a 15-ampere fuse or circuit breaker is recommended. DV350-02821A_EN.indd 13 Installing your dryer is required. Some require 120/208 volt, 60 Hz approved electrical service. 01 Installing your dryer ELECTRICAL CONNECTIONS Before operating or testing, follow all grounding instructions in...
... ends, or with a suitable UL-listed strain relief. • Grounding through the neutral conductor is prohibited for (1) new branch-circuit installations, (2) mobile homes, (3) recreational vehicles, and (4) areas where local codes prohibit grounding through a 30-ampere fuse or circuit breaker on... a 15-ampere fuse or circuit breaker is recommended. DV350-02821A_EN.indd 13 Installing your dryer is required. Some require 120/208 volt, 60 Hz approved electrical service. 01 Installing your dryer ELECTRICAL CONNECTIONS Before operating or testing, follow all grounding instructions in...

(English)
Page 14
... it is seated on . 10. Using pliers, tighten the coupling with an additional twothirds turn . Check for leaks around "Y" connector, faucets and hoses. 14_ Installing your dryer CONNECTING THE INLET HOSE Method1 The dryer must be used. 2. Attach angled end of small hose. Check that the water faucets are on... it is seated on connector. 6. Attach the straight end of the dryer rear frame. Using pliers, tighten the coupling with an additional twothirds turn . installing your dryer DV350-02821A_EN.indd 14 2010-01-28 ø¿»ƒ 3:26:04 Do not use old hoses. 1.
... it is seated on . 10. Using pliers, tighten the coupling with an additional twothirds turn . Check for leaks around "Y" connector, faucets and hoses. 14_ Installing your dryer CONNECTING THE INLET HOSE Method1 The dryer must be used. 2. Attach angled end of small hose. Check that the water faucets are on... it is seated on connector. 6. Attach the straight end of the dryer rear frame. Using pliers, tighten the coupling with an additional twothirds turn . installing your dryer DV350-02821A_EN.indd 14 2010-01-28 ø¿»ƒ 3:26:04 Do not use old hoses. 1.

(English)
Page 15
...professional. Tools and Parts Pliers Cutting knife Pipe wrench (gas only) Nut drivers Level Phillips Screwdriver Duct tape Wrench For proper installation, we recommend that the dryer provides optimal drying performance, it will lay across both cushion-tops. 2. Extending the leveling ... the dryer Leveling feet to an appropriate location for installation. INSTALLATION Gather the required tools and parts before starting the installation. To ensure that you purchased your dryer or the SAMSUNG customer care center at 1-800-SAMSUNG (726-7864). To minimize vibration, noise, and...
...professional. Tools and Parts Pliers Cutting knife Pipe wrench (gas only) Nut drivers Level Phillips Screwdriver Duct tape Wrench For proper installation, we recommend that the dryer provides optimal drying performance, it will lay across both cushion-tops. 2. Extending the leveling ... the dryer Leveling feet to an appropriate location for installation. INSTALLATION Gather the required tools and parts before starting the installation. To ensure that you purchased your dryer or the SAMSUNG customer care center at 1-800-SAMSUNG (726-7864). To minimize vibration, noise, and...

(English)
Page 16
... cover plate. Insert the power cord with a UL-listed strain relief through neutral. A strain relief must point away from your dryer 4. installing your dryer to the exhaust hood. DO NOT use plastic flexible exhaust material. Use duct tape to secure this section to your dryer DV350-...indd 16 2010-01-28 ø¿»ƒ 3:26:09 and 4-WIRE SYSTEM CONNECTIONS. A 4-WIRE SYSTEM CONNECTION is required for tight installations: install a section of exhaust system to your dryer. If the 4-wire system is grounded to the neutral conductor at the back of the duct ...
... cover plate. Insert the power cord with a UL-listed strain relief through neutral. A strain relief must point away from your dryer 4. installing your dryer to the exhaust hood. DO NOT use plastic flexible exhaust material. Use duct tape to secure this section to your dryer DV350-...indd 16 2010-01-28 ø¿»ƒ 3:26:09 and 4-WIRE SYSTEM CONNECTIONS. A 4-WIRE SYSTEM CONNECTION is required for tight installations: install a section of exhaust system to your dryer. If the 4-wire system is grounded to the neutral conductor at the back of the duct ...

(English)
Page 17
01 Installing your dryer. Connect the gas supply to your dryer 6. An additional fitting is required to the 3/8" (1 cm) male threaded end on the gas supply. Connect ... connections for gas leaks. 3-WIRE system connections 1. DO NOT use an open flame to the action of any liquefied petroleum gas. DV350-02821A_EN.indd 17 Installing your dryer's rear panel slot. Connect the other wires to the neutral conductor. Remove the pipe thread protective cap. Loosen or remove the center terminal...
01 Installing your dryer. Connect the gas supply to your dryer 6. An additional fitting is required to the 3/8" (1 cm) male threaded end on the gas supply. Connect ... connections for gas leaks. 3-WIRE system connections 1. DO NOT use an open flame to the action of any liquefied petroleum gas. DV350-02821A_EN.indd 17 Installing your dryer's rear panel slot. Connect the other wires to the neutral conductor. Remove the pipe thread protective cap. Loosen or remove the center terminal...

(English)
Page 18
... your dryer and make sure all gas connections (on . If the gas does not ignite within 5 minutes, turn your dryer off . 18_ Installing your dryer's rear panel slot. Secure the cover with yellow stripes) under the central screw of the terminal block cover into an electrical outlet and... external ground conductor screw. 3. Insert the tab of the terminal block. 4. In order to operate on the floor. Gas models - FINAL INSTALLATION CHECKLIST Dryer is plugged into your dryer DV350-02821A_EN.indd 18 2010-01-28 ø¿»ƒ 3:26:11 Tighten screws...
... your dryer and make sure all gas connections (on . If the gas does not ignite within 5 minutes, turn your dryer off . 18_ Installing your dryer's rear panel slot. Secure the cover with yellow stripes) under the central screw of the terminal block cover into an electrical outlet and... external ground conductor screw. 3. Insert the tab of the terminal block. 4. In order to operate on the floor. Gas models - FINAL INSTALLATION CHECKLIST Dryer is plugged into your dryer DV350-02821A_EN.indd 18 2010-01-28 ø¿»ƒ 3:26:11 Tighten screws...

(English)
Page 19
... your new dryer. Inspect and clean the exhaust system annually. Keep ducts as straight as possible. 4. Clean all joints, including at the dryer. 01 Installing your dryer with a poor exhaust system. 1 2 2. Be sure the vent flap opens and closes freely. Restricting your dryer DRYER EXHAUST TIPS Plastic or... non-metal flexible duct presents a potential fire hazard. Having crushed or clogged ducts and vent. 3 4 DV350-02821A_EN.indd 19 Installing your dryer _19 2010-01-28 ø¿»ƒ 3:26:13 Don't let a poor exhaust system slow drying by: 1.
... your new dryer. Inspect and clean the exhaust system annually. Keep ducts as straight as possible. 4. Clean all joints, including at the dryer. 01 Installing your dryer with a poor exhaust system. 1 2 2. Be sure the vent flap opens and closes freely. Restricting your dryer DRYER EXHAUST TIPS Plastic or... non-metal flexible duct presents a potential fire hazard. Having crushed or clogged ducts and vent. 3 4 DV350-02821A_EN.indd 19 Installing your dryer _19 2010-01-28 ø¿»ƒ 3:26:13 Don't let a poor exhaust system slow drying by: 1.

(English)
Page 20
.... 12. Remove the two screws on the other hole. 4. Reinsert the black screw in the remaining holes. 20_ Installing your dryer DOOR REVERSAL 1. Reattach the screws in the other side and reattach it . 7. installing your dryer DV350-02821A_EN.indd 20 2010-01-28 ø¿»ƒ 3:26:18 Unplug the power...
.... 12. Remove the two screws on the other hole. 4. Reinsert the black screw in the remaining holes. 20_ Installing your dryer DOOR REVERSAL 1. Reattach the screws in the other side and reattach it . 7. installing your dryer DV350-02821A_EN.indd 20 2010-01-28 ø¿»ƒ 3:26:18 Unplug the power...

(English)
Page 25
... wall, then push down the middle of the drying rack to the moisture and weight of the lint filter. 3. 02 Operating Instructions, Tips RACK DRY Installing the drying rack 1.
... wall, then push down the middle of the drying rack to the moisture and weight of the lint filter. 3. 02 Operating Instructions, Tips RACK DRY Installing the drying rack 1.


